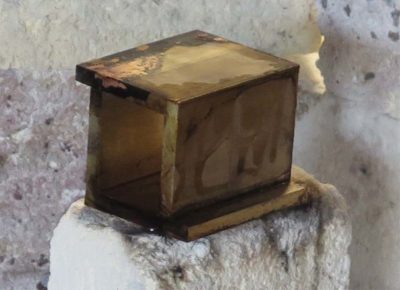
With the two halves of the mallet head shell soldered together I got to work making it into something resembling what I wanted (a la Studley’s mallet).
I began by trimming off the overhang from the soldering with the band saw. One of the great things about working in brass, bronze, copper, and aluminum is that they can be worked with a variety of woodworking hand tools and virtually all woodworking power tools and machines. Well, maybe not jointer and planer.
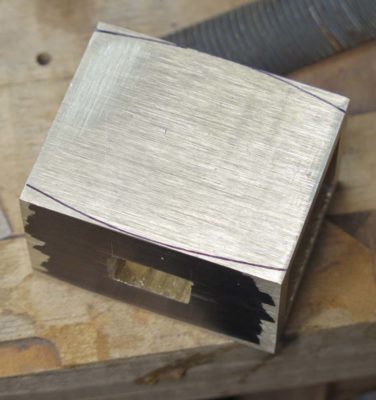
Once the trimming was done I cleaned and squared the head on the stationary belt sander.
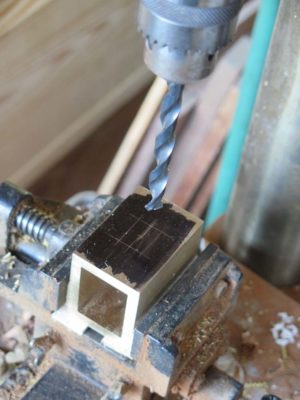
Then, while everything was still square I drilled then filed the holes in the center of the top and bottom faces. These holes allow for the handle to protrude all the way through the metal shell and the wood block infill. Doing all this before shaping the head was the only way to get it right.
I was wandering around youtube the other night and stumbled cross this half-hour video we made as a bonus for my PopWood video on Historic Wood Finishing. I vaguely recall making this but did not recall it was now residing on youtube. I’m pretty sure I have not posted this video before, but if I did I’ve forgotten and you get it once again.
Enjoy (and I hope you laugh in all the right places).
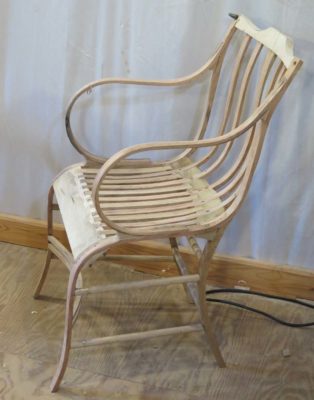
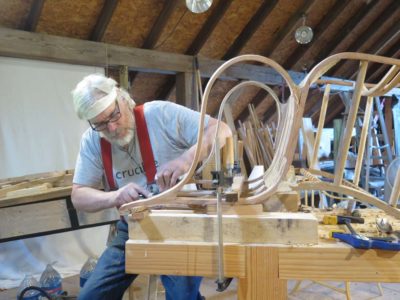
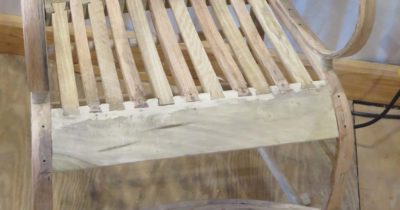
It might have been the hottest week of the summer, well over 100 degrees in the attic where I am doing all the Gragg chair project (admittedly only about 85 outside) but finally the construction is complete. Now it was time to move on to sculpting all the edges and profiles of the elements.
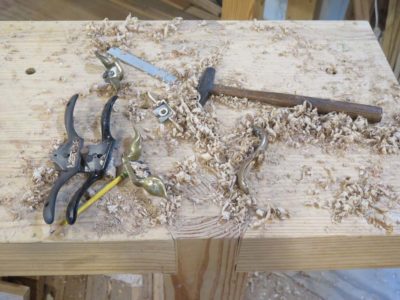
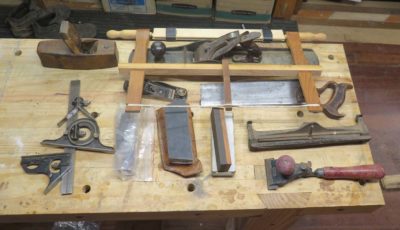
Virtually every single component was ovalled, tapered, smoothed, and shaped to add the elegance that this chair deserved. Even in its raw state immediately after final assembly it is a thing of beauty, after a the surfaces are sculpted it is sublime. The primary weapon for much of this process is a spokeshave, or more properly, a whole selection of spokeshaves I’ve assembled over the past 45 years. The main workhorse of the stable is the tiny patternmaker’s spokeshave I made In 1979, if I recall correctly. It is the tool closest to the hammer head. Another favorite is the “pig’s ear” spokeshave I probably got at a Martin Donnelly auction but I cannot remember precisely.
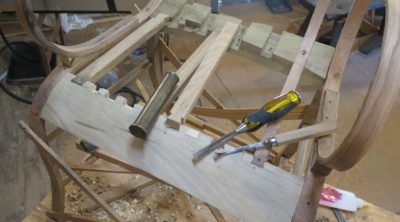
Systematically I went over every element, shaping them to be a harmonious whole.
Shaping the triangular glue blocks imparted tremendous elegance, and a few final touches made it ready for paint.
While reading the profile of my long time friend and fellow Lost Art Press author Joshua Klein I was reminded of his small (tiny?) workshop when I visited him for the first time many years ago. This in turn caused me to continue my reflection on the blessings of my own work space where I have a generous space for virtually each of my undertakings, roughly 6500-7000 s.f available to me. AS I wrote recently, there will come a time when life in the hinterlands will likely become too challenging for us as we eventually approach our dotage, and the cabin and barn will be in the rear view mirror.
Though I pray that day is still long over the horizon I remain cognizant of the need to one day be constrained in my shop footprint. When we eventually build our geezer-friendly final home I expect my shop space will be limited to a 10×15 shed, perhaps with a four-foot wide lean-to storage shed on three sides. As I ruminate on that distant eventuality I find myself looking to see what other folks are doing with tiny spaces for shops.
I stumbled across this shop tour recently. To say it is the opposite end of the spectrum from my current locale would be a gross understatement, but I found it immensely engaging nonetheless.
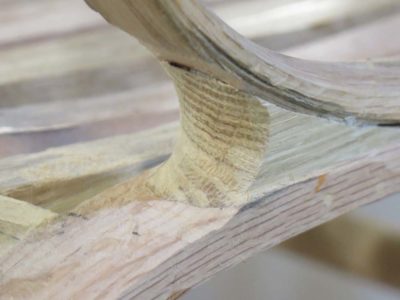
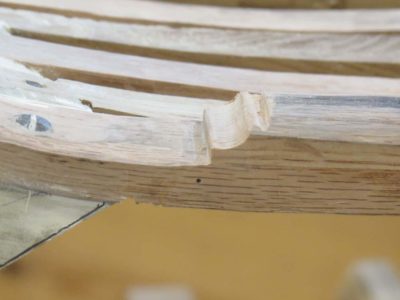
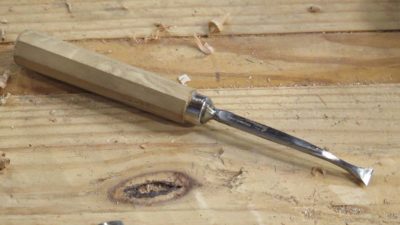
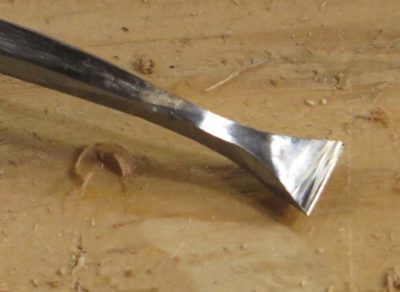
One of the challenges when building Gragg chairs is that the short seat slats are half-blind dovetailed into the front and rear seat rails (well, the front of the continuous slat are too, but it is mor difficult for these ones). As a practical matter this can only occur after the chair has been mostly assembled, so the work is in tight and awkward quarters. I generally cut the mortise shoulders of the dovetails as deeply as I can to make waste removal as easy as possible with a narrow dovetail chisel, but then I have to remove the remaining waste very carefully so as not to damage the joint fitting.
A tool that is extremely helpful in this undertaking is a custom-made curved flat fishtail gouge. I tried store-bought curved flat fishtails and although the are fine tools but they do not flare enough to be particularly useful. Instead I took a 1/2″ curved flat fishtail and ground away the shoulders to make their flare much more pronounced, and that works just fine. It allows me to reach way into the interior corners of the dovetail mortise and get them clean.
Still, it does make for a mighty long work session.
I have enough trouble keeping the joint shoulders intact without creating additional hurdles to jump. At this pint of the project that light at the end of the tunnel is getting brighter.
I just realized that I had some more episodes of this initial, free, video. In this one I cut out the fitted patch with a jeweler’s saw on a bench pin or sawing platform. If I recall correctly, it was below freezing that day in the attic studio.
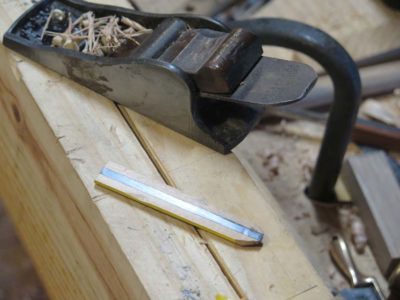
I’m certain I am not even the millionth person to transform a pencil into at tracing gauge, but it is a tool that I use whenever I am making the intermediate seat slats for the Gragg chair, transferring the shape from the steam bent unified bottom/back slats.
I prefer to start with a carpenter’s pencil, saw it in half length-wise, then shave off most of one side with a utility knife.
Then I plane it flat with a block plane to reveal fully the graphite core.
To keep the open graphite from smearing all over everything I simply place some transparent tape over it and burnish it to make it perfectly intimate with that surface, then trim the excess tape. That way I can not only handle the new tool but place it directly on a surface to be traced without contaminating that surface. I make the tip sharpened, leaving the graphite/tape side flat and beveling the other three facets and place the tape side against whatever contour I am trying to trace, transferring the shape onto the workpiece being made to fit that shape.
Yup, when fabricating the seat of a Gragg chair the most important tool was free and required almost five full minutes to modify.
Mrs. Barn and I often listen to audio books when traveling, and recently we heard a story in which on-line gaming was an element. Truth be told I cannot see the attraction for such things, even board games hold little interest for me, and that’s with the other players sitting right beside me. The notion of playing a game with strangers over the interwebz simply strikes me as bizarre, even though a family friend actually earns money playing on-line games as people pay to watch him play. I guess this is no weirder than paying to watch baseball or something similar (although one of the surprises in recent years has been he ease with which not watching sports television has become manifest since moving to the mountains. Even when in a place where televised sports is available I find that a quarter of football or a few innings of baseball is about all I can take. And of course pro basketball is dreck now.)
But really, how much stranger is compewder game playing than browsing for news, instruction, or contact with people I have never met and am unlikely ever to cross IRL? (I just learned that acronym). Yes, the web allows us to make and maintain contacts we would otherwise never encounter.
As I have written previously I connected with and have been corresponding for some time now with woodworker and tool maker Rob Hanson, whose Paradise CA home and shop were reduced to ashes in last year’s catastrophic wildfires. Since the physical assets of his business were completely obliterated and I have accumulated a stash of surplus tools, I have been packaging and sending him tools. Almost none are new, but none are junk either. They can be put to work to help him rebuild his family’s lives.
Recently Rob returned to visit his former home and wrote this to me.
The cleanup work in Paradise is nearly complete. There have been hordes of dump trucks on the roads all over the area hauling the refuse away, some 6,000,000 tons of debris had to be removed. Driving out there was somewhat surreal because everything looks extremely different than it used to, and what once was a very lush and green forested area is now dead. There are literally thousands and I would venture to guess tens of thousands if not many many more dead trees everywhere.
Mentally, It’s kind of like being held in a holding cell and each time they bring you out you see something different. Of course while you’re in the holding cell your life is continuing on in a new vein, but every so often you get to go look at your old life, and it’s just a snapshot of what’s going on in your old life for a moment. So your last memory of everything being normal is you know, you had your home in your shop and all your stuff in your yard and your life was happy and everything was set up the way you wanted it.
The next snapshot is that everything is burnt to an absolute, blacksmith Forge Crisp, and you see that a couple of times completely soggy with rain and rust is on everything that has been burned, and everything else is just ashes. And then you finally see it completely excavated and cleaned up and stuffed in dump trucks and gone. What’s left behind has remnants of things that you recognize before the most part it looks like the moon, with spray on hydrotreat grass seed everywhere. Nothing is manicured anymore, and weeds where they have never been before are everywhere.
Got that? Six million tons of debris! Now that is compelling IRL. And if yu follow the news from there you know that the rebuilding efforts face monumental changes, not the least being mny of the local water sources have been thoroughly contaminated, and the complete utility infrastructure need to be rebuilt.
It is a rare day when I do not reflect on the travails of Rob’s family and the tens of thousands like them, while the poltroons in public office wail and gnash their teeth over plastic straws. I think it was Mark Twain who said something like, “America has no native criminal class, except for politicians.”
I’m sending another box of tools to Rob this week.
Of all the tools I’ve encountered that have seduced me Henry Studley’s infill mallet ranks at the top of the list. To continue the unenviable task of keeping my probably ADD self amused I decided to play with making something similar, a project I could work on intermittently while some glue or paint was drying, or when I needed a distraction while I cogitate. For the raw material I ordered 1/4″ wall thickness right-angle brass stock from McMaster Carr to serve as my starting point. Since this was more a “proof of concept” exercise, the concept being proven being the silver soldering of very heavy stock, it seemed like a sensible approach. Perhaps for a “proof of concept” exercise I should have started with aluminum rather than brass, but that’s where I started nevertheless.
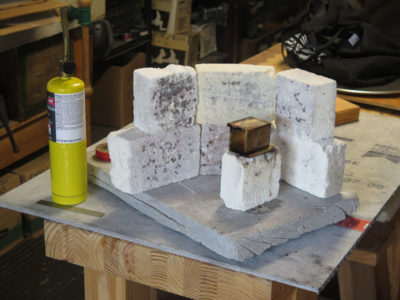
With the measurements in-hand I chopped the requisite segments and set up a soldering set-up on my heat-work station (I think I will probably write a series of posts about setting up such a work station yourself as I hope you will all follow me down this rabbit trail). My strategy was to simply overlap the two sections with each other as shown and fire up the torch. Even though I could/would only do one seam at a time I slathered generous dollops of paste flux on both interfacial surfaces.
After heating the entire mass I concentrated on the seam joint and introduced the silver solder on the inside corner of the seam and let the torch heat draw the solder through the joint.
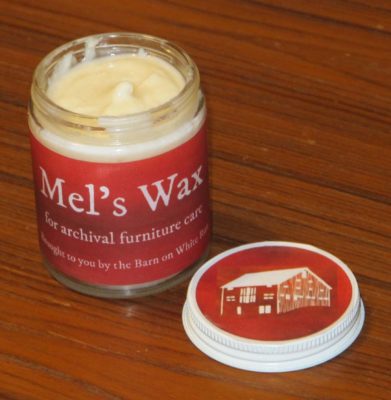
My friend LenR posted this in his Instagram page, featuring his use of Mel’s Wax. It is much appreciated, and prompts me to think seriously about how to market this remarkable product. At this point I am selling about one unit per month, when in reality I should be moving it by the case load. I’ll be turning my attention in this direction imminently. I’m definitely interested in ramping up production, but refuse to sub it out and am not really interested in wholesaling it. Those might be two intractable problems with my plan.


Recent Comments