Boulle Marquetry Day 1
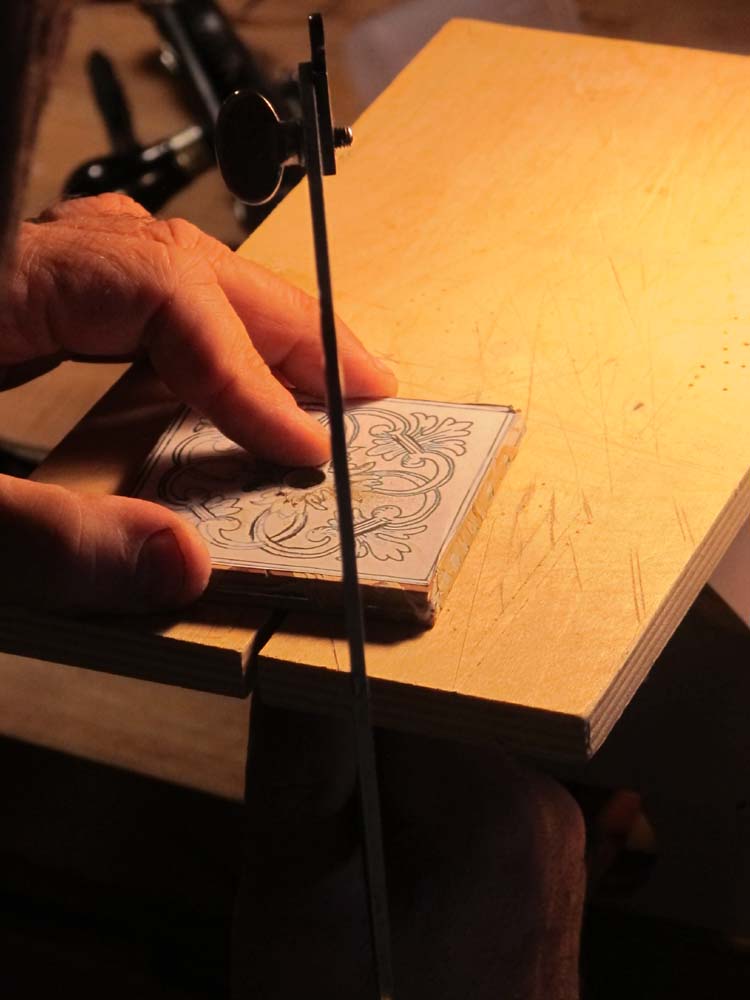
We hit the ground running at about 9 this morning with the review of Boulle-work, and then assembled packets for the first sawing exercise, whose only real function was to get newcomers comfortable with the tool and technique of sawing at this scale. Boullework is essentially a fret-sawing technique, and I started everyone off with a copy of their initial to saw in three parts; copper, pewter, and tordonshell.
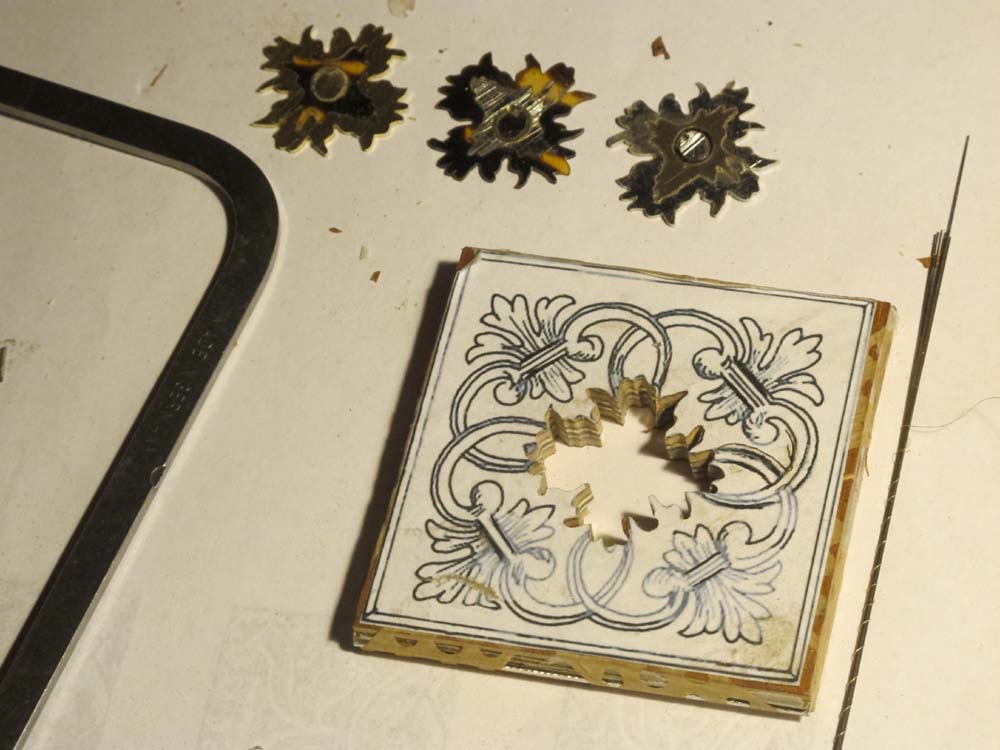
The first step was to cut all the pieces in the packet the same size,
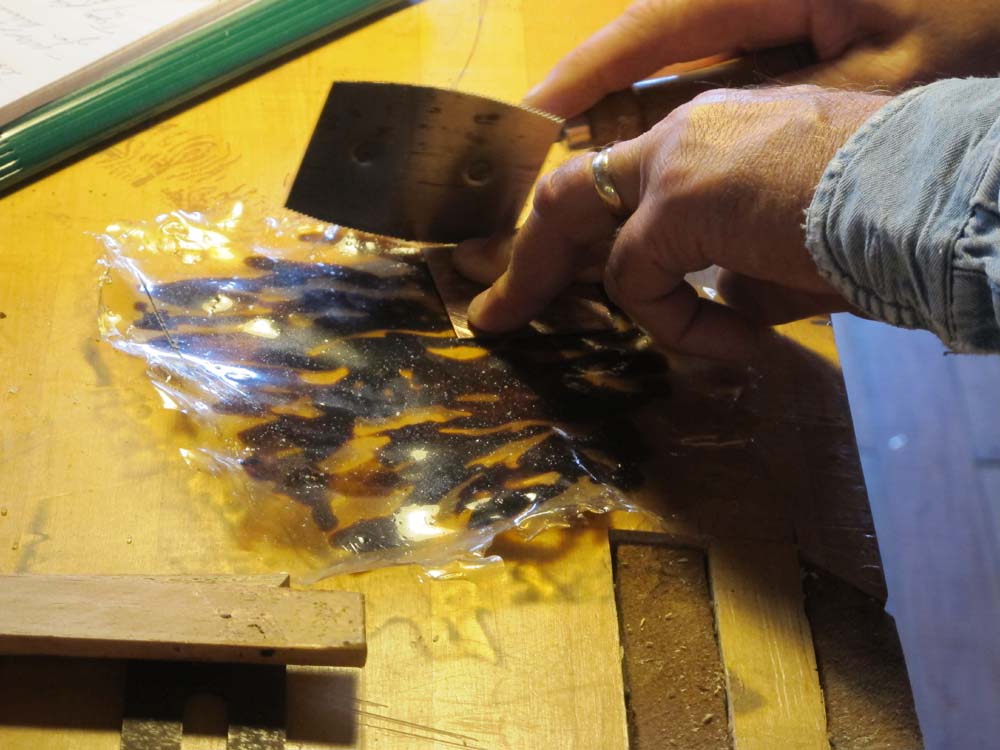
then score one face of the metal pieces to serve as a cleaner gluing surface. This meant that all the work was being done in a mirrored pattern to the final workpiece.
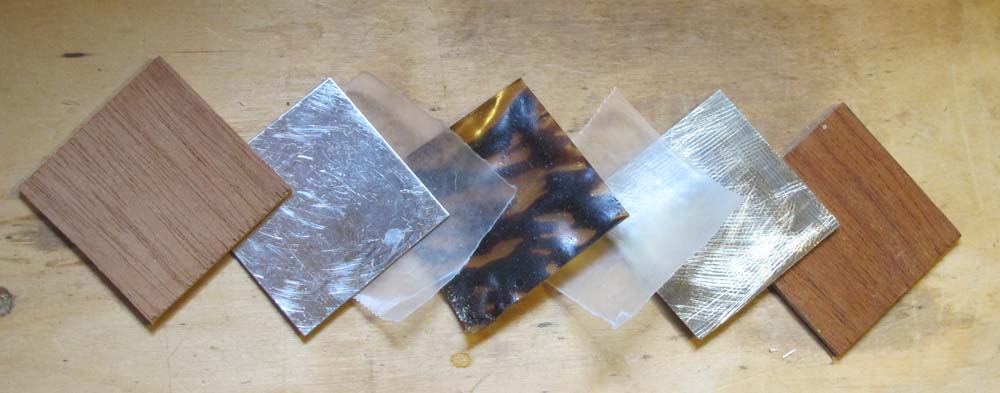
We assembled the packets with 1/8″ plywood as the bottom face, followed by the copper layer, followed by a piece of waxed paper (as a sawing lubricant), then the piece of tordonshell followed by another piece of waxed paper, then the pewter layer and finally another 1/8″ plywood face.

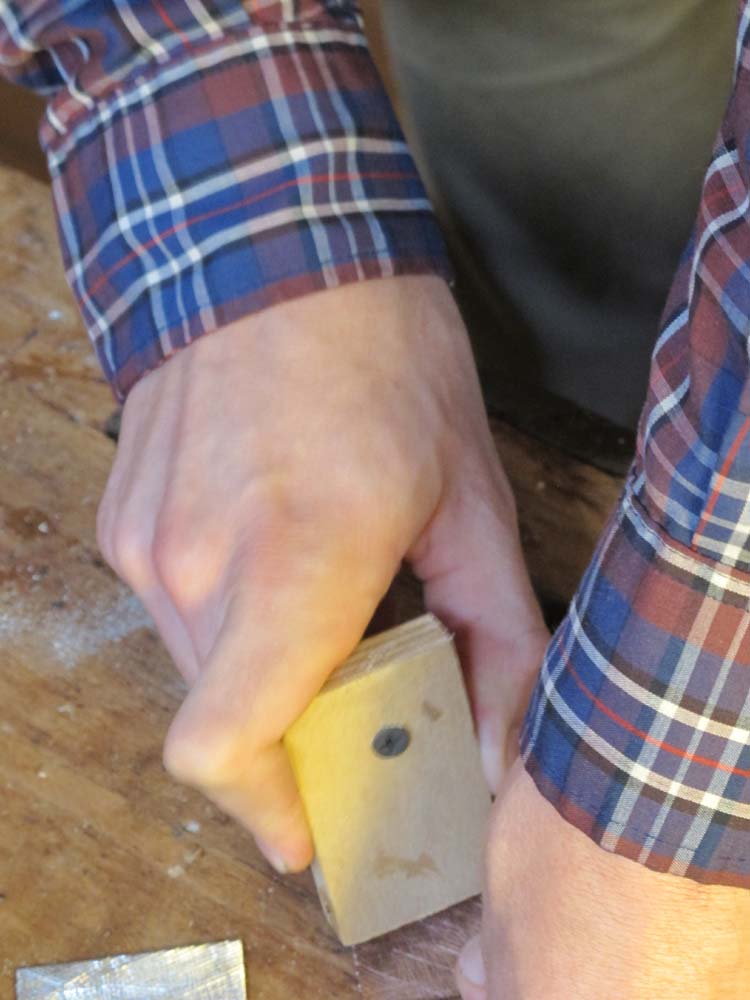
Veneer tape wrapped around the corners held the packet together, and the pattern was glued to the face of the plywood with stick glue.
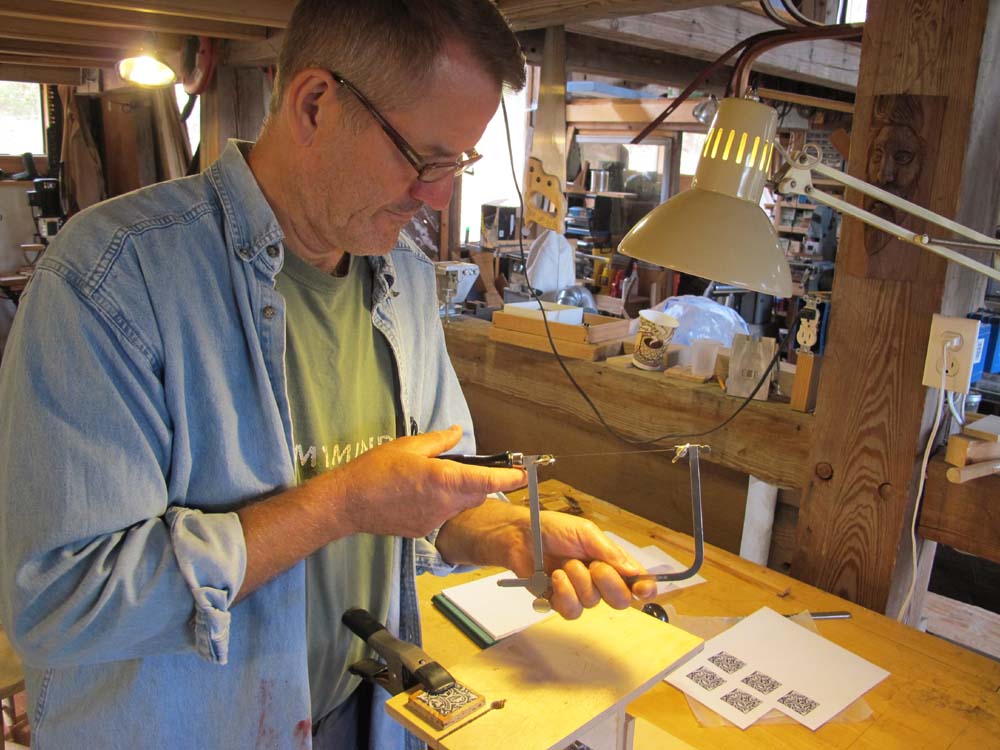
Everyone used the same type of saw, a traditional German jeweler’s saw, fitted with 6/0 blades.

Getting the teeth in the right orientation was a challenge, given the near-microscopic size of them. I prefer these tiny blades as they allow for more detailed cutting, and leave such a tiny kerf.
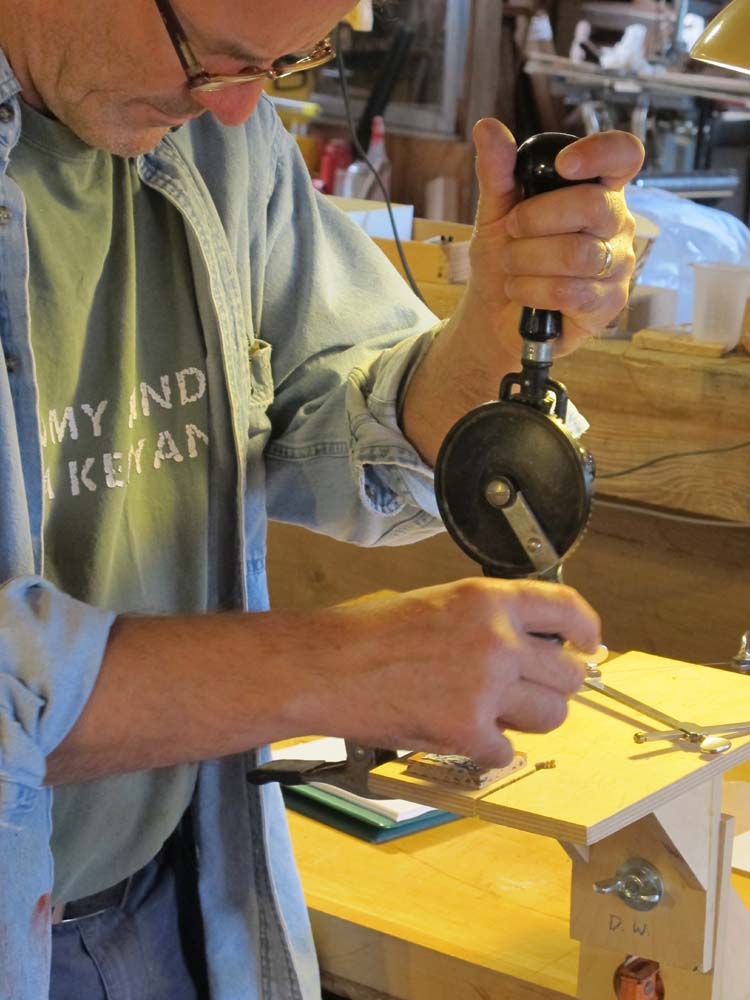
A hole drilled with an eggbeater drill gave entre’ for the blade to be inserted through the packet,
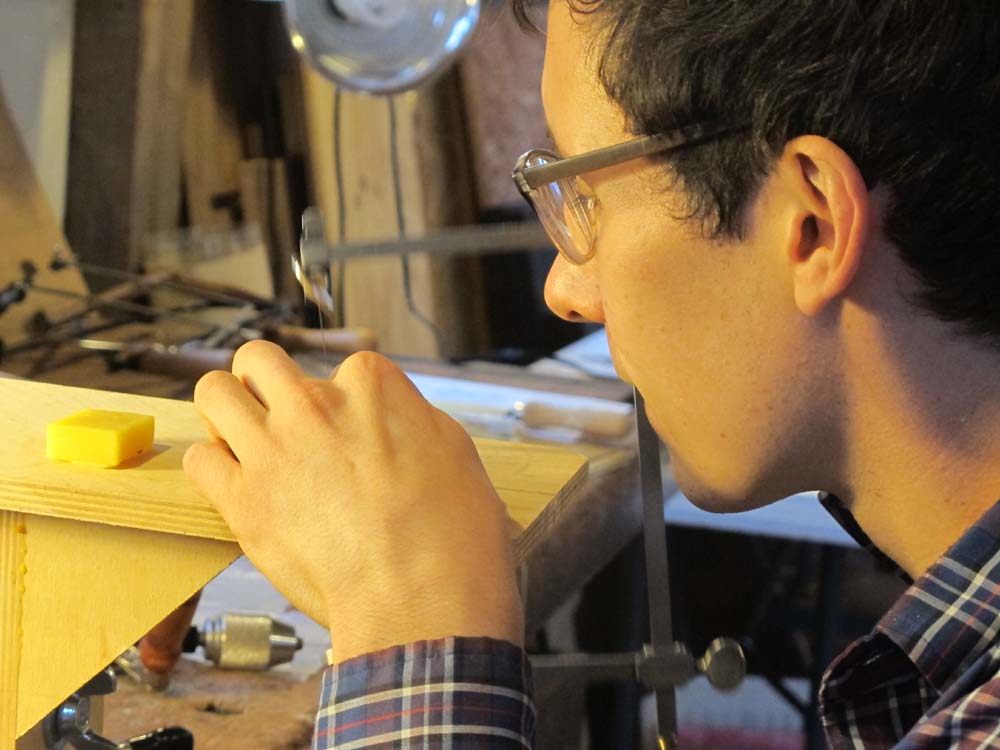
and sawing could begin.
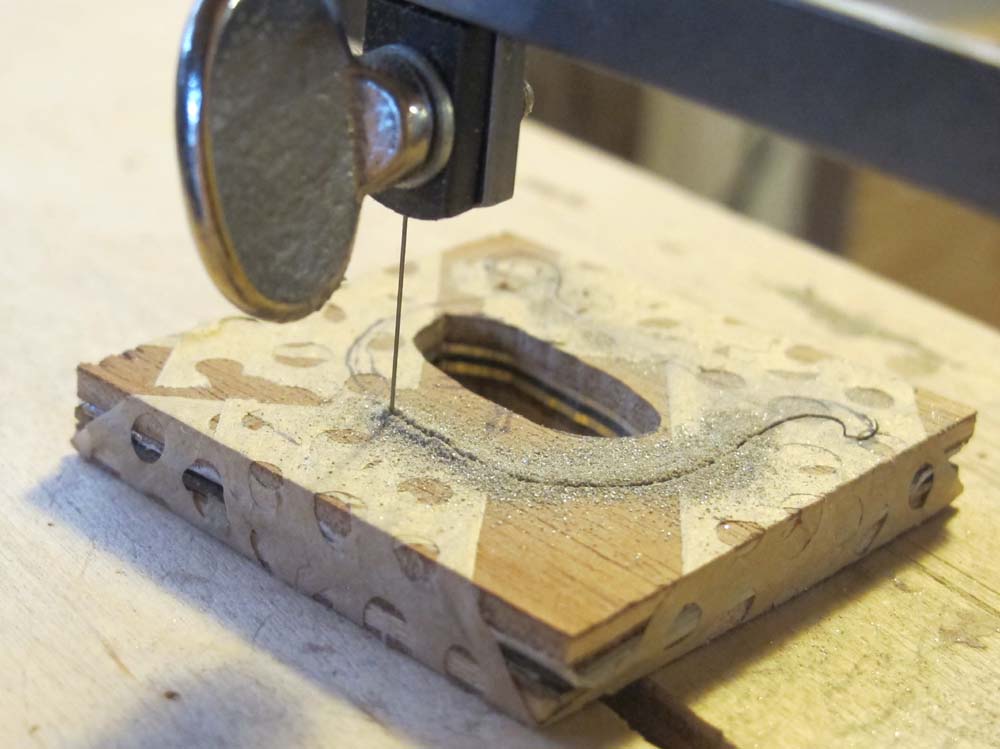
The scale of the sawing is tiny, and so is the saw dust.
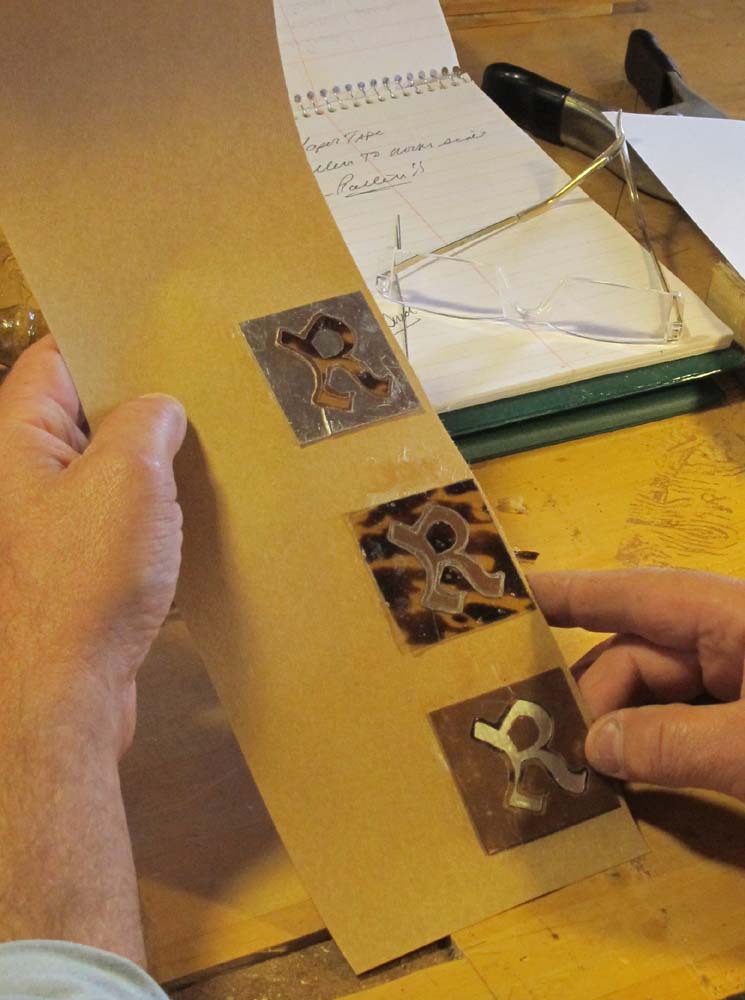
The results of this introductory exercise was gratifying.
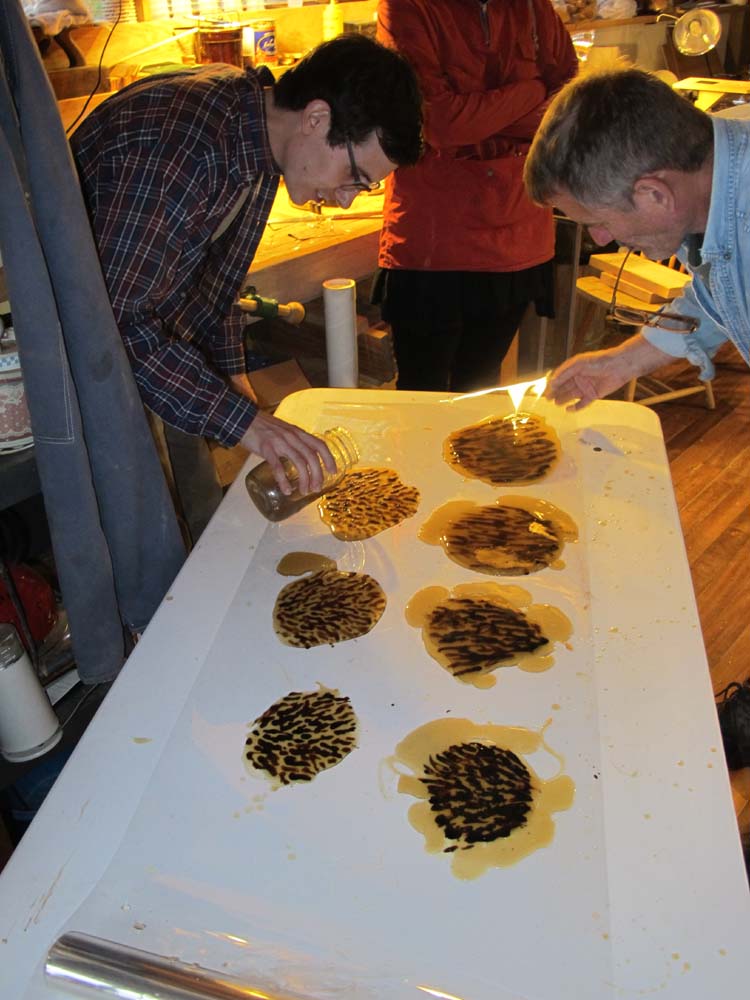
We then made some tordonshell, with everyone getting their hand in the process.
The second, larger packet was assembled, and the sawing began on the more complex pattern.
Here is how far we got today. More tomorrow.

Join the Conversation!