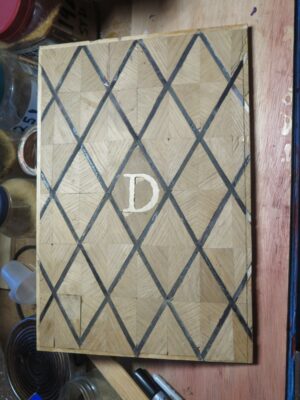
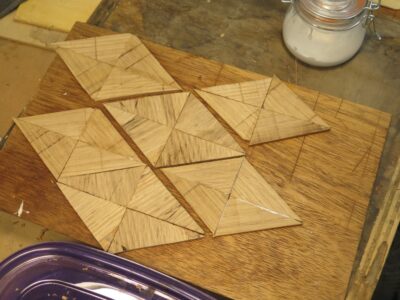
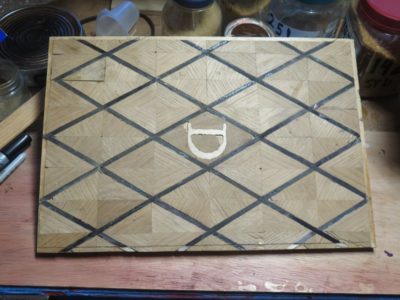
My proof-of-concept panel with the parquetry pattern at full scale. Rendering this was an extremely instructive and useful exercise that changed my approach to every step of the process.
In prepping for the tool cabinet parquetry mock-up — that is as exact as I can make it rather than my previous proof-of-concept — plus the actual parquetry on the cabinet, I was going to need dozens if not hundreds of the diamond units. A task that large is similar to eating an ox. You do it one bite at a time.
Here’s that first bite.
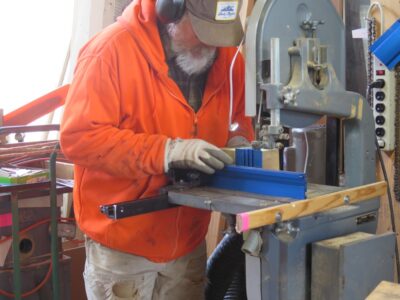
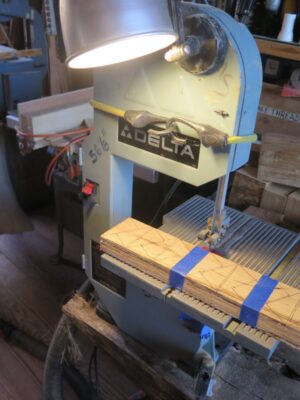
My starting point was cutting hundreds of 30-60-90 triangles both with the grain and across the grain. My veneers were all white oak cut from leftover scraps from the French Oak Roubo Project, and man was it dense. I tried cutting the triangles using jigs and handsaws (that is how I teach introductory parquetry workshops like the upcoming one at Wood and Shop near Charlottesville VA), but soon came to the realization that this ox needed a little prodding.
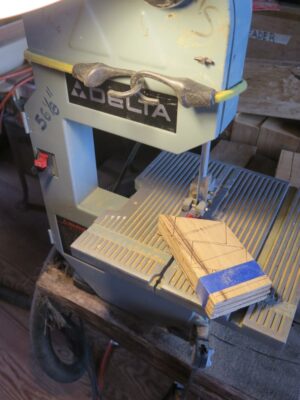
Given my recent success using my Delta benchtop bandsaw with a fine blade, combined with a new strategy for working the parquetry, I decided to do all the sawing on that little machine.
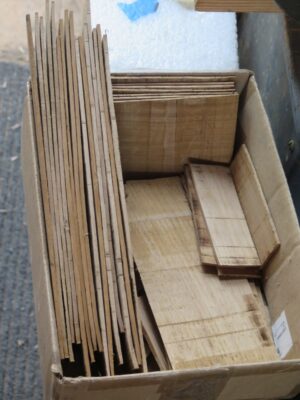
Soon enough I had two plastic shoebox-sized tubs each filled with hundreds of the slightly oversized triangles I needed for what would come next.
Changed horse #1.
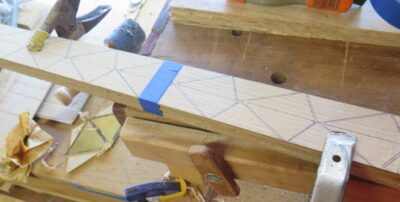
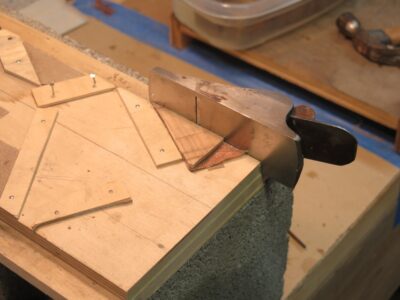
Even though I wasn’t sawing the triangles by hand I was determined to edge plane each one using precise shooting jigs fabricated especially for that purpose. A few dozen of those, especially the ones that are primarily cross-grain, and that determination flagged. I needed a different system if I was to get the ox eaten. That “new system” will be the focus of my next post on the project.
Changed horse #2.
In addition, once I first established the size of the parquetry pattern I created a brass template to make each diamond the perfect size and fit. I was so intent I used trigonometry calculations and a vernier caliper to get the dimensions and angles really precise. (If you ever wondered when you would use what you learned in 11th grade Trig class, now you know.) The frustration of this fussiness soon depleted my enthusiasm for this approach. The alternative I devised will be demonstrated in a post a way down the road.
Changed horse #3.
Stay tuned for “what would come next.”
PS Posting might continue to be sorta sketchy for another little while as grandson #3’s arrival is imminent, and grandsons #1 and #2 have birthdays right on the heels of #3’s introduction to his share of the national debt.
Dr. Elderbarndottir has been a pipe organist since before she could drive, and some of the treasured times of my life were driving her back and forth to the church where she was employed to play. We had precious time together alone talking in the car coming and going, and I got to sit and listen to her practice pieces for worship. They had a small pipe organ and she loved playing it, and would frequently exclaim, “It comes alive!” when she turned on the blower. For a time I thought she might actually go into the business of building and repairing pipe organs. IIRC the pipe organ company offered her such a job even while she was in high school, troubleshooting is just in her veins.
Instead she went off to college, graduating with a Physics BS (summa cum laud; both daughters were HS valedictorians who went on to be summa cum laud in college, proving that Mrs. Barn fit the description when I was in the market for the smartest BabyMomma), although she did continue pipe organ studies her whole time there. Then off to more college for her PhD. She never lost her love for the organ even though she does not get to play much anymore. I too have maintained a longstanding love for the instrument, and this performance and organ are both sublime.
Now that I think about it, pipe organs are about the most complex wood-and-metal things out there. One of the most famous organ builders in the world is just over the mountain from here.
And this is just weirdly wonderful. I think I first learned of this music form from reading Richard Feynman’s autobiographies.
My latest conversation with long-time friend Brian Wilson dropped yesterday on his Now For Something Completely Different podcast. If pungent (but not vulgar) discussion of current events interests you, find it and give it a listen. If not, don’t.
Lately I’ve been contemplating the concept of “scale” in great part because I am now incorporating the making of smallish things for smallish people (for 2, soon to be 3 grandsons) into my shop time, building my huge tool cabinet, and touring the largest timber frame structure in the world.
When we visited Li’l T and his family for Thanksgiving I had in-hand a small step stool I’d made specifically for him. I made nearly identical versions for his mom and her sister when they were little girls, and these little step stools not only served them well at the time but are still in regular service 35 years later. I expect the same results for Li’l T’s step stool and the one I make for his brother MightyM next year and his new cousin in a couple years after that. This one was made to fit exactly inside a 12″ x 12″ x 12″ cardboard shipping box in case I had to ship it to him.
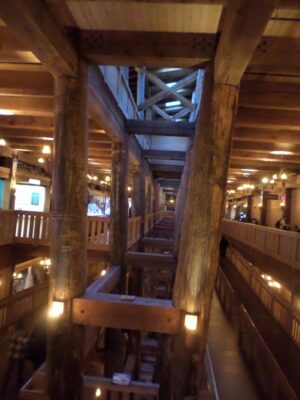
On our way home from Thanksgiving we made a couple of memorable stops in Kentucky, again emphasizing scale. First stop was Mammoth Cave, of which we got to see about 1%, but what we saw was still monumental. Then on to The Ark Encounter outside of Cincinnati, where an interpretation of Noah’s Ark was presented at full scale. “Big” does not begin to describe the structure, and if you have any interest in monumental timber framing it is worth the visit.
It is over 500 feet from end to end, and although it has a modern steel frame skeleton the interior structures are built almost entirely of timbers including whole tree trunks. I believe they employed Amish barn framers for the work. I spent hours just looking at the structure itself.
Back home I have resumed work on the parquetry for the tool cabinet, probably the largest piece of furniture I will ever make. Ironically the presentation surface will be a parquetry surface assembled by combining hundreds of small triangles approximately 1″ x 2″ into scores of parallelograms roughly 2″ x 4″, further enhanced in the final composition with hundreds of mother-of-pearl dots and ivory diamonds. There will be much blogging about this as the project resumes more fully.
This is a pattern for a half-scale version, I decided this was too small.
In addition I am delving once again into the world of Gragg, where I am still working out the details of a 3/4-scale elastic chair for Li’l T’s upcoming birthday (hope I get it made in time). Again, at least two additional iterations will be manifest in the coming couple of years.
One of the issues with “scale” is the question, “Can something be scaled-up (enlarged) or scaled-down (miniaturized) and still be successful?”
I think I am about to find out.
PS – Warmer and sunny with an inch of rain tomorrow, so the snow should be all gone.
Although there are several in the pipeline, I do not have any active workbench projects in the barn at the moment. I am delighted to feature other folks’ work, though, and here is a video from Bob Rozaieski on his new magnificent workbench.
I don’t think Bob and I have met but I plan to rectify that shortcoming the next time I pass near by his shop, which does happen on occasion as we head up and down the highways. We correspond with some regularity but thus far no in-person fellowship.
One of the great things about possessing and occupying the barn is that I have 7,000 square feet of space. And occupy it I do. Lots of storage, lots of work space(s). As a matter of fact, I have more than a dozen work stations allowing me to set up multiple projects, moving from one to the other as needed. Or more truthfully, moving from a cluttered one to a less cluttered one.
Thus the down side to occupying the barn. It needs more regular cleaning than I am inclined to do.
I have two dear friends, MikeM and MartinO, whose shops are so neat and orderly at all times they are what critics of shop videos would say, “It looks like no one ever works there, they are too clean.” I can attest that Mike and Martin are indeed so orderly their shops do look that way. Whether it is by necessity or temperament, the shops reflect the orderliness of the men themselves. Everything is in its place, put away immediately after use. Everything is kept clean, all the time, beginning with the moment a task is completed.
I will resist the churlish temptation to brand this as some sort of psychosis (smile). Alas, I do not possess the traits these two neatniks have as my operating system.
For the past few months I have been paying the price for my own poor housekeeping habits, working my way back into regular shop time by cleaning the place, one work station at a time. The end in in sight but I know well enough the trial of messiness will return soon enough.
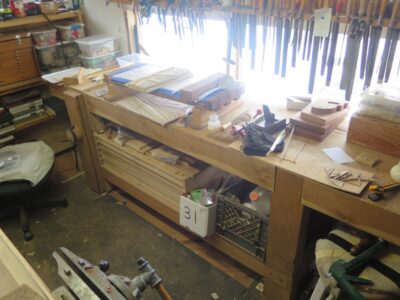
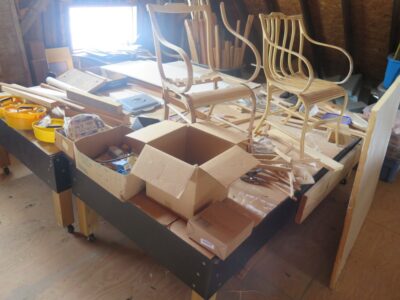
Here’s a partial montage of my work stations. I apologize in advance for the photography; trying to get good images when the space is ambient light and blinding snow reflection is blasting through the windows.
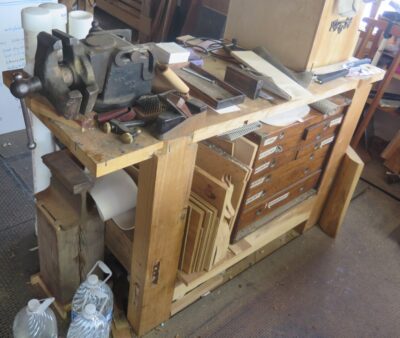
On the east wall, directly underneath a double row of windows is my FORP monster workbench, 8-1/2 feeet long and probably close to 500 pounds. This bench gets used almost every day, currently is is the working platform for assembling my parquetry units for the big tool cabinet I’m making. Underneath the bench is a cabinet full of marquetry/parquetry tools and supplies, and my stash of adhesives. They are located here to be near the wall propane furnace.
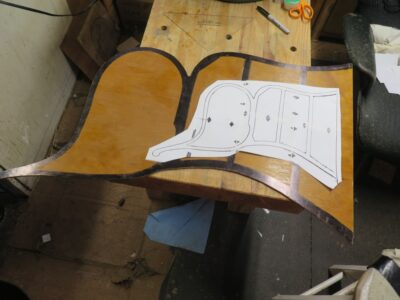
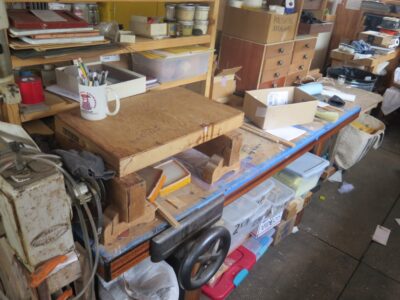
Turn around from Roubo and you’ll find my third child. If I was a Viking I would have this one buried with my in the mound. This bench, with one of my Emmerts on board, is my most used piece in the whole shop. I’m currently using it tp layout the doors of the parquetry tool cabinet.
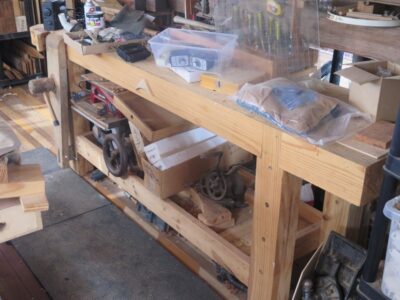
One step behind and parallel to this bench is an early Roubo, not really successful but good enough to use as my metalworking and tool repair bench. It has an Emmert machinists vise on it, and many jigs underneath.
Midway along the north wall is another Roubo bench, now my primary finishing station. Underneath are cabinets full of brushes, pigments, and tube paints, etc.
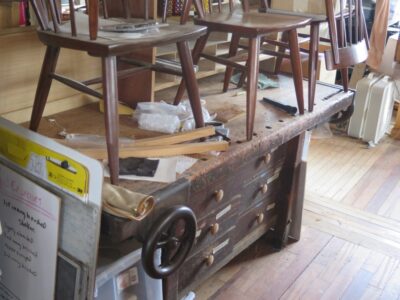
Turn around from my finishing bench and you will find the Studleyesque bench I built for the exhibit now almost a decade ago. It is perfectly usable as a general bench, but I mostly use it for my sellable inventory underneath, and packaging orders to ship out.
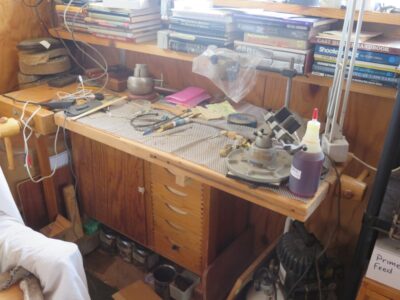
Down in the northwest corner of my shop is my “fine work” bench, a salvaged and renovated Sjoberg I use for all manner of small scale work. Gunsmithing, engraving, checkering, silicone mold making, chasing, etc.
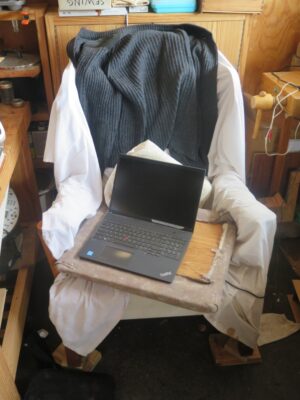
Literally adjacent to the Sjoberg bench is my writing station. You might not think writing is work, but I promise you it is. The chair frame was made by my Roubo translation collaborator Philippe Lafargue. I use a turned over seat deck from a long gone project as my lap desk.
In the corner opposite my engraving station is my waxworks, encompassing all manner of wax processing. It’s on top of a large map case unit full of veneers, mother of pearl pieces, and other exotic material. Keeping the waxwork tidy is an unwinnable proposition, I just try to keep it usable with minimal fuss.
And this is just some of the stuff inside my 15′ x 35′ heated shop.
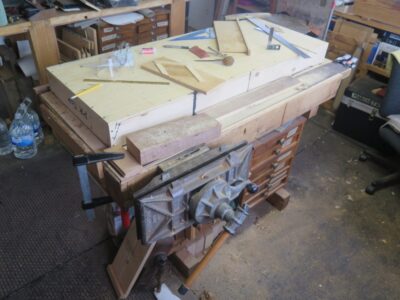
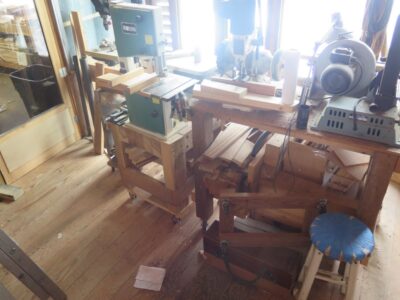
Stepping outside the heated shop is the “great room” in the center of the floor. In the center of that is this Nichiols that I use whenever I am traveling to demonstrate traditional hand tool work. It gets used here too, currently for making a Japanese planing beam and the base frame for the parqutery tool cabinet.
The north side of the great room is just tool and supply storage, but along the south edge is the space for my lathe, chop saw, and a vintage machinist lathe I bought at Donnely’s and then it was restored by my long time friend Jersey Jon.
At the east end of the room, in front of the wall o’windows, are two rolling benches with a variety of power machines, and next to them is my drill press.
On the opposite side of the floor from my shop is a space I originally designated as a classroom. It contains several work stations for students, but now serves as an intermediate space for things in process of being “put away.”
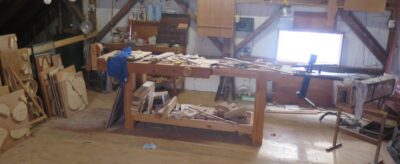
Then on the fourth floor is my Gragg chair workshop.
At one end of the 40 x 24 space is my Roubo workbench, steam box and many bending and assembly jigs.
I also have a couple of large assembly tables that can be situated as the need arises.
So there is a truncated account of all the work stations I need to clean.
I’ve never been a “New Year’s Resolution” sorta guy; either I do something or I do not. That’s not to say I don’t articulate goals, which is itself a fluid undertaking. The primary manifestation of this is a large “DO, MAKE, BUY” whiteboard always on display in the shop. This gets updated by erasing items once completed or new ones added when they pop into my fertile brain. Remember, manure is fertile, too. There is no hierarchical organization to the contents, things just go where there is space.
As of January 1, 2025 this is my set of reminders.
For unto us a child is born, unto us a son is given: and the government shall be upon his shoulder: and his name shall be called Wonderful, Counsellor, The mighty God, The everlasting Father, The Prince of Peace.
The angel went to her and said, “Greetings, you who are highly favored! The Lord is with you.”Mary was greatly troubled at his words and wondered what kind of greeting this might be.But the angel said to her, “Do not be afraid, Mary; you have found favor with God.You will conceive and give birth to a son, and you are to call him Jesus.He will be great and will be called the Son of the Most High. The Lord God will give him the throne of his father David,and he will reign over Jacob’s descendants forever; his kingdom will never end.”
And they said, “Isn’t this the carpenter’s son? Isn’t his mother’s name Mary?”
And I heard a great voice out of heaven saying, Behold, the tabernacle of God is with men, and he will dwell with them, and they shall be his people, and God himself shall be with them, and be their God. And God shall wipe away all tears from their eyes; and there shall be no more death, neither sorrow, nor crying, neither shall there be any more pain: for the former things are passed away.
I pray for you to have a blessed Christmas with loved ones and that you are celebrating the Incarnation, through whom we can be reconciled with The Creator.
As I approach the end of the year I am reflecting/projecting on the projects ahead of me. In addition to diving deeper into writing I’ve got a large number of things on my plate, including the mini-Gragg for Li’l T’s March birthday (coincidentally the month for the arrival of grandson #3, all of them March boys), outfitting my 18thC tool chest collection for on-site interpreting and re-enacting, doing some casting and patternwork, some possible private tutorials at the barn, several new workbench builds, blah, blah, blah.
High on my list will be resuming work on my ultimate tool cabinet, the one that will take me along until my ashes are scattered on the mountain. Since the presentation surface of the cabinet will be parquetry in the fashion of the Roentgens, and made from scraps left over from the French Oak Roubo Project, I still have a lot of veneer to saw to complete that. I’ve written about that some, but it has been so long I will probably start the account all over again.
To enhance my veneer sawing I am thinking seriously about another upgrade to my bandsaw using the roller guide set from Carter.
Have any of you tried this product? If so, please let me know. It is not cheap, around $200, but if it works as well as they say I will plunk down the money without hesitation. Given the fact that I originally bought the saw for $100 at a yard sale, I can afford to tart it up a bit.
Thanks to the generosity and tech savviness of a blog reader and dear friend, I’ve had my favorite version of G.F. Handel’s Messiah playing on my pocket mp3 for some time now. BTW, I have my favorite mp3 player model Mrs. Barn bought as a gift more two decades ago, and I especially like the feature of external battery power (one AA lasts a week or more) and external memory (a single 2G SD card, the maximum this ancient model can support, holds about 40 hours of audio). IIRC it was so long ago she bought it at a KMart! Since that model is no longer available, of course(!), I keep browsing ebay to get replacements when they get worn out (or too banged up). I rue the day this model is no longer available. Sometimes I score a NOS unit in the original unopened package but used ones are more likely.
This Messiah is most sublime in its medieval setting using period instruments. All the musicians and vocalists are superb, but alto Delphine Galou is simply hypnotically radiant.
As I ease back into work in the shop, mostly cleaning and organizing which I find to be the best way to get into it, I have this music running through my ear buds more minutes than not. It puts a sensory smile on my face to accompany the transcendent smile in my heart as I reflect on the incomprehensible grace of The Incarnation.


Recent Comments