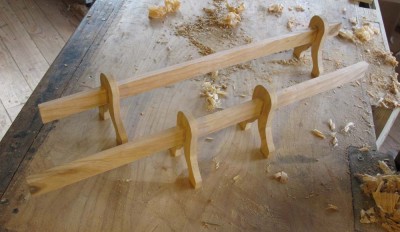
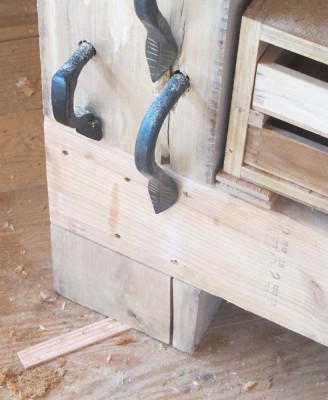
I’ve gotta say this about old Andre, he never stops larnin’ me. Over the weekend I built another set of his winding-sticks-on-stilts as I call them, so that I could photograph them for an essay in the book. I have been trying to incorporate them into my own work practices for the past several months, and doggone if I can’t already see how they will make my work so much more efficient than it was previously. His approach to flattening rough stock is insidiously ingenious.
You can read more about these gems and how they are used in the upcoming To Make As Perfectly as Possible: Roubo On Furniture Making (Lost art Press, 2014?)
Even my little niche of a “hardware store” the barn is beginning to look like there is a guiding organization involved. As a huge fan of Friederich Hayek and his mentor, Ludwig von Mises, it delights me any time order is emergent!
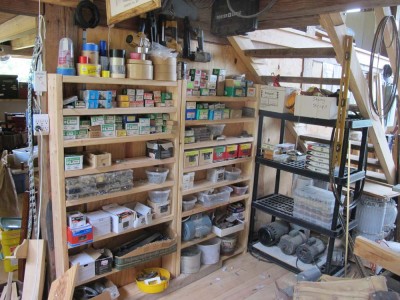
I have a few more parts cabinets to place there in the coming days, but I am not displeased at the progress thus far.
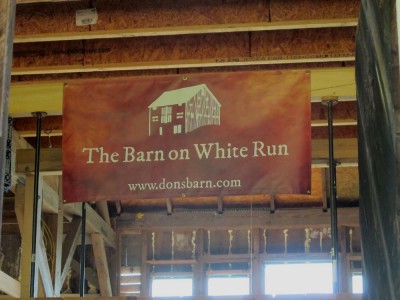
I recently hung a couple of banners in The Barn, just because they make me smile.
First was the original Barn On White Run banner we had last year at Handworks in Amana IA. I hung it off the bridge that connects the north and south balconies, and it is an immediate greeting once you enter the door.
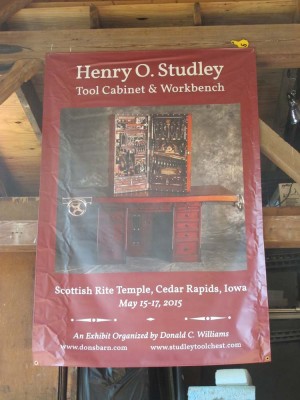
As a total whim I ordered a 4-foot by 6-foot version of an image I am using to promote the Studley Tool Cabinet exhibit (tickets are still available), and hung it just opposite the door to my workshop.
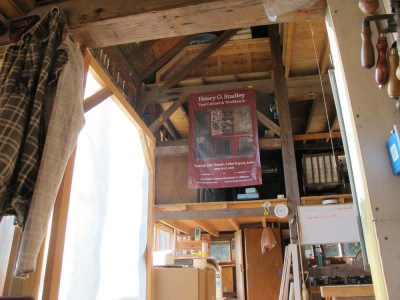
At that size it is an unavoidable reminder of 1) how cool the Studley cabinet and workbench are, 2) how great the exhibit is going to be, 3) how great the upcoming book is going to be, and 4) that I should be scared out of my mind with all the work (and expense) still awaiting me in order to make #s 2&3 a reality.
When back in the city last week I disassembled and loaded my first real workbench, a 5″ thick torsion-box mounted on an oak base unit, and brought it back to the mountains when I returned.
Reassembled and in its rightful place — it was designed and is intended for use in “the middle of the floor” rather than against the wall — its diminutive size makes it a near perfect fit almost anywhere, and the space between the Roubo bench in the window and the planing beam makes it an integral part of the shop activities. NOW The Barn feels like home. It was home-y before, now it is home.
I built this bench in 1986 as I recall, using a pair of “Closeout table” vise screws from the local Woodcraft for the full length twin screw face vise, which is unbelievably handy. The Emmert was mounted a few years later, and I remember listening to the debates prior to the first Persian Gulf War on the radio as I was rasslin’ the beast into place.
The only real downsides to this bench are three. 1) it is really small, as was dictated by the space I had back then. At 24′ x 48″ for the core unit and 32″ x 54″ overall, it does limit the kinds of work you can do, but I have managed to do a lot with it over the years. 2) With the 90-pound Emmert vise hanging outside the trestle base, it does get kinda tippy especially when you put something heavy in it. I found that using the base as a lumber storage rack pretty much solves the problem. And 3) there was no end vise function, which I solved by designing and building the face-mounted end vise on it, a project that was featured in Popular Woodworking.
This bench has served me superbly for the better part of three decades and uncounted projects ranging from planing window trim to being a toy hospital to fabricating parts and even entire replicas) for priceless antiques and everything in between. If you have a severe space restriction for your working area, you might want to give something like this a thought. If so, I will be delighted to provide any insights and counsel I can to help you along.
But tread lightly when contemplating acquiring an Emmert. If you do try one out, be forewarned that a complete one in excellent shape often costs a fortune. In addition you will have to suffer the discomfort of kicking yourself non-stop for not having one before. There is also the continued annoying (to other woodworkers) habit of comparing everything to an Emmert from this point on. Frankly, nothing else measures up. Thanks to Benchcrafted and others we are living in a Golden Age for woodworker’s vises, but this standard is what keeps me looking for improvements all the time. Even when we get to fabricating Studley vises, this will probably remain my “go to” tool.
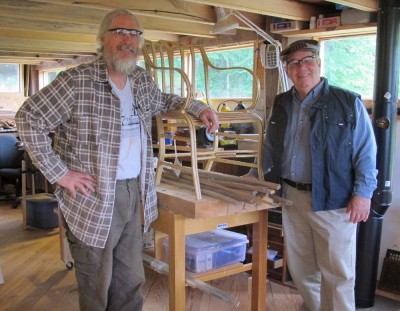
Yesterday I had the unmitigated delight of hosting Charles Brock (aka Mr. Highland Woodworker), Mrs. Brock, and Charles’ videographer colleague Stephen Price. They were up to film a segment for an upcoming HW episode, talking to me about my passion for finishing, which does make me a bit of an oddball in the woodworking world (which just confirms my oddball-ness in relation to just about every facet of the human endeavor) and my upcoming production of Gragg chairs. Being a chair maker himself, Chuck and I got into pretty deep weeds about the minutiae of curvilinear chair construction.
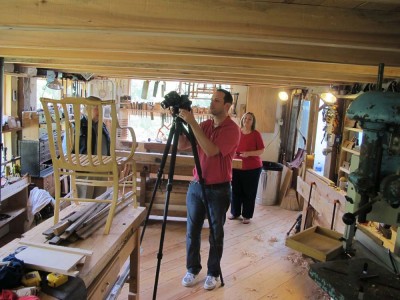
Thank you Chuck (and Mrs. Brock) and Steve for a day of invigorating conversation, and giving me the opportunity to show off The Barn to you.

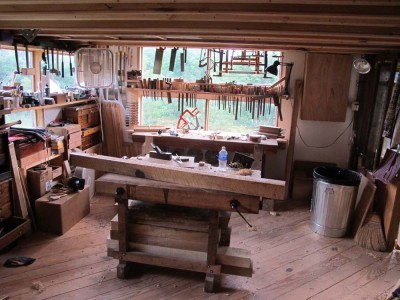
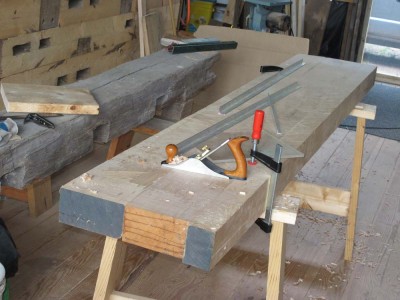
This was my first Roubo bench, built from leftover timbers that were part of the original barn in Illinois. It’s been several years since I built it, and I never really did get the top finished all proper. Now it is. Using my scrub plane on opposite diagonals I got it pretty darned flat. At that point I slathered it with some of the Schwarz bench varnish of 1/3 polyurinate, 1/3 tung oil, and 1/3 turpentine. I did it at this point because two of the timbers turned out to be eastern white pine and were a bit soft compared to the southern yellow pine; I hoped the softer timbers would be firmed up by impregnating them with the varnish. They did, but only after a week or so, which was way longer than I was willing to wait.
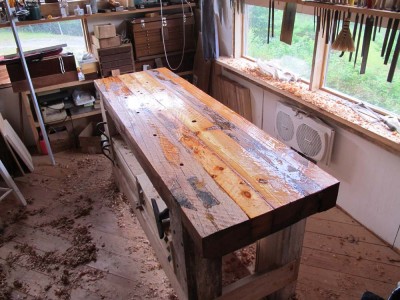
I followed the scrub plane on the varnished top with a toothing plane, on opposing diagonals again, checking to make sure everything remained flat. I prefer the tightly checkered surface of the toothed top as it grabs the work piece a little better than a smooth surface.
In the years since fabrication the entire unit has twisted a tiny bit, so I have a thin shim underneath one of the legs to keep it from rocking.
I have not installed a leg vise, even though I have a vintage one ready to use. I’m just trying to see how long I can keep on using the bench as is, with my workpiece-holding functions solely with holdfasts.
Above the bench I finally built racks to hold a multitude of tools, mostly files, and am hanging saws and the like off the joists with nails.
No doubt this may soon be supplanted by the group of in-process benches in line awaiting my ministrations, including a 5″ solid maple top with white oak legs bench; my French Oak Roubo Project bench, which is slowly being uncovered by the ongoing archaeology within the barn; a pair of Roubo benches also made from salvaged barn timbers (although I am almost certain to hang an Emmert K1 off one of them); a mahogany slab and black walnut legs Roubo bench (I was originally going to use this for a Studley bench, but have now decided to build a Studley bench the way Studley built it instead), and finally the true Studley bench.
I’m thinking I may need to install some of my existing or future benches up on the fourth floor. That’ll take a passel of stout guys even with a compound block-and-tackle.
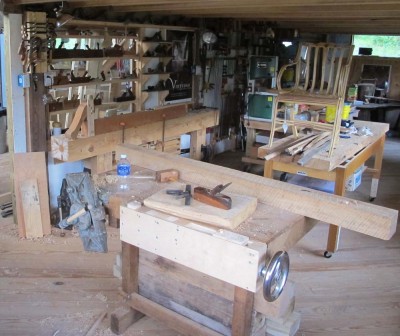
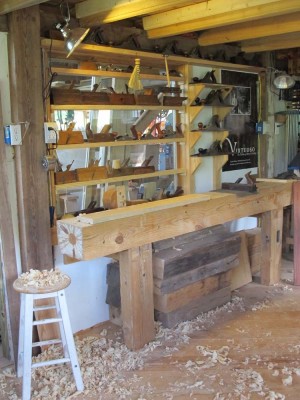
In my workshop in the Barn I have a number of work stations — planing, main bench, secondary bench, Japanese tool corner, main tool cabinet, sharpening, metal smithing, etc. — awaiting my ministrations to make fully functional and dare I say it, DONE! I am going to attempt to address them one by one for a week or so to get the place ready for making and restoring furniture, as it was intended to be from the beginning.
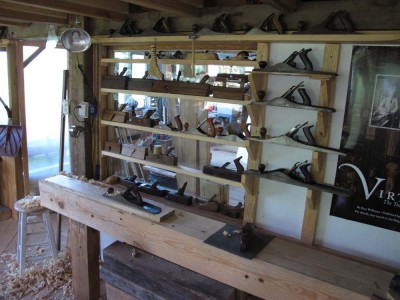
The lowest hanging fruit was the planing beam and surroundings, as it has been in place and vaguely functional for quite some time. Still, my planes were scattered about in a variety of boxes and bins, so I cut, planed, and installed several shelves into the window well behind the beam to hold the ones I wanted close at hand. It looks like I have space for a few more planes, but never fear, I have more and will pack the joint very shortly
One unexpected benefit was the realization that my shaving beam for making Gragg Chair parts fits right behind the beam on the trestles, nestled out of the way and immediately accessible.
No doubt about it, this image makes me smile. You can just barely spot the head of the shaving beam behind the planing beam.

You can order it here.

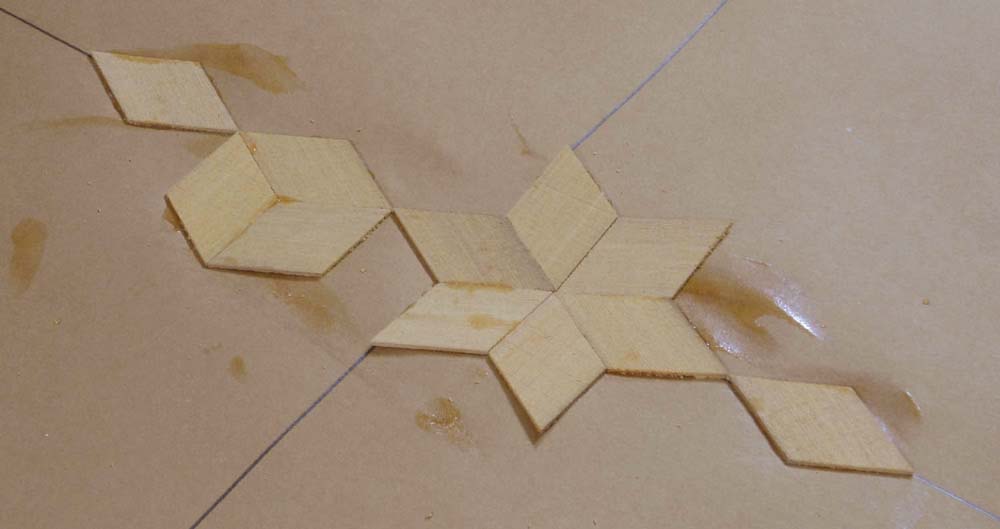
One of the beauties of parquetry, aside from its, well, beauty, is that it is a decidedly simple process requiring only a few tools to get started.
When we gather for the workshop at The Barn in less than a fortnight each student will need only a few tools, none of them exotic or impossible to find or purchase or even make.
These are not presented in any order of importance.
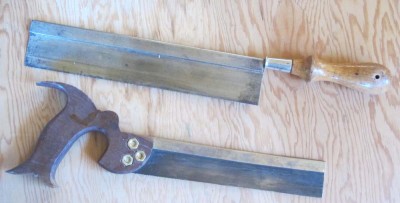
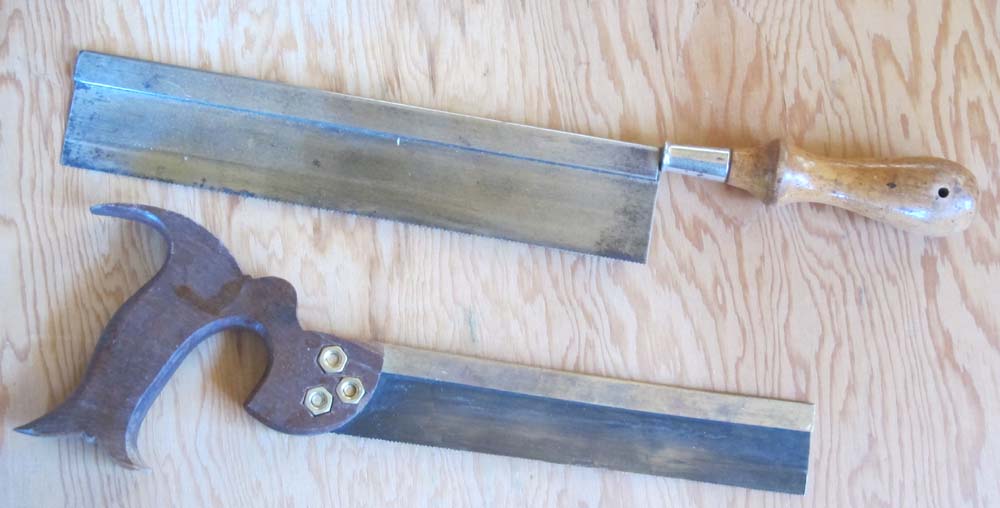
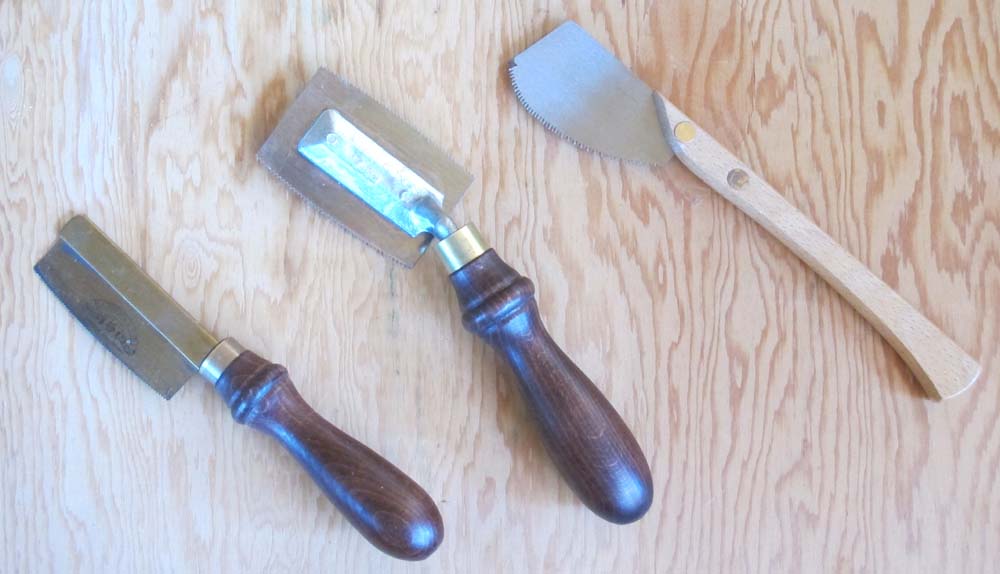
1. Small back saw
The first tool needed is a small dovetail-type saw, used to cut the already fashioned veneer strips into equilateral parallelograms. Almost any kind of small back saw that cuts cleanly will do.
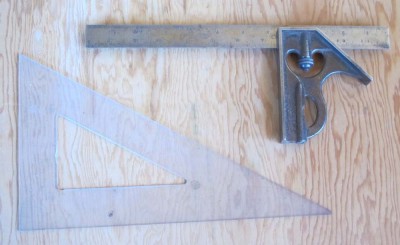
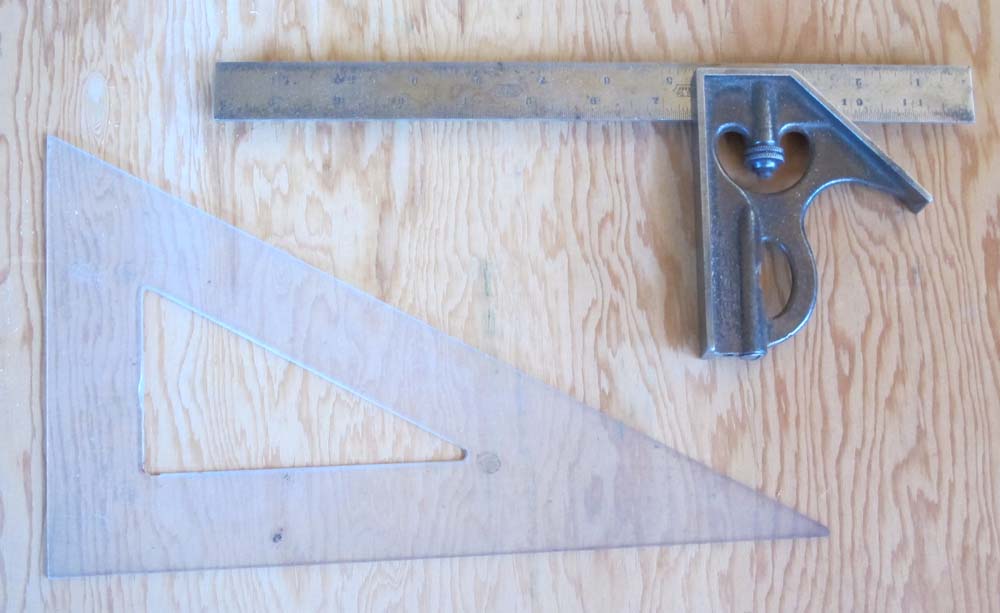
2. 30-60-90 triangle
Since this type of parquetry is based on the 60-120 degree equilateral parallelogram, a 30-60-90 triangle is required. A decent quality plastic one from the big box store works just fine. Or you could do what I do and just pick them up at yards sales for a quarter apiece. That does sorta explain why I have a whole drawer full of them…
3. Bevel Gauge
To both prepare the sawing jig and the layout of the veneer panel, a bevel gauge is needed. In the preparation of the sawing guide it is the fence against which you ride the back saw for establishing the initial kerf. As long as the blade of the gauge is straight and the locking nut locks, you are good to go.
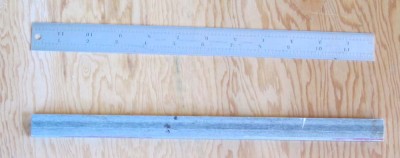
4. Straightedge/ruler
In order to assemble the parquetry pattern properly you have to establish the greater and lesser axes so you know how to assemble the pieces on the kraft paper backing. The straight edge makes this an easy task, especially if it is a ruled bar used in concert with the aforementioned triangle.
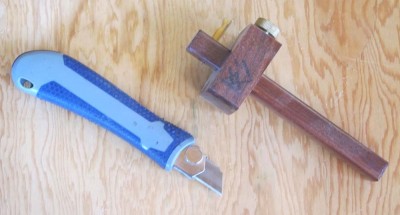
5. Utility knife
Many times in the course of a project you need to cut or trim something, so some sort of utility knife is called for. Equally applicable would be a straight ship carving knife.
6. Cutting gauge
If you are including banded inlay into your composition, a cutting gauge (pictured next to the blue utility knife) is useful for establishing the edges of the channels into which the banding will be glued.
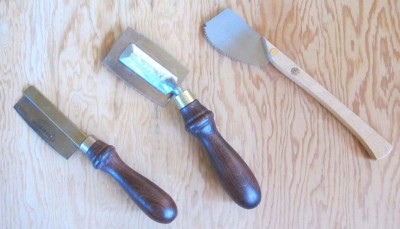
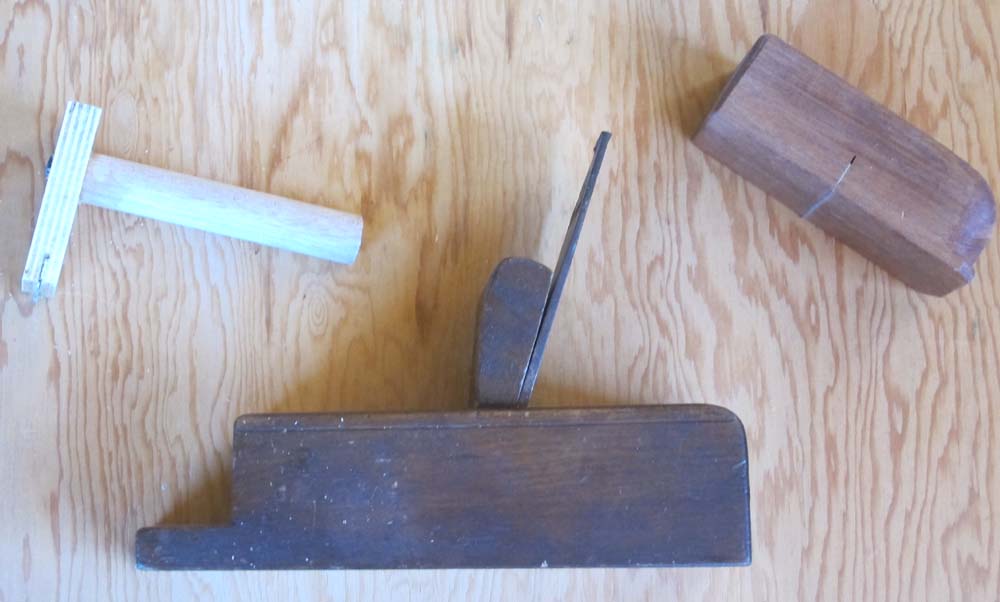
7. Veneer saw
For finishing the edges edges of the marquetry panel, or establishing the channels for the banded inlay, and marquetry saw is a godsend. I show three different iterations; on the left is an “English” style, the center one is I believe of German heritage — both of these saws cut on both the push and pull stroke — and the one on the right is Japanese, hence cuts only on the pull stroke. I have tried but do not yet own the new design from Gramercy Tools, but it is superb. Since much of my future work will be parquetry, I will order one.
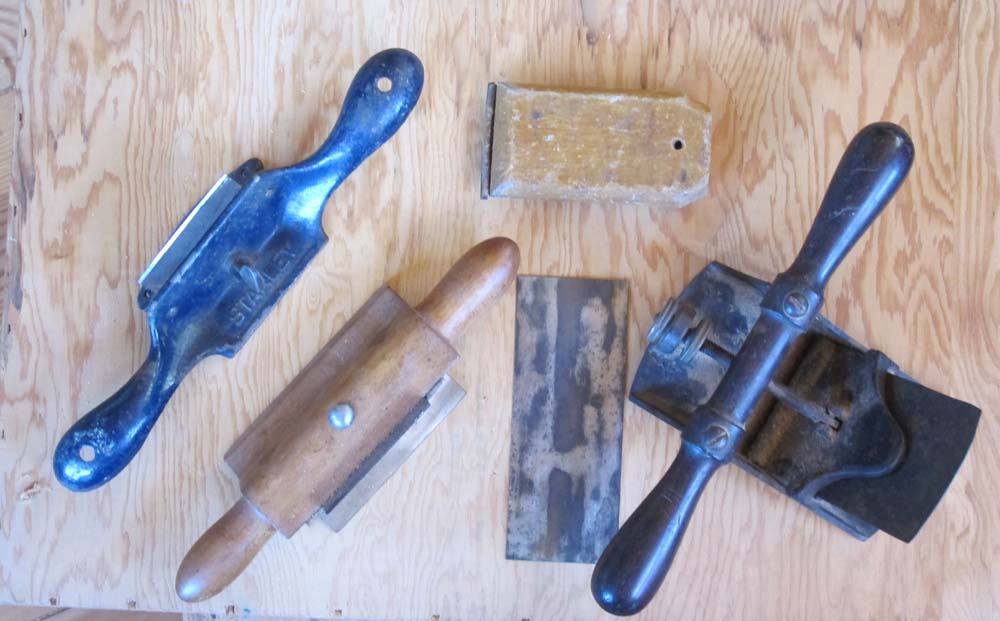
8. Small bench chisel
To clean out the channels for the banded inlay.

9. Toothing plane or analogue
When the parquetry panel is assembled and applied to the substrate, it will be neither flat nor smooth. A toothing plane will accomplish the former. I have about ten, but if you don’t have one you can make either a low-tech block toother or a squeegee-style toother, both of which employ hack saw blades.
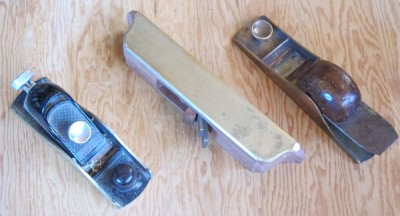
10. Block plane or similar
Often the parallelogram lozenges need just a touch along an edge to make it fit perfectly, and the sharp block plane is just the tool. Later on, you will need the block plane to follow the toother in the finishing.

11. Scraper
The final step of smoothing is done with a scraper. Whether you use a card scraper or a block scraper is immaterial, all that counts is that it be cutting nicely and leaves a perfect surface.
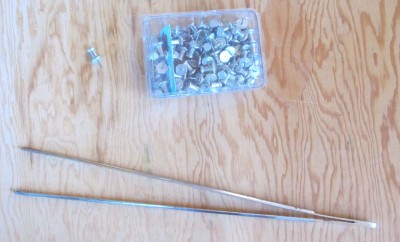
12. Miscellaneous tools
I always like to have a pair of tweezers laying in the vicinity, and a bunch of metal-headed thumb pins, to tack down the banding while the glue set.
That’s pretty much all you need tool-wise to get started. Next time I’ll talk about making and using the sawing and planing jigs.
===================================
If spending a weekend in Virginia’s Little Switzerland making a parquetry panel sounds like fun, drop me a line and sign up for the class. It is a week from Friday-Sunday.
Don Williams has a new DVD with us. I caught up with him last week to learn as much as I could about the topic – creating historic (and stunning) furniture finishes. We ended up talking even more about Don’s wealth of experience in both building and instructing.

Dan:
The first thing most of us notice when we look at a true historic finish is the sheer beauty of it. Where does that beauty come from? What is it we are actually looking at on the face of the wood?
Don:
I have read a number of studies about brain physiology and the connection between our vision and our psychology. There are certain kinds of images we almost all identify as beautiful. I’m not an expert on that whole topic, but what I have found in finishing is that there is an almost universally accepted definition of beauty. It translates to a finish with low molecular weight, high gloss and high sheen. Think about a traditional French polish versus an epoxied bar top. The French polish has low molecular weight and high gloss and sheen. The bar top finish is too heavy.
This can be a chicken and egg debate. Did we develop the tools to create what we already considered beautiful, or did the definition of beauty come after using the tools for many years? It doesn’t matter very much. Historic finishes are beautiful, and we have all the tools we need to do the work.
Dan:
At what point in your career did you develop your own finishing vision and technique?
Don:
In about 1974 I went to work for a father and son crew – Pop and Fred Schindler. Pop had more or less retired when I arrived, but he still puttered around the shop. He was Swiss, very traditionally trained in Europe and seen as kind of funny here in the U.S. I was the victim of a good upbringing, and did not see Pop as odd, but rather treated him with a lot of respect.
When it came to finishing, we were all just sitting at the bench and doing the work. We were not following aesthetic theory or anything like that. I worked in the Schindler shop for 4 years, and that was when I developed my technique.
Dan:
After 45 years of finishing and teaching, you have boiled the technique down to 6 concise rules that you share with students and woodworkers everywhere. Tell us more about where this list comes from.
Don:
To the extent that I have any native gifts at all, my gift is the ability to organize ideas. I taught off and on for 25 years at the National Institute for Wood Finishing, and throughout that time I was always seeking a more concise way to explain the craft. That’s where the 6 rules came from.
Dan:

One of my favorite moments in the new video is when you show viewers the Japanese rasp that has become one of your favorite tools for flattening veneered surfaces. Are there any other modern or non-traditional tools you like to use in your historic finishing process?
Don:
I probably own over 500 brushes, and have used everything from the traditional badger brush to goat hair and even boar bristle. But I use modern synthetic nylon brushes most of all. They work really well.
Dan:
Thanks, Don! Readers – be sure to check out that new DVD. It’s a gem.


Recent Comments