With the light shining at the end of the tunnel, in hopes that it was not an oncoming train there were but a few more elements to fashion and fit and the desk construction would be complete. Sort of. In fact the final assembly did not take place until after the individual pieces were finished, but more about that later. This final construction phase would perhaps be better named the final fitting phase. This included the two top sections, one the writing surface and the other the horizontal back piece all cut from the same mahogany slab, and a little extra enhancement. The back (horizontal) piece of the top was thinner than the writing surface by 1/4″ in keeping with the original.
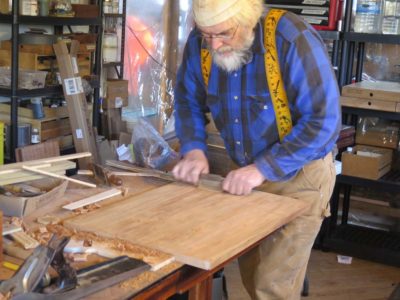

The “construction” of the top pieces was ordinary to the point of mundane. They only had to be cut to the right size for the places, planed and scraped with a rounded edge planed onto them, then fitted together in a butt joint.
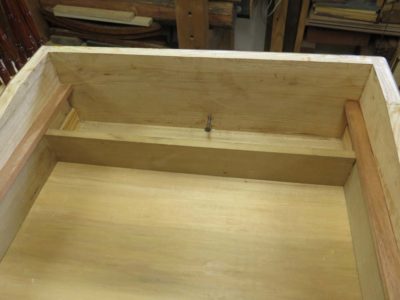

Before the top was glued onto the sides with glue blocks it was the proper time to make the drawer stop. I used a preposterously simple technique I have seen in many small-ish pieces of early 19th Century styled furniture like this replica. A simple flat head wood screw served the purpose perfectly, with the additional benefit that as the dimensions of the case or drawer changed over time to to moisture cycles and any resultant compression set, the depth stop could be easily adjusted infinitely.

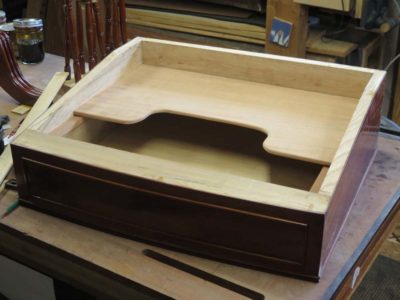
On final little whimsy was to add a hidden “whisky shelf” immediately above the drawer. Since the top was slanted and fixed there was a fairly spacious void above the drawer, and it was not uncommon for a small shelf to be included inside to that a flask of libations could be kept there. I made a “U” shaped shelf that could be accessed when the drawer was pulled part-way out, then tacked the shelf on to the fixed drawer guide rails with a spot of hot animal hide glue.
And now it was on to the finishing.
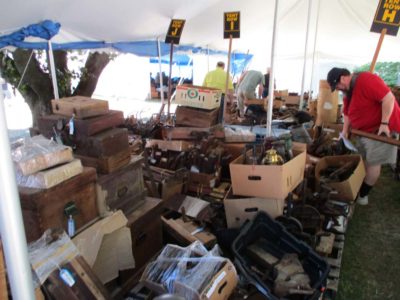
Recently Mrs. Barn and I headed to central New York for the annual overdose of antique tools at Martin Donnelly’s compound in Avoca. It is a phenomenal experience that I can commend heartily to anyone interested in pawing through nearly 100,000 tools, all for sale. The really great thing about this auction is it is the “cleaning out the warehouse” sale of items left over from MJD’s other auction the preceding year. The earlier auctions have a much higher portion of “collectible” tools, this one is mostly “user” tools with little collectible value. Not all, but mostly.
Previewing the auction lots is a nearly impossible task unless you take the full week beforehand; we arrived there the morning of the auction that was beginning at 2PM. I was able to get about five hours of looking prior to the opening gavel.
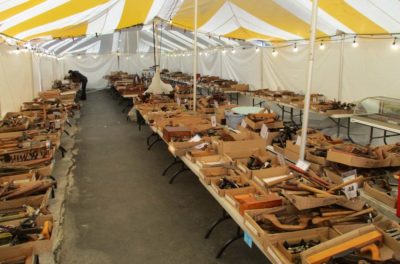
I began with the first 600 lots, which were the opening day’s salvo. Most of these are located in the first of the dozen or so tents on the grounds (there is logic to this arrangement, and the 2nd evening barbecue is in this space so it gets cleaned out first. Most of the box lots for the sale include groupings of tools, sometimes up to a couple hundred small tools. It is a fairly rare lot that inlcudes only one tool, I would estimate that at about 5%.

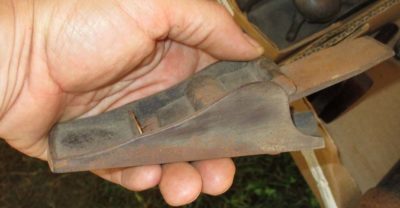
In the first-day tent I found a few things that interested me, including this solid ebony smoothing plane. It was part of a small lot with several ebony navigating tools included.
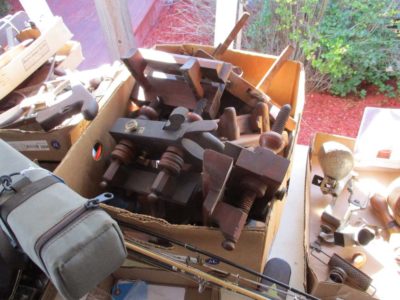
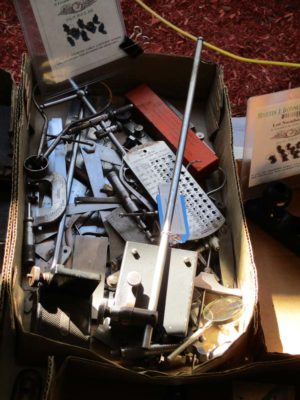
More common were lots like these which included anywhere from a couple dozen items to a couple hundred.
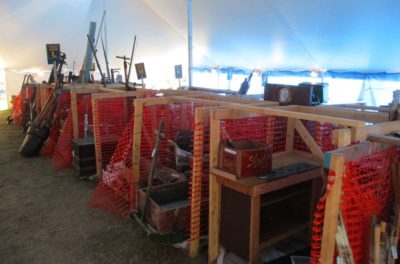
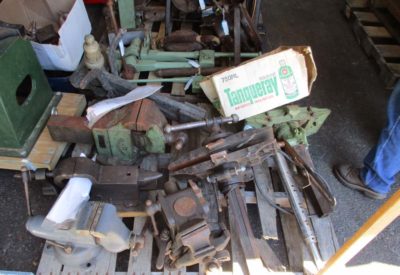
About 1-in-25 lots is oversized and thus in one of the several tents full of bins or palates. After browsing through the box lots in tent #1 for a couple hours I wandered through these tents and found some real treasures to be sold later, especially on Day #2. One palate of heavy iron included THE tool I went to bid on, an Emmert Universal Metalworking Vise. I’d been on the hunt for one of these behemoths for many years, always losing out when the bidding entered the stratosphere. Maybe this was the year.
There was stuff everywhere, including the largest selection of foot-powered machinery I had ever seen in one place. There must have been about 50 of these machines, including the pedal-powered shaper my pal MikeM is trying out.
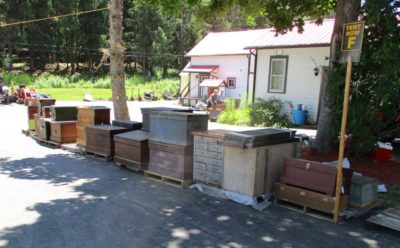
There was even an avenue of tool chests out along the driveway.
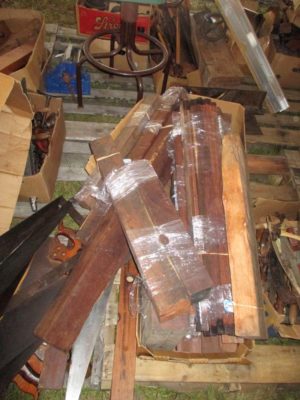
Another tent for oversized lots included this pile of several hundred pounds of Brazilian rosewood, cocobolo, Gaboon ebony, and even more. It came from an old closed yacht manufacturer in Long Island.

Still more giant tents stuffed to the gills with tools, baskets, boxes, you name it. This included a fair number of boxes I was interested, at the right price of course.

And this does not include the two-dozen small tents and tailgates of tool swapping out near one of the parking areas. I have learned to have a lot of fun with the wheeling and dealing here and can often learn a lot of tool lore with the dealers.


This fellow had two older Panavises that my pal JohnH and I were interested in. His wallet was the size of a hoagie roll. One friend of mine who was selling here confessed that she used to make fun of old guys with big wads of cash in their pockets, the had to confess further that she had become one of them.
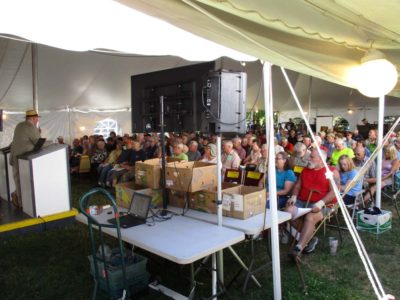
Soon the time raced to the point where folks filled the bidding tent, and the contest was ready to begin. Martin Donnelly greeted the crowd then turned the show over to the auctioneers, whose goal is to gavel four or five lots per minute until all 3000+ are gone. You snooze, you lose.
With all the disruption of two robust independent electricity producing systems going belly-up at the same time I decided to add another producer into the mix, is essence to modify the “two is one and one is none” rubric for logistical planners into “three is two, two is one, and one is none.” In the absence of the hydro and solar electron hamsters I relied on my gas powered generators and a bunch of extension cords.
I decided to contact the local electrician to see if he could wire the generator into the service panel of the barn, and he suggested instead wiring it into the power system at the bottom of the hill, alongside the electrons provided by the hydro and solar units. I got a quote, smacked my forehead and said, “Of course!”, and authorized the work. Plus, since there was already a buried cable from the powerhouse to the cabin, could he perhaps also wire that into the system? Sure, he sez.
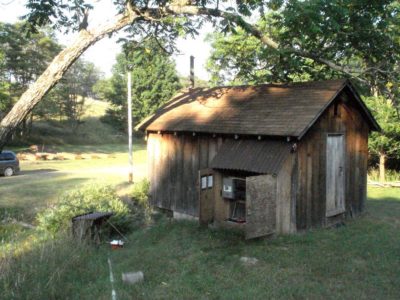

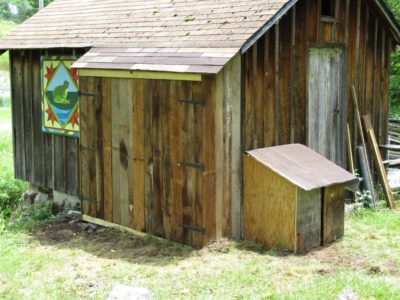
The day came when he and his son, also an electrician, arrived to do the work. The first step was to clear the work area, which translates into “ripping off the raggedy shelter over the electronics closet.” I’d been wanting to do this anyhow in order to build a more proper enclosure for all these components so this was the time.
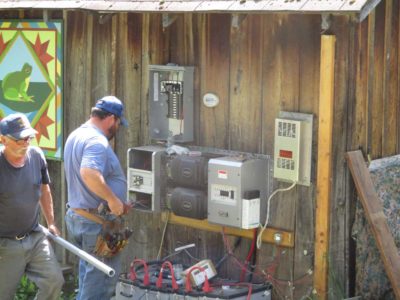
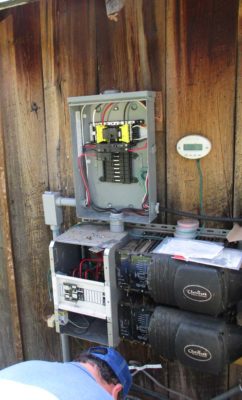
In no time flat they were abuzz with work, installing a new sub-service panel to provide for vastly improved current distribution.


After a bit of time they separated so one was completing the sub-service box to serve as a new router for the electricity and the other was making the modifications to the service panel inside the cabin, alowing it to be powered by the same auxiliary system.
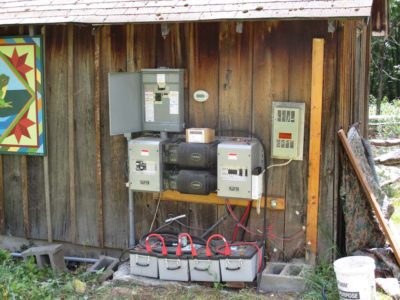
By lunchtime they were finished and I test drove the system in all its iterations available at the time: inverter/battery bank power to the house or barn, gas generator power to the house or barn.
Brilliant!
I spent a couple days making more proper housings for the system electronics and the generator and this chapter was complete.
Building on what I learned from the initial prototype of the portable restoration workbench I charged ahead with a “final” version. I say “final” in quotes because this concept is one I have continued to tinker with even to this day, and a late entry in this series four or five months from now will focus on the most recent one.

For this first final version I used the same structural strategy for the top, modifying the stock weight being the only real modification. On this second iteration I used 3/8″ A/C plywood for both the faces and ribs of the torsion box top rather than 1/4″ and 3/4″ luan for the same purpose on the prototype. Making the box approximately 3″ thick and placing the ribs in a 6″ x 6″ grid achieved a satisfactory result with essentially no change in weight while yielding a stout structure. In fact, I could do some pretty serious joinery and carving on the bench, which I couldn’t do with the prototype.
I wanted a large-capacity vise on my bench, but there was no point in defeating my original purpose by building a lightweight bench and then installing a heavy vise on it. The vise(s) I built opens about 12″ and employs aluminum threadstock for the screws, tapped holes in the endpiece of the top, and 2″ x 3″ x 24″ wood jaws. The screws pass through same-sized holes in the movable jaw, and terminate in simple wooden handles passing through holes drilled in the ends.

One pretty dramatic change in this function was to switch from standard steel threadstock to 1-inch aluminum rod stock that I had cut at a local machine shop (I already had the aluminum rod stock in my scrap barrel). It’s been a long time since this project but I recall paying $25 for the job. All it took was to set up the pieces in the lathe and cut the threads with a single pass, along with a single groove above the threads for some retaining collars. I’m guessing it took ten minutes maximum, so $25 for a quarter hour of machine shop time sounds about right. It might have been $25 for each pair of screws, but either way it seemed pretty reasonable.
My procedure for incorporating the vise into the bench top involved drilling oversized holes in the internal grid but not the added fixed jaw, so I couldn’t assemble the box all at once. I cut my grid pieces and glued them to one face of the torsion box using 315 gram hot hide glue, which was the adhesive employed throughout the project. After laying out for the vise screws, I drilled holes through the fixed jaw (the torsion box end pieces) to tap-out and received the threaded screws. I was unsure whether holes the same size as the aluminum rod stock used for the vise screws would be large enough to allow the screws to go through the grid members, given the inevitable wobble in the screws. To be on the safe side, I drilled larger holes through the grid to a slightly longer distance the desired vise opening dimension. The vise screws would then pass through these openings as the vise was closed. After I was sure the vise was fully operational, I glued the second face on the grid and the top was complete.

By fabricating simple leg end units with long folding diagonal braces, the problem of too much shimmying parallel to the long axis was overcome on the final bench. The leg units were fabricated from the clearest 2x construction lumber I could find, and the folding braces from 1/4″ x 1″ aluminum bar stock with 1″ x 1″ aluminum angle stock for the mounting brackets. The slightly heavier face plywood made it easy to screw all these elements to the underside.


The leg units were not installed symmetrical relative to the short axis, but rather were off-set by half the leg width so they could fold up next to each other rather than on top of each other. This way, the table could become a remarkably compact unit which needed absolutely no assembly or disassembly; it could just be folded up. Following final assembly I added a snap-on strap for carrying the bench like a large suitcase. By throwing the strap over my shoulder, I could easily carry the bench for long periods of time and maneuver it through pretty tight quarters.
Next week, some accessories.


Recent Comments