My compewder is working after a manner. But I am definitely in the market for a new one.
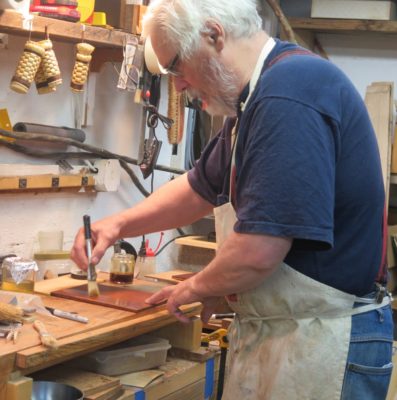
I’ve spent much of the past few weeks readying for tomorrow’s presentation at the SAPFM Mid-Year Annual Meeting in Fredericksburg VA. I’m now packing up everything and will hit the road shortly.
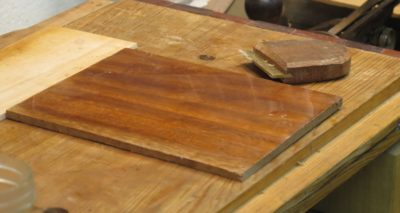
It’s all been about making sample boards based on the likely finishing resources available to colonial craftsmen, which by definition means it has been non-stop fun. The variety of finishes possible with a small menu of materials is astounding. Colophony, beeswax (shellac (of course), turpentine, whisky, naphtha, linseed oil, walnut oil, are all it takes for a party to break out.
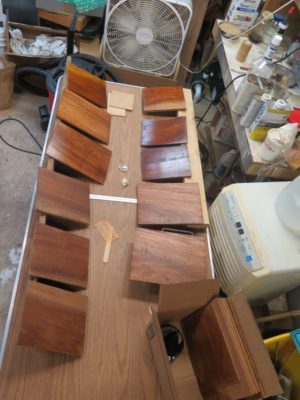
How could anyone not love finishing?
One added benefit of the exercise is that I am getting re-enthused to knock out the book. It has been hanging over my head for far too long!
Apparently my laptop (or its charger) just died. Since this is where I keep all my documents and pictures I may not be posting for a bit. Yes, everything is backed up on an external archive drive, but I do not have access to that at the moment. All I’ve got is my Kindle, which IIRC is incompatible with anything USB so I’m kinda stuck for now.
Check back later to see how things progress, if at all.
Stay tuned.
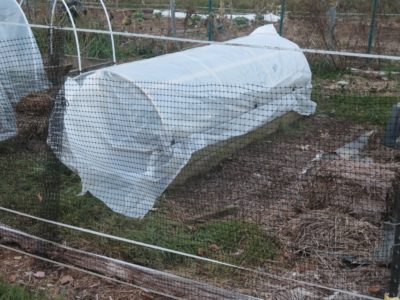
Another of the regular winter/spring/summer rituals here in Shangri-la is to re-think the carpentry needs for the gardens, and this year two new hoops over the raised beds percolated to the top of the pile. There had been hoops before but those were made in haste and only lasted ten years. The time had come for something a bit more robust. They get used year round, in the winter to serve as mini-greenhouses, in the summer to keep out the cabbage butterflies.


I decided to make the ribs with three lamina instead of two, so I ripped the requisite number of 1/4″ strips from pressure-treated 2x lumber. The actual forming/laminating process began with constructing a form that can serve to fabricate laminated hoop ribs from now until I become part of the landscape myself. I used scrap materials for the form and used clamps for making the first curved ribs. I used up all the clamps I had that would fit and kept them engaged for 24-hours (I used T3 adhesive).

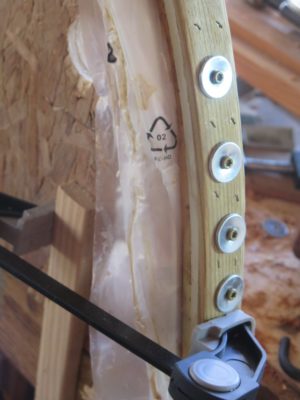
I got smarter. On subsequent ribs I used deck screws and fender washers to clamp the laminations to the form. With the addition of crown staples I was able to assemble two ribs per day.
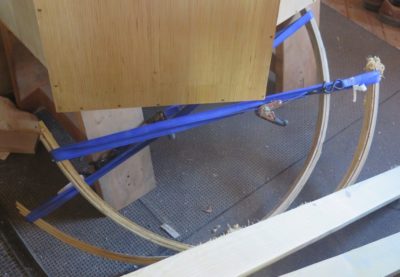
After removing the laminated ribs from the form I restrained them with ratchet straps to keep the correct shape and size, and set them aside. Once I had enough I could assemble the skeleton and cover it with the screening.
Stay tuned.
May you spend this day in reverence for our Heavenly Father and in celebration or remembrance of your earthly father. We commemorated the occasion last night as Li’l T’s dad will be on duty today. I got this t-shirt from his mom and a Peer Gynt Suite CD from the other barndottir. Glory abounded.
 .
.
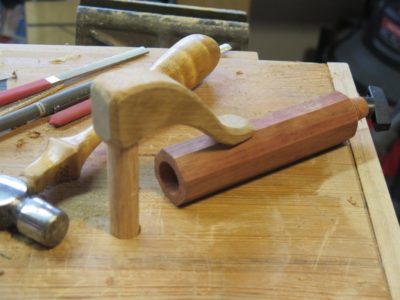
I’ve been hanging with my pal MikeM for a couple decades, and at least one of his consuming passions is rubbing off on me — hammers. Many times a Christmas package would arrive from Mike, and on more than one occasion it was a hammer or mallet he had restored or made. One of them, a polished vintage ball peen hammer head with a sublime curly maple handle, is in my personal tool pantheon and gets used every day I am in the barn (pic above). Every day.
Well, as they say, “Bad company trumps good character,” and Mike’s “bad” influence on me over the years in the realm of hammers has taken hold. (Just kidding folks, Mike’s friendship is a life treasure.) I now find making hammers one of the many delightful undertakings in the studio. I’m probably not approaching Mike Territory, but in response to a comment by a recent visitor in the studio, “No, I do not have a ‘hammer problem.’ I have a lot of hammers. Big difference.”

Many years ago I picked up several steel pieces at a flea market. These cylinders, which I naturally thought would make great mallets, were of unknown origin and a peculiar morphology. The flat ends were easily drilled and tapped. My original thought was this would be great for affixing faces to the striking surfaces.
The problem emerged when I tried to drill a hole on the cylinder surface for a handle. It was hard. I mean really, really hard. Too hard for any drilling device I had, up to and including carbide and cobalt drill bits. The rounded surface was so hard I could not even make a dimple with a machine punch and in fact the tip of the punch broke off when I tried. I have never encountered something this hard, and scratch my head about the manner of hardening this surface. It was probably case hardened on a precision rolling mill, but what was its purpose? I have no idea, but for several years its purpose was mainly to hold down the sill of one of the studio windows. Occasionally it would be used as a dolly or backing anvil, but nothing more.
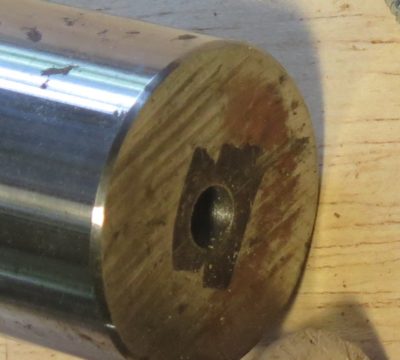
Recently, while in the tool-making “zone,” I decided to give up on the idea of creating a typical mallet configuration from the cylinder and exploit its differing hardness to create a joinery/carving mallet. This began with drilling a hole in the flat face.

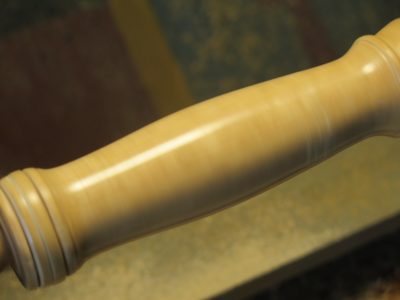
To match this I turned a white oak handle from some of my scraps, and drilled that as well. The finish on the handle was Blend 31 wax melted into the surface while turning on the lathe, then burnished with a piece of coarse linen. I like both the look and the feel of the handle, beautifully smooth but with just a hint of tack for gripping.
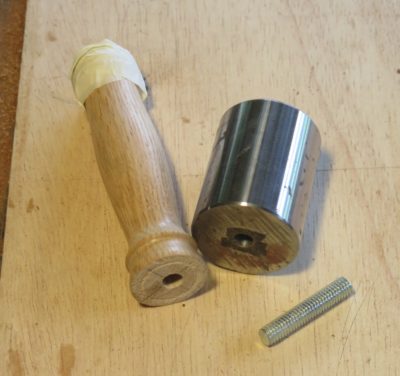
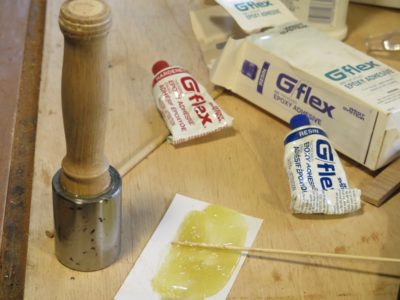
Inserting a threaded rod dowel with epoxy to assemble the two pieces completed the assembly process. I didn’t clamp the assembly and let the hydraulic vacuum of the thick epoxy hold everything steady while it hardened.
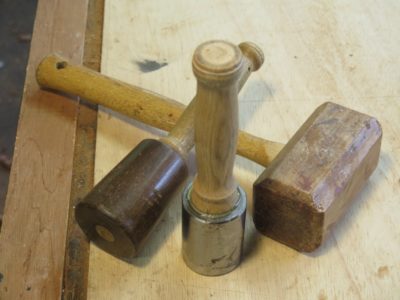
It is now an intriguing addition to my inventory of homemade mallets. I note that of these mallets there is a huge range of shape and weight. The tapered cylinder mallet on the left, made thirty-five years ago, weighs in with a lignum vitae head of a half pound, plus the handle. The tulipwood mallet on the right, made 25+ years ago, weighs in with a head of 3/4 pound. This new one with the steel cylinder has a head weight of two pounds. It just might be a beast. Because of its comparative diminutive size I was thinking of keeping it in my traveling tool kit. With that weight I am reconsidering that decision as it is almost two full pounds more than the lignum vitae one
I will probably wrap the new steel cylinder with leather to diminish any strike damage inflicted onto anything I whack with it.
Stay tuned.
When it comes to sawing lumber there are three distinct processes. Crosscutting is the most common to most woodworkers, wherein a longer board is made into a shorter board. Ripping is when a wider board is cut into two or more narrower boards (one of which may be purely waste material) and is the function for which the table saw was primarily created. Resawing, by which a thicker board is cut into two thinner boards, is generally the least employed of the three sawing methods. And if it is done, it is mostly reserved for table saw or bandsaw work.
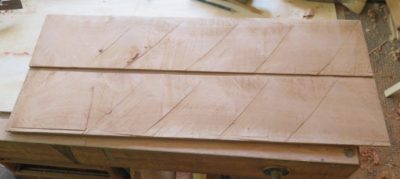
Because of my own peculiar interests and projects, I find resawing to be a regular function in my studio as I routinely saw my own veneers, both by hand and by bandsaw. Recently in my preparations for my presentation at the upcoming SAPFM Annual Mid-Year, as I was working on some luan plywood panels to create the set of sample boards reflecting my presentation content, namely the options available to rural colonial craftsmen, I was dissatisfied with the aesthetics of the outcomes. I decided to make some honest-to-goodness furniture lumber sample boards. The most readily available material I had was true mahogany of 8-9 inches in width and 1 to 1-1/4″ thick. In other words just a smidge wider than I could resaw with my upstairs bandsaw. My downstairs bandsaw with the riser block and beefier motor was out of commission for some maintenance. So, I decided to resaw the mahogany boards by hand. [N.B. I would have preferred to use walnut as that would reflect 18th C rural life in the mid-Atlantic region better than imported mahogany, but the lumber for that was at the bottom of a very big pile of lumber. Nuts to that.]
I used my 3/8″ kerfing saw on all four sides of the boards and got to work (the saw cuts a 1/16″ kerf 3/8″ from the edge of the board, not a 3/8″ kerf).
Back in the day when the Woodworking in America shindigs were a thing one of my favorite presenters was Ron Herman of Antiquity Builders of Columbus, Ohio, who would show up with a half-dozen boxes of carpenter’s saws of almost every iteration known to man, and talk about all things saws and sawing. I learned tremendous amount from Ron as he waxed eloquently of things he had been taught and subsequently learned from his many years of restoring and preserving historic buildings. One thing he said which remains embedded in my brain was, “Make sure the saw fits the job.” He would then walk the audience through the process of selecting from among the scores of saws he had for a specific task at hand.
Ron’s words were ringing through my ears as I undertook the slicing of my mahogany boards. The mahogany was dense, and some boards were denser than others. This required fine-tuning my tool selection to make sure the saw I was using was the best fit for the board itself, and given that the three boards I resawed were different densities, I wound up using three different saws (and tried several others) to get the job done. Such a conundrum is not present when I am resawing, for example, cypress when the grain is so uniform and the density so creamy I can go at it with my most aggressive saw. Or, when I am resawing hard cherry or maple. But when, as in this case, the boards are not uniform in density or even when different sections of the same board differ in character I was switching back and forth between saws.

At this point in my studio trajectory my default starting point for resawing is the Bad Axe one man Roubo saw, which works wonderfully well and did so in this case. For the densest of the mahogany boards this saw and its 4 t.p.i. configuration was the tool of choice for much of the work.

This time, inspired by this Salko Safic video I decided to try one of my c.1800 frame saws. With its 2 t.p.i. configuration it cut like a beast on fire but I had a bit of wander on the outfeed side. Perhaps with a bit more practice… Or, I could give Mark Harrell a call to ask for some advice on getting the saw to cut dead true. I had not tried using a four-foot saw by myself much before this, so perhaps all I need is more time in the saddle. It could also be that Salko is simply a better man than I.
I have two brand new saw plates for four-foot frame saws so maybe a new tool project is coming over the horizon.

The most Ron Herman-ish episode of the excursion was tuning my saw selection to the individual piece of wood. For the denser board my usual re-saw tool, the vintage 3-1/2 t.p.i. Disston “skated” over the wood a bit much, even after I gave it a quick tune-up with a file (about five minutes’ worth of work; it took longer to set up my saw sharpening rig than to actually do the touch up). Switching to the equally vintage 4-1/2 t.p.i. Disston, set up with the exact same specs did the trick. Both saws were what I call “skin prick sharp” (the teeth are so sharp they grab my skin when I gently press my finger against them) so really the only difference was the tooth spacing. The 3-1/2 t.p.i. saw worked like a charm on the less dense board.
I might not need Ron’s eight dozen saws in my inventory, but maybe a few more than my dozen-and-a-half could be called for. I’m always scouting for good vintage saws cheap at flea markets. All I want is an original depth plate and no kinks.

One final note: I make a point of keeping my saw plates well waxed, stopping to apply a thin swipe of paste wax whenever I feel things “grabbing.” It makes all the difference. Normally I use a paste wax made from my 31 Blend but that would have required walking to the other end of the studio to retrieve it. This tin was right there.
I find resawing to be an immensely rewarding exercise, and I do mean exercise. It takes a good while and a fair number of calories but the result is exhilarating when done well. To paraphrase Toshio Odate, “If I find a task pleasurable, why would I want it to be over quickly?”
He is a wise man.
After two years of mostly inactivity teaching-wise I’ve got several now on the calendar, all more or less in the vicinity. Over the next couple weeks I will be diligently preparing for my presentation at the SAPFM Mid-Year in Fredericksburg VA, on the topic “The colonial craftsman’s finishing kit,” with a special emphasis on locally available materials. If you are there you can come and see it, if not, not.

For this presentation I am creating a set of sample boards to reflect the information I am presenting.
No sooner do I return home from that than I will be assembling all the materials for the three-day Historic Woodfinishing Workshop near Charottesville VA. I’ve done this workshop several times and have settled on a well-defined syllabus to leave the students with greater confidence in the finishing process.
Over Labor Day weekend my friend Tim, for whom I built the ginormous workbench a couple years ago, will be hosting an 18th century craft shindig at his place just a few miles form here. He has asked me to demonstrate historic wood finishing and tordonshell work. Ought to be a boatload of fun.
It’s the best of all worlds in a way. I get to teach and interact with talented people in a range of skilled trades without having to even travel!
… and it’s home made and free from the scrap pile!
I was introduced to the layout knife when I went into the pattern shop in 1978 (I was a strictly power tool woodworker prior to that) by shop master John Kuzma, who taught me more about precise work than anyone who has ever crossed my path. Regardless of the scale of the foundry pattern, ranging from a small gear or housing to huge dredge pump components, the standard was always the same — work to the center of a knife cut. Given that the final product in metal was probably going to be machined to a .001″ tolerance this made sense. Rarely/never is this the case for woodworking otherwise.

While marking knives (of an astonishing variety) have been a constant presence in my tool kit over the past 4+ decades I have never encountered a better version of the marking knife than the one John used very day. It was simultaneously no-nonsense and performed exquisitely in every application in the wood shop. Recently I made another of these tools like this. The beauty of this method is that not only do you end up with a superb tool using recycled material, it does not require any de-tempering or re-tempering the material. It’s all cold work.
The starting point was a retired file. I make no secret of my pack-rat tendencies, so I always have old files on hand. If they were a good file, they are good tool steel. John’s knife was built from a 1/4″ square file, this one I just made was from a 3/16″ round chainsaw file. Given my reliance on firewood for heat I have a nearly never ending supply of worn out round files.
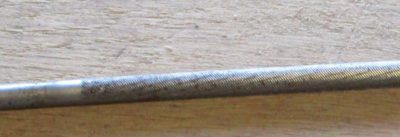
The first step of the process is to smooth out the remaining texture of the file teeth using a diamond stone or similar. This leaves a texture but not so much as to be uncomfortable in your hand.
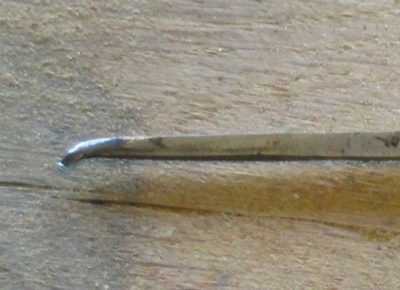
The second step is to put the tang in the vise and give it a bit of a bend. The amount of the bend is slight enough that there is no need for any heat treatment of the metal.
Once the bend is done, sharpen the tip to a knife edge. In my case I use a coarse diamond stone for the shaping followed by a routine regimen of achieving a sharp knife edge. The beauty of this little curved tip is that it enhances the ability to make marks inside or underneath restricted spaces. I have never encountered a better way to transfer the lines of the small dovetails I often make,
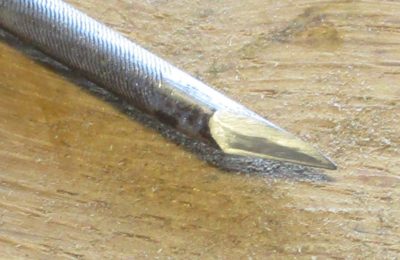
On the other end of the file I again used the diamond stone/sharpening stone routine to create a knife bevel and razor sharp tip.
That’s all there is to this tool.
No cost, almost no time (under a half hour) and incomparable performance. Sounds like a near perfect formula to me. As soon as I come across a worn out square file I’ll make one from that, too.
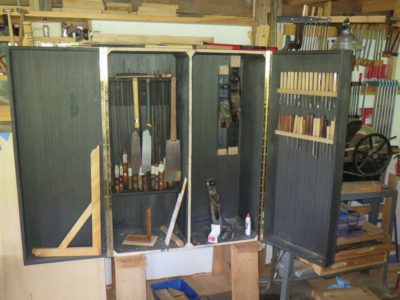
As I have stated previously, the interior of the tool cabinet will be “composed” more than it will be “designed.” The process of layout and fabrication will certainly be a deliberate one, and the amount of progress will depend greatly on the other activities in my life, projects in the studio and events outside the studio.
I have made my first choices and taken the steps to make them happen.

First, I moved my saw rack en toto into the rear of the proper right compartment.


Second, I began to design the fittings to affix my hand planes to the rear of the proper left compartment.
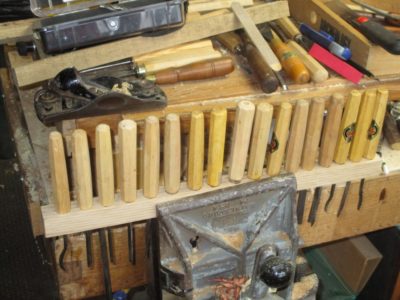
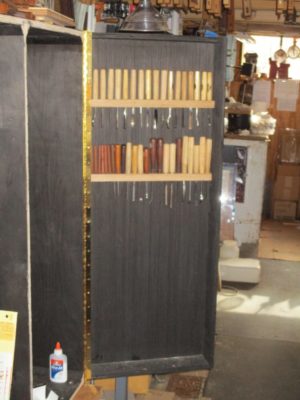
Third, I began the process of mounting my carving chisels on the proper left door panel.
It’s clear there will be a lot of proceeding and retreating as I work out the composition, but it will all be a lot of fun. There will be irregular updates as they are called for.
Stay tuned.

In between extended travels to spend with Li’l T and his parents we are back at the homestead. The “to do” list is lengthy; mowing the hay that popped up in the yard, lotsa gardening for Mrs. Barn (pretty much all day every day), packaging and mailing several polissoir and wax orders, preparing for the upcoming presentation at the SAPFM Annual Mid-Year conference at the end of June, more mowing (always a problem given my extreme allergies to grass pollen), along with all the other things that are ongoing in the studio, paying bills, doing laundry, and a multitude of other things I cannot remember at the moment.
I get tired just thinking about it. Tough. Better get to it.


 .
.


Recent Comments