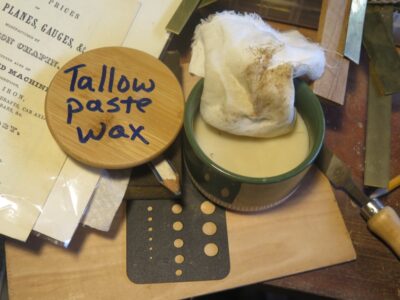
By request, here’s a blow-by-blow of my tallow/beeswax paste wax.
When making small formulation test batches I rely on my yard sale fondue heating plate. It’s a pretty steady 150-degrees F so I do not need to watch it with an eagle eye, as it will keep chugging along until my wax and any other ingredients are melted. A Pyrex sauce pan fits it perfectly so I just toss in the ingredients and check back in an hour.
For almost all of my formulation endeavors I combine the components by weight. Since I am not doing anything other than melting, in this case I do not really need to use one of my analytical scales. A digital kitchen scale is more than adequate.
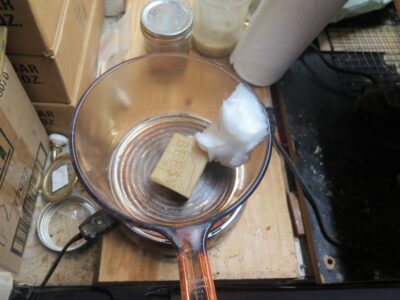
The beeswax is of course the product that we make by hand, triple filtered Tupelo Honey beeswax. I would gladly use local beeswax but there just aren’t enough local beekeepers.
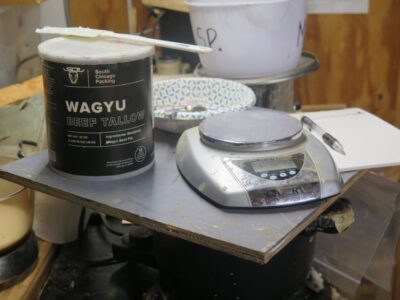
For the tallow I just used some purified beef tallow I bought on-line. I have not tried using any other tallow but will entertain the idea. This works fine for me, is nearly odorless (if I close my eyes and inhale a big snort of air I can almost imagine the faintest smell of pot roast), and has remained stable for the four years I’ve had this container open. I could certainly add a dash of turpentine as a fragrance but don’t need that for my own use. Originally, I bought this tallow to lubricate wood threads on my bench and Moxon vises.
For my paste wax test batch I wound up with 75 grams of beeswax to 150 grams of tallow as the sweet spot. When sneaking up on this (melting and cooling, melting and cooling) I added a bit of one or the other (ALWAYS keeping notes along the way) until I got the outcome I wanted.
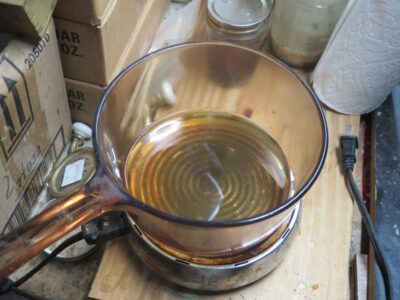
Once everything is melted and uniform I just let it cool, The result is a very firm paste wax that can be used like any other. I’ve ordered some more tallow to make a bigger batch so I can send out samples to those of you who requested some.
Of course my curiosity bone wonders what the result would be if I used Blend 31 instead of pure beeswax…
Stay tuned.
Around this time each year I try to get the following winter’s firewood processed (e.g. 2025/2026). Fortunately I was being visited by my brother for a week, so we knocked out many tons of wood. Adding a second person to the crew does not double the productivity, it quadruples it! Especially when the second person is younger, bigger, and stronger than I am.
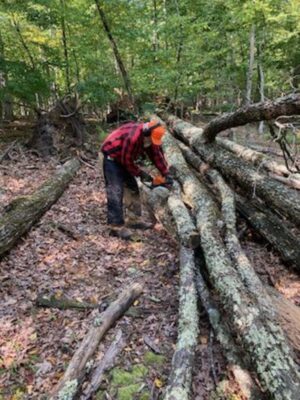
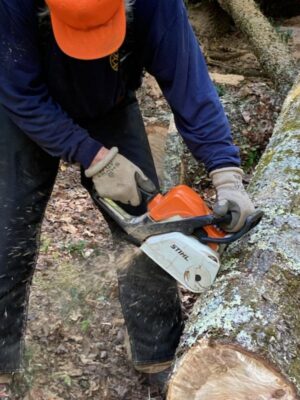
We spent three days working together, beginning with harvesting a cluster of four large-ish trees that came down in a wind storm a year ago. It was a near-perfect blend of trees/woods; maple, white oak, locust, and birch.
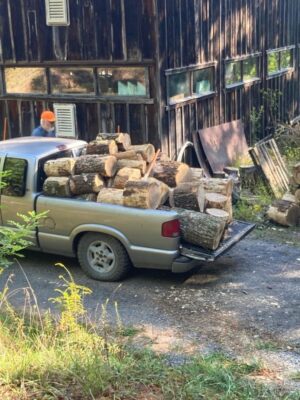
After first cleaning up the brush-y ends of the trees we just worked our way up the trunks, cutting them into ~16″ bolts. By the time my little S10 was loaded fully, it was definitely a low rider.
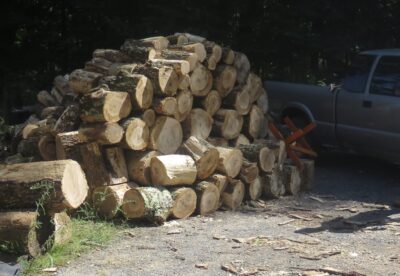
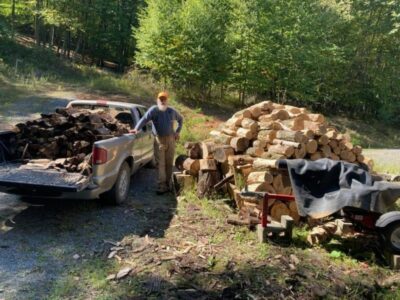
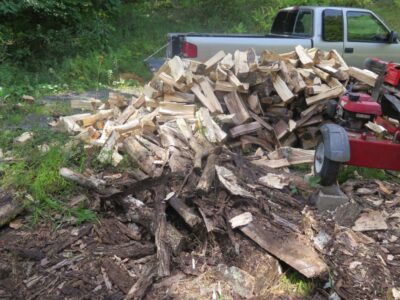
By the end of the second day we had a substantial wall o’wood to split and stack. Once we got the crib filled at the cabin I started to build the pallet stacks next to the barn. Of course, now that I want to spend a part of every day doing that we have a forecast for a week of daily rain after six months of drought. Sigh.
I continue working alone after he departed and the pace is demonstrably tortillian. But, I will soon have all the firewood for winter 2025/2026 processed and continue working on several other large windfall trees on the hillside, including a pair of gigantic locust trees so large I might have to borrow a larger chain saw to get them cut up.
My ultimate goal is to get firewood processed through the end of the decade.
Stay tuned.
As a general rule, in olden days paste wax was made from one of two recipes — Beeswax melted into Spirits of Turpentine (what we call simply turpentine), or beeswax melted into tallow. I’ve made much of Version 1 in the paste but not so much of Version 2. So, to best talk to visitors about the finishing processes of the past at the recent 18th Century Trades Fair I made a good batch of tallow/beeswax paste, and I gotta tell you it was magnificent! I think it actually has some advantages over the turpentine/beeswax solvent paste, namely that it does not have a volatile component to evaporate, is basically odorless (may not be an “advantage” for those who like the fragrance of turpentine), and it is harder in the jar than the turpentine beeswax paste. This means that the doling out can be more easily controlled and that less is used to accomplish the same goals as with the solvent paste. I especially like the feel of the tallow paste wax and have been using it on my tools to great success.
I like it so much I just might make a batch of it to share with others who might like to try some. If this is you, let me know.
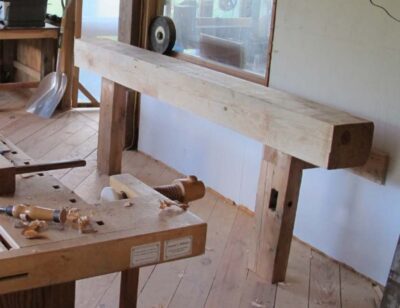
Image from early 2012, the year before we moved to Shangri-la. At this point the shop was still mostly empty space.
In my early days of working in the barn one of the very first things I did was install a massive (8″ x 10″ x 8′) planing beam along one wall of the shop, but over time I realized it was mostly 1) the most robust junk shelf in the world, and 2) a tremendous space hog consuming too much valuable wall and floor space I could not afford. Especially given the reality that eventually I had several other options for hand planing workstations. In the end I dismantled the beam and repurposed the timber into something else.
Still, I never lost that ephemeral sentiment that, particularly in the realm of Japanese toolwork, an inclined planing beam would be a nice addition to the place. [N.B. it seems as though I am creating new workbenches about as fast as I get rid of the old ones! Mrs. Barn thinks I have “a workbench problem.” She is incorrect; I do not have “a workbench problem,” I have a lot of workbenches. Completely different thing.]
Thus I set about trying my hand at the classic Japanese planing beam using some of my less-than-perfect cypress planks as the core, glued together to make something stout. By “less than perfect” I mean that one side of the 11/4 c.1840 water tank staves was a little beat up or degraded. I extracted a pair of the staves from my stash and ran them through my little power planer that has been my corded apprentice for nearly forty years.
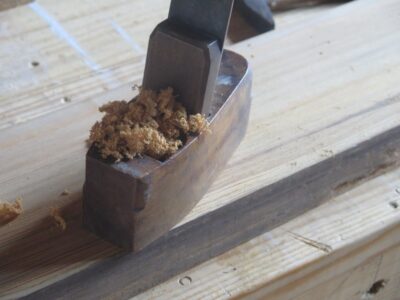
Once I got the gluing surfaces cleaned up I dressed them with a toothing plane to remove the planer chatter and increase the surface area for the glue contact.
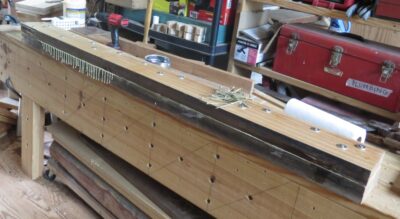
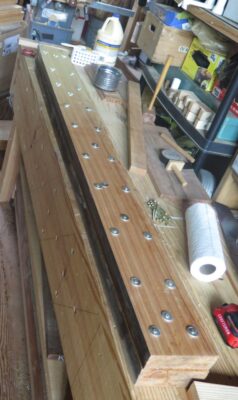
Using the technique for gluing stack laminations I learned in the foundry pattern shop 45 years ago I employed screws to temporarily clamp the two planks together, this time using 4″ decking screws with fender washers underneath each screw head. The clamping power of this system is impressive, as you can tell from the squeeze-out. I left them overnight then removed all the screws and washers.

Since the compression divots and the screw holes are all on the underside of the beam they are of no consequence.
Time to true the beam.
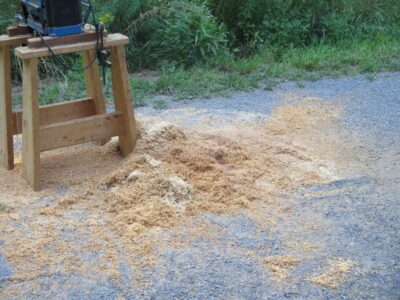
The recent three-day 18th Century Trades Fair was a gas. I started making sawdust and shavings around noon on Friday and shut down with the torrential downpour on Sunday afternoon. Too bad we got almost none of that at Shangri-la only a few miles away. In fact, other than when the remnants of a tropical storm residue blew through town last month, resulting in four inches of rain that got soaked up instantly, we’ve had about an inch of rain since April. It’s been a tough summer for the garden, lawn, and the barn’s micro-hydroelectric system. Nevertheless, the attendance at the Fair was really hampered by regional weather forecasts projecting heavy rains all weekend. Sigh.
But I digress.
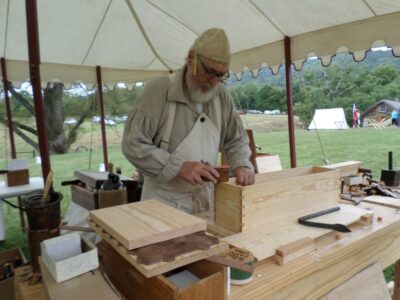
I spent time at the Fair doing some simple work, basically making a storage till box for my tool chest (more about that in a coming post). Folks liked seeing me work and asked a good number of questions but mostly they marveled at the really simple stuff like plane shavings.
It as my first rodeo with this tool kit and I learned lot about what I need for an event like this vis-a-vie the workbench, tools, workpieces, show-n-tell, etc. Next time I will know what to add to my kit and what to leave behind.
One of the things I knew I would be doing at the recent 18th Century Trades Fair was using an open flame, to 1) heat up a waxing iron to use for applying a molten wax finish, and 2) cooking hot animal hide glue.
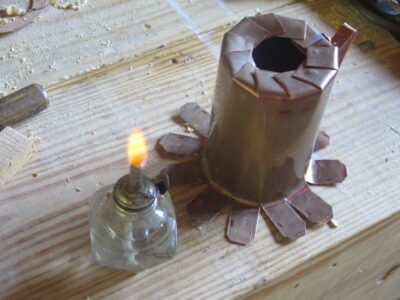
I have a couple old alcohol burners but neither would hold up to the least little bit of wind in the open. So, in order to make these processes part of my presentation I needed a wind screen inside of which the burners could reside while in use.
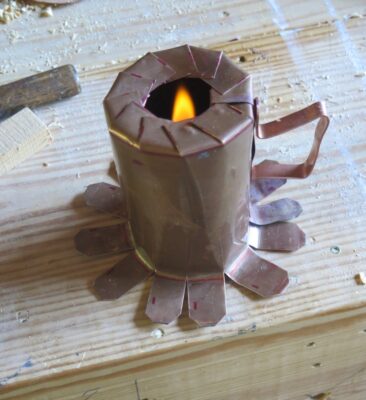
Browsing my handy supply of scrap metal I found the perfect piece of heavy copper flashing and set to cutting with my hand shears once I made the measurements of the burners.
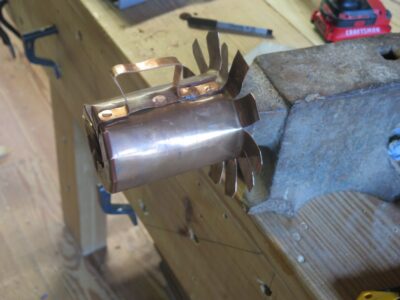
Since I could not put my hands on my tinsmith’s stake I grabbed a 2-1/2″ maple rod to use as my form for bending the copper sheet and drilling rivet holes and then pounded the copper rivets on my anvil. The design is quirky and inelegant but works like a charm. Only after use in battle will I know if I need to punch a few breathing holes to keep the flame lit.

One thing is for sure, a small alcohol lamp (or even candle) can provide a lot of calories and if they can be concentrated can heat up something pretty efficiently. I had this re-purposed tinsmith iron hot enough for melting and spreading block beeswax in just a few minutes. Ditto my small double boiler glue pot.
I cut a piece from my metal stock inventory to make a handle, which does get mighty hot after an extended use. I’ll have to wrap it with some cordage or such to insulate it for handling.
For the second time in a month I loaded my truck to the gunwales and headed off to teach/demonstrate, this time at the recent 18th Century Trades Fair at my friend Tim’s place down county. I brought about a half shebang, the whole shebang would have require at least two trips. As it was I had an 8-foot Nicholson bench, a display table, a full-sized tool chest, lotsa wood to cut and plane, a ton of show-n-tell including my finishing box and exampls of furniture joinery, etc.
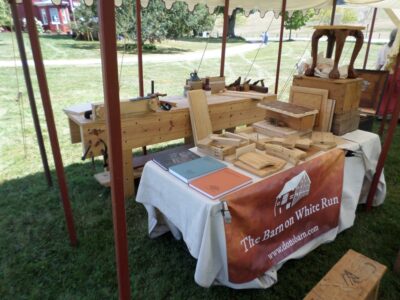
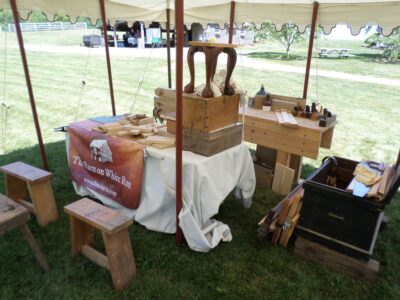
After a couple hours I was set up and ready to go.
No sooner did I get home from teaching the Introduction to Historic Woodfinishing class and got the truck unloaded, I dove straight into prepping for last week’s 18th Century Trades Fair down at my friend Tim Duff’s place in Mill Gap VA. I was looking forward to the event, the third annual Labor Day Weekend shindig, as I missed it last year to attend and participate as a longstanding supporter of Handworks in Amana IA.
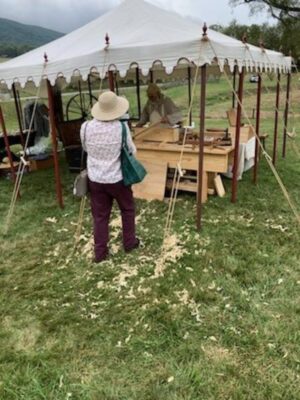
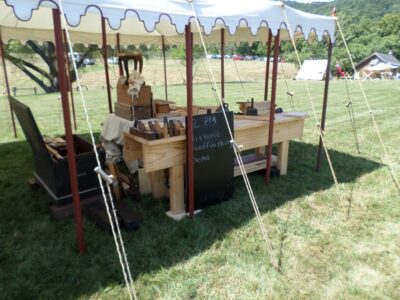
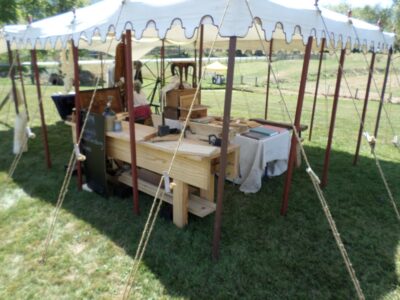
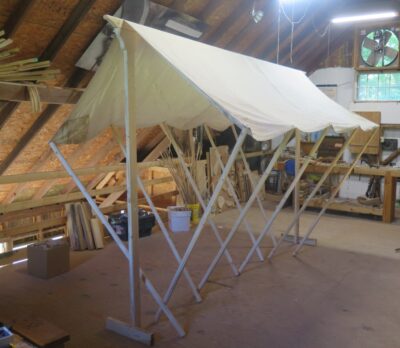
One of the aspects of preparing for the Trades Fair was making myself a period-appropriate-ish tent in which I would occupy for my demonstrations. I’d purchased a nice canvas drop cloth several months ago to use as the covering and had “conditioned” it by leaving it spread outside through several rains (tells you how long ago this was; we had no decent rain from April through early August). Supposedly this tightens up the canvas weave.
As for the tent structure I decided to make everything from 2×4 construction lumber I had on-hand, it was a bit lightweight but it was handy.
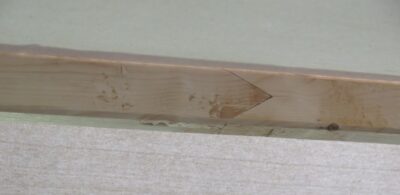
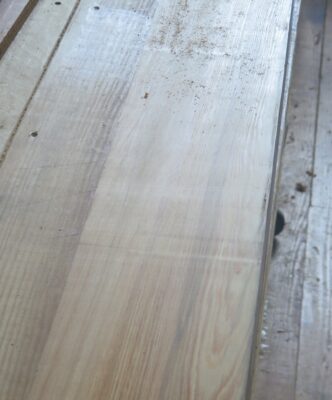
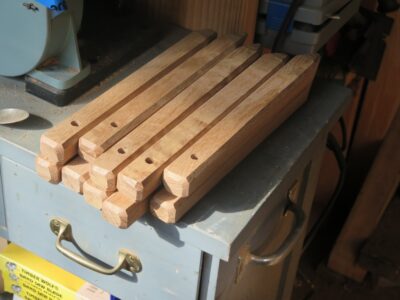
I made the long main beam from a pair of full-sized boards, hand planed and scarfed together with a 24″ long “bird mouth” to achieve the 12-foot length I needed. These were supported by hand planed full-sized 2x4s mortised into the beam.
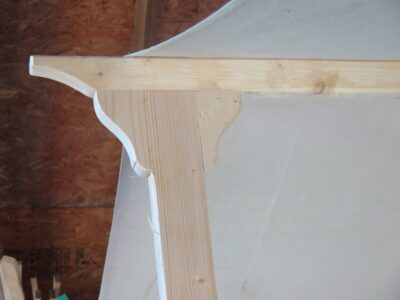
I spruced up the posts with recurved corbels and cut a curve on the end of the beam, then chamfered everything by hand.


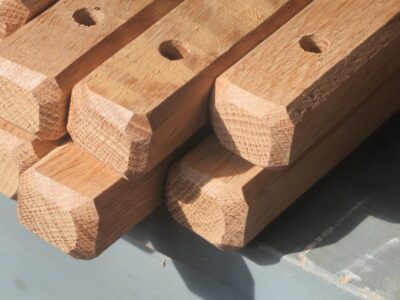
To make the posts and beam into a tent I fashioned ten tent poles, again using 2x4s but cut into octagons on the bandsaw, then spokeshaved and once again hand planed. I actually found one of my Japanese planes to be the best tool for this task.
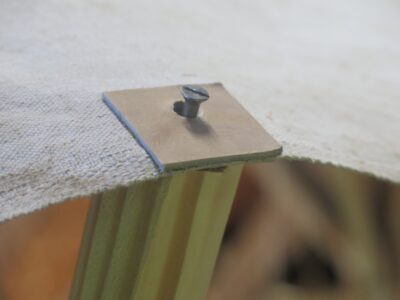
Once the surfaces were all planed I added pins (screws) to the tops of each pole. The pins were inserted into holes in the leather grommets I glued at the appropriate places in the canvas.
The guy ropes held everything upright and I planed a bunch of leftover Gragg chair pieces to be used as the cord stakes on-site.
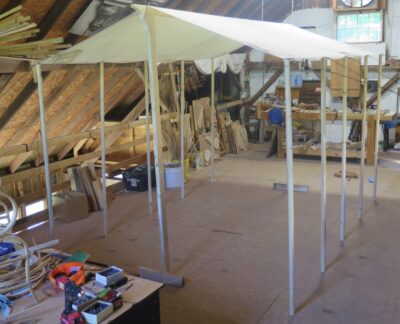
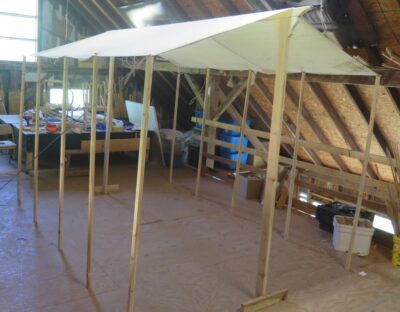
Fortunately, I had the space on the fourth floor of the barn to set it up ahead of time. As it turned out I did not need the tent at the event, Tim had erected a large tent and asked me to demonstrate there along with a hand-finished deerskin artist and a local historical fort presenter. But, as Mrs. Barn says, I’ve got a first-class shelter for the next time I need one.
Plus, as the title alludes, two trash bags of shavings to use as tinder this winter. Since she is the one to revive the fire from the overnight coals every morning (a handful of shavings gets it going right away) the pleasure from the project will continue for many months.
N.B. Things have been crazy busy in a wonderful way and I’m looking forward to a more sedate pace in the coming days. Stay tuned. — DCW
Three weeks ago I gathered with 10 novitiate varnishistas from around the country for a three-day romp down the long and winding trail of historic woodfinishing hosted by Joshua Farnsworth at his Wood and Shop facility near Charlottesville VA. Over the years I have evolved a very tight syllabus to make sure every participant leaves with a set of successful exercises under their belts, or fingernails as the case may be. This solid foundation allows me to work around the edges and incorporate some new things as I did this year, with mixed success.


A large part of the course success is due to the fact that I supply EVERYTHING for the students to use. Though that is a substantial undertaking it does guarantee a greater chance of success than if I mail out a supplies-and-tools list. After a couple experiences of wasting several hours of class time scrounging up supplies, tools, and projects for the students who forgot them I tossed that concept overboard many years ago.
The routine should be fairly familiar to anyone who follows this blog, so this year I will simply be posting a gallery of images to capsulize the three days. There is no way a few pictures can convey fully the richness of the event from either a learning or fellowship perspective, plus there were many portions where I had no pictures because I was, well, teaching. There are entire exercises that were not included in the photos.
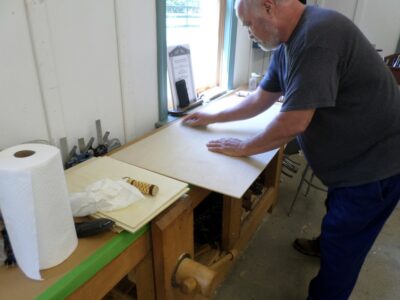
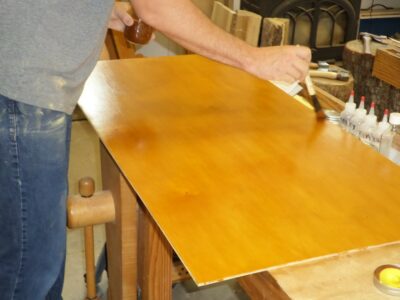
Smoothing the 24″ x 48″ birch plywood panels in preparation for fifteen coats of 1-1/2-pound lemon shellac.

Shellac makes its first appearance
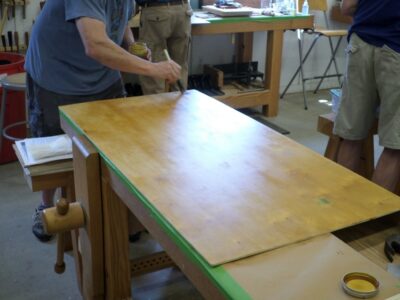
The end of the “first inning” (five brushed coats of shellac)
After drying for several hours, we ended Day 1 with a light scuffing of 220 sandpaper followed by another five brush coats of shellac.
After drying overnight following the “second inning,” the surface was uniformly scraped, followed by a “third inning” of five coats and set aside to dry for 24 hours.

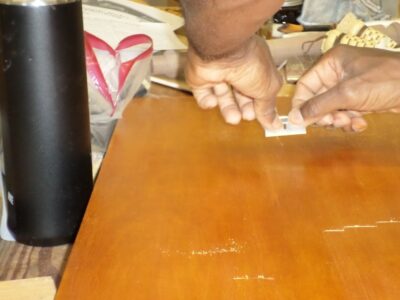
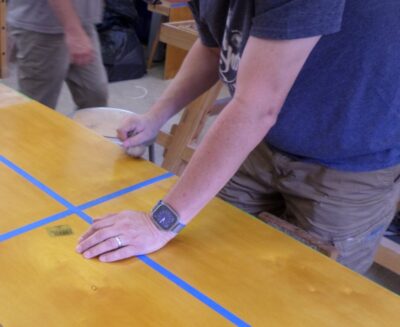
The final steps for the large panel included dividing it into quadrants, each of which was treated differently. This quadrant was dry-pumiced in preparation for shellac pad polishing.
Final shellac varnish pad polishing.
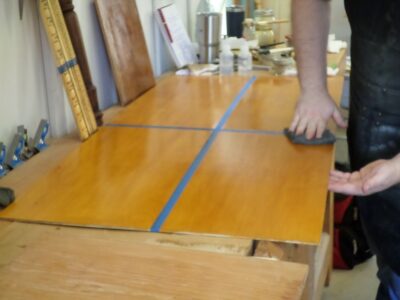
A second quadrant was polished with tripoli (rottenstone) in white spirits, the third was rubbed strenuously with Liberson 0000 steel wool saturated with paste wax, and the fourth was left “off the brush.”

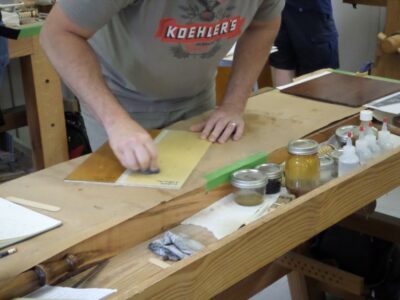
Smoothing a mahogany panel with a pumice block.
Working the mahogany panel with a 1″ x 1/8″ polissoir, followed by molten beeswax (scraped clean) as a grain filler.

Making and using a linen pounce/pad to apply the 1/2-pound shellac varnish.
Building the padded shellac varnish.
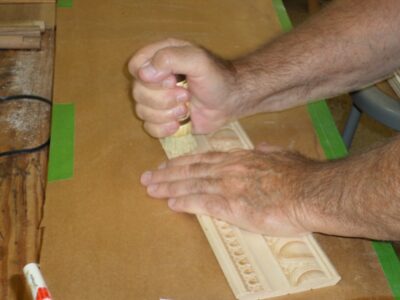
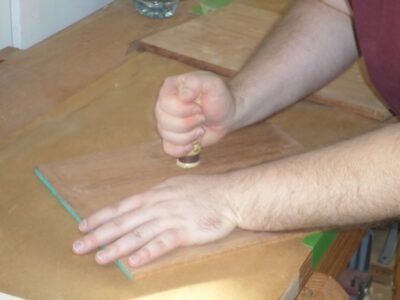
Burnishing an embossed molding with the Carver’s Model polissoir, followed by a few coats of brushed shellac.

Revisiting the shellacked surface with the Carver’s Polissoir.

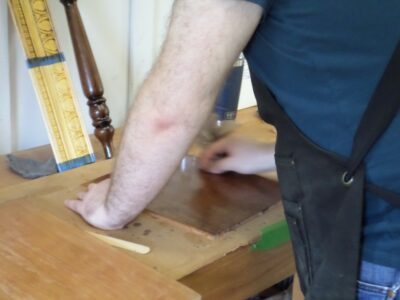
Applying asphalt glazing to half of the molding piece.

Feathering out the asphalt glazing with a badger brush.
Comparing the appearance of five coats each of Bullseye Amber and Bullseye Clear from the hardware store.

A classroom full of busy varnishers.
And much, much more.
So there’s a snapshot (pun intended) of the recent gathering. I know we will have the class again next summer at the school in Earlysville VA.

Recent Comments