In the realm of wood finishing there is probably no technique more revered than that of the mirror-like French Polish. The catechism, liturgy and mysticism of this top-of-the-food-chain practice form the transcendent popular doctrine of the art form. In roughly 100% of the finishing workshops I’ve taught over the past four decades my exhortations on the strategy and structure of finishing success are politely entertained, but the student response tells me that what they really want to know is “how to French Polish.”

Such was once again the case in the recent workshop. Inasmuch as “French Polishing” is not a direct manifestation of The Divine I am not particularly seduced by this mindset. Pad polished spirit varnish surfaces are indeed spectacular and lovely in the right setting, but I see the world of wood finishes as being so much larger and richer than that. Nevertheless a spirit varnish pad polish is one important component of the art, a practice I undertake on occasion and with pretty solid competence. Given that my pal Knoxville Dave does more of it these days than I do, I asked him to come to the barn for the weekend and lead the students through this series of exercises.
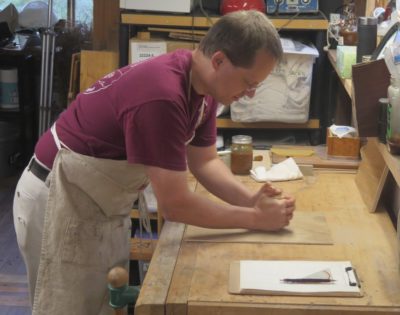
Spirit varnish pad polishing is unusually dependent on the “feel” feedback loop running through the brain, down the arm, into the hand holding the pad, the nature of the interaction of the varnish laden pad with the surface being polished, and the resultant information signal being sent back up the hand and arm to the brain. With practice this OODA loop becomes habituated like almost every other aspect of creativity, but at the beginning it is critical to decode the process. Dave is really excellent at that decoding tutorial.


This workpiece is purposely bland so that the visual information will be derived solely from the varnish being laid down. Dave charged his pad and began sweeping his pad across the surface in a landing-and-takeoff motion, developing both the motion and rhythm for the equation of pad + varnish charge + temp + humidity + character of the workpiece, feeding into the OODA loop instructing the process.

In short order the sheen began to build such that the evidence was clear of the proceedings. After a few minutes of the pad polishing there was enough build-up that Dave moved on to a more visually appealing workpiece.
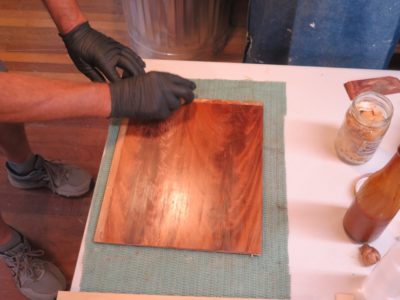
The mahogany veneered panel was just the thing to emphasize the possibilities of this most simple finishing technique. Given the wax filled grain of the surface the build-up went very fast; the time codes on the images indicate a total work time two minutes between the previous picture and the following picture.

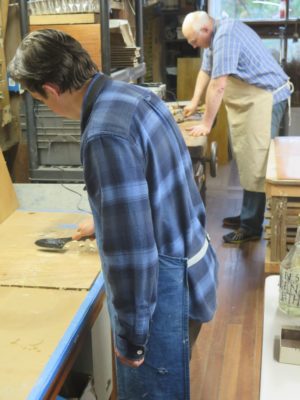
With this encouraging demo completed the students began working on their own workpeices. They took it it like a fish to water.


One of the issues we struggled with for the weekend was the cool, damp weather. As the spirit varnish was applied the solvent evaporation brought the surface temperature of the workpiece down to the dew point, and we wrestled with cloudy films. Once they began to become manifest it was time to set the workpiece aside and after an hour or so the film clarified.
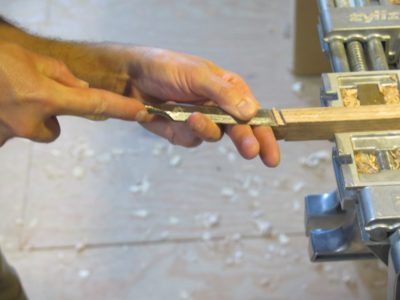
It was, in the unforgettable words of actor Pat Morita in The Karate Kid, “Wax on, wax off.” This time, however, the “wax on” was molten and the “wax off” was accomplished with Roubo-esque scrapers I made from brass bar stock and scraps of tropical hardwood flooring. By melting wax into the surface, the wood would be prepared perfectly for a grain-filled spirit-varnish finish in the traditional fashion, wax being the dominant grain filler until mineral deposits like plaster or gesso became more popular with industrial manufacturing of furniture. Although, when hammer veneering was the fabrication technique, the grain was well-filled with hot hide glue.

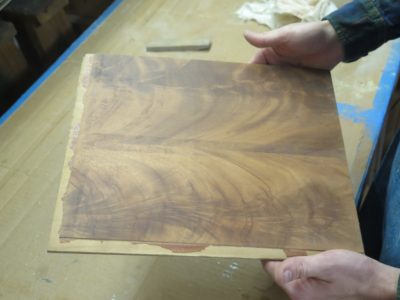
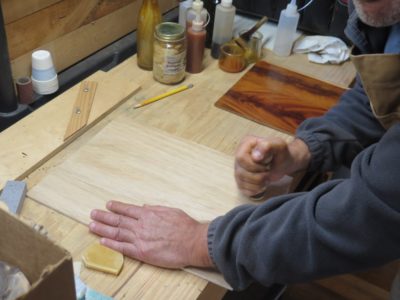
Three sample boards were readied for the exercise with pumice block and razor blade scraping, especially the crotch mahogany veneer panels that had a lot of residue from their original manufacture (I picked up a stack of these panels somewhere along the way and cannot say exactly how they were made except to say that the trace evidence suggests the use of phenolic adhesive and a mighty powerful press, but there was a lot of smoothing to be done). The mahogany panels were being prepped for primo pad polishing as was one of the nondescript sample boards, the third board was going to be waxed, buffed and nothing else.


With small tacking irons wax from the solid blocks was drizzled onto the wood surface, then the drips were re-melted and spread around the surface until there was a good deposition of the molten wax over the entire sample board.
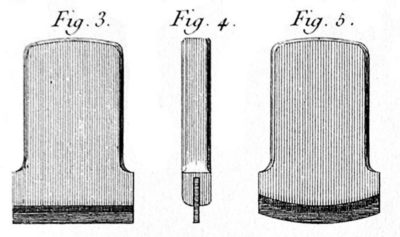

Once cooled, any excess wax was scraped off with a burr-less scraper fashioned after those described and illustrated by Roubo. When finished, it was time to move on to the process everyone had been waiting for.
It is worth reiterating the purposes of the Big Board exercise, which in many ways is the foundation for the whole workshop curriculum. When I present a 2-foot by 4-foot piece of unremarkable luan or birch plywood to the students and tell them they will be finishing this entire board with a 1-inch watercolor brush, their quizzical expressions are met with my exhortation to hang in there as the outcome will be workshop-life-changing. Once this exercise is completed, actually it is an entire series of exercises embedded into a single plywood board, the student will have become fearless Finishing Ninjas. Everything else in the workshop is frosting on the cake.
I have come to refer to each finish application session as an “inning”, and the big board exercise for the workshop entailed three innings. First thing on Day 1 it was a light abrading with a pumice block followed by four or five consecutive brushed applications of the shellac varnish, then set aside for several hours. Inning 1 was my opportunity to preach about the selection of the correct brush and proper use of that brush. Even by the end of Inning 1 it was readily apparent that a near-perfect film could be built with that 1-inch watercolor brush, with no resulting overlap margins due to good brush technique.

Inning 2 commenced with a light sandpaper smoothing of the material deposited during Inning 1, followed by another four or five consecutive applications of the brushed spirit varnish. Again, this was set aside, this time until the following morning.

By this point we were well on the way to constructing an excellent foundation for the final elements of the exercise as almost a dozen layers of spirit varnish were flowed on skillfully.
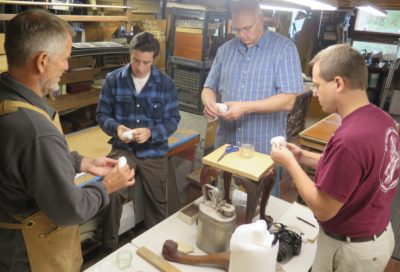
As with many woodworkers the students for the recent workshop were enamored with the mystique of shellac spirit varnish pad polishing, also known in the trade vernacular as “French polishing” although I am unpersuaded by the accuracy of that moniker (I have listened to impassioned recitations by French craftsmen referring to the practice as “English polishing” because true historic French Polishing is a wax spit-polish technique). To that end I asked my long time pal Knoxville Dave to stop by for the weekend and he was a great addition to the fellowship and learning experience.

Dave provided the hands-on instruction for the exercises of pad polishing through the weekend, beginning with constructing the pad itself.
As is my (and his) preference the starting point is a roll of surgical gauze, cut into long strips then folded and rolled into the ball that is the core of the polishing pad.

Once the ball is formed to fit into the palm of the user, it is wrapped with a piece of fine linen to serve as the disposable contact surface for delivering the dilute shellac varnish onto the surface of the workpiece. (I am always on the lookout for fine linen rags at antique shops, and with great success in recent years. If I have to use new linen I rely on an ultra fine weave known as either “handkerchief linen” or “Portrait linen,” the latter being used by fine art painters. Still, I prefer well-worn tablecloths or napkins and have a good stash.) At that point the entire tool is “conditioned” with the introduction of the spirit varnish to saturate both the ball core and the outer sheath, not enough to be dripping wet but enough to leave a trace of the spirit varnish when pressed into the opposite palm. At this point the pad is ready for work.
It went into a dedicated sealed jar awaiting the combat to come. Dave and I showed our own polisher jar containers, mine has served me with the same pad for almost two decades.
Now it was time to prep the panels to be polished out. By the time we finished I think there were five separate pad polishing exercises to be completed.

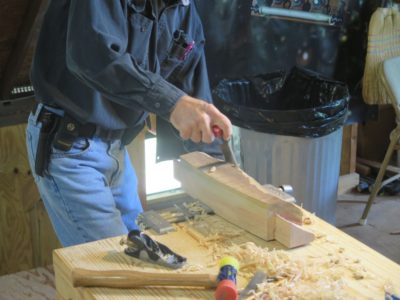
The next world changer to emerge from the mists of the far distant past was to equip each student with a 1-inch polissoir and turn them loose burnishing the surface of smaller sample panels. The instructions were to press as hard as they could and rub with the grain until the entire board had an even sheen.
They did this to two panels; they set the first aside then scrubbed the second one with cold beeswax before wailing away on it with the polissoir, rubbing hard enough to turn the wax buttery and press it down into the grain interstices.
This was followed by second round of polissoir rubbing, followed by scraping off the excess and buffing out the final surface. Though this technique was often used simply for filling the grain, in this case I just had them remove the excess with a Roubo-esque scraper and then buff it out with a piece of linen.
Even this simple exercise resulted in the first of many sumptuous surfaces for the weekend.

It was lovely.
NOTE: Every aspect of this workshop is dealt with, sometimes with ridiculous detail, in my completed upcoming book A Period Finisher’s Manual; certainly much more detail than the blog. In fact, the workshop has re-lit the fires of getting that beast finished and off my neck.
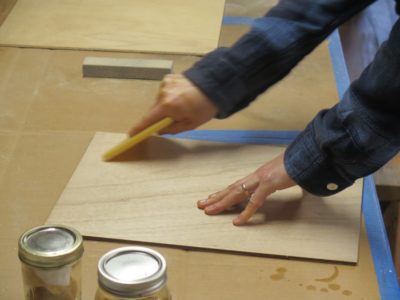
The first of the class exercises, which in fact became the foundation of a half-dozen exercises, was to take a 24″ x 48″ panel of cheap (not inexpensive, this is 2021!) luan plywood panel and get started building the finish on it using a 1″ flat watercolor brush. Trust me, the proof of the pudding is in the tasting and in the end this leads to a tasty treat.


Even before we started applying the finish was the surface prep. That alone was a paradigm threat as the prep work was accomplished by rubbing the wood surface with the tool most prominent two centuries ago – a pumice block. Sandpaper was expensive and to residents of a time where surface prep is done with a power sander, the performance of a pumice block is truly surprising.

With the surface abraded and smoothed, and the detritus cleaned, it was time to mix up and apply some varnish. Since I have hundreds of pounds of lemon shellac flour, that is what we used. We each mixed a jar of approximately 3-pound shellac varnish with the shellac flour and 190-proof liquor. (Approximately a lean 1/4-jar, then filled to the brim with alky.)


Soon enough we were applying the first of dozen coats of spirit varnish on the panels. I gave impassioned instructions about how to apply brushed spirit varnish so that there are no overlapping marks, and I must say that the participants each accomplished that task perfectly.

The first coat was immediately followed by a second, and a third, and a fourth. Then it was set aside until the end of the day.
Last weekend I hosted another Historic Finishing worship at the barn, an event commissioned by a group of guys who met at a woodworking class somewhere. Given the general level of disinterest in folks attending classes here I will no longer be scheduling any workshops other than ones that are commissioned. I am truly not complaining, just recognizing reality for what it is. As CS Lewis commented, “Reality is a ruthless instructor, it does not care if you agree with it or not.”
It took a long time to get the classroom cleaned out, prepped, and outfitted with a range of tools and exercises for the students. I’ll recount the experience over the next few days. It was a marvelous time, but since it was all about shellac and beeswax, how could it not be?
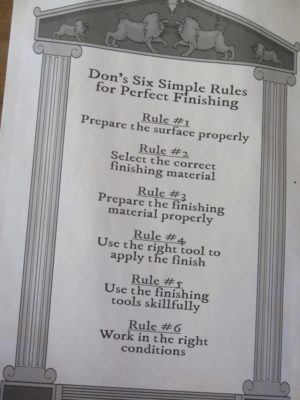
As always we will begin with a discussion of the Six Rules, handing ledger sized printouts for each to take home and guide their work the remainder of their lives.

I have distilled and refined the curriculum over the years into a dozen exercises, and think it is just about the max I can cram into 2-1/2 days. I suppose I should write this up some day in a syllabus format.
Stay tuned.
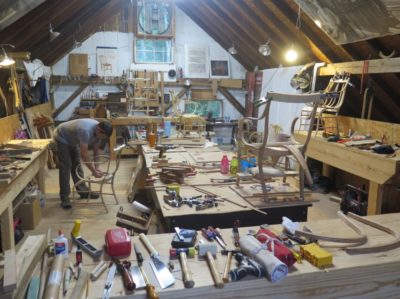
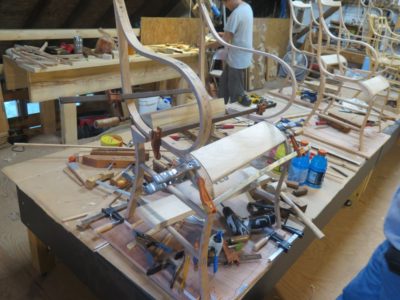
Our final day of the workshop opened with our recognition that no one would be 100% completed with the chair construction, but everyone was close with the demonstrations of the last tasks to be completed.
This list included adding the front stretcher and rear rungs along with all the intermediate seat slats, insertion of four triangular glue blocks associated with the arms, followed by all the sculpting required after all the construction is finished and glued up.
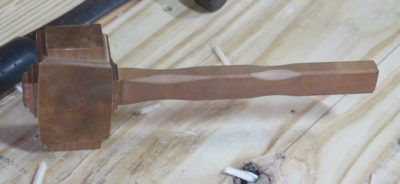
I forgot to mention earlier that one of the fellows brought a nicely finished Studelyesque mallet, based on the castings by Bill Martley that I blogged about earlier. The mallet came in handy a great many times.
It was a great week of fellowship, comradery and loads of creative work. Throughout the six days we jointly noted a number of places in the syllabus where en toto a few hours could probably be shaved off the schedule. So if there is interest I would be glad to offer the workshop again, but even better.
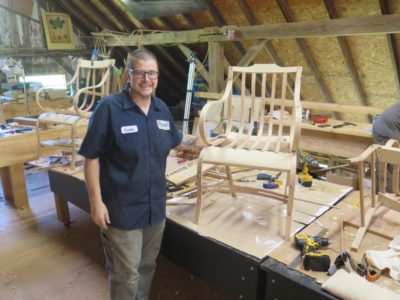
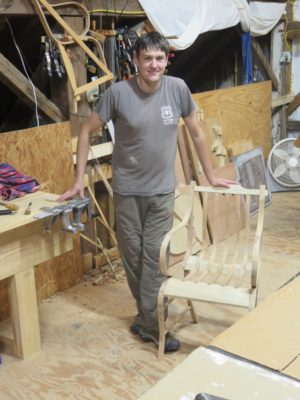
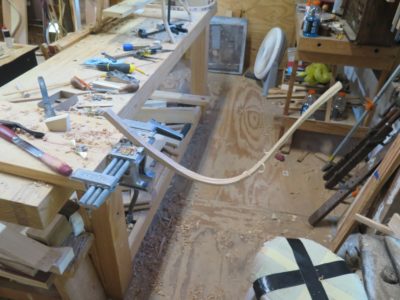
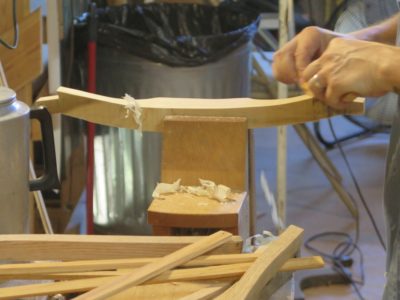
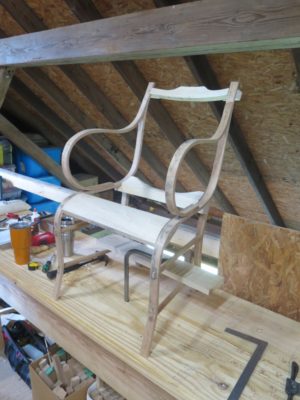
With the incorporation of the continuous seat/back slats the artifacts began to adopt the true character of a Gragg chair.
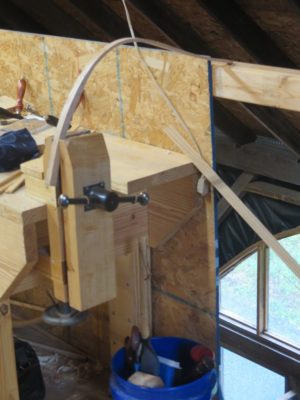

There’s not really a lot to say about the process; you thin the vertical sections to impart the requisite springiness (this is where clamping/vise weirdness is a feature, not a bug), mark, cut and excavate the dado troughs in the rear seat rail, and lay out the half-blind dovetails on the front set rail and the mortises in the crest rail. It sounds so mundane to describe many hours of intense work thusly.
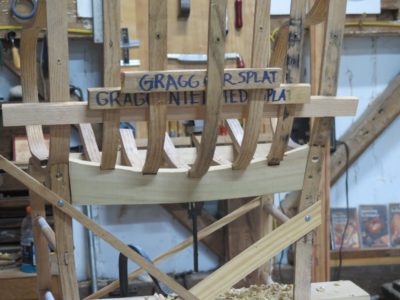

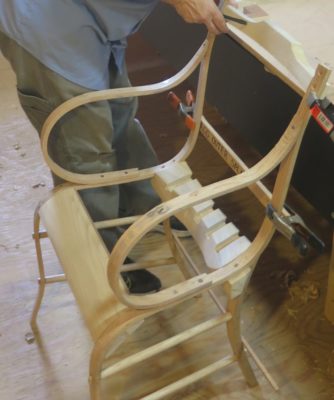
One “complication” is that the slats must be off-set front-to-back so that they are staggered in order to impart the “elastic” leaf spring function to the chair as a whole. The is accomplished by using spacers between the slats just above the rear seat rail. Only after this configuration is achieved can the half-blind dovetails in the front seat rail be layed out and cut.

The dovetails themselves are a piece of cake, literally a minute or two per joint. The pocket mortises chopped into the rear edge of the front seat rail are a bit more involved but still not hysterically complex.

Once this is done the tops of the slats can be marked and the tenons cut.
Fitting and shaping the cross-chair elements is at the heart of turning this pile of parts into a structural construct capable of supporting a sitting body. This takes a lot of time.
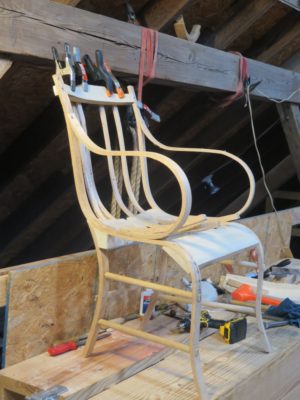
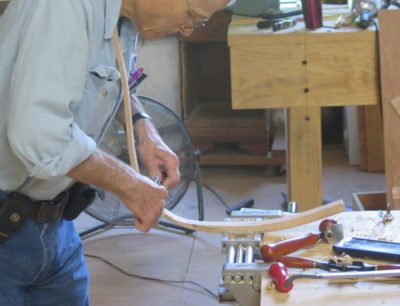
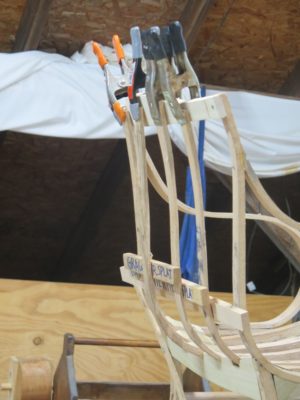
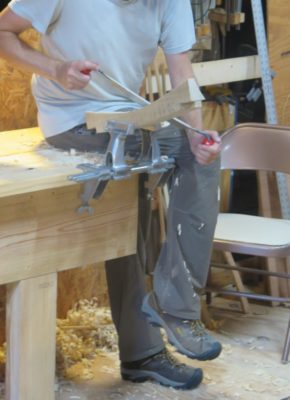
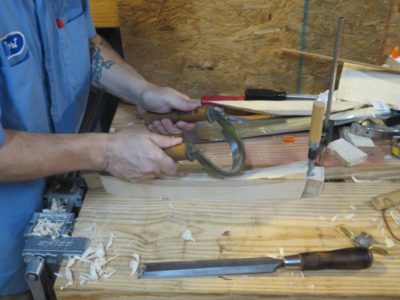
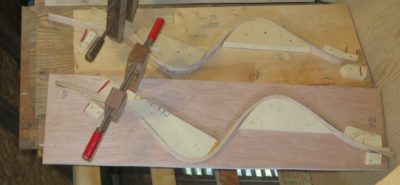
As the cross-chair structural elements were added and shaped it was time to move on to the work of shaping and thinning the continuous seat/back slats. My experience has been that these must be bent full thickness over the whole length, then the section beginning with and above the rear seat rail must be thinned by hand, usually with spokeshaves or drawknives to the point where they are appropriately springy. Concurrent with this step is cutting the dado troughs for the slats in the rear seat rail and there is a fair bit of back and forth getting them to fit properly and be properly springy so that it can all go together in the end.


Since one of the students had very limited experience with steam bending I loaded up the steam box with chair parts and went through the entire process with him so that he could get the “feel” of how each of the parts was cooked and formed.

Recent Comments