
Some days you eat the bear…

And some days the bear eats you.
As I dive ever deeper into producing Gragg chairs, currently two on commission and another for myself with hopes of including this item in The Barn Store in the coming months/years (and even entertaining thoughts about offering a Make A Gragg Chair workshop as soon as the summer/autumn of 2020; first, I have to make one from start to finish in a week myself), I realize all the more how close Gragg was coming to the limits of what can be accomplished with wood as the raw material. Given the extremity of the bends involved, including the main serpentine element with two 90-degree four-inch-radius bends within a foot of each other and a180-degree four-inch-radius bend for the arms, working out the routine is a critical process.

I recall the first time I tried this almost a decade ago on the original Gragg repro prototype, in front of my Smithsonian colleagues no less, I broke every single piece of the ash I took from our prized lumber inventory in the conservation studio. Every. Single. Piece. Not to mention breaking several of the bending form elements which had been woefully under-built. It was not my proudest moment of professional accomplishment but drove me on to get it right.
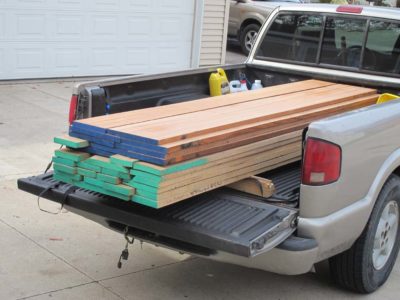
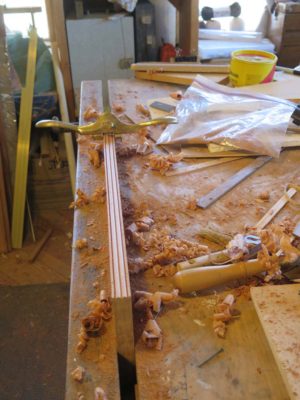
Even now I test the boundaries, trying riven and sawn kiln-dried oak (at the bottom of the pile in the truck), trying ancient/recycled but possibly air dried oak salvaged from a derelict weaving loom,

trying oak I harvested several years ago but have kept from seasoning fully, first cross-stacked outside and now residing in the basement/first floor of the barn,

and finally using oak I harvested this year. Through it all my batting average kept improving.
I’ve heard my friend Bruce Hoadley tell the story of a small manufacturer who was plagued with broken elements resulting from very tight bends after steaming. The punch line was that after going to watch the definitive practitioner for making the identical items, the manufacturer said with a smile something to the effect of, “He breaks most of them too!”
I encountered the same thing with the Gragg chair elements. Some stock bends like taffy, some breaks like crystal. I am moving more toward the former than the latter, but it is exasperating all the same. At least the failures make good kindling.
Yesterday afternoon my success rate was 92% with only a single stick making it into the failure pile. By observing the character of the pieces being bent, the stresses of the bending itself combined with the addition of bending straps, this is an outcome I can live with.
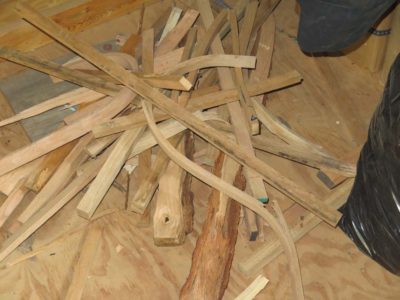
Still, the pile of kindling grows, just not as fast as in the past.
I am definitely gaining ground on the bears.
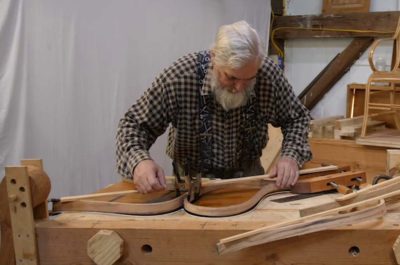
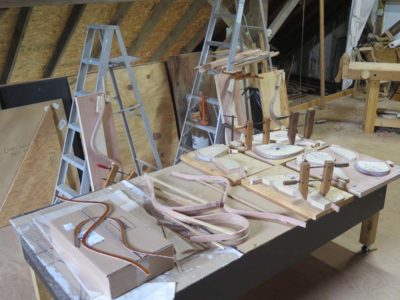
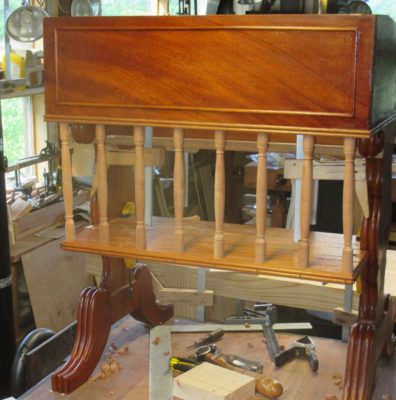
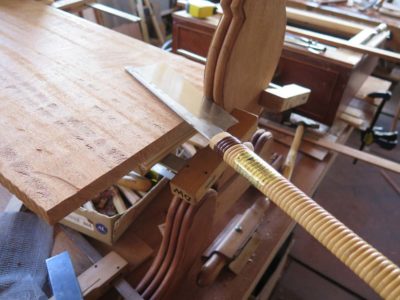
Our latest day of video recording dealt with the beginnings of assembling the pieces into a whole chair, including fitting the individual pieces together to fit the master template based on the many Gragg chairs I have examined over the years.
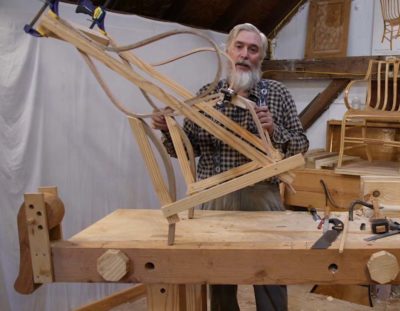
Once we moved on to fabricating the cross pieces things got fussy.
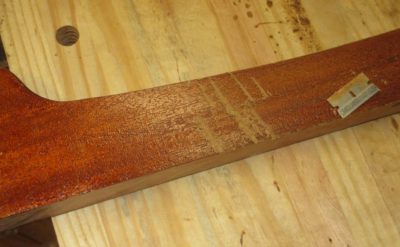
Chris wrapped up the day by taking some detailed footage of my shaving beam, my primary stock preparation tool for the project.

With the desk surfaces well-sealed with lemon shellac and the finish foundation built up with garnet shellac it was time to wrap up the color work while simultaneously imparting the craqueleur that would reside under the final, polished surface imparting the “look” of an ancient but well-cared-for surface. The process was simple, one that I have employed before and takes advantage of the properties of the materials found on the shelves of finishing shops. Well, at least on the shelves of my finishing shop.
As I have written previously I am loathe to contaminate the raw wood with colorant that cannot be easily removed. Hence my distaste for pigmented “stains,” dyes, or chemical treatments. I find these techniques to be insufficiently control-able for precision finishing, preferring instead to introduce any coloration into the finish system itself. Not only is this much more easily controlled but comparatively effortless to undo if the target is missed.
My common terms for this kind of in-finish coloration is “toning” if the coloration is included in the film forming material itself (i.e. the varnish), or “glazing” if the coloration is imparted via a discrete material in-between coats of finish. In this project I was able to blur the lines in these concepts and add an additional feature to arrive precisely where I wanted to go.
In short, my goal was to provide visual unity of both the color/tone and impart richness to the texture to replicate a finish that gave the appearance of being well-cared-for but 200 years old. It was not to be a grain filled, brilliantly glistening “French” polished surface, that was simply not appropriate for this project. I wanted the surface texture to be presented subtly for both the wood grain and the cobwebbed craqueleur within the finish film itself.
Here is a brief recitation of the technique I used to accomplish this. It depended on understanding the nature of materials and their means of forming films (or not). There was no magic elixir, but rather an exploitation of those materials.
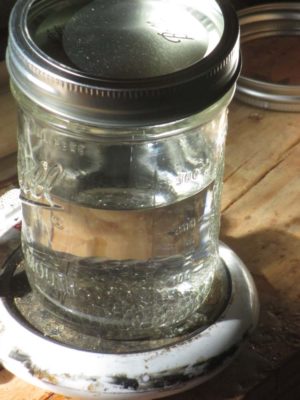
I began with my glaze formulation, which first consisted of solid acrylic resin beads dissolved in hot mineral spirits to a 25% solids content. This served as the backbone for the glazing solution and the governor for my desired solvation limits that in turn controlled the craqueleur.

To this I added some oil/resin varnish in the proportion of 1 part acrylic resin solution to 3 parts of varnish, followed by stirring in asphalt as the primary chocolate-y brown colorant and a dab of sienna artists’ oil paint to get the right amount of reddishness, thinned as needed with naphtha.

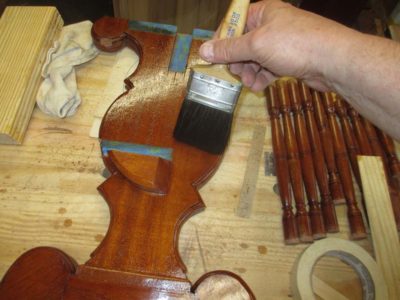
I slathered this on to the surfaces that had been well-built-up with the shellac base. The glaze was evenly distributed with a well-worn vintage (and thus soft-ish) bristle brush, pulling off glaze in places where it was imparting too much unnecessary coloration, smoothing it out where the color was correct.

The final step was to soften any striations by whisking the surface with a badger blender or goat hair hak-e brush just before the glaze dried too much to be manipulated further. The entire process for a particular work area from slather to done was probably about 90 seconds. This was then allowed to dry overnight.
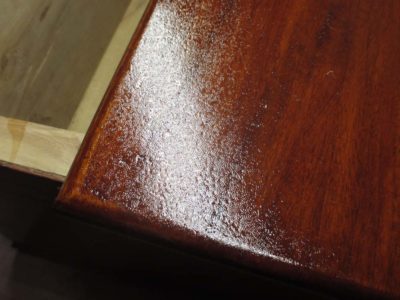


The next morning to lock it all in place I spritzed it with a light coating of sprayed shellac. This resulting surface might have sent an inexperienced finisher screaming for the hills but I had a huge smile on my face because the result was exactly what I wanted to achieve.
Let me explain.
The oil-resin varnish and artists’ paint in the glaze had stiffened but were not yet fully hardened, so the introduction of of a more polar solvent (in this case alcohol in the sprayed shellac) to the glaze would cause the glaze film to become imbibed with the solvent, swelling the polymer matrix into a crinkled texture. On the other hand, since the acrylic resin and asphalt are not susceptible to the same solvation effect they remained calm, otherwise the surface would not have been a variegated craqueleur, it would have been velour. And, with the glaze film being ultra thin yet bonded to the underlying shellac via the adhesive properties of the acrylic resin component I did not have to worry about the whole laminar construct coming apart.
(NB – I discuss all these properties and effects much more thoroughly in my upcoming book, A Period Finisher’s Manual).
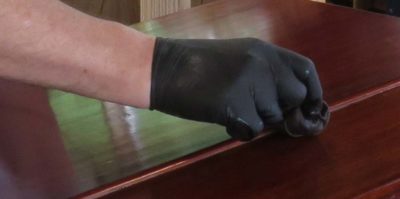
I waited another day to make sure the solvent from the shellac mist coat had diminished sufficiently and abraded the surface very lightly before building more finish. At this point my main concern was adding too much additional alcohol to the system and causing even more oil/resin film swelling, so rather than brushing on shellac to build the finish I padded it on. Remember, my goal was not a glistening pad-polished presentation surface. I padded the finish simply because it was the best way for me to deposit film-forming material while controlling the solvent encroachment.

After enough new finish was added on top of the craqueleur, three applications as I recall, I abraded the entire surface smooth, in essence leaving the craqueleur embedded down in the finish but still presenting a smooth surface that I could polish out. I built up another half dozen padded applications to the writing surface after the piece was assembled then set it aside for a fortnight before final polishing, assembly and detailing. As you might surmise the craqueleur was so subtle it was impossible for me to photograph. It has to be observed in real time and in real space.
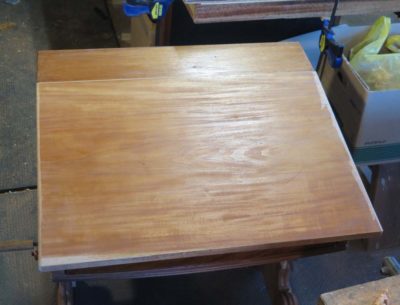
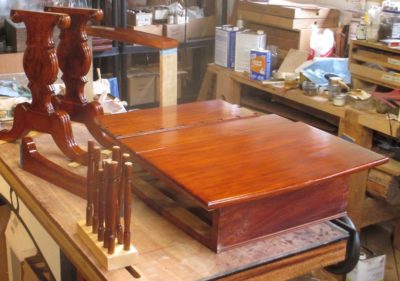
It is worth remembering the beginning point for all this color work.
Now it was time for the polishing, assembly and detailing.
Stay tuned.
Our recent day of video recording for the Making A Gragg Chair was pretty much all about bending forms/jigs for the components of the chair. I showed how I make the forms and why I make them the way I do, including a discussion of “spring back” and how that affects my design and layout of the forms. Somehow that one topic managed to consume the entire day of work in the studio.
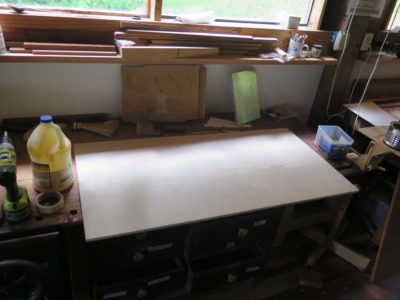

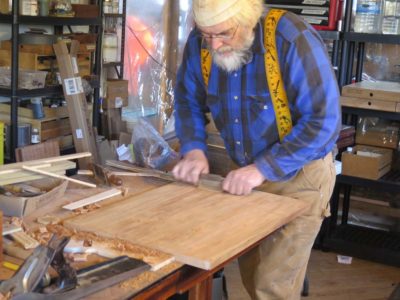
These three pictures were ones I took when I was prepping for the video shoot, but I replicated the process upstairs in the studio with the camera running. In them I am making some form stock, the 1-inch thick double laminated sheet I make from two pieces of 1/2″ baltic birch plywood. The finished product is what I use to cut the actual bending forms themselves. I begin with two pieces of 24′ x 48″ x 1/2″ plywood and slather PVA on one of them, then screw them together with decking screws and fender washers.

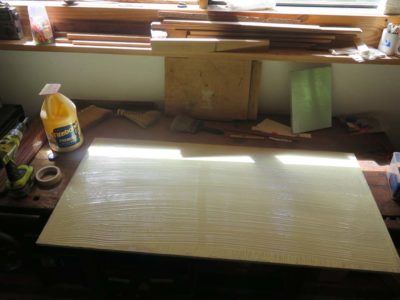
Here is that panel after finishing along with another double laminated panel made from two pieces of 3/4″ baltic birch type plywood that serves as the ground for the bending forms. Once they are dry overnight I remove the screws and washers and they are ready to go. I got all of this material from the closest big box home center.


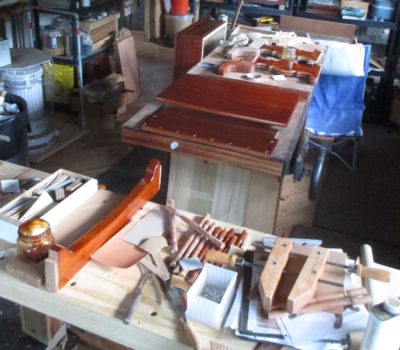
Here are some images from the session in the studio.
With the construction finally completed it was time to dive into the part of the project that had no down side, the part where it was all fun all of the time — finishing. In my back-and-forth with the client I decided to shoot for a non-filled-grain look, a general tonal consistency, and with craqueleure underneath the the final surface. In short my overall strategy for the process was to have the desk looking like it was “old but well-cared-for,” looking new was not part of the plan, nor was “antiquing” nor “distressing.”
Since the desk was small and convoluted I intended to finished almost all of the pieces prior to final glue-up. So the full glory of it was not revealed until nearly the last step when all the pieces were put together. Finishing each piece separately required a careful masking of all the surfaces that were glued together in that assembly.
The first step was to lay down a few seal coats of garnet shellac brushed on in three or four applications of a one pound cut. This allowed me to get a good sense of how I needed to shift the visual coloration and tone of the pieces to bring them into harmony. I would make no attempt to make each and every piece identical to the other, that was nonsensical given the variety of grain directions, etc. involved, but simply to bring everything closer en suite.
For the most part the starting point for this shifting was accomplished via the addition of dyes to the garnet shellac being brushed on. I am loathe to employ chemical stains to bare wood as part of the finishing exercise; they are simply too difficult to control for an equal outcome when the starting points are different, and when they do not behave their reversal (removing the surface of all the wood) induces foul language in the shop.
By building the finish with dyed coatings the depth of the wood’s beauty soon emerged forcefully.
I built the finish steadily, five coats becoming ten, then fifteen. I smoothed all of the flat surfaces by scraping with razor blades and the curved surfaces with pumice pads and before long I was ready for the home stretch.
But the real magic of final blending of the coloration, along with imparting craqueleure, was achieved in the next step.
Stay tuned.
With the light shining at the end of the tunnel, in hopes that it was not an oncoming train there were but a few more elements to fashion and fit and the desk construction would be complete. Sort of. In fact the final assembly did not take place until after the individual pieces were finished, but more about that later. This final construction phase would perhaps be better named the final fitting phase. This included the two top sections, one the writing surface and the other the horizontal back piece all cut from the same mahogany slab, and a little extra enhancement. The back (horizontal) piece of the top was thinner than the writing surface by 1/4″ in keeping with the original.

The “construction” of the top pieces was ordinary to the point of mundane. They only had to be cut to the right size for the places, planed and scraped with a rounded edge planed onto them, then fitted together in a butt joint.
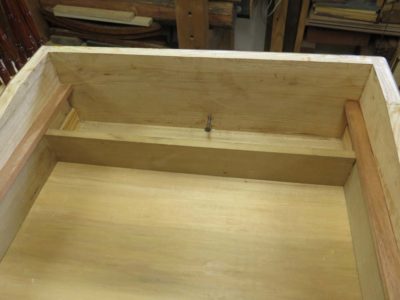

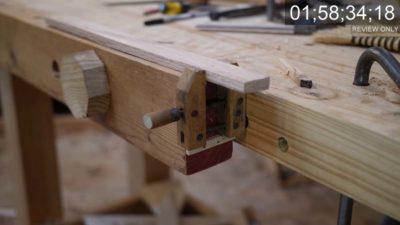
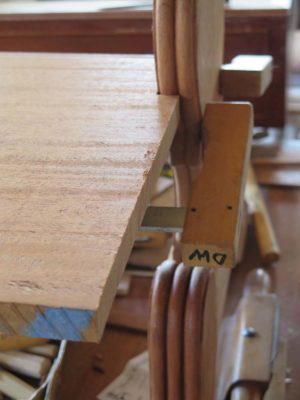
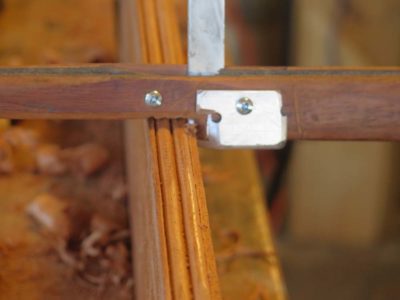
Before the top was glued onto the sides with glue blocks it was the proper time to make the drawer stop. I used a preposterously simple technique I have seen in many small-ish pieces of early 19th Century styled furniture like this replica. A simple flat head wood screw served the purpose perfectly, with the additional benefit that as the dimensions of the case or drawer changed over time to to moisture cycles and any resultant compression set, the depth stop could be easily adjusted infinitely.

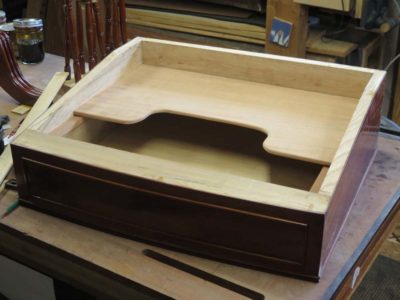
On final little whimsy was to add a hidden “whisky shelf” immediately above the drawer. Since the top was slanted and fixed there was a fairly spacious void above the drawer, and it was not uncommon for a small shelf to be included inside to that a flask of libations could be kept there. I made a “U” shaped shelf that could be accessed when the drawer was pulled part-way out, then tacked the shelf on to the fixed drawer guide rails with a spot of hot animal hide glue.
And now it was on to the finishing.
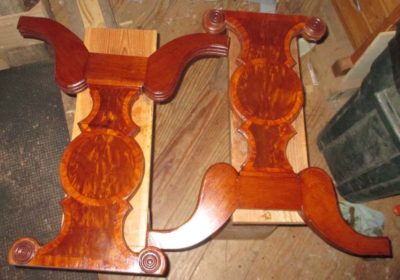
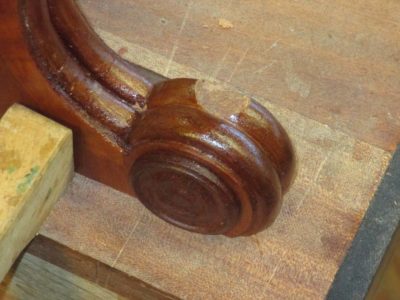
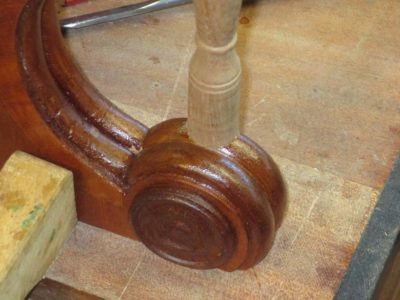
Though a minor piece of real estate on the desk, the roundels were certainly visually prominent. Thanks to my four-jaw chuck on the lathe making them was a breeze.
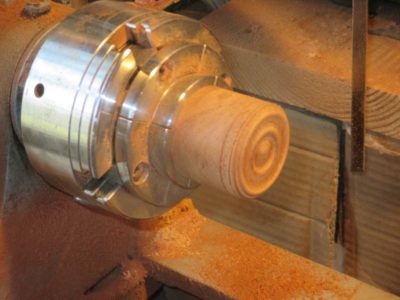

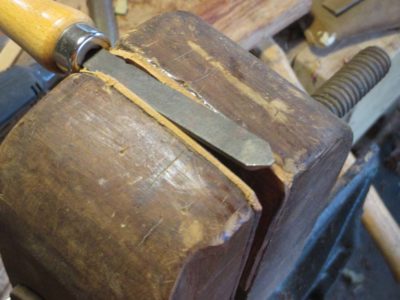
My first step was to make a cylinder from some of the mahogany then turn the roundel profile on the end of the cylinder. Once the profile was satisfactory I scored the lip of the roundel with a turning chisel then sawed off the circular wafer right on the lathe.
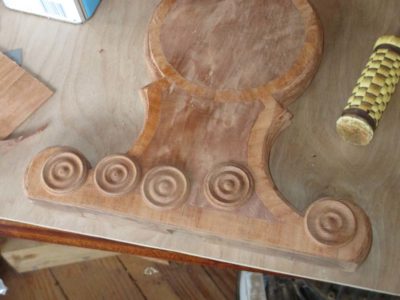
I repeated the process until I had excess roundels, then glued them in place.

In addition to the roundels there were bits of applied moldings to the field and bottom perimeter of the writing box and along the edges of the shelf. After spending numerous hours making the curved moldings on the legs these seemed like a holiday.

I simply cut the moldings on the edges of a board then ripped them off for application to the surface of the box.


The half-round string moldings in the field of the writing box allowed me to use a set of pinch clamps I’d made years before. These were featured in a Popular Woodworking article some time ago.
The only construction left to accomplish was to complete the top of the desk, then it would be on to the best part — finishing!
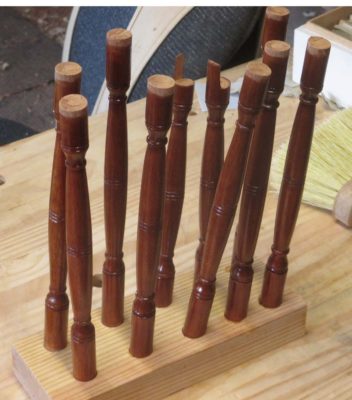
Making and installing the spindles that would tie together the shelf and the writing box was the last major complex fabrication step for the desk. It was also perhaps the most stress inducing aspect of the whole project; it was not difficult per se, just a very fussy layout exercise with zero margin for error.
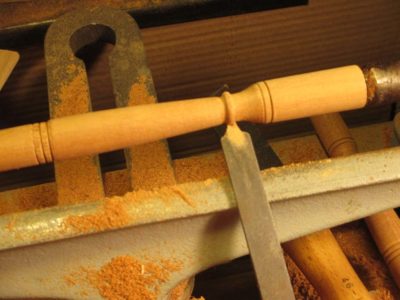
The turnings themselves were straightforward. I made a measuring template and a sample to send to the client, and got to work after getting approval. Turning premium vintage mahogany is a delight. Some of the details of the spindles even provided the opportunity to make and modify some tools. Since each spindle had several half-round elements of just under 1/8″ it was worth my time to take a no-account old turning chisel from the drawer and regrind the tip to the right profile to make it effortless to work. I tried it out on a sample to make sure then proceeded apace.
I needed to make sure that the spindles were precisely sized, as their installation required sliding them up through the holes in the shelf and into the corresponding holes in the underside of the writing box. I spent more time laying out, then checking and double checking before drilling the holes. I was relieved that they all went in exactly as planned.
The fussiest part of the whole undertaking was fitting the two spindles on either side of the shelf. These had to be drilled and fitted into the underside of not the writing box but rather the “ears” of the legs. Careful layout and a steady hand served me well.
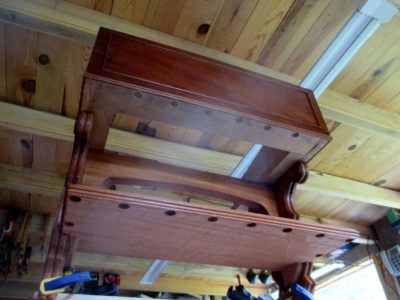
The final few steps of the construction phase of the desk project were to make and fit the mid-level shelf, make install the single and double beading moldings on the box, turn and install the spindles that suspended the shelf from the underside of the writing box, and turn the roundels that adorned the “ears” of the legs. Each of these operations will be dealt with separately beginning with the shelf (I’m not sure I’m getting the blogging order correct, but you’ll get the whole picture by the time I finish).

The mid-level solid slab shelf was partly cantilevered off the “leg” units, fitted into notches on the double bead moldings on the edge of the leg and sitting on simple glue-block brackets on the insides of the legs. Placing and affixing the shelf was pretty fussy work, nothing especially complex but the key was working slowly and carefully. I started by tacking a scrap into the location of the support blocks on the legs and rested the shelf slab on them to get the notching on the moldings correct, easily. (The actual finished mahogany support blocks will be visible in the offering about the spindles upcoming)
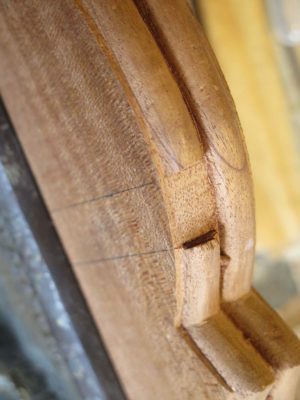
With the shelf slab sitting on the temporary supports I marked the locations of the notches on the moldings with a fine saw, then excavated with the saw and chisels.
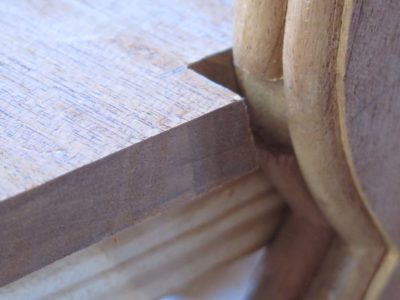
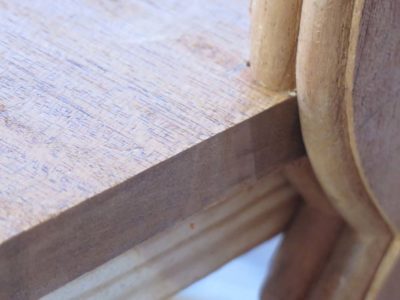
The fit was darned near perfect, especially once I beveled the contact edge on the shelf where it connected with the notch.

At this point the only further work on the shelf per se was to add double beading on the edges, using a bronze scratch stock tool from LNT, followed by my home made scratch stock to removed the shoulders of the profile.

Recently we had our first day of production for the “Making A Gragg Chair” video. We had been waiting for several weeks to get a beautiful day to film outside while I harvested the wood for making the chairs that will be documented in the video. Full disclosure — I will actually be making three chairs more or less simultaneously so that we can use subsequent production days most efficiently, getting several consecutive steps recorded on the same day by having three chairs at different points of the construction.
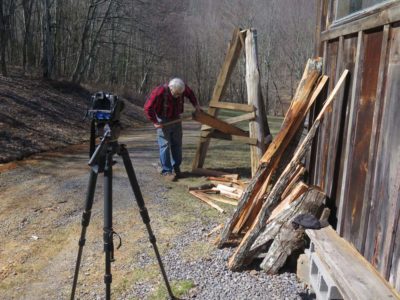
So this beautiful day was spent splitting wood up the mountain with wedges and sledges, then on to a mallet and froe in the riving brake next to the barn. The setup for the latter was new to me so it was a bit awkward getting into the swing of things, but due to the magic of video editing it might actually look like I know what I am doing.

We also shot the introduction to a Special Feature we will be including on the video, and probably on the web as well, as we record the entire process of me conserving my own damaged chair.
One of the things I am trying to keep track of is the amount of time it will take me to build one chair from start to finish. I would love to teach a workshop on building Gragg chairs but I need to get the time down to seven days max, six days preferably. I suppose once these chairs get down I will build one from scratch as fast as I can to see if it is a reasonable project for a workshop.

Recent Comments