
Some days you eat the bear…

And some days the bear eats you.
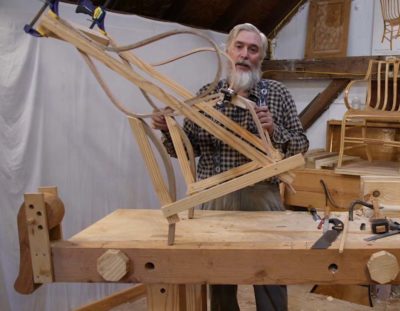
As I dive ever deeper into producing Gragg chairs, currently two on commission and another for myself with hopes of including this item in The Barn Store in the coming months/years (and even entertaining thoughts about offering a Make A Gragg Chair workshop as soon as the summer/autumn of 2020; first, I have to make one from start to finish in a week myself), I realize all the more how close Gragg was coming to the limits of what can be accomplished with wood as the raw material. Given the extremity of the bends involved, including the main serpentine element with two 90-degree four-inch-radius bends within a foot of each other and a180-degree four-inch-radius bend for the arms, working out the routine is a critical process.

I recall the first time I tried this almost a decade ago on the original Gragg repro prototype, in front of my Smithsonian colleagues no less, I broke every single piece of the ash I took from our prized lumber inventory in the conservation studio. Every. Single. Piece. Not to mention breaking several of the bending form elements which had been woefully under-built. It was not my proudest moment of professional accomplishment but drove me on to get it right.
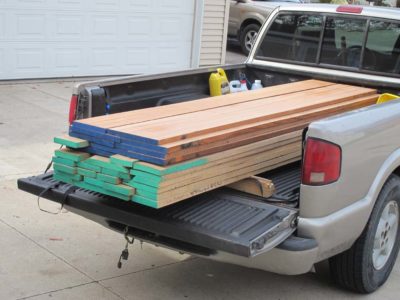
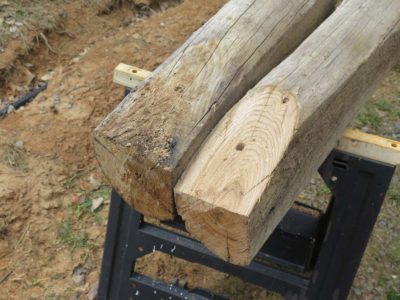
Even now I test the boundaries, trying riven and sawn kiln-dried oak (at the bottom of the pile in the truck), trying ancient/recycled but possibly air dried oak salvaged from a derelict weaving loom,

trying oak I harvested several years ago but have kept from seasoning fully, first cross-stacked outside and now residing in the basement/first floor of the barn,

and finally using oak I harvested this year. Through it all my batting average kept improving.
I’ve heard my friend Bruce Hoadley tell the story of a small manufacturer who was plagued with broken elements resulting from very tight bends after steaming. The punch line was that after going to watch the definitive practitioner for making the identical items, the manufacturer said with a smile something to the effect of, “He breaks most of them too!”
I encountered the same thing with the Gragg chair elements. Some stock bends like taffy, some breaks like crystal. I am moving more toward the former than the latter, but it is exasperating all the same. At least the failures make good kindling.
Yesterday afternoon my success rate was 92% with only a single stick making it into the failure pile. By observing the character of the pieces being bent, the stresses of the bending itself combined with the addition of bending straps, this is an outcome I can live with.
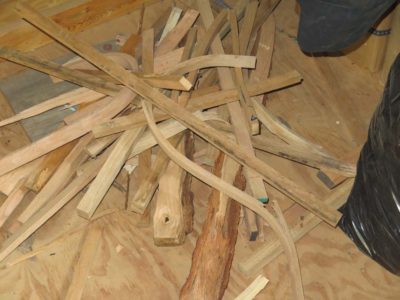
Still, the pile of kindling grows, just not as fast as in the past.
I am definitely gaining ground on the bears.
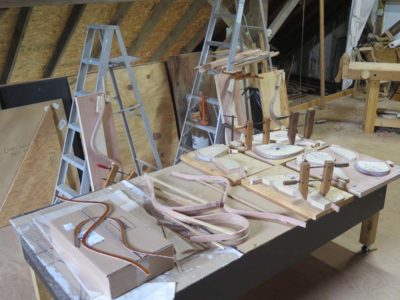
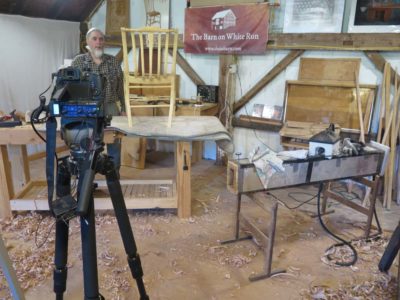
Our latest day of video recording dealt with the beginnings of assembling the pieces into a whole chair, including fitting the individual pieces together to fit the master template based on the many Gragg chairs I have examined over the years.
Once we moved on to fabricating the cross pieces things got fussy.
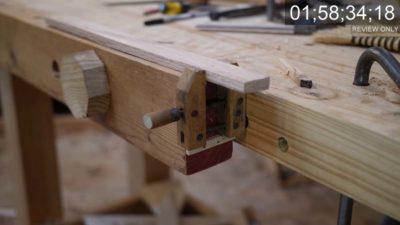
Chris wrapped up the day by taking some detailed footage of my shaving beam, my primary stock preparation tool for the project.
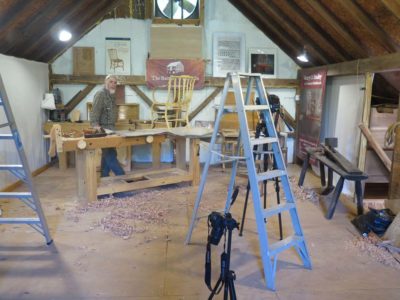
Our recent day of video recording for the Making A Gragg Chair was pretty much all about bending forms/jigs for the components of the chair. I showed how I make the forms and why I make them the way I do, including a discussion of “spring back” and how that affects my design and layout of the forms. Somehow that one topic managed to consume the entire day of work in the studio.
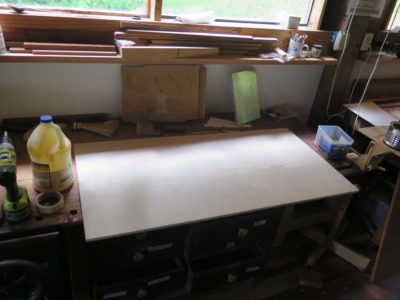

These three pictures were ones I took when I was prepping for the video shoot, but I replicated the process upstairs in the studio with the camera running. In them I am making some form stock, the 1-inch thick double laminated sheet I make from two pieces of 1/2″ baltic birch plywood. The finished product is what I use to cut the actual bending forms themselves. I begin with two pieces of 24′ x 48″ x 1/2″ plywood and slather PVA on one of them, then screw them together with decking screws and fender washers.

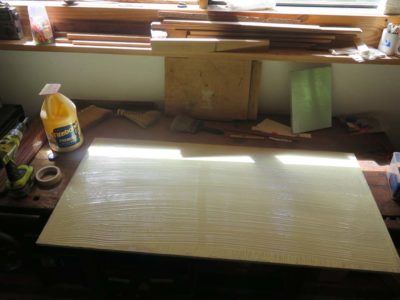
Here is that panel after finishing along with another double laminated panel made from two pieces of 3/4″ baltic birch type plywood that serves as the ground for the bending forms. Once they are dry overnight I remove the screws and washers and they are ready to go. I got all of this material from the closest big box home center.


Here are some images from the session in the studio.
We recently had our second day of video work on the Make A Gragg Chair video.
We spent some time on the Special Feature portion of the production and the remainder fashioning the riven wood into thin slats for bending.

Then I steam bent some pieces.
The only dark cloud to the day, and it was a considerable one, was that the barn power system failed just as I was nearing the end of a long and complex steam bending process, causing us to lose an afternoon’s work. That system failure has turned into a headache of the first order as the solar system quit working for as yet undetermined causes despite many, many hours of trouble shooting. Then, two days ago the hydro turbine developed the familiar grumble of bearing failure requiring its shipment back to the manufacturer for repair as I do not own the requisite tools. If my hair had not already turned white…
Black swans, my friends, black swans. But more about that later. Sigh.
The next video session will actually be precedent in the final edited video as I walk through the process of creating the bending forms from the patterns I made. I have not yet decided whether to make the patterns available with the video, although it does sorta make sense to do so. I am also trying to keep my sense of the time required to build a chair in hope that I can create a week-long workshop for that project.
The first pair of considerations when designing a conservation treatment plan for an artifact, in this case my own Gragg Chair, is to weigh the nature and needs of the artifact versus the nature and needs needs of the user. Without comprehending the location of the artifact on the entropy time-line and achieving user buy-in no process can derive a balanced response to the damage being addressed. As a property rights absolutist I am fine with that; if you own a priceless treasure and choose to incinerate it in the front yard, so be it. Short of that, there is a wide range of locations for the fulcrum of this competing pair.
The process of understanding the nature and needs of the object can be fairly straightforward. What is it? What is its intended purpose? From what and how was it made? What is its condition? What action is needed for it to maintain its existence or function? All these questions are fairly straightforward as the artifact is, in essence, a static (or not so static) entity at a particular point on its entropy curve, or as my late friend and colleague Mel Wachowiak, Jr., used to say, “On it way back to dirt.”
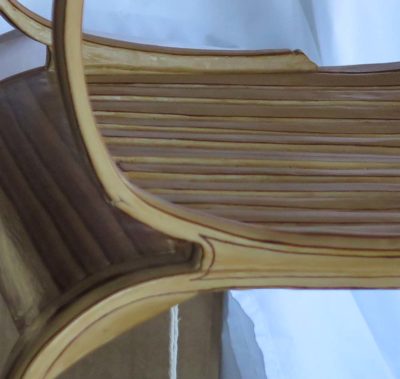
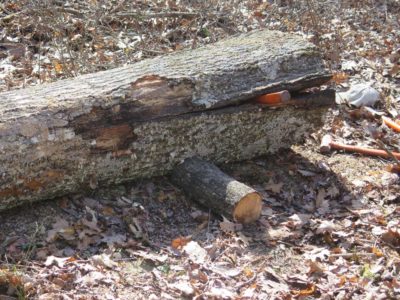
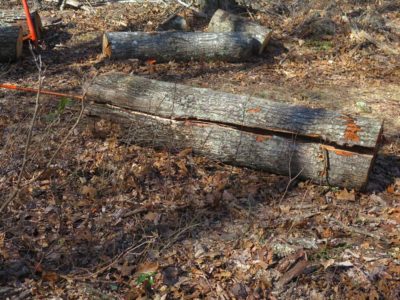
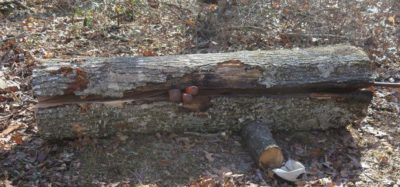
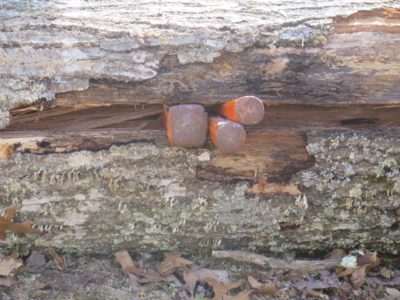
In the case of this chair the continued existence of it in its current form and condition was not really in doubt, only one or two of its functions. The chair could be left completely unattended and remain “as is” for decades or centuries as a thing, but one of the primary functions of this particular chair form and presentation, namely that it is a comfortable and beautiful thing, was compromised due to the breaks and attendant distortions of the arms. That damage, and its disruption of the chair’s “beauty” is a real and meaningful void in its current “function” and regaining that beauty is not a whimsical undertaking.
As for the nature and needs of the user there is far more variability in both theoretical and practical perspectives. In the case of a chair, the user may need for it to actually be functional as a structure that can support a grown adult for the chair’s intended purpose: to be a chair. Or, the user (owner) may prefer for it to be an antetype, prototype or example of the generic or specific chair form, or that it simply represent the form and historical attributes of this particular type of chair. If, for example, one of the legs were missing altogether but the user’s desire was to preserve the remaining fabric as-is, the fabrication of a plexiglass support in place of the missing leg would be entirely defensible.
This is not some bar stool, this is an aesthetically sophisticated and technically refined form, one that is both artistically notable and historically significant. Its current damage reveals — at the very least — a failure of its maker to anticipate the stresses that might be paced on it in “normal” use and his failure to accommodate those stresses in its structural design or manufacturing execution. (True enough, I did not anticipate the unauthorized use of the chair by a morbidly obese person and the damage that would result from his frenzied effort to extricate himself before I returned to the booth) From this context the user may choose to leave the static damage exactly as it is as a painful reminder of that failure.
In this object vs. user consideration, more than with the coming two pairs of contending concepts, balancing the needs of the chair with the preferences of the user results not at a single point of agreement or strategic objective (or one and only one “exact” way to proceed) but a continuum of options that can respond to both competing needs to some degree.
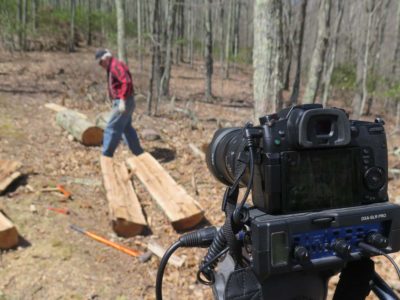
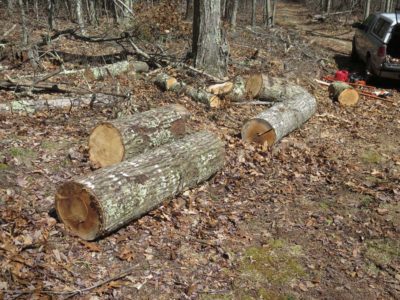
Recently we had our first day of production for the “Making A Gragg Chair” video. We had been waiting for several weeks to get a beautiful day to film outside while I harvested the wood for making the chairs that will be documented in the video. Full disclosure — I will actually be making three chairs more or less simultaneously so that we can use subsequent production days most efficiently, getting several consecutive steps recorded on the same day by having three chairs at different points of the construction.
So this beautiful day was spent splitting wood up the mountain with wedges and sledges, then on to a mallet and froe in the riving brake next to the barn. The setup for the latter was new to me so it was a bit awkward getting into the swing of things, but due to the magic of video editing it might actually look like I know what I am doing.

We also shot the introduction to a Special Feature we will be including on the video, and probably on the web as well, as we record the entire process of me conserving my own damaged chair.
One of the things I am trying to keep track of is the amount of time it will take me to build one chair from start to finish. I would love to teach a workshop on building Gragg chairs but I need to get the time down to seven days max, six days preferably. I suppose once these chairs get down I will build one from scratch as fast as I can to see if it is a reasonable project for a workshop.
With the commencement of production for the video “Making A Gragg Chair” steaming down the rails I thought it would be good to get back in practice splitting logs I had culled from last year’s harvest up on the mountain. As soon as the mud dried out I drove up there and started wailing away at one in particular. As I already recounted the initial results were not heartening. The last time I split some giant logs was a couple years ago and that went perfectly. Had I forgotten how to split a log?
A second log went much better but I had left my camera in the barn so you’ll have to take my word for it.
I also had long desired to build a riving brake, a tool I had never before possessed. Now was the time to spend part of an afternoon doing so.
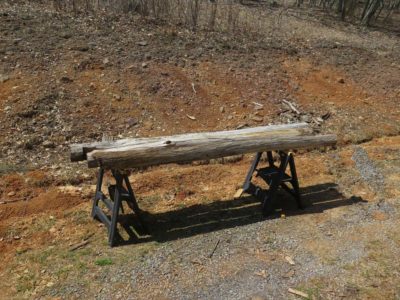
When my brother and I rebuilt the lean-to on the lower log barn lat year I was left with a half-dozen ancient chestnut poles. They seemed to be perfect candidates for the project.

Using precision woodworking processes I trimmed the ends of the logs to allow for whisper-fit angled joinery.


That joinery was accomplished with a low-speed high-torque drill and a length of 1/2″ threaded rod and nuts. With some judicious use of leveraging I got the tripod up on its feet.
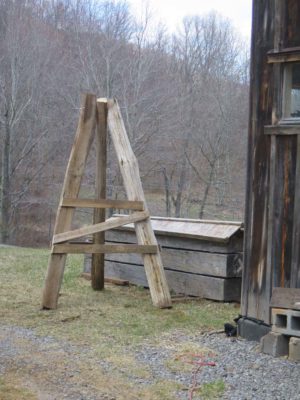
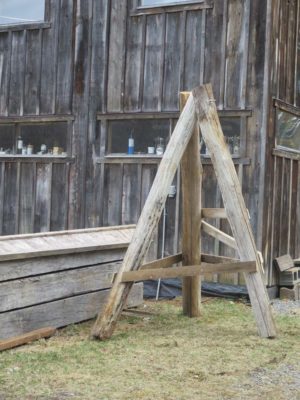
I added the cross bracing and it was ready to put to work.
I’ll see if it is as easy to use as Follansbee makes it look.
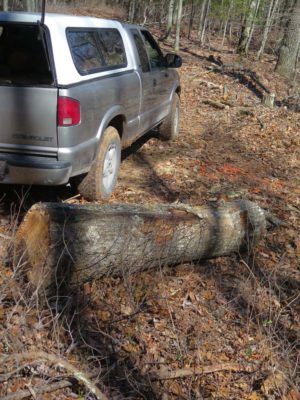
As a practice session for the impending commencement of the second video, “Making A Gragg Chair”, I trekked up the mountain to the pile of “good” logs I had culled from the firewood-harvesting sessions. One in particular caught my fancy, a large red oak about 24″ in diameter, looking straight and true for its seven-foot length. I decided to work it with “wedge and sledge” to both get my stamina up to speed but perhaps even yield enough material to make a pile of useful things.

Within ten minutes I knew all I had was a pretty spectacular pile of firewood, albeit unprocessed. After I opened a nice split on the end grain and started working down the sides of the log the core of the log separated, essentially ruining it as a workpiece.
To make matters worse, the intertlaced grain inside the log caused it to start eating wedges. It took me more time to extract the wedges than anything else.
Oh well, as the Gump of the Forest says, “Sometimes log is like a box of chocolates.” And this one had something unpleasant inside. At least I’ll get another thousand pounds of firewood from the experience.
A life of woodworking is a humbling one.
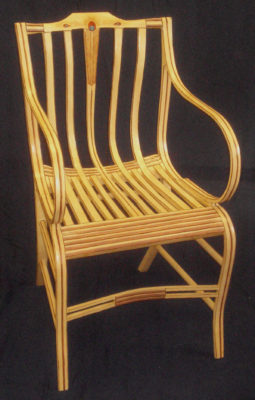
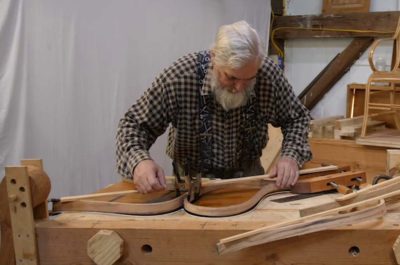
One of the projects that has been slowly percolating up the pile of “To Do” projects is the repair of my own Gragg chair, built several years ago and damaged while on display at a woodworking event when a corpulent fellow wedged himself in the chair (uninvited) and broke both of the curved arms when desperately extricating himself from it.


As I cogitate on the project of repairing the chair, even though it is my own piece and I can build another (actually I am beginning to build three more which will be recorded for a future video), I am approaching the problem as though it were a museum/historic piece and this is the execution of a conservation treatment from a formal/museum point of view.

In so doing I will be employing and implementing the decision-making model I devised almost thirty years ago, consisting of six separate questions, linked in opposing pairs. This model has served me without fail during my career in the museum, and for clients outside the museum. It has become such a part of my thinking that it almost does not register with me any more. I am hoping that as I work through this series I manage to include all the connections, but if I do not please let me know.
The strategic path for any particular conservation treatment depends on the answers to these six questions, and on balance the six answers makes that path clearer. In some cases the questions are not relevant and can be discarded, but they must be contemplated at least to the point of making that determination.
The first pair of questions is, What are the nature and needs of the object, and, What are the nature and needs of the user? While this pair is essentially a conversation between me, the advocate for the artifact, and me, the user, I hope it does not devolve into slapstick.
The second pair is, What are the technical limitations you are facing (particularly regarding the materials), and, What is the perfect, or least most desired, outcome?
And finally, What are the ethical guidelines for intervening with the object, and, What are the resources available for the project?
While the context of every object and circumstance is unique, and thus the balance of the answers can vary widely, nevertheless I find the exercise to be a powerful tool for plotting a route from Point A (where or how the object is currently) to Point B (where the object needs to go/be). In coming essays I will address each question (and answer) individually and in concert with its counterpoint question as I elucidate the chosen strategy for dealing with the project as a whole and individual procedures and choices within it. We may find ourselves in pretty deep weeds from time to time, but at least you will know how I approached the problem.
I’ll close this essay with the reminiscence of the first time I presented this decision-making model at a national professional meeting, I think in the late 1980s. In a somewhat unusual response from a “sophisticated” audience, I heard occasional hisses and boos during the presentation which directly challenged portions of the prevailing museum/conservation orthodoxy. Over the following three decades there came to be a sporadic and gradual acceptance of the model, and by the time I bolted for the boondocks this graphic was seen on the walls of museum and private conservation labs from coast to coast.
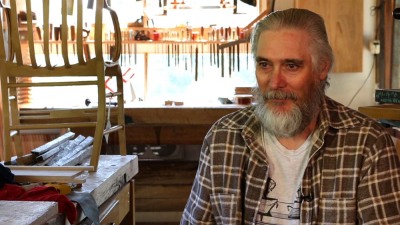
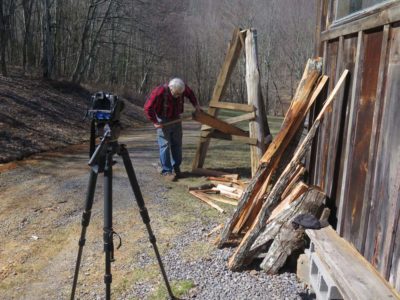
Charles Brock of the video series Highland Woodworker visited me a few months ago to film at The Barn, and the episode came out today. They did a nice job of making me seem sensible. It was an ordinary day in the shop, I didn’t get all dressed up or anything.
New compewder tomorrow. They were able to save the files on the hard disk, so it looks like all is well.


Recent Comments