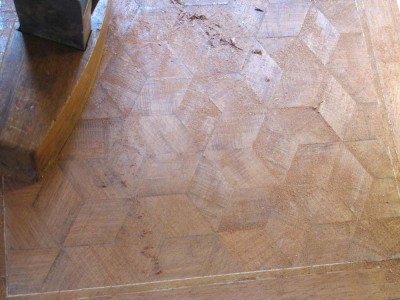
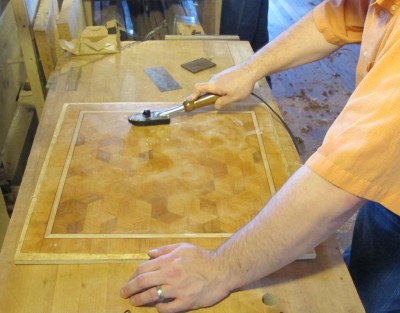
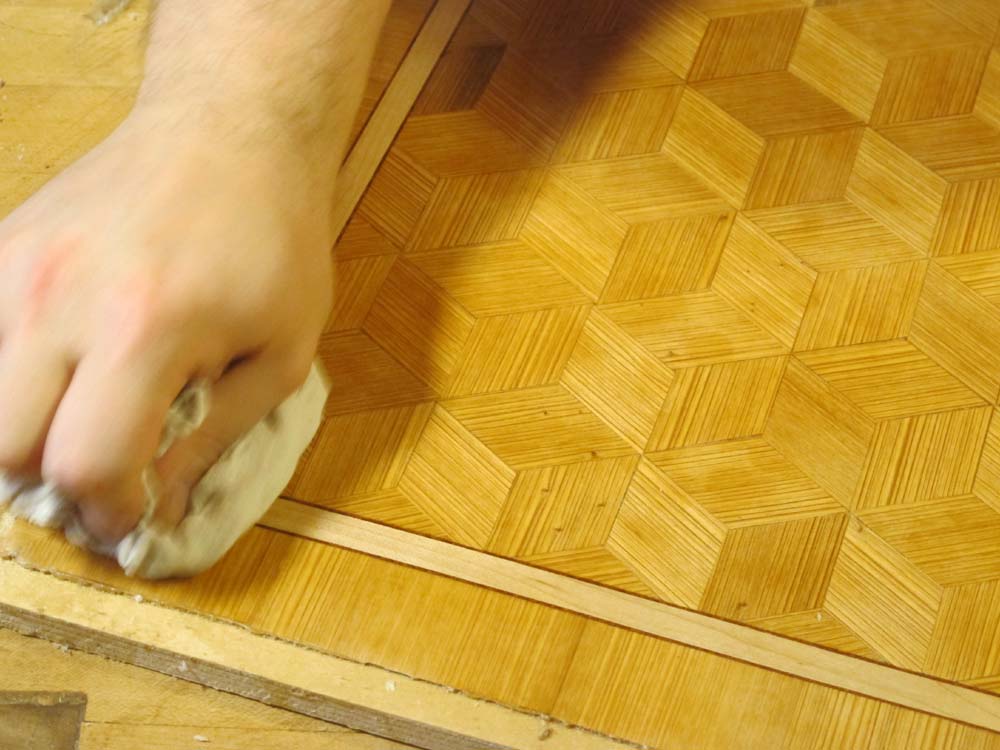
With the applied parquetry solidly glued down and stable, the final steps revolve around getting that surface flat and smooth. This is necessary since we started out with sawn veneers, which by definition will have some variations in thickness.
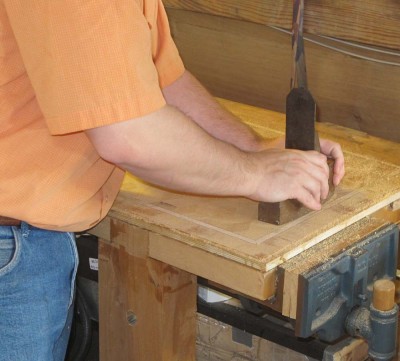
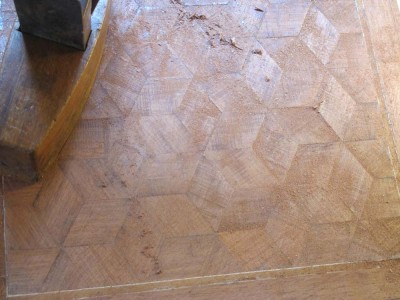
Since the grain directions run in multiple directions, the tool of preference for gross flattening in smoothing has been for over 200 years a toothing plane. A modern option includes a so-called “Japanese” rasp which is comprised of numerous hacksaw blades configured into a surfacing tool. Using this approach, the rough and irregular surface can be rendered into a flat but not perfectly smooth surface.

Following the toother or rasp comes the card scraper, either hand-held or handled, or even a finely tuned smoothing plane (I actually find my low-angled Stanley block plane to wrok perfectly for this) to yield a flat, smooth surface ready for whatever finishing regime you choose.

And, you are done!
In closing I want to thank Rob Young of the Kansas City Woodworker’s Guild for requesting and encouraging me to compile this series of blog posts to help explain the steps we were executing during the workshop I taught there. Thanks Rob!
Over the next couple of weeks I will be combining this long series of blog posts into a single tutorial which I will post in the “Writings” section of the web site, and will announce that addition to the archive here.
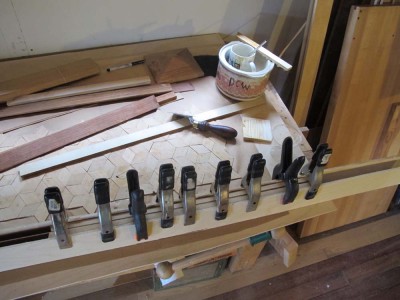
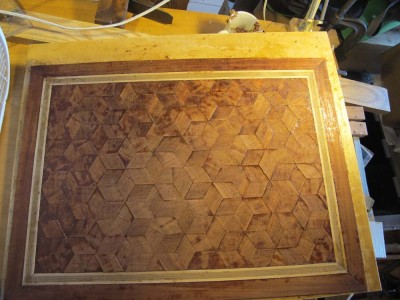
The penultimate chapter in the saga of creating a simple parquetry panel is to affix the assembled decorative lamina to the substrate of choice. In this instance I selected 1/2″ baltic birch plywood as the substrate, which is pretty much my default position these days.
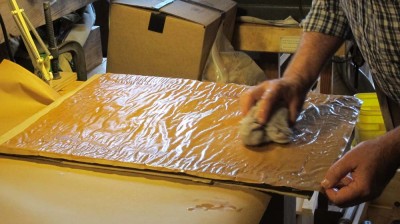
Once you are ready to put the assemblage together, the first thing to do is moisten both sides of the paper-backed parquetry. Not sopping wet, but damp.
This allows the assembled parquetry to move in the vertical axis while it is getting glued down, in other words allowing all the individual pieces of the pattern to be pressed down into intimate contact with the substrate. This is what you want. Don’t worry about the show surface being uneven in the aftermath, you will flatten and smooth it in the next, final episode.

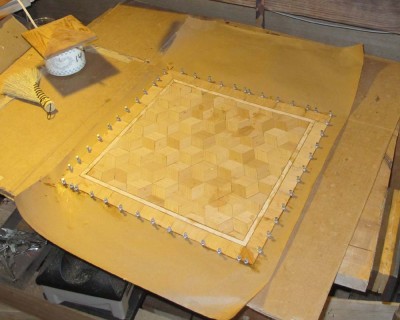
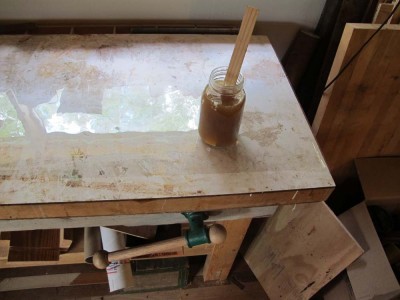
Once the assembled lamina is a bit soft and ready to glue down, using hot animal hide glue slather both the substrate surface and the underside of the parquetry (the wood surface, not the papered surface) and place them in the proper alignment.
As a typical practice I then drape a piece of plastic sheet on top of the parquetry, followed by at least two thicknesses of corrugated cardboard or a flannel blanket to provide for even pressure on the uneven surface, followed by the gluing caul, usually a slab of plywood. For planar panels I often simply flip the glued panel over and clamp it face down to the bench top.


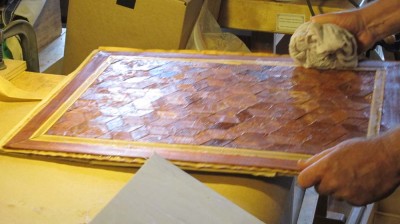
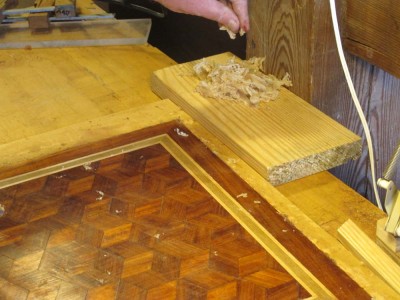
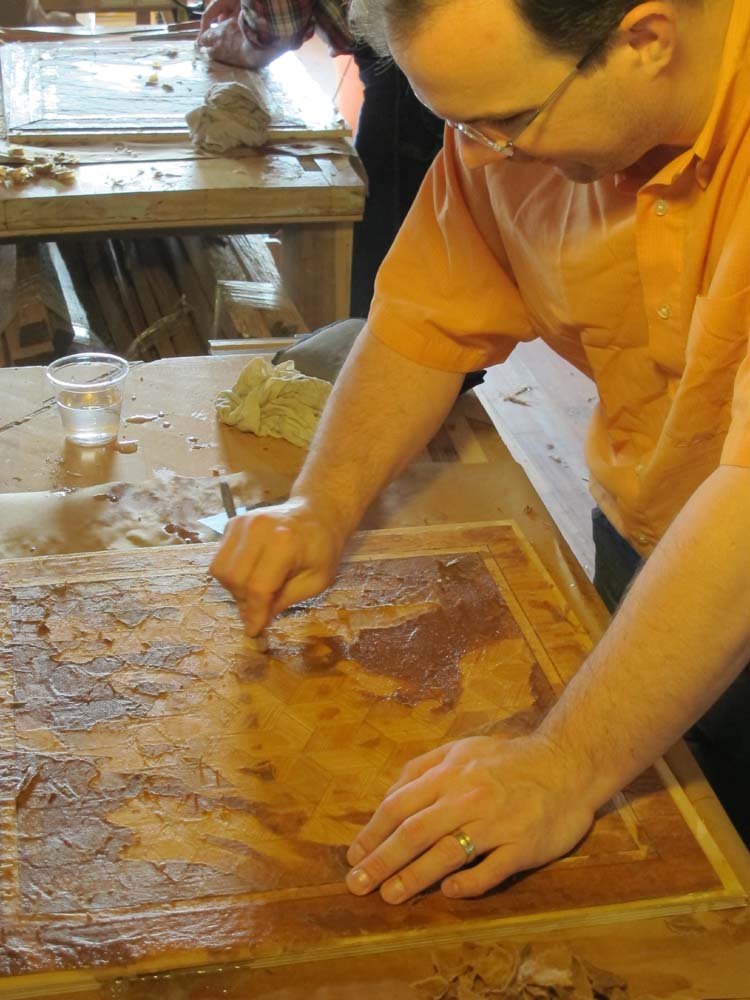
Leaving the construct to set overnight, in the morning unpack the whole unit and begin removing the paper on the surface of the parquetry, with a dampened sponge and a dull scraper or knife. Once you have finished with this and it is all clean and the excess glue scraped off, set it aside until the surface is dry enough to plane and scrape, which comes in the final steps.
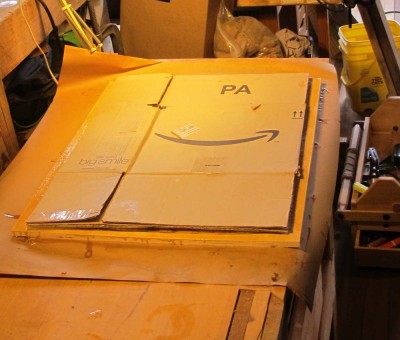
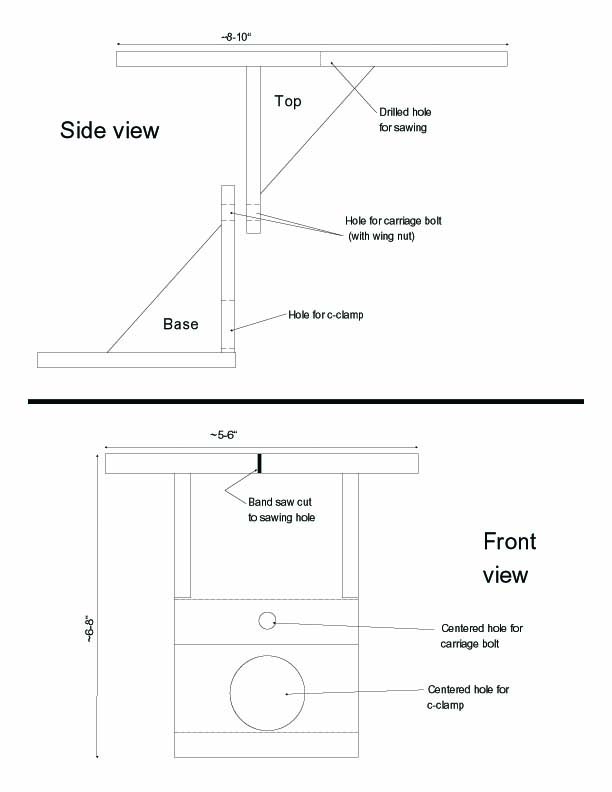
My friend BillF asked me to post the image and plan of the tilting saw bench I use for cutting marquetry with a jeweler’s fret saw.
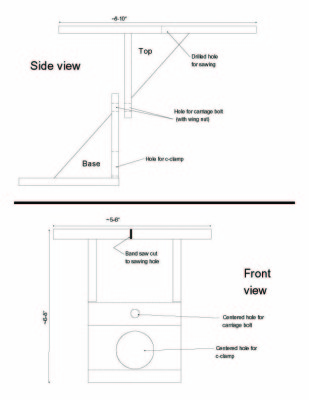
Okay Bill, here they are. I’ll see if we can get the PDF of the plan on the Writings page.
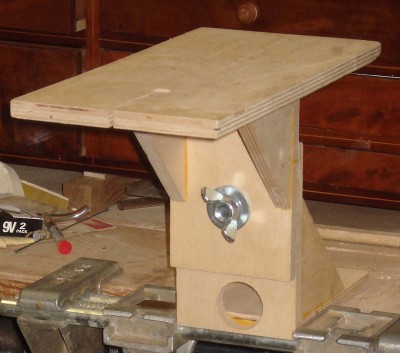
I think I first saw this tool in a c.1900 book on fretwork, and have since seen it many other places and books. I made a passel of these at one time, and have used and gifted them for years.
I am earnestly trying to wrap up some frayed threads in the blog posts, and this one and two more will complete the tutorial on simple parquetry, which I will combine, edit, and post as a downloadable document.
===================================================
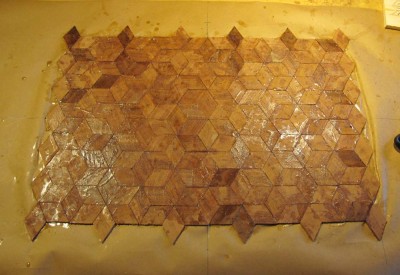
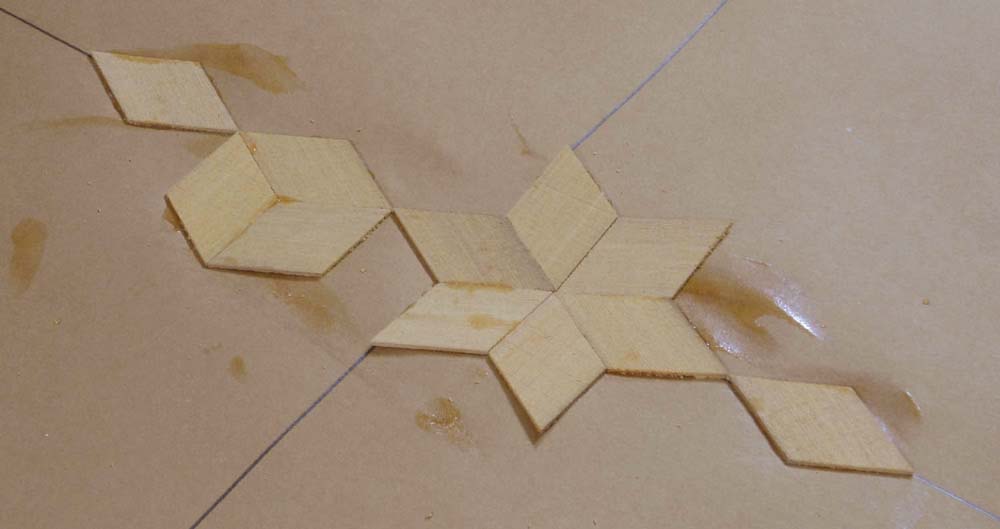
Once the parquetry composition has been assembled such that the area completed is larger than the field of the composition as it will be presented on the panel, the time has come to trim it to the exact size you want. But before that, you have to decide exactly how large you want the central field of the parquetry panel. I tend to work my way in from the edges of the panel as determined by the sizes and proportions of the furniture on which it will reside, then subtract a symmetrical border and a symmetrical banding.
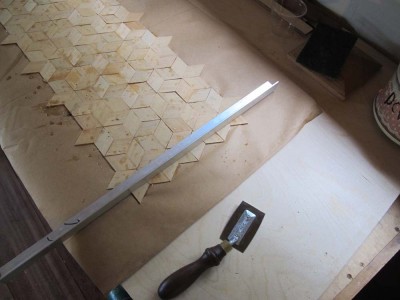
Once I have done that, I simply re-establish the center lines of the parquetry assemblage and precisely mark out its perimeter, and saw it with any of the veneer saws mentioned earlier. The desired end result is a rectangular and symmetrical composition. Once I have the field trimmed to the proper size, I re-mount the unit on a second, larger sheet of kraft paper using hot glue. It need be adhered only at the perimeter.
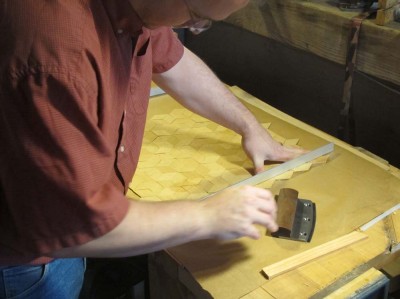
I tend to make my own banding, frequently making a simple stack of veneer faces with slightly thicker centers, assembled and glued between two cauls until they are set. Then I just rip of as many pieces of banding as the assembled block can yield.

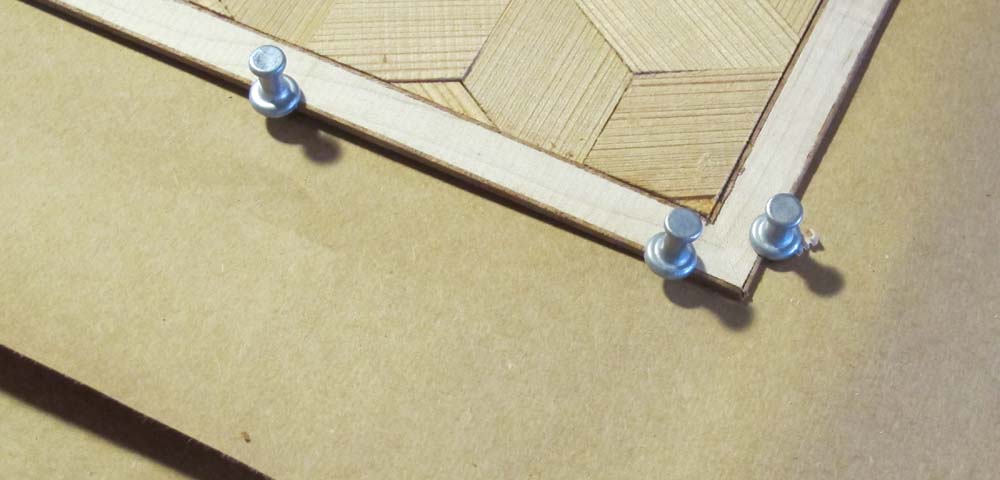
Once the banding is available, I cut them then trim the ends with a plane and miter shooting jig. Once the first piece is ready to apply, I place the entire composition on a large board with a corked surface. Then just like Roubo, I glue the banding down on top of this second piece of kraft paper, tight against the cut edge of the field, and “clamp” it in place with push pins, similar to those illustrated by Roubo. By the time I get all the way around the perimeter of the field, cutting then trimming each of the banding pieces, the piece is ready to set aside for a bit.
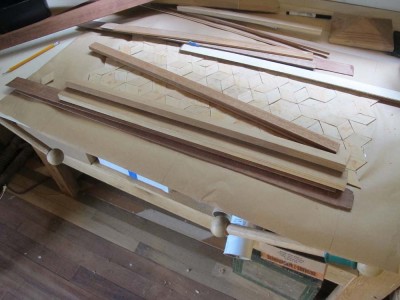
For the outer border, I tend to use a simple approach, often employing some of the original veneer stock in either the long-grain or cross grain orientation.
Once the banding is set I remove the pins then hammer veneer the borders in place, and the assembling of the parquetry panel is complete.
Up next – Gluing Down the Parquetry
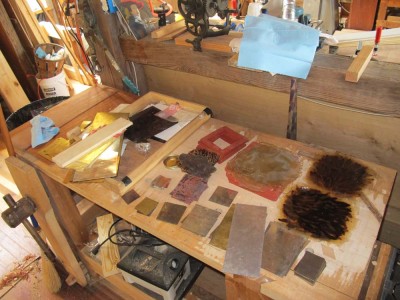
This coming Friday through Sunday I will be teaching a three day workshop on the Boulle technique of marquetry at The Barn. This is something I very much look forward to. So, for the past few days I have been punctuating my days by preparing the classroom space for the event.
One of the parts attendees seem to enjoy the most is the making of tordonshell, and here is a batch I have prepared for them to use. They will make their own to take home.
Come Sunday afternoon they will have some finished panels, the number and complexity depending on their interest and the time it takes them.
I still have an empty slot for this, so if it interests you drop me a line at the Contact portal for the site.
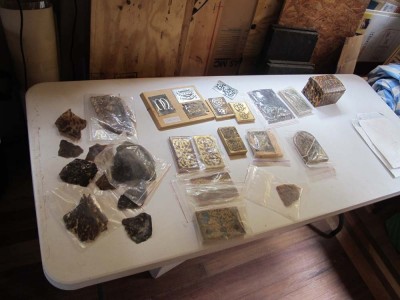
We’ve got a weekend workshop on Boullework Marquetry coming up at The Barn the first weekend of October. Recently I made a batch of artificial tortoiseshell for us to use in that workshop, with at least two pieces for each participant. One of the exercises for the weekend will be to make another batch so that each attendee can make their own once they get back home.
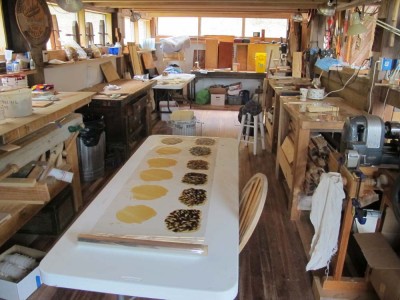
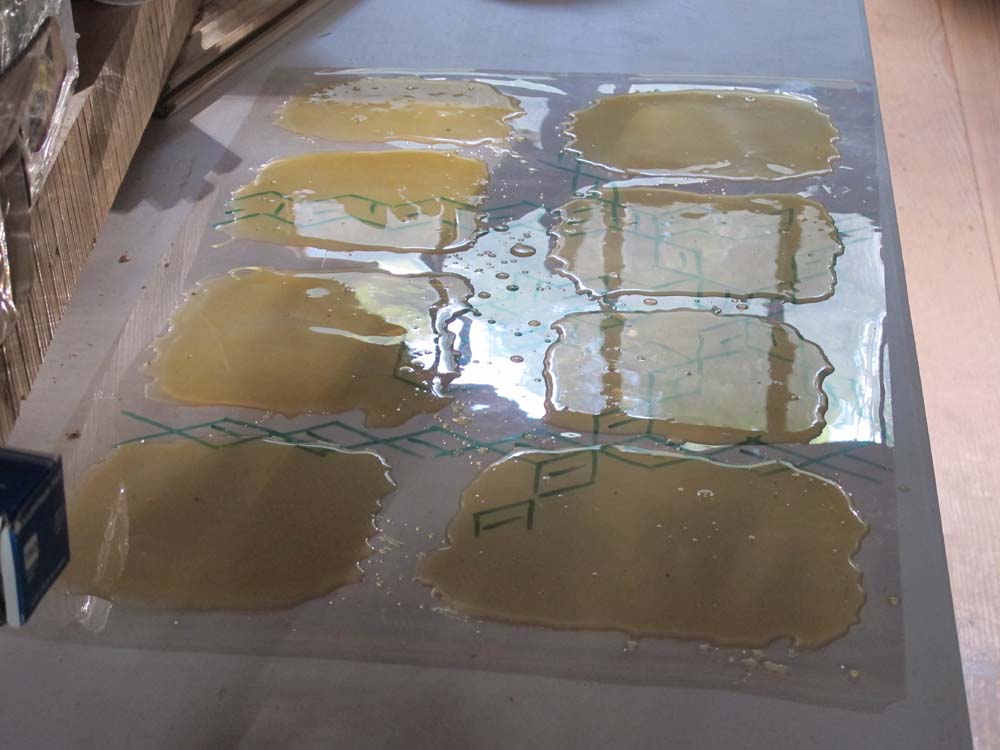
My method is described somewhat in an article I will post next week in the Writings section of the web site, but here again is how I did it this time. Start with a flat clean surface with a sheet of mylar on which to cast the artificial shell on.
Cast out the material on the mylar,

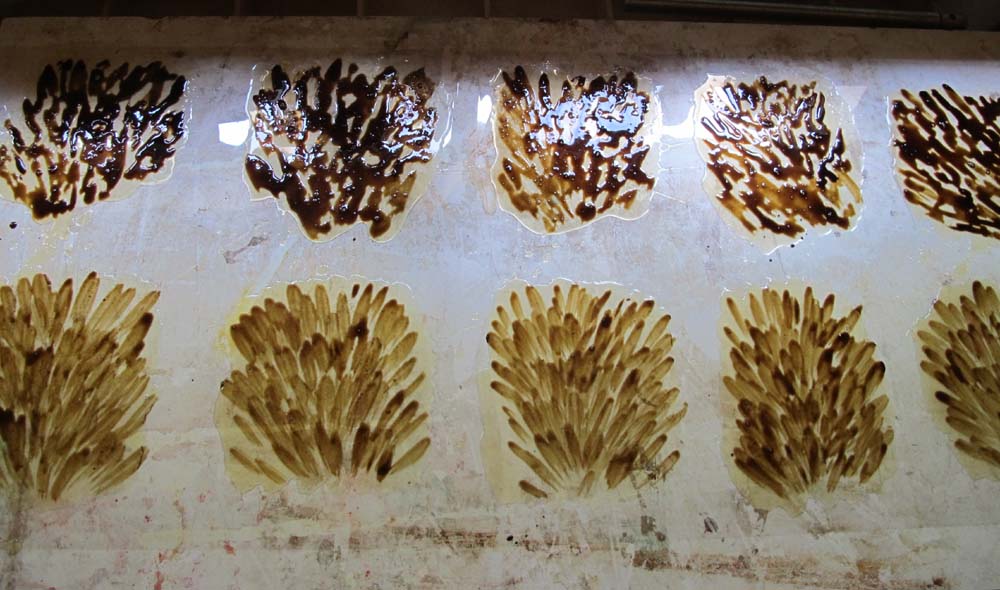
then create the pattern. The upper row of scutes is made to mimic “hawksbill” turtles, and the lower row “greenback” turtles. Once that is firm, cast a second layer of polymer on top of the pattern to complete the composite, and you are done.
PS – I purposefully left out all the chemistry stuff. It’s in the article
PPS If you are interested in joining us for the course, drop me a line through the “Contact” function of the web site.
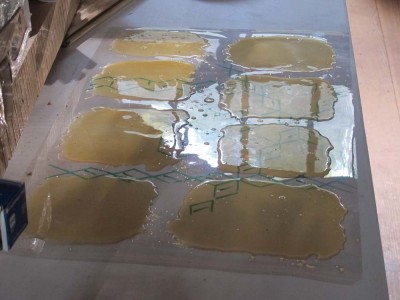
The day began with the excitement of seeing the glued-up panels. We had slightly oversized 1/2 baltic birch plywood for each of the panels so that they could be trimmed precisely to size one the project is complete.
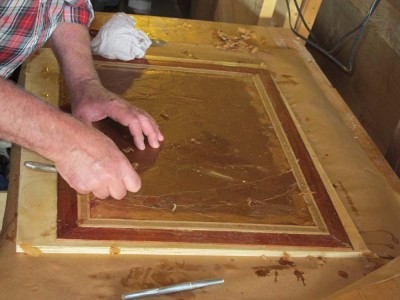
The first step to getting finished from this point was to moisten and peel off the kraft paper that served as the support for the assembling of the pattern, banding, and border.

It was a delicate balancing act, moistening the surface enough to remove the glued-down paper, but not so wet as to lift the veneers. Once the paper is removed begins the tiresome task of dampening and scraping off all the glue left behind.

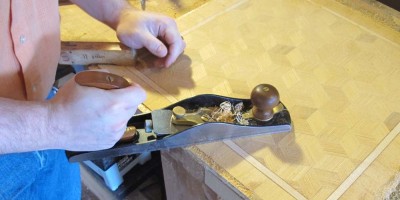
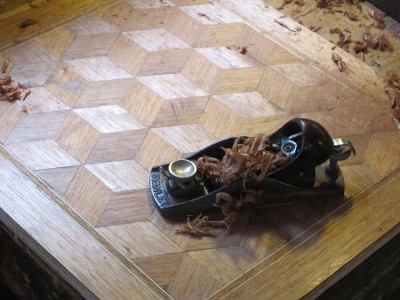
A quick stint on front of the fan to dry them, and then we brought out the toothing planes, scrapers, and small planes to get everything flat and smooth.
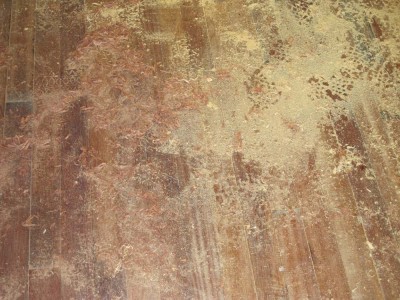
The conditions of the panels,

and the floor indicated we were making great progress.
In a normal 3-day parquetry workshop this would have been the final process,
but these guys were working so efficiently we made it all the way through a finished project by the time they left.

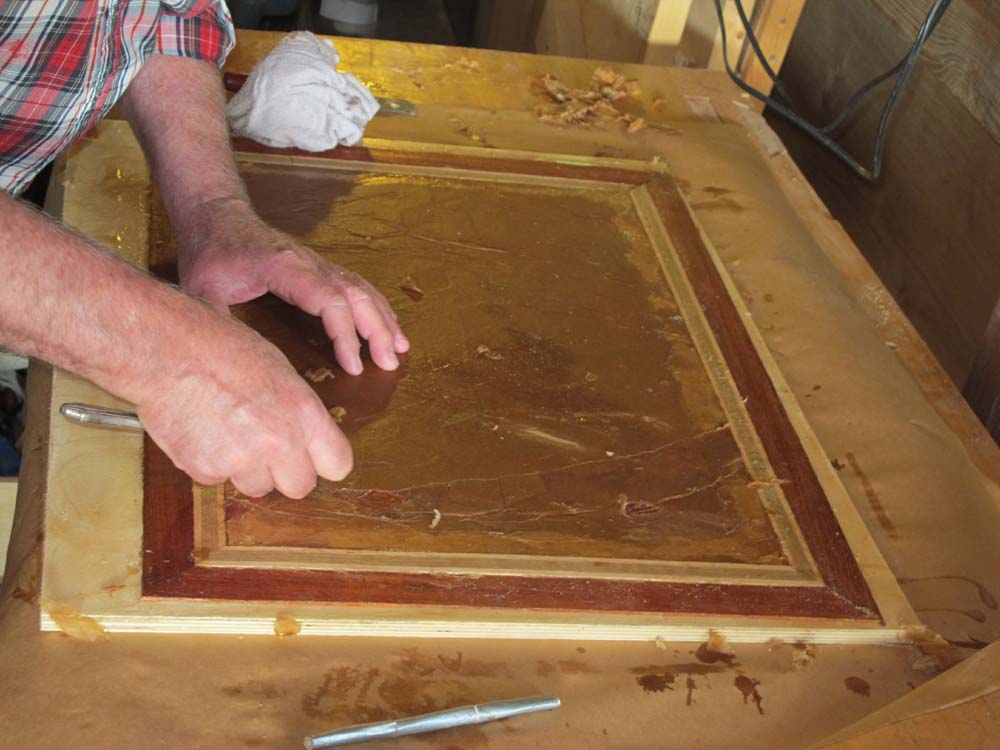
Using one of my panels, I demonstrated the simplest finishing approach to the parquetry, and they charged ahead.

Burnishing with polissoirs came next,
and then the molten wax treatment for the final finish. The wax was first dripped on the surface, then trowelled around with the tacking iron. Again it was important to use the iron delicately to melt the wax enough to impregnate the surface, but not to heat the surface enough to lift the veneer.
Once the surface was fully impregnated the panel was set aside to let cool and harden, then the excess was scraped off,

and the remaining surface was buffed with a linen rag.
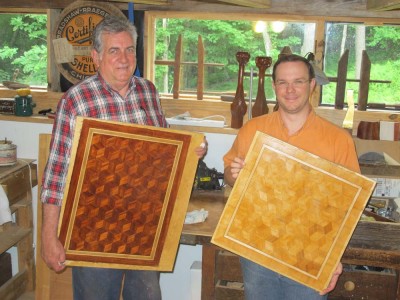
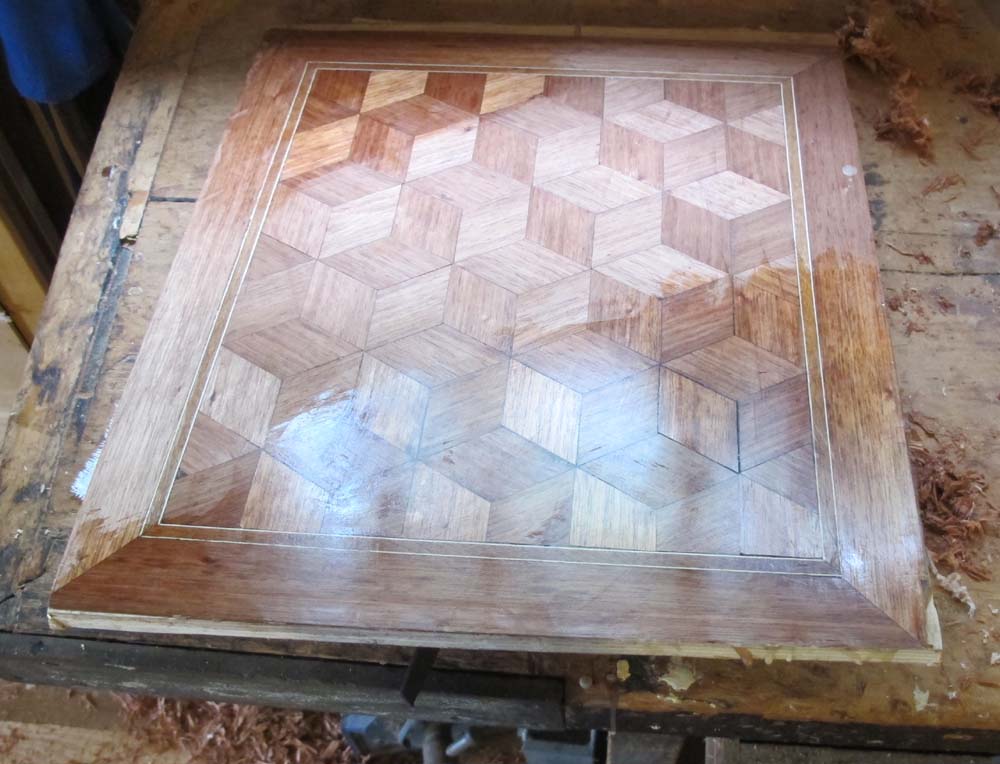
The results were eye popping, and demonstrated what can be done with very little wood in a short while. If you snoozed on this one, you loozed. Joe and Joshua now possess another important tool for their design and fabrication toolkit for the future, and when they get home they both plan to trim their panels and build a small table around them.
Great job, guys!

One of the beauties of parquetry, aside from its, well, beauty, is that it is a decidedly simple process requiring only a few tools to get started.
When we gather for the workshop at The Barn in less than a fortnight each student will need only a few tools, none of them exotic or impossible to find or purchase or even make.
These are not presented in any order of importance.
1. Small back saw
The first tool needed is a small dovetail-type saw, used to cut the already fashioned veneer strips into equilateral parallelograms. Almost any kind of small back saw that cuts cleanly will do.
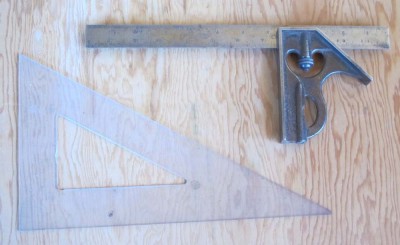
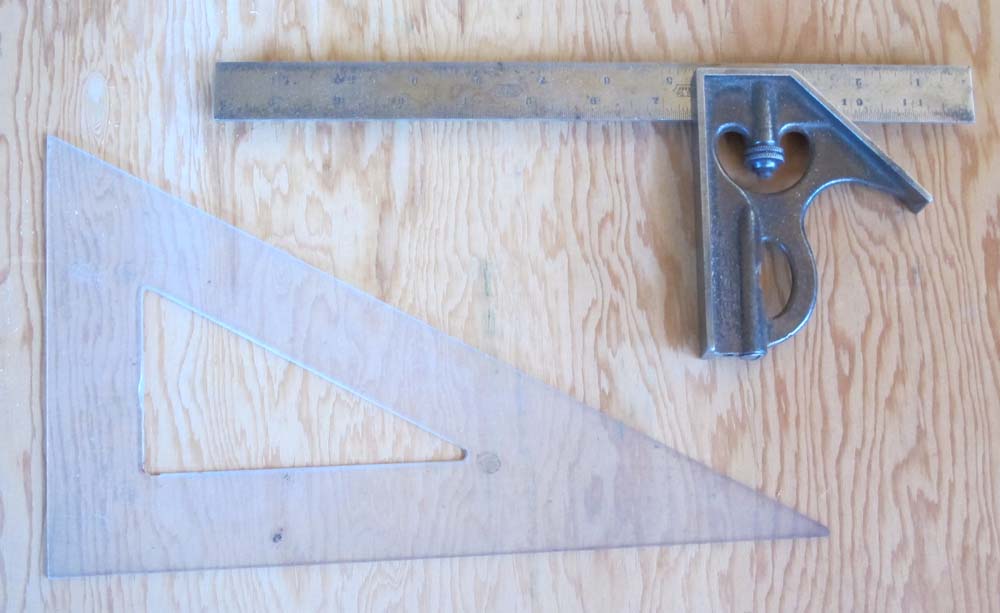
2. 30-60-90 triangle
Since this type of parquetry is based on the 60-120 degree equilateral parallelogram, a 30-60-90 triangle is required. A decent quality plastic one from the big box store works just fine. Or you could do what I do and just pick them up at yards sales for a quarter apiece. That does sorta explain why I have a whole drawer full of them…
3. Bevel Gauge
To both prepare the sawing jig and the layout of the veneer panel, a bevel gauge is needed. In the preparation of the sawing guide it is the fence against which you ride the back saw for establishing the initial kerf. As long as the blade of the gauge is straight and the locking nut locks, you are good to go.
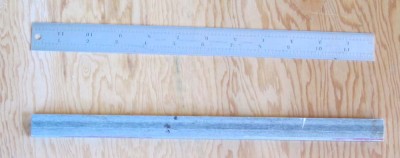
4. Straightedge/ruler
In order to assemble the parquetry pattern properly you have to establish the greater and lesser axes so you know how to assemble the pieces on the kraft paper backing. The straight edge makes this an easy task, especially if it is a ruled bar used in concert with the aforementioned triangle.
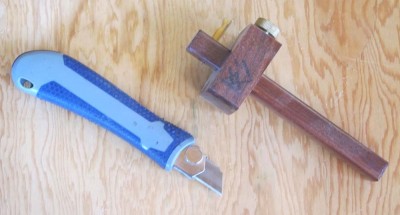
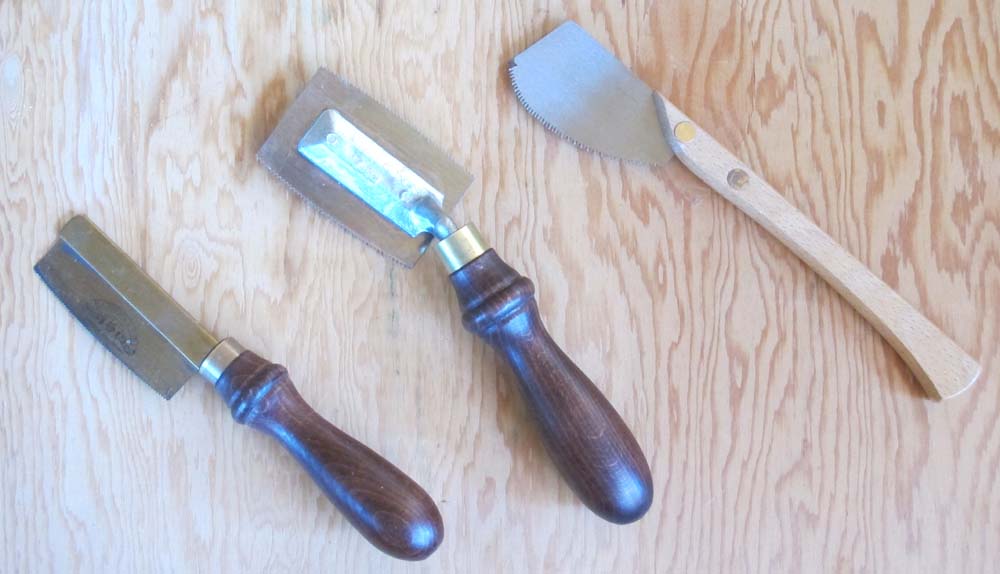
5. Utility knife
Many times in the course of a project you need to cut or trim something, so some sort of utility knife is called for. Equally applicable would be a straight ship carving knife.
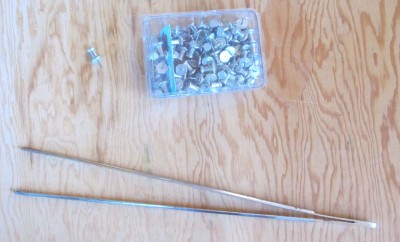
6. Cutting gauge
If you are including banded inlay into your composition, a cutting gauge (pictured next to the blue utility knife) is useful for establishing the edges of the channels into which the banding will be glued.
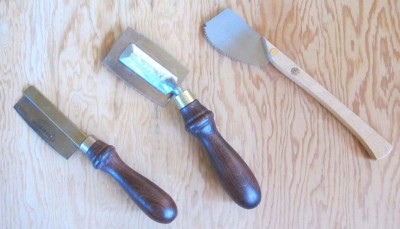
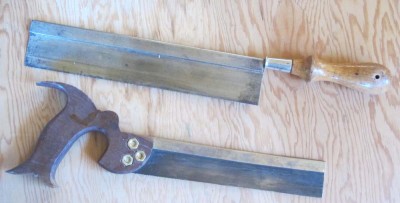
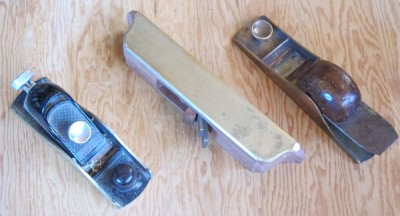
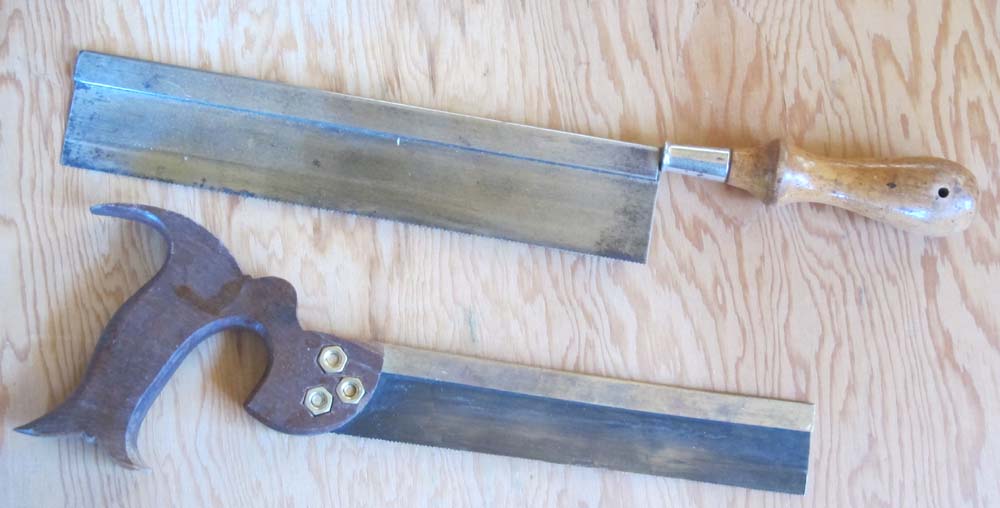
7. Veneer saw
For finishing the edges edges of the marquetry panel, or establishing the channels for the banded inlay, and marquetry saw is a godsend. I show three different iterations; on the left is an “English” style, the center one is I believe of German heritage — both of these saws cut on both the push and pull stroke — and the one on the right is Japanese, hence cuts only on the pull stroke. I have tried but do not yet own the new design from Gramercy Tools, but it is superb. Since much of my future work will be parquetry, I will order one.
8. Small bench chisel
To clean out the channels for the banded inlay.

9. Toothing plane or analogue
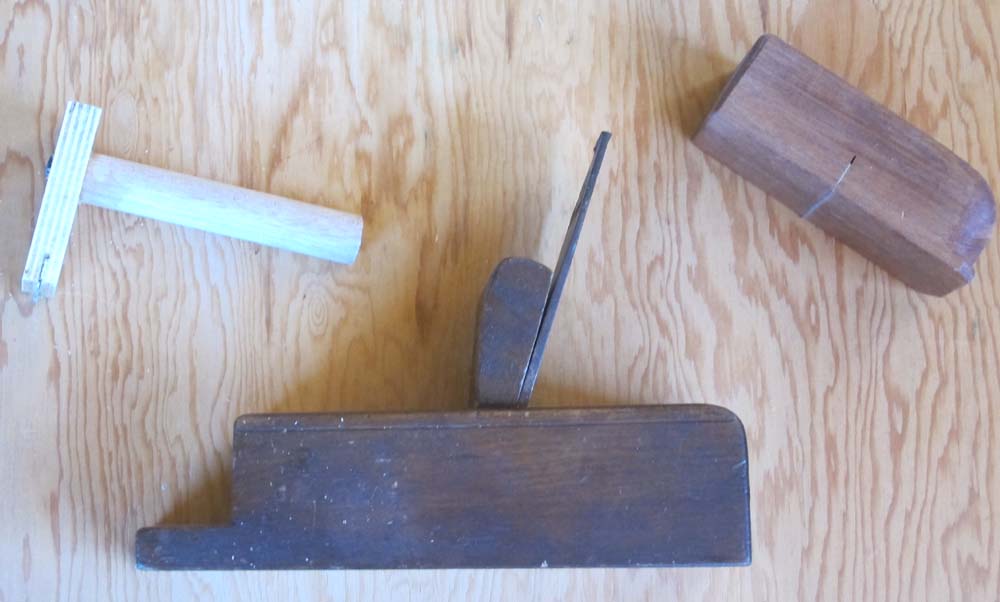
When the parquetry panel is assembled and applied to the substrate, it will be neither flat nor smooth. A toothing plane will accomplish the former. I have about ten, but if you don’t have one you can make either a low-tech block toother or a squeegee-style toother, both of which employ hack saw blades.
10. Block plane or similar
Often the parallelogram lozenges need just a touch along an edge to make it fit perfectly, and the sharp block plane is just the tool. Later on, you will need the block plane to follow the toother in the finishing.

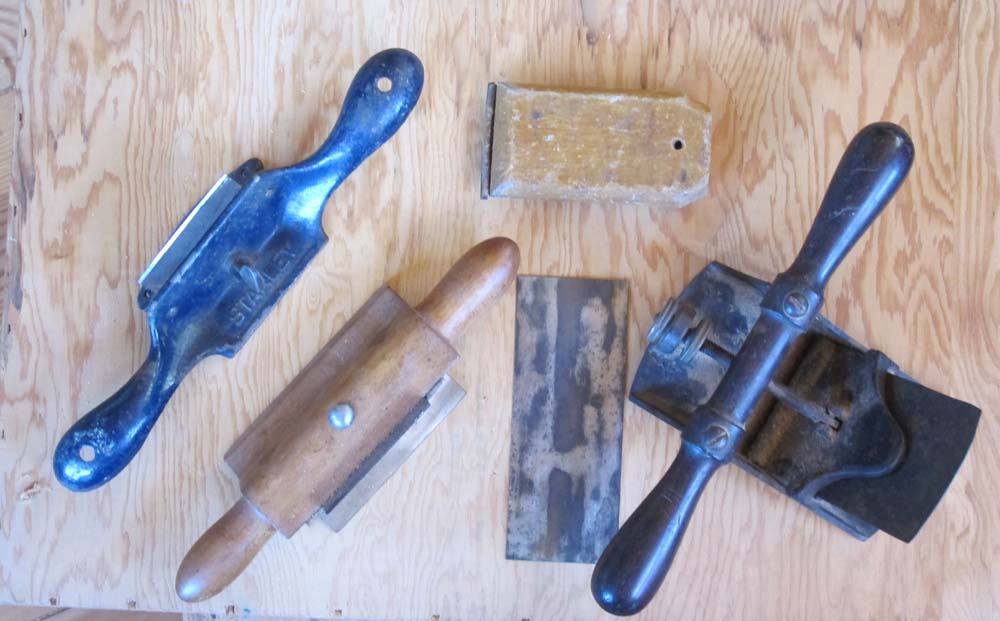
11. Scraper
The final step of smoothing is done with a scraper. Whether you use a card scraper or a block scraper is immaterial, all that counts is that it be cutting nicely and leaves a perfect surface.
12. Miscellaneous tools
I always like to have a pair of tweezers laying in the vicinity, and a bunch of metal-headed thumb pins, to tack down the banding while the glue set.
That’s pretty much all you need tool-wise to get started. Next time I’ll talk about making and using the sawing and planing jigs.
===================================
If spending a weekend in Virginia’s Little Switzerland making a parquetry panel sounds like fun, drop me a line and sign up for the class. It is a week from Friday-Sunday.


Recent Comments