My recent conversation with retired broadcaster Brian Wilson has been posted for his Now For Something Completely Different podcast. It’s a bit more pungent than usual, as it is an election post-mortem. If you are enamored (or outraged) by my observations on the society around us, check it out.
Recently my friend JD came for a visit, bearing a crosscut slab from a cherry tree that fell across his driveway. He wanted to turn it into a small tea table to hold his cup of morning coffee out on the porch.
I thought I might be able to smooth and flatten it only using planes, but the amount to remove (~3/4″ of very hard end grain) was simply too much. So, I spent a couple hours sawing to get the two faces coplanar.
After that I did most of the work with my trusty #5 set up as a foreplane, followed by a companion #5 set up as a smoother.
Some vigorous work with my user-made scraper, picked up somewhere along my path, and I was done.
So a few hours of good fellowship and labor it was ready to go home with him for attaching the legs and finishing. At first he was dismayed at the “washed out” nondescript appearance, but I assured him the rich cherry color would soon return. Since it will be out on the porch for his morning coffee he will finish it with some thinned polyurethane for the greatest penetration and protection. I’m awaiting the finished pictures myself.
The conceptual core of this greenhouse design is an arched tunnel made from heavyweight metal grids, known as “cattle panels [fencing].” In fact that is what the product is used for, to fence cows in or out, and it is robust enough to withstand the rubbing of cattle against it. Even our little feed-and-seed hardware store in the middle of the least populous county east of the Mississippi has a stack of it out in the yard, and since the dimensions are 52″ x 16′ I was glad they could and did deliver it to the greenhouse site.
Unfortunately I failed to get a picture of my pile of eight panels, but here is one lying on the ground. They are #6 gauge so plenty stout.
These panels are not heavy but they are unwieldy. Think of trying to handle a full sheet of 1/4″ luan plywood in a windstorm. Once I got the hang of handling these panels and setting them in place on top of the knee walls it went fairly quickly. I first strung parallel lines on top of the wall sills, then drove in nails along those lines. The nails were proud about an inch to “catch” the ends of the fence panels as I placed them where they belonged. In an hour or so they were all in place.
I drove fence staples all along the bottom edges of the panels then joined the panel edges together with zip ties along the joints to yield a single 30-foot panel from the multiple individual four-foot panels.
This is going to be a marvelous addition to the homestead.
Most folks building this style of greenhouse simply drape it with plastic at this point, assuming (correctly) that the arched configuration could withstand all manner of problematic weather. I know this to be true but it felt a little flimsy to me, so I decided to build structural ribs to enhance the robustness of the arch.
Three Saturday’s ago I went to our friends Pat and Valerie for their annual apple butter day. It’s a local tradition that we have gladly glommed on to.
Great fun and fellowship abounded.
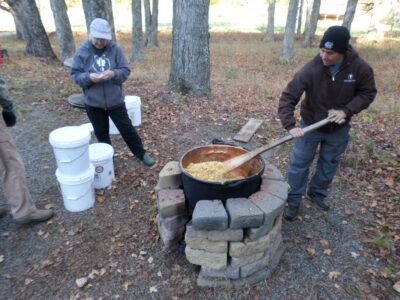
At the start, apple chips are just dumped into the copper cauldron and stirred with a canoe paddle.
There is a lot of standing around while we watch the person with the paddle. This is where the tall tales and gripes about taxes emerge.
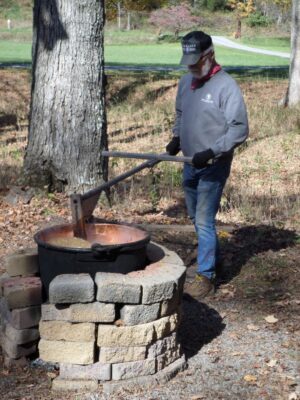
As it cooks down more apple chips are added and the stirring switches to a custom designed stirring paddle.
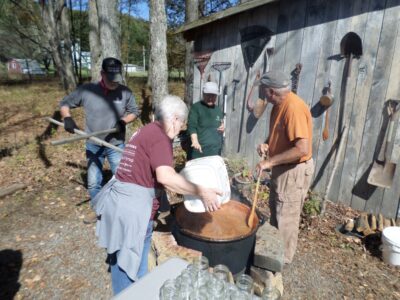
Hours later it is all cooked down and ready for adding the spices and sugar. Occasionally they make a batch of sugar free apple butter, that is the stuff we like. But this was a sugared batch.
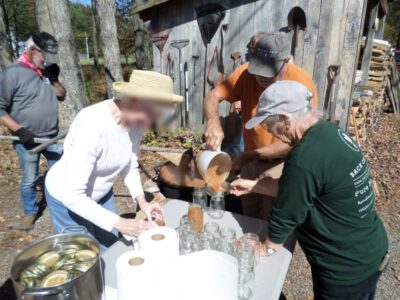
Once that is all cooked and stirred some more, Pat conducts an “all finished” viscosity test by depositing a dollop on the underside of a sauce pan. Too runny? Cook some more. When it is ready it gets canned in jars.
At this point my job was to carry the cases of still-hot jars into the sugar house for later labeling and, eventually, selling.
The big highlight is that after all the work is done, Pat’s sister breaks out the bin of fresh, still-warm biscuits we use to scrape the residue out the cauldron. The moaning of delight commenced.
There is no part of this video that I did not find captivating. The blend of traditional excellence with modern technology is simply sublime. It appears to be “manufactured housing” and if so, there is much we can learn from it.
With stout posts driven 36″+ into the ground I was ready to move forward and ordered the requisite 1/4″ hardware cloth to cover the entire floor space (to keep out all the little rodents that make Mrs. Barn’s gardening life one of frustration) and the pile of 2x8x10′ PT/SYP to build the knee walls and other components. Now that was a shock, as the price was 3X more than the last time I ordered any meaningful quantity of construction lumber. Those who are Inflation Deniers clearly do not comprehend either the definition of the term nor its manifestation. But Don, are you saying you are smarter than the President and Secretary of the Treasury and Chairman of the Federal Reserve and all those other “experts”?
Yup. Why that is would be another blog post, or better yet, in some other universe of discourse. Hint: it all boils down to the “Austrian” strain of economics.
I laid the hardware cloth and began screwing the 2x8s to the posts. I bought enough material for a four-course wall but Mrs. Barn decided three was better, so I managed to build my reserve inventory of that supply even more.
With the three courses in place, I fired up the chainsaw and lopped off the posts at the top of the knee wall. Carpentry by chainsaw is definitely a thing. Those scraps will become bench legs in the greenhouse configuration.
Setting the edge with string I lined up all the sill plates on top of the walls and posts, readying everything for the addition of the cattle fence panels that will form the arched roof structure.
Frequently, for both relaxation and edification, I watch videos of chainsaw magicians felling trees. Big trees, troublesome trees, trees leaning the wrong way, trees in the wrong place. As my own tree-felling is part of life on the homestead (I am confident in my ability to fell trees the size of my thigh, not confident in felling trees the size of my waist) I try to watch and learn. Other times I just watch to be captivated by the skills of these men doing this dangerous work with caution and confidence, sort of my version of ASMR.
This video documents the felling of the largest tree I have even seen, executed by a barefoot lumberjack working without eye or face protection for the most part, with a cigarette hanging out of his mouth a hundred feet in the air. Since I watched this with the sound off I am not really certain of the context of where or when this occurred.
We are smack-dab in the middle of a fortnight-plus stretch of simply spectacular weather, sunny days in the 60s and nights in the 30s and 40s. we are taking full advantage of the opportunity to get tons of outside work done. Matter of fact I have not been in the shop for nearly three weeks other than to package orders for mailing out.
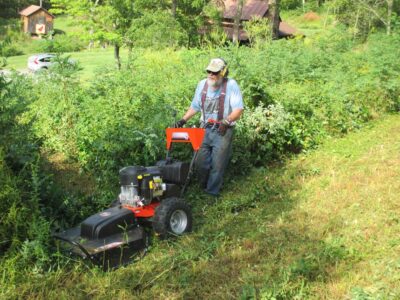
Thanks to our connection to a stout young local lad, we’ve been able to keep up with the routine yard work much better than years past. One of the things we really appreciate is his mowing of the large hillside area directly above the garden. It keeps the underbrush under control and the expanse of green is a delight.
A picture from eight years ago when I first got the beast.
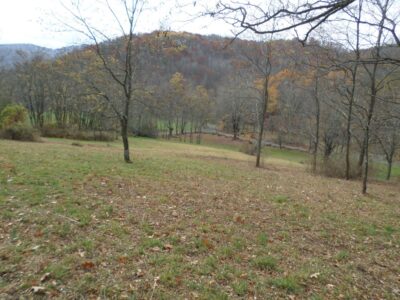
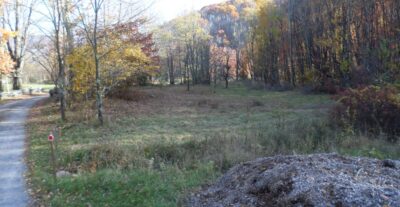
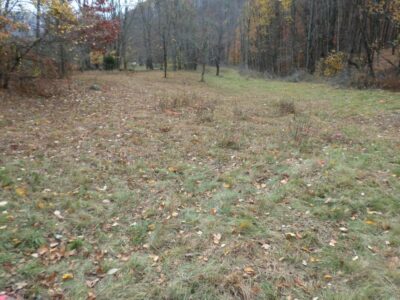
In order to expand that vista and perhaps make more space available for other things, an orchard is in the discussion, I spent several days with my DR Brush Mower whacking away at the ~4 acres of hillside adjacent to this mowed area. It’s the brown-ish area just beyond the green. I can only work on this about every third day as my shoulders need a lot of recuperation time these days.
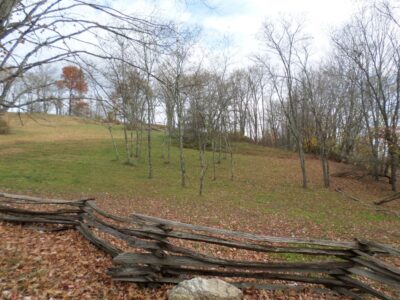
For the first time since we bought the property almost 25 years ago that section of hillside is all cleared except for the woodland we are keeping. With this step our young fellow is certain he can keep that area mowed as well. There is definitely a difference between a cautious old man with a $4K lawn tractor and a fearless 16-year-old with a $10K lawn tractor.
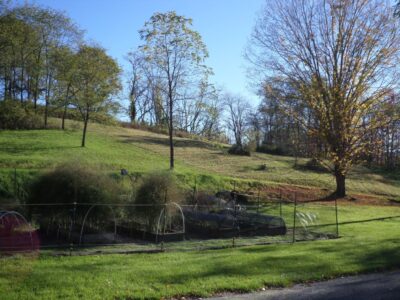
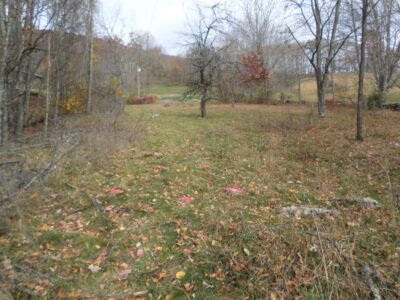
In addition I cleared a 1-1/2 acre section between the driveway and the creek, an area we always called “the orchard” since there were a few apple trees there. That field is chock full of large rocks and I walked it ahead of time, marking each big rock with fluorescent spray paint. It was still several hours of arduous work, with many more hours of work yet to come.
In no particular order here are a few updates that may be of interest to you.
During one of their interminable Updates to “improve” their platform WordPress changed the protocols for both the Contact and Comment functions. Webmeister Tim tracked down those changes (they were not self-evident), and I know at least now the Contact function works. I am less certain about the Comments utility.
I’ve been told that the first shipment of the back ordered Woodfinishing DVD is being shipped this week. Cross your fingers. Oh, the travails of using fulfillment service providers in Florida, a/k/a Hurricane Alley. Whenever the DVDs arrive I will immediately package and ship them to those three dozen of you who have waited so patiently and graciously for your order.
I’m keeping an eye on a batch of Mel’s Wax I made and packaged several months ago and will open the jars next month. If they are okay it will probably be back in the Don’s Barn Store around Christmas. The formulation is purposefully designed for archival properties rather than shelf life, so it’s always a knife’s-edge proposition. I could add stabilizers and preservatives and such, but then it would not be Mel’s Wax.
Finally, Webmeister Tim and I are in the planning and implementation stages for a YooToob channel featuring less formal “at the bench” type short videos (3-5 minutes) about projects and techniques. Right now, we need to settle on a cheap (free?) meat-and-potatoes editing application that is simple and easy enough for me to use but can still integrate two video feeds with the sound feed. At one time I had a long menu of formal videos I wanted to make, but since I cannot even finish editing the Gragg Chair video I am exploring this new path.
Stay tuned. For at least another week the weather is expected to be beautiful in Shangri-la so the outside/homestead work will take precedence over the in-shop time. Today I hope to finish up removing the detritus from the shack up on the hill, a project that was so rudely interrupted several years ago when the wheelbarrow broke my hip.


Recent Comments