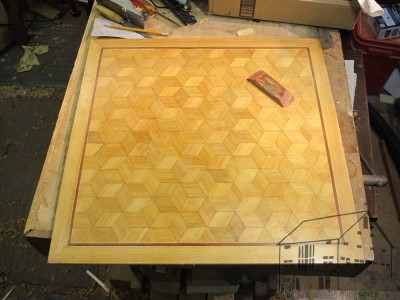
Last weekend I taught a three-day workshop on creating this parquetry panel a la Roubo for the Kansas City Wood Worker’s Guild, a delightful host if ever there was one.
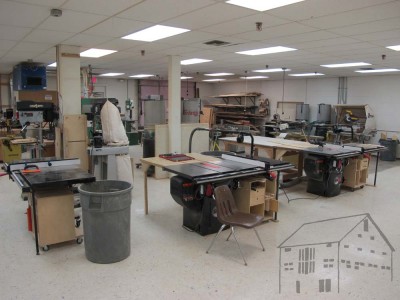
All you’ve heard about the Guild, its membership, and space is true and then some. they are positively at the top of the food chain studio-wise with a nice lecture space, and complete bench room, and a machine shop to die for.
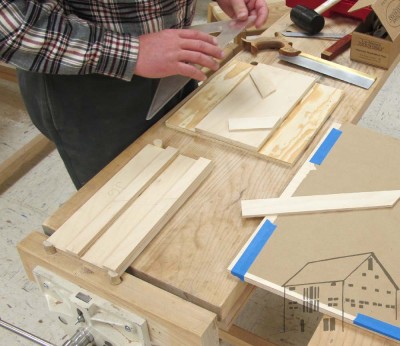
The first day began with a discussion of the project in general, but more importantly several specific tasks to get things started. First was the construction of two jigs necessary for the cutting of the 60-120-60-120 parallelogram lozenges that comprise the parquetry. One of the Guild members had prepared all the baltic birch plywood to make them, so all we had to do was cook some glue and assemble them.
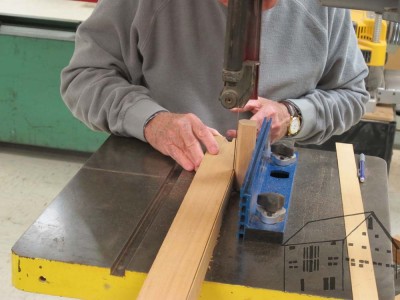
Next came the ripping of the lumber into the veneer strips from which the lozenges were cut.
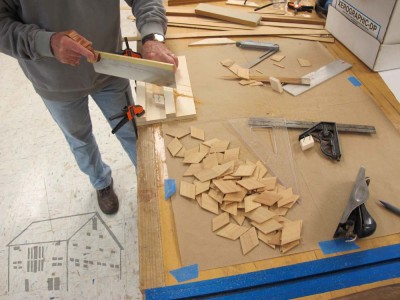
Following that was the cutting of lozenges. By the hundreds.
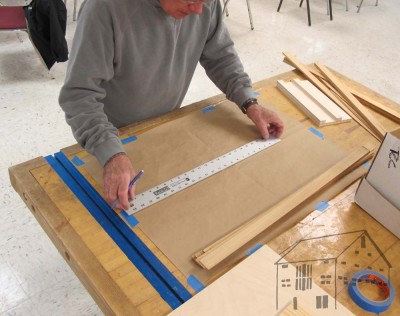
Since the pattern is first assembled and glued precisely onto heavy kraft paper, the needed to be divided exactly on both axes.
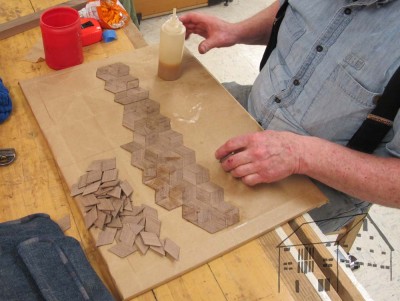
Finally came the assembling and gluing on the paper. this is actually more difficult than it seems and can be quite a challenge for newcomers until they get the knack of it, something I will be addressing in a blog in a week or so unless the spirit moves me to make it sooner.
More tomorrow.
About a month ago, a mere three weeks before I was set to leave for Woodworking in America, I received a note from Jay Christian, Program Chair for the Washington Woodworker’s Guild, reminding me of my presentation to them on the evening of October 15. Immediately I checked my calendar and smacked my forehead. I enjoy presenting to the Guild and have done so close to a dozen times over the decades, but this one presented some scheduling problems.
The evening for my scheduled presentation coincided with my plans for packing so that I could depart for Cincinnati the next morning. Given the late date of the reminder, I felt there was no way I could ask the Guild to reschedule and so I simply proceeded with the presentation as scheduled.
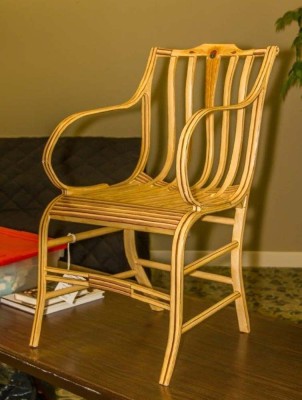
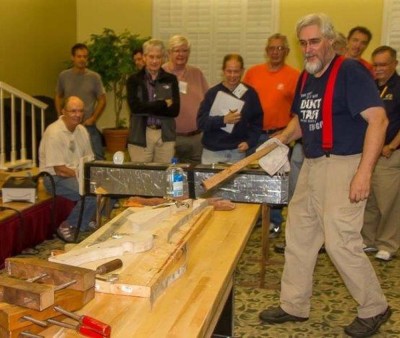
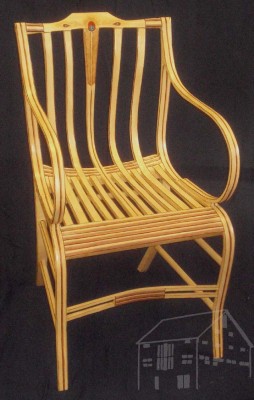
My topic for the evening was the steam bending of parts for the construction of the Gragg elastic chair, one of the favorite research projects from my nearly three decade long career at the Smithsonian Museum Conservation Institute. I’d shown the chair at a previous meeting’s “Show and Tell”, and they invited me back to show exactly how I was doing it. I will be blogging extensively about the two Gragg chairs I am building over the winter.
Much to my delight my protégé Daniela was able to arrange for her husband to watch little Pedro so she could attend. That was exceedingly helpful as she and I had worked out a choreography for the necessarily rapid forming of these complex parts.
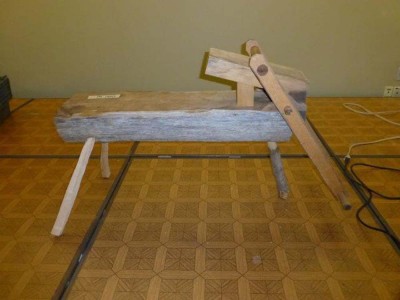
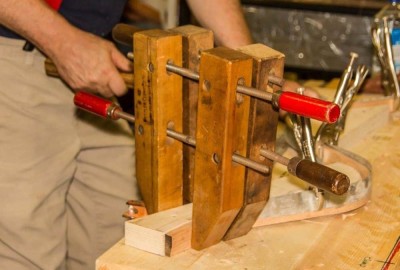
A demo of this type requires a large inventory of materiel, tools, and devices, including my petite bodger’s shaving horse built from a recycled half log that used to be a door header from a log barn and a variety of scraps from the wood pile.
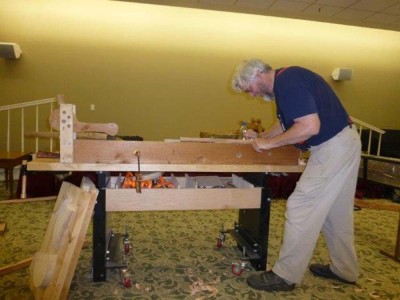
Another favorite fixture is my shaving beam that can be clamped to a work surface. The beam has a mondo cam clamp at one end and a tiny wood screw at the other, so I have a lot of flexibility to either pull or push a tool against the work piece. It is a genuine favorite accessory, and is used extensively when preparing the stock for steam bending.
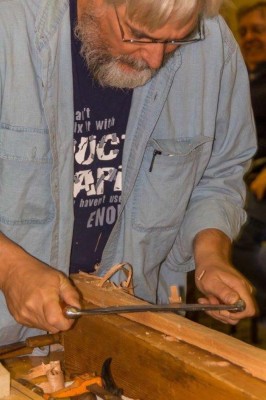
I covered a wide range of topics including harvesting, and demonstrating splitting, and riving, shaving, and planing the oak stock.
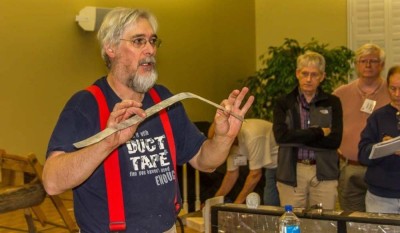
The tight serpentine form of the major side element for the chair — it begins at the crest rail of the back and ends as the front foot — requires bending straps to help everything bend without breaking.
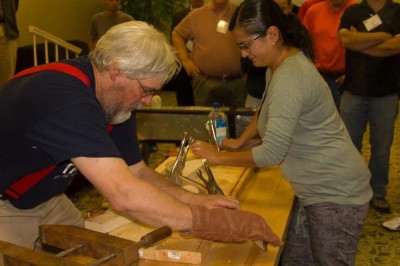
Once the piece has cooked properly, in this case for about 20 minutes once the steam chamber gets to proper temperature (about 180 degrees or a bit more) out it comes. It is as hot as you would expect, and often I use welding gloves.
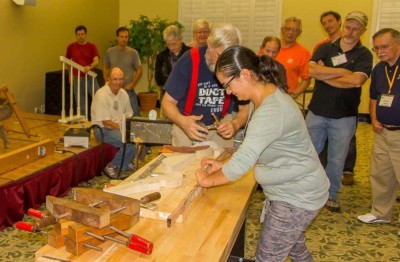
To make things move more quickly I marked out the locations for the straps on either side of the element, and we quickly clamp them in place with Vice Grips. We only have about 60 seconds to get everything done. We almost hear the clock ticking in our brains as we get going.
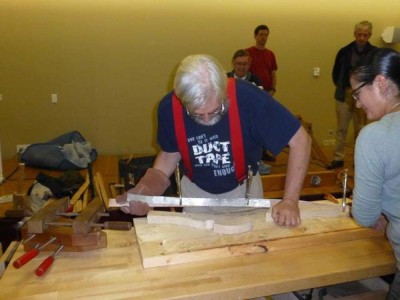
At thirty seconds I’d better be wrapping up the first curve, setting up for the opposing second curve. Haste is not helpful if it is jerky. I have to work steadily but quickly.
By the 45 second mark I need to be working on the second of the serpentine bends.
The last step is to tighten the wood screws that inflict the return sweep onto the bottom of the front leg at the 60 second mark.
Done! This bend went perfectly.
While I had hoped for a 9PM conclusion, between my longwindedness and the audience’s enthusiasm it was more like 10.30 before we got all wrapped up and on the road, and 2.30 Wednesday morning before pulling up at the cabin. The next morning we unloaded, reloaded, and spent nine hours driving through the rain to Cincinnati.
Photos courtesy of Barry Ingram and Joel Jacobson
… of course, you get ready to make 100 Gragg chairs!
Departing home the other morning for a manly breakfast with my woodworking friend TomS I encountered the roar of a chain saw and the necessary surrounding activities at my neighbor Bob’s house. As a dead-tree sorta guy, I was compelled to stop and check it out. It seems that Bob was removing some mature trees that had become a risk to his home. As someone who just last month replaced a chunk of roof as the result of tree damage, I am entirely sympathetic to the sentiment.
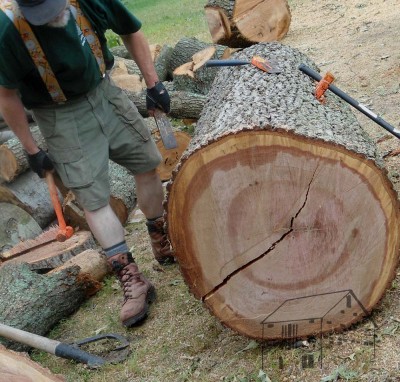
As I got close I saw the last vestiges of a red oak, standing stark against the sky. All I could think was, “There’s at least 100 Gragg chairs on the hoof!” I asked Bob if I could have it, and when he said, “Yes,” I asked the tree-trimmer to leave it in 5’ long logs for me on the ground.
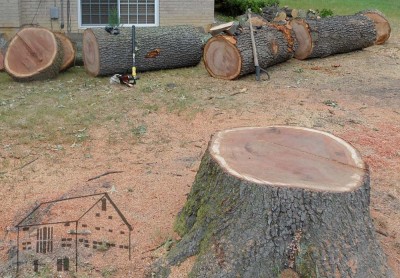
When I returned from breakfast, there the 6′ logs were neatly on the ground awaiting my ministrations. And how magnificent they were! The bottom section was well over 36” diameter, and the successive ones an inch or so smaller. The upper two did have some branch stumps, but it looked like there was plenty of meat left to salvage.
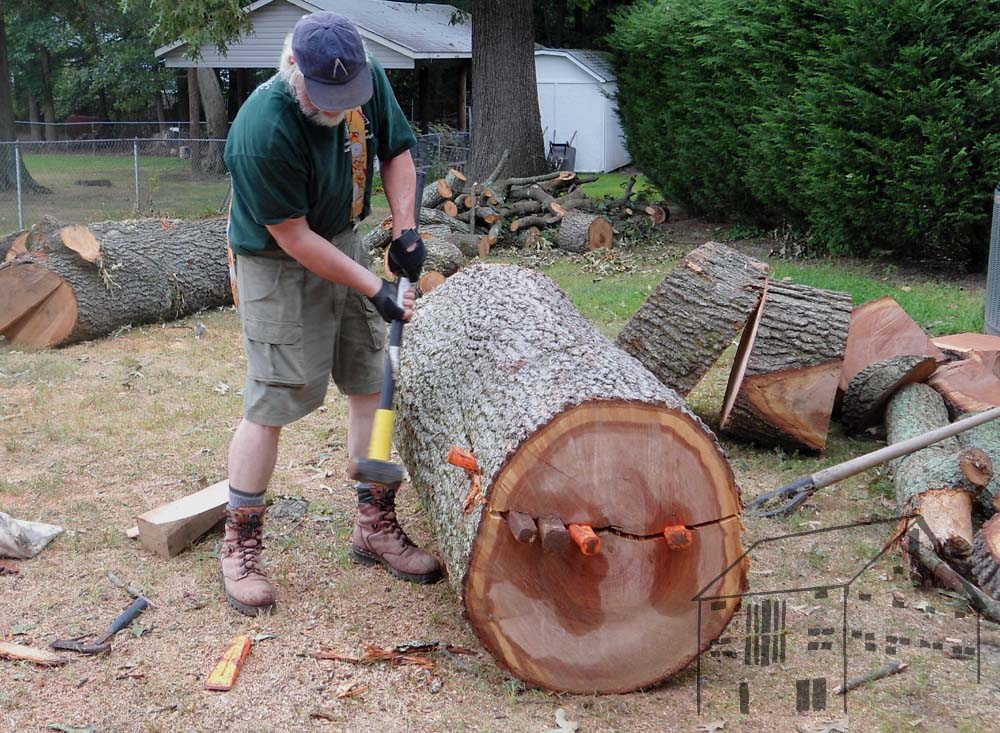
Thus began my unexpected nearly two-week adventure (thus far; fitting it in amongst a full slate of home improvement projects in preparation for moving was, shall we say, domestically challenging) in reclaiming some spectacular wood from a suburban neighborhood, using only sledge and wedge. Fortunately TomS has tutored me well and the harvesting proceeded well. Not easily, but well.
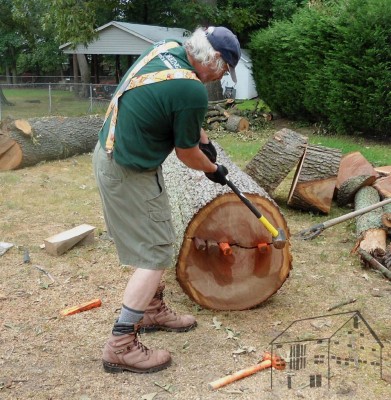
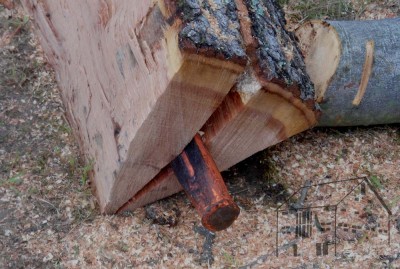
With Bob’s grandchildren watching along with him and another neighbor, I began by identifying the natural fault lines of the log, and drove in the first wedge. Then another. And another. Within a couple minutes the cr-a-a-a-a-ck of sundered wood filled the air. BTW, Bob’s granddaughter C graciously agreed to take some pictures. I had hoped she could portray me as young, slender, handsome, rich, and suave. She mostly failed at that, although my loss of 85 pounds over the last 12 years is evident.

The kids and adults alike watched in wonder as over the next half hour or so I split a nearly 3,000 pound log in half.

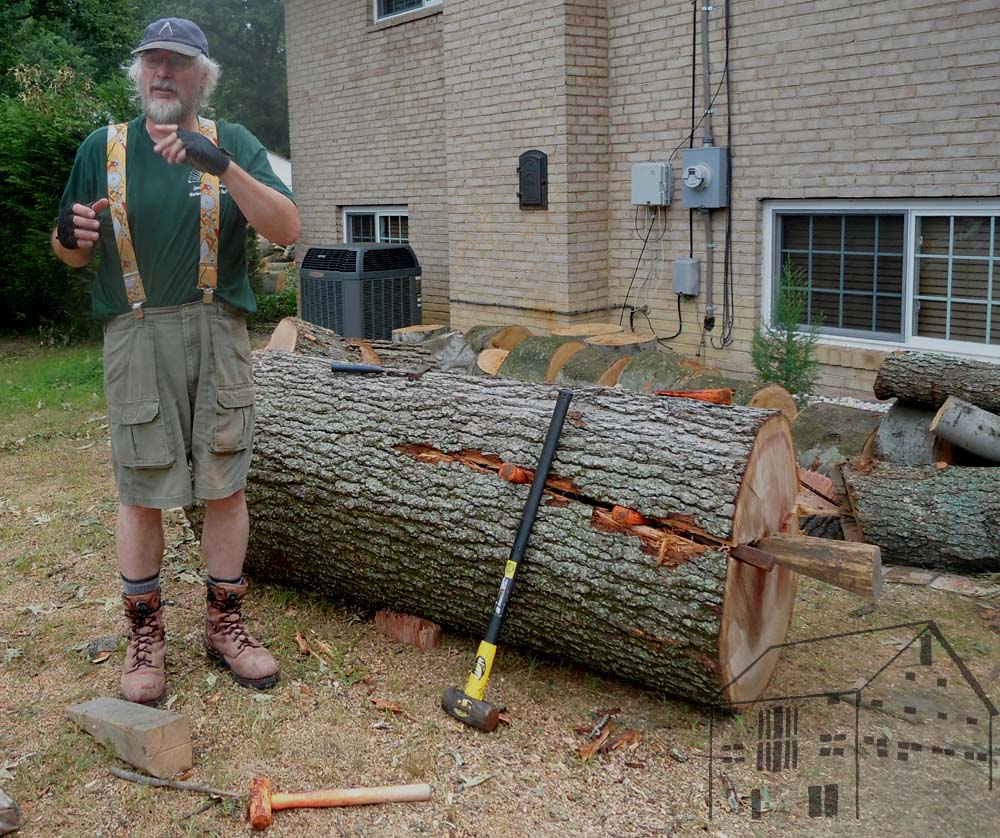
I had the pleasure of stopping periodically to explain what was happening to Bob and his grandkids. They thought what I was doing was almost magic.
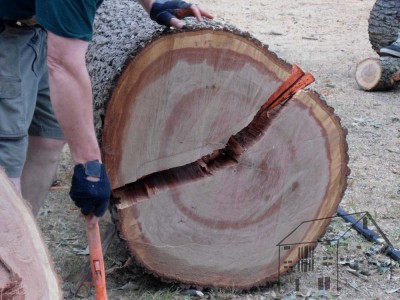
Following the “Rule of Halves” that TomS taught me – always split a piece of wood in half to keep it balanced and splitting evenly – I then split the half into quarters, then the quarters into eighths, all on the radial plane.
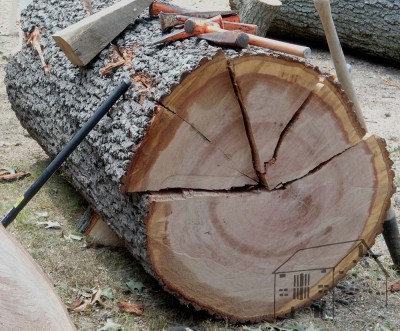
In an hour or so I had those four sections free and ready for further work, all while using the lower half of the log as my “work platform.” I don’t do this sort of work regularly so I am pretty slow.
Moving the “eighths” to the ground I split them one more time into “sixteenths.”
They were still exceedingly heavy, too heavy to load into my truck (which was the ultimate goal for the exercise – they needed to be moved out of the way ASAP.)
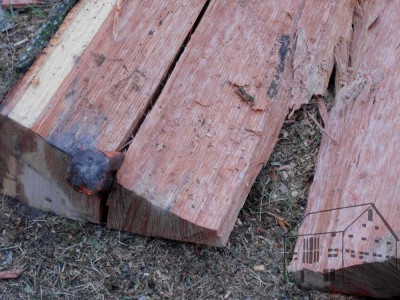
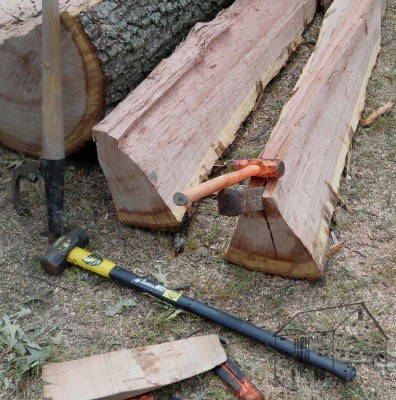
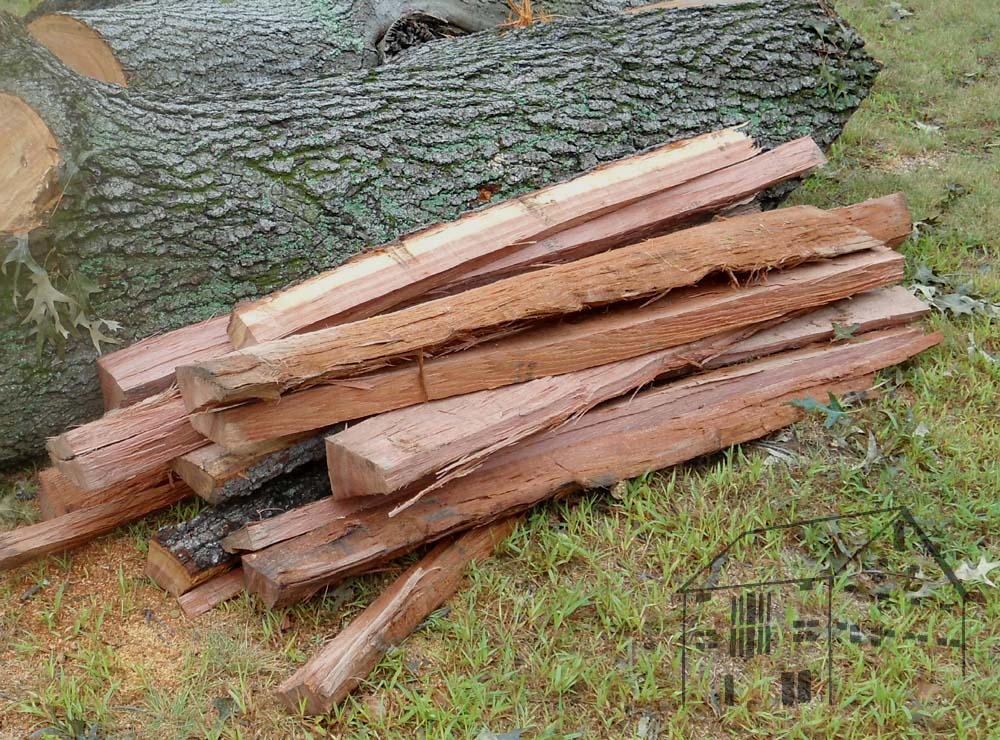
So, each “sixteenth” was split but on the tangential plane, and each of those two 32nds were slated for a second tangential split.

The firewood pile of pith was sizable and grew quickly.
The inner section was easily split with the pith being discarded into the firewood pile, but the sapwood was simply too squishy to split. I will return to them for that step perhaps in a month or so once it has dried a bit and will split more easily.
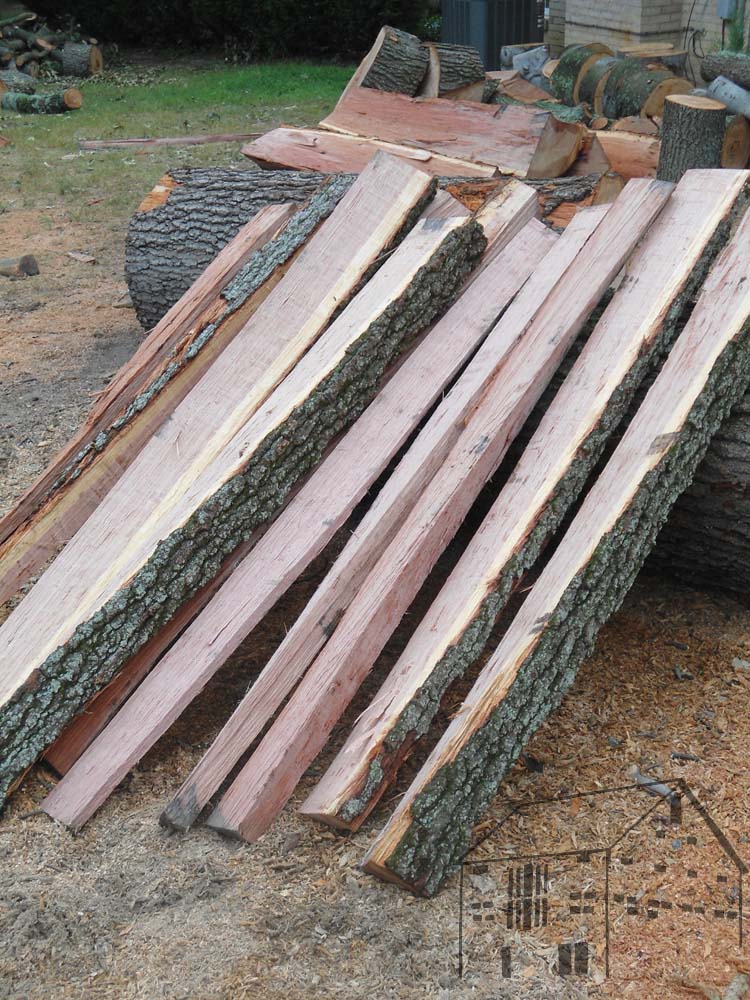
Sharp eyes will note that the splits have a bit of wind to them, perhaps 10 degrees give or take. While that might bring on the vapors to someone building 17th century board furniture, for me that is no problem. Virtually all of the elements I employ in constructing Gragg chairs have been reduced to approximately 5/8” x 1-1/4” cross sections, and once these are steamed they pretty much submit to my demands for them to conform to their bending forms.

This was the harvest from the first QUARTER of the first of three logs! After I get done with this, it might be decades before I need to do it again.
It took me two pretty full days to harvest just the first (bottom) log. My arms hurt all the way to my knees, or perhaps it was my knees that hurt all the way to my shoulders. The yield, even with the inner quarter missing when I split off the pith, was probably close to 2,200 pounds. All I know was that my little truck was groaning as I loaded the pile and moved it to my place two houses down. Since wet oak is about 45% water that weight will diminish naturally over the coming months, and will be helped by a fairly rapid loss of about 1/3 as I split off the sap wood.
A complete full-arm/continuous-leg Gragg Chair requires about as much steam bent oak of the size of a standard 8-foot 2×4. At this point I think my inventory of raw materials is approaching 150 chairs. I only have two chairs commissioned thus far, but when I get more orders and have streamlined my process enough to host a workshop on building them, I’ll be ready.
But for now, I’m only 2/3 of the way towards getting these beauties out of Bob’s yard, to be followed by a lot more work getting ready for use and even more in making the chairs.
Stay tuned.
I just finished a few days of production of glazed doors for the library bookcases. It gives me all the more respect for those artisans to make acres of kitchen and bathroom cabinetry. I am not really set up for large scale joinery production, but great progress was made nevertheless.
 In following Occam’s Razor, the philosophical construct that suggests simplicity as the best answer to a convoluted question, I decided to make exceedingly simple glazed doors using the pile of southern yellow pine I had left over from the barn flooring along with a dozen or so sheets of plexiglass from a house project that never materialized (it actually evolved into a much better one). Of course I overlooked the inverse of Occam’s Razor, namely that the simpler the structure, the greater the need for skillful design and execution.
 My plan was to build open faced mortise and tenon corners (bridle joints) using my table saw to cut all the joints. In principle the idea was fine, but in practice, let’s just say that a $25 saw from Craigslist is probably not the one you want for such a process (especially when the fence is such a piece of garbage it almost isn’t even worth the effort to throw it out the door). But, it was what I had on hand. My Unisaw was back in Maryland, along with my home-built but perfectly useable tenoning jig.
 The first thing I needed to do was make a simple tenoning jig, which I did. Then, I cut all the open mortise shoulders on the rails, which were purposefully 1/2″ wider than the stiles. This went smoothly. I was left with several score of identical wooden tiles, which I gathered to save for the myriad times I need a small shim or spacer.
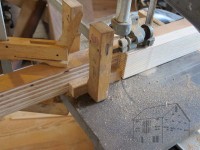 Cutting the open tenons was not so easy as the tenon length, corresponding to the wider rail, was deeper than the saw blade could cut when fully exposed by almost a half an inch. Grrr.
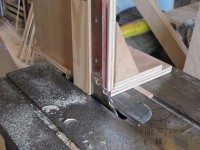
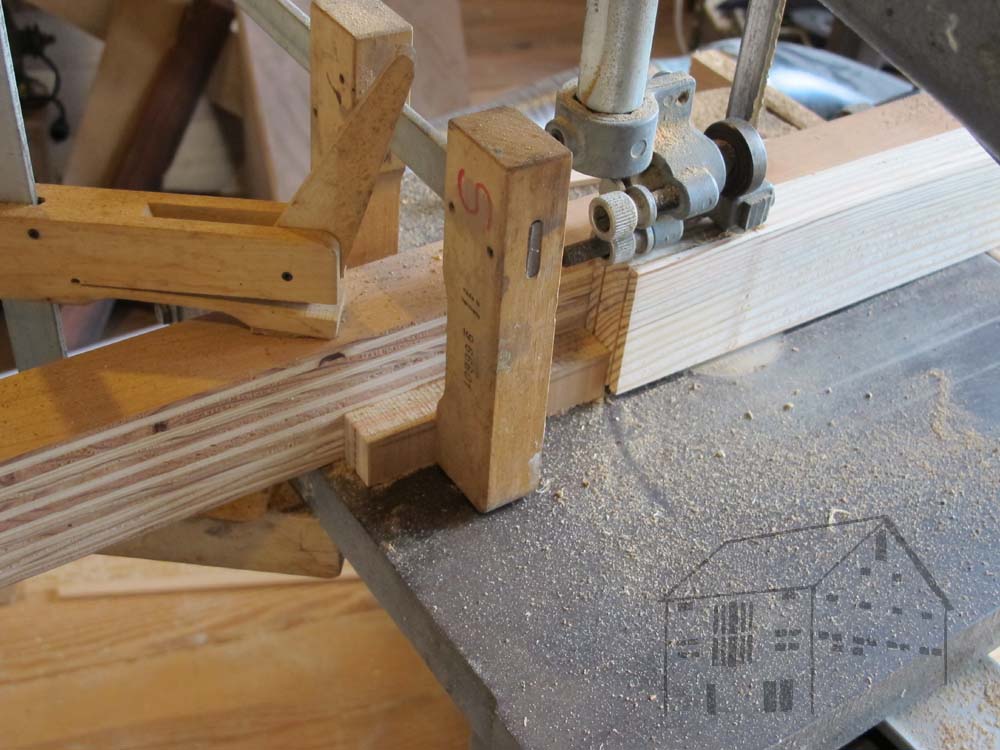
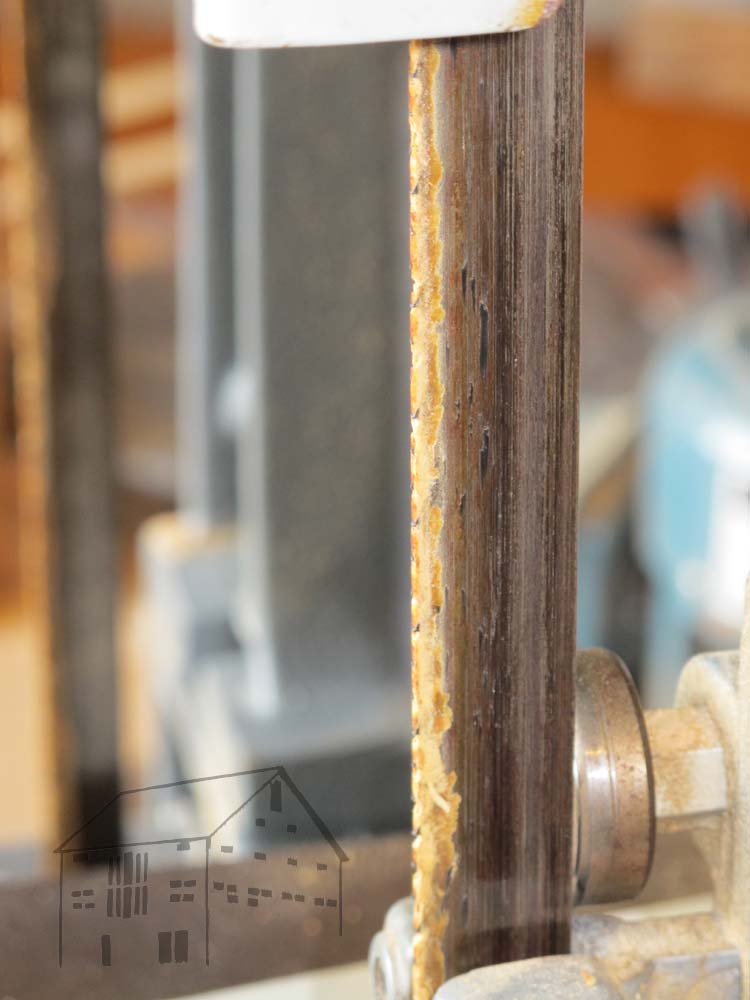
 Quickly I set up the band saw to make the necessary shoulder cuts and it went fairly smoothly. Near the end things began to bog down a bit, and you can see why here. Even though well dried (almost three years for 5/4 stock) the rosin in the southern yellow pine was so gooey it clogged the 3/4″ 4 tpi blade. The only reason it worked as long as it did was the friction kept the rosin soft, so the saw blade could still do its work. Once I stopped the pitch cooled and hardened into a rock. I will either need to clean the blade completely or throw it away. Fortunately it is not my only blade.
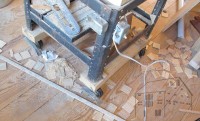
 Since the glazing was 1/8″ plexi, and I like fully housed glazing, I ripped an off-center groove on the inside edges of all the door elements into which I would insert the glazing. In retrospect I should have been more careful to line up the groove with the outer edge of the tenon. It would have made the fitting of the corners a lot cleaner, but then so would a well-performing table saw.
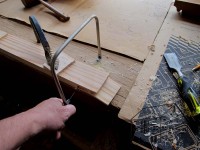
 I moved to the work bench, my first Roubo model, and trimmed the shoulders of the tenons and cut the blanks from the open mortises with a coping saw. It literally took only ten or fifteen seconds per mortise. Most of the corners fit together without further attention, a few needed a handful of strokes with the rabbet plane for them to slip together.
I then glued the frames together with the plexi sheet inserted, and when dry they were ready for trimming and installation.
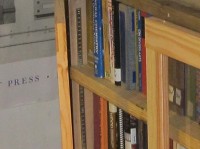
 As a sop to motivational psychology, I temporarily installed two pairs of the doors and filled the cases with books. This fatuous gesture was very encouraging. When I return probably at the end of the month I will assemble the remaining doors, and finish the detailing of all the doors before I install them and load the units with boatloads of books.


Recent Comments