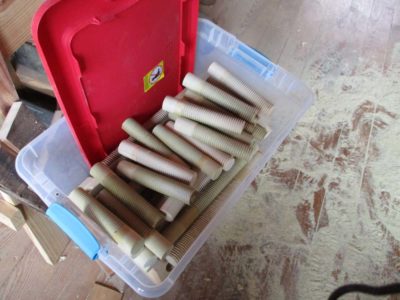
The final large scale undertaking for the trip to teach in Arkansas was to make the wood screw sets for both the face vise and the Moxon vise, enough for ten benches. There was nothing special about it other than the scale of the work, in total I made 20 long screws and 20 short screws.

Again I doused the tulip polar dowels with acetone-diluted epoxy and set them aside, moving on to the octagonal knobs.
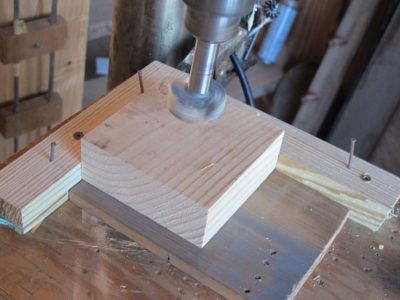

I ran off the 60 squares needed for the knobs (the face vise hubs were double layers) then moved to the drill press to punch the center holes into which would go the threaded dowels.
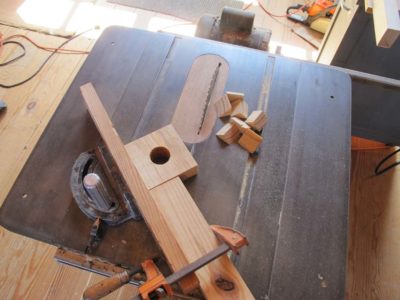
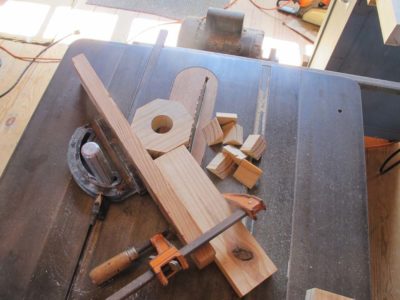
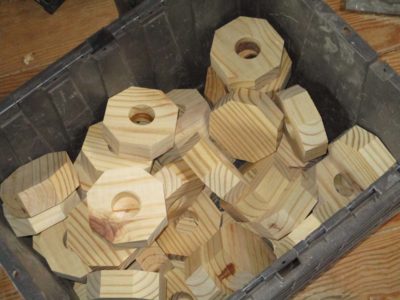
Once I had the requisite pile of holed blocks I returned to the table saw and octagonalized them. I must say that drilling the holes first made it a lot easier to handle them in this process, there was always somewhere to grab to hold them firm against the fences for the miter cuts.
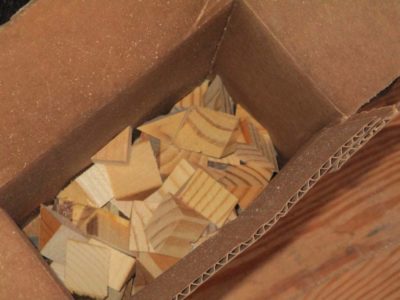
A pleasant by-product was a box of glue blocks from the off-cuts. I’ll set that aside and will no doubt use them over the coming months and years.
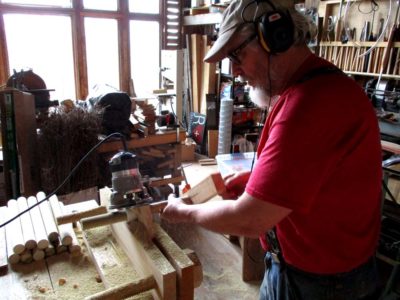
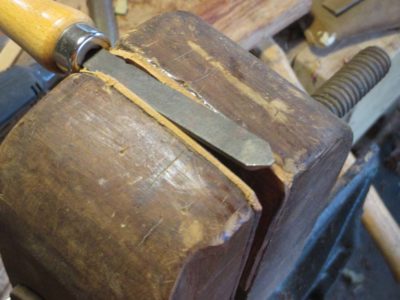
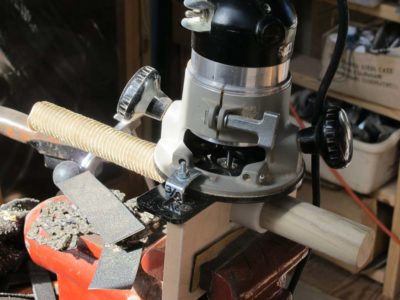
I dealt with the long screws a little differently from the short screws at this point. This had to do with the arrangement of the Beall thread cutter. With the long screws passing through a double thickness of stock for the movable jaw I could get close enough to the thread cutter for the threads to work fine by making a split handle to hold and turn them. This was not true for the shorter Moxon screws, so I fed them by using a small plumbers wrench as a grip to get the threads far enough toward the head.
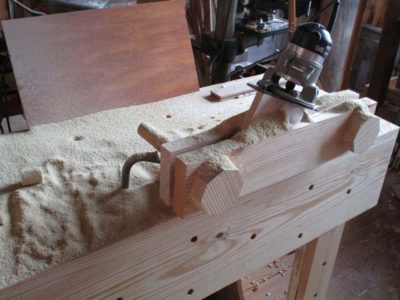
Off to the thread cutter, where a couple hours of concentration and labor ensued. Before long I had a large tub of thread stock.
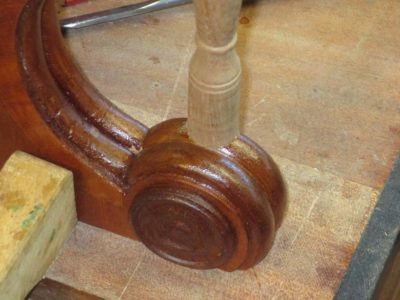
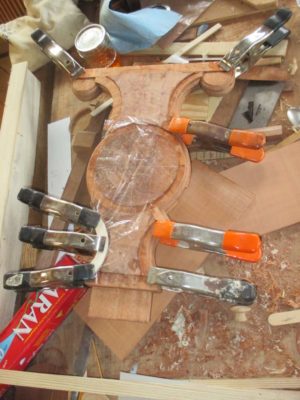
I glued the knobs on them using yellow glue.
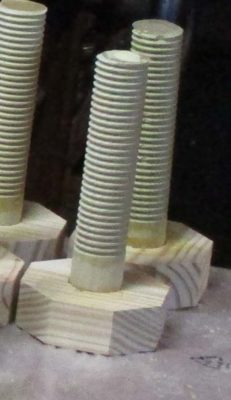
At this point the shorter screws were finished. As for the longer screw’s doubled knobs I trued up the octagons with a Shinto rasp and drilled the pass-through holes for the handles they were finished, too.
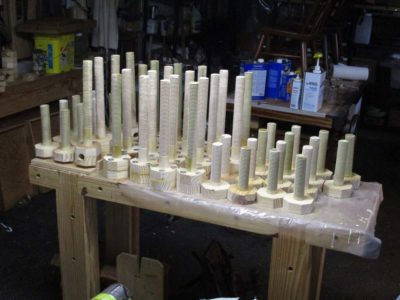
Two full tubs of vise screws and it was time to move on to the next thing.
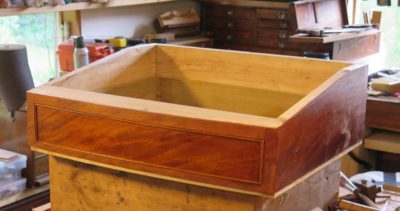
Making and installing the spindles that would tie together the shelf and the writing box was the last major complex fabrication step for the desk. It was also perhaps the most stress inducing aspect of the whole project; it was not difficult per se, just a very fussy layout exercise with zero margin for error.
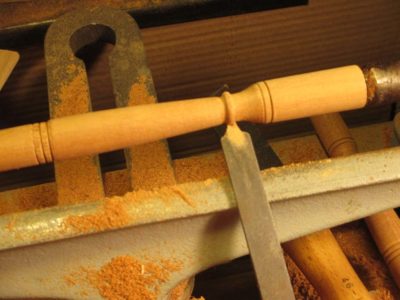
The turnings themselves were straightforward. I made a measuring template and a sample to send to the client, and got to work after getting approval. Turning premium vintage mahogany is a delight. Some of the details of the spindles even provided the opportunity to make and modify some tools. Since each spindle had several half-round elements of just under 1/8″ it was worth my time to take a no-account old turning chisel from the drawer and regrind the tip to the right profile to make it effortless to work. I tried it out on a sample to make sure then proceeded apace.
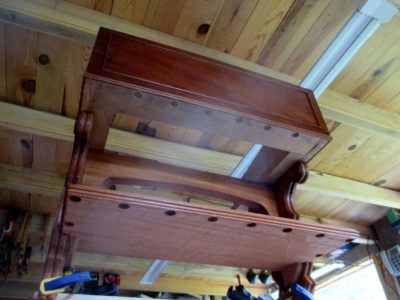
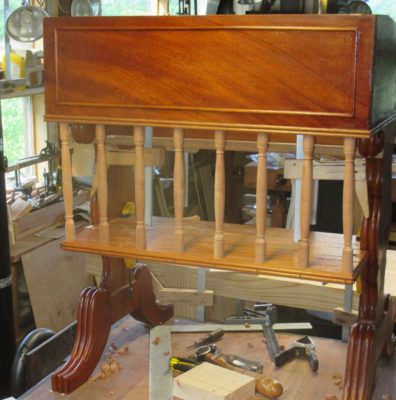
I needed to make sure that the spindles were precisely sized, as their installation required sliding them up through the holes in the shelf and into the corresponding holes in the underside of the writing box. I spent more time laying out, then checking and double checking before drilling the holes. I was relieved that they all went in exactly as planned.
The fussiest part of the whole undertaking was fitting the two spindles on either side of the shelf. These had to be drilled and fitted into the underside of not the writing box but rather the “ears” of the legs. Careful layout and a steady hand served me well.
With the workbench itself completed it was time to move on to the two twin-screw vises for the unit, one face vise and one “Moxon” vise for temporary use on top of the bench.
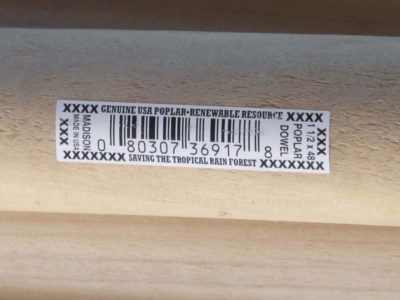
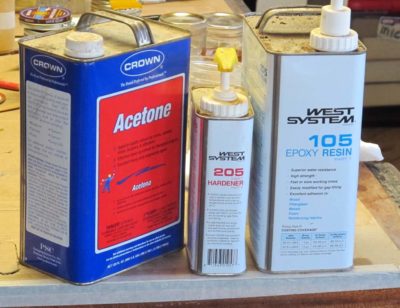
My first consideration was the stock for the screws themselves. For all the screw making on this unit I used 1-1/2″ tulip poplar dowels from Lowes; it was clear, straight, cheap and readily available. But, in a previous undertaking of refitting my Roubo saw-bench with new screws, I had observed ferocious tear-out when using the Beall Wood Threader due to the softness of the wood. I think the Beall system was designed for use on dense hardwoods like maple or tight-grain oak, but all that meant was that I had to turn tulip poplar into something that behaved like a harder, tighter grain wood.
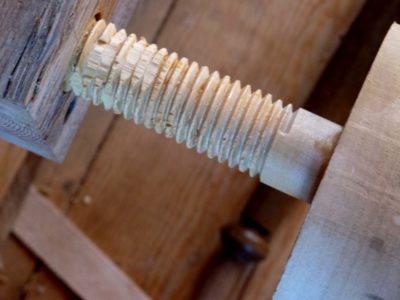
My resolution of the “tear out” problem was to impregnated the dowels with a dilute solution of epoxy and acetone. I mixed a small batch of epoxy, thinned it 50/50 with acetone and brushed it on the dowels. It soaked in well, and was hard in 24 hours. The result was to reduce “tear out” by more than 90%.
Even the “feel” of the impregnated screw stock was better when feeding through the cutter. With this problem addressed I could charge forward. Goo thing, as I not only had to make the four screws for the prototype bench but for another ten benches as well in order to get ready for the Arkansas workshop.
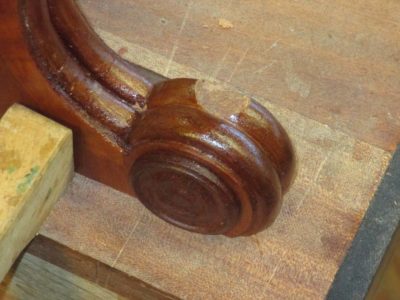
The final few steps of the construction phase of the desk project were to make and fit the mid-level shelf, make install the single and double beading moldings on the box, turn and install the spindles that suspended the shelf from the underside of the writing box, and turn the roundels that adorned the “ears” of the legs. Each of these operations will be dealt with separately beginning with the shelf (I’m not sure I’m getting the blogging order correct, but you’ll get the whole picture by the time I finish).

The mid-level solid slab shelf was partly cantilevered off the “leg” units, fitted into notches on the double bead moldings on the edge of the leg and sitting on simple glue-block brackets on the insides of the legs. Placing and affixing the shelf was pretty fussy work, nothing especially complex but the key was working slowly and carefully. I started by tacking a scrap into the location of the support blocks on the legs and rested the shelf slab on them to get the notching on the moldings correct, easily. (The actual finished mahogany support blocks will be visible in the offering about the spindles upcoming)
With the shelf slab sitting on the temporary supports I marked the locations of the notches on the moldings with a fine saw, then excavated with the saw and chisels.
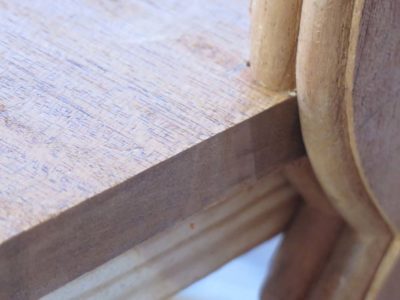
The fit was darned near perfect, especially once I beveled the contact edge on the shelf where it connected with the notch.
At this point the only further work on the shelf per se was to add double beading on the edges, using a bronze scratch stock tool from LNT, followed by my home made scratch stock to removed the shoulders of the profile.

Recently we had our first day of production for the “Making A Gragg Chair” video. We had been waiting for several weeks to get a beautiful day to film outside while I harvested the wood for making the chairs that will be documented in the video. Full disclosure — I will actually be making three chairs more or less simultaneously so that we can use subsequent production days most efficiently, getting several consecutive steps recorded on the same day by having three chairs at different points of the construction.
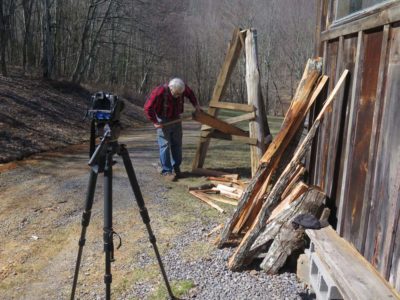
So this beautiful day was spent splitting wood up the mountain with wedges and sledges, then on to a mallet and froe in the riving brake next to the barn. The setup for the latter was new to me so it was a bit awkward getting into the swing of things, but due to the magic of video editing it might actually look like I know what I am doing.

We also shot the introduction to a Special Feature we will be including on the video, and probably on the web as well, as we record the entire process of me conserving my own damaged chair.
One of the things I am trying to keep track of is the amount of time it will take me to build one chair from start to finish. I would love to teach a workshop on building Gragg chairs but I need to get the time down to seven days max, six days preferably. I suppose once these chairs get down I will build one from scratch as fast as I can to see if it is a reasonable project for a workshop.

During the time I was working on the fancy veneerwork for the legs, the drawer had been sitting minding its own business at the other end of the bench. Unfortunately and unbeknownst to me in those intervening weeks the finished drawer, complete with matching veneer and bead edge, decided to act like an elected official and go crooked on me. When I picked up the drawer to put it back into the writing box I saw that it had racked and twisted almost 1/2″ from corner to corner and would only go into the runners part way. I could have dealt with 1/16″ with a little bit of shaving and a little bit of shimming. But this require pretty drastic intervention.
The problem was both vexing and perplexing. I had specifically selected a piece of very old tulip poplar for the structure of the drawer, yet here it was, gone all potato-chip-ie on me. At the very least I would have to trim the dovetails and hope I could get it all back together, flat. The edge beading that trimmed the edges of the drawer face was completely sacrificial and I knocked that off with a mallet and chisel in short order. An hour in a water-filled trough released the rear dovetails and the back slat of the drawer, but the front was a trickier issue.
My first and foremost consideration was NOT damaging the veneer on the front of the drawer as that was carefully matched to the surround on the desk. If I screwed that up I would have to saw a whole new piece of veneer from the prized figured plank, and I had zero interest in that. Since the veneer had been applied to the curved front of the drawer with hot hide glue all it took was immersing it in hot water and letting the glue line relax to remove the veneer and get to work solving the problem. No problem, right? We’ve all heard this was the Achilles Heel of hide glue, that it was not robust and prone to failure in high-moisture environments. I placed the drawer face down in a plant trough and poured in the hot water. I checked back in a few minutes and nothing had happened. Well, the finish had bloomed but that was irrelevant. The veneer was holding firm.
I did it again.
No change.
And again.
No change.
I left it in the water trough overnight and checked it again in the morning.
Still firm.
In aggravation I dried off the drawer front and removed all the shellac finish. Using my tacking iron and spatulas I rubbed the heated iron (over a wet rag) on the face of the veneer and gently worked the spatulas underneath the veneer to separate the glue line. It worked, but took over an hour of nerve-wracking time.
I set the veneer aside, undamaged but a little warped as you might expect. But certainly salvageable. I put the drawer front back into the water trough overnight and was able to disassemble the dovetails to see where I could trim the joinery to get it to fit snug and flat.

But for whatever reason this piece of clear, vintage wood had twisted and there was nothing I could do to un-do that. I won’t describe the whole process of trying to re-use and re-fit the original components — I think I have exasperation induced amnesia on this chapter of the tale of woe — but in the end decided to build a whole new drawer front. The drawer sides and back were just fine, but that bowed drawer front was, as my beloved Mom might say, a stinker. (My mother is among the most gentle, even tempered people I have ever met, and I never heard an uncouth word cross her lips. She once, however, described a troublesome co-worker as, “A real stinker,” and I knew he must be The Spawn of Satan.)

So I fabricated new new drawer front from a different piece of lumber, also vintage tulip poplar, cut new half-blind pins, and reassembled the whole. New edge beading, relaid the veneer, and newly finished.
It was perfect, and held true until the desk was finished and delivered. Whew.
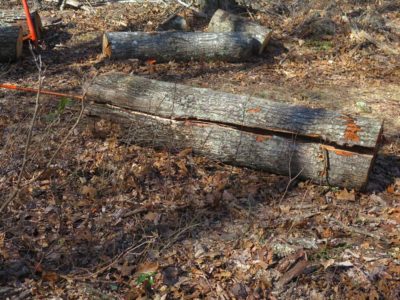
With the commencement of production for the video “Making A Gragg Chair” steaming down the rails I thought it would be good to get back in practice splitting logs I had culled from last year’s harvest up on the mountain. As soon as the mud dried out I drove up there and started wailing away at one in particular. As I already recounted the initial results were not heartening. The last time I split some giant logs was a couple years ago and that went perfectly. Had I forgotten how to split a log?
A second log went much better but I had left my camera in the barn so you’ll have to take my word for it.
I also had long desired to build a riving brake, a tool I had never before possessed. Now was the time to spend part of an afternoon doing so.
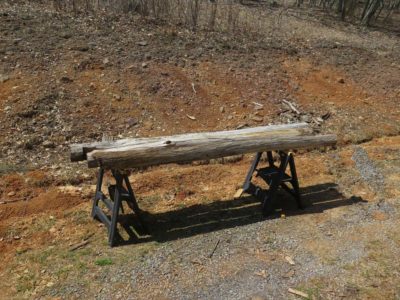
When my brother and I rebuilt the lean-to on the lower log barn lat year I was left with a half-dozen ancient chestnut poles. They seemed to be perfect candidates for the project.
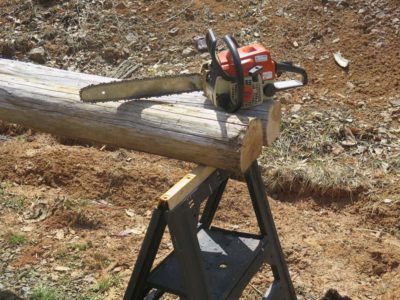
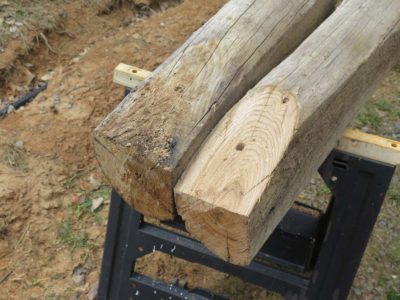

Using precision woodworking processes I trimmed the ends of the logs to allow for whisper-fit angled joinery.


That joinery was accomplished with a low-speed high-torque drill and a length of 1/2″ threaded rod and nuts. With some judicious use of leveraging I got the tripod up on its feet.
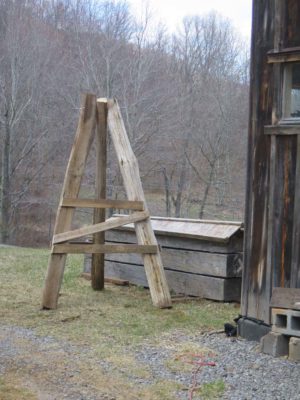
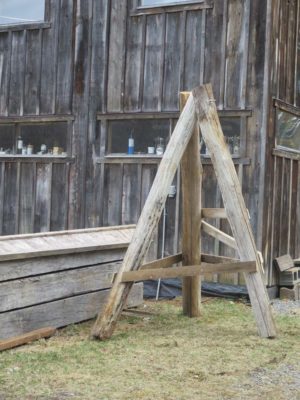
I added the cross bracing and it was ready to put to work.
I’ll see if it is as easy to use as Follansbee makes it look.
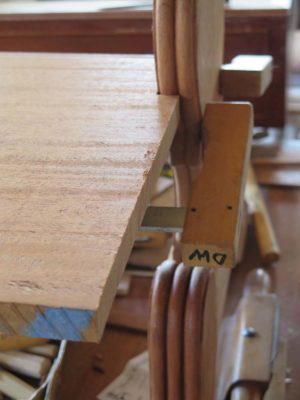
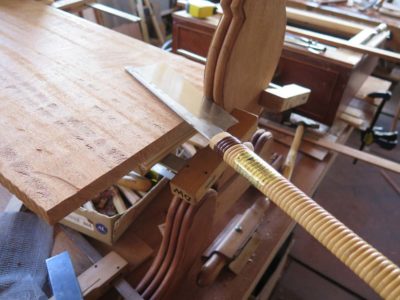
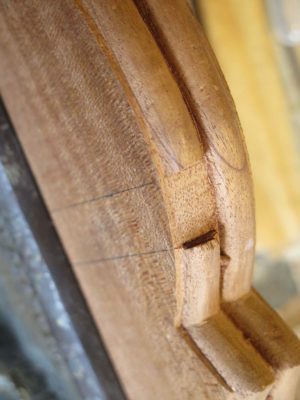
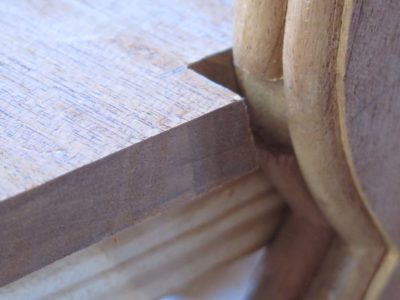
The general approach to constructing a Nicholson Bench, an essentially “stick built” structure, is to assemble the legs into two end units and attach the aprons and top to them. This time I tried something a little different just to see how it worked. I assembled the legs to the aprons first, then added the end aprons to tie the four legs together. I found the approach neither more or less beneficial than the other.

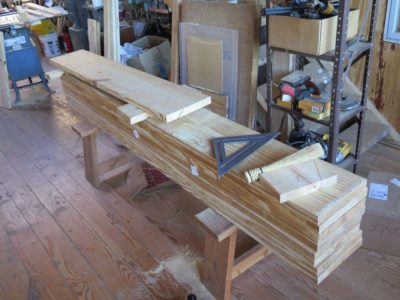

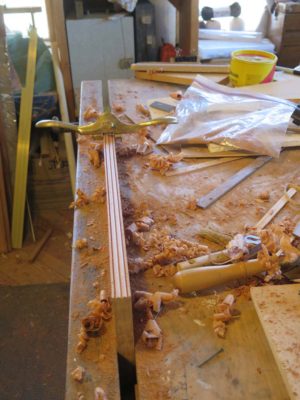
As with any other project the first task is to start with a pile of lumber and make bigger pieces into smaller pieces. It was first thing in the morning so I was not up to full steam, and it took me about 45 minutes to get done. I chopped them to length with my circular saw and a framing square, and ripped the narrower pieces with the table saw. I ripped the boards in half, then ripped the factory edge to make sure everything was not only the same width but had a clean, sharp edge.

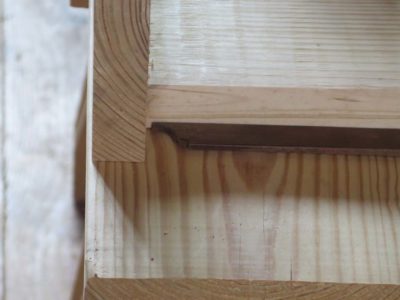
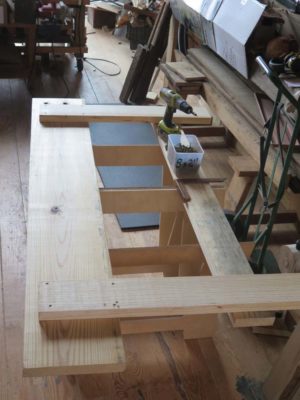
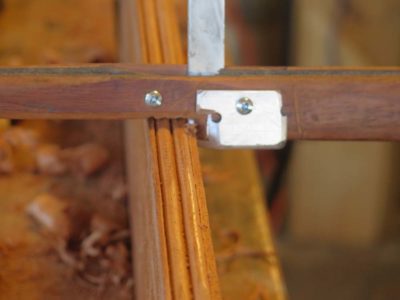
This project gave me the perfect opportunity to pull out my “butterfly sawhorse” as my assembly platform. I laid out the legs on the inner side of the aprons so that they were located such that the cross batten for the top (its location was determined by the top of the leg itself, the center picture is a close-up of the arrangement) was going to fall approx. 1/8″ below the rounded factory edge of the 2×12 apron, so that I could easily plane that edge square once the unit was up on its feet.
I used a drill driver for the decking screws that hold the unit together (the ultimate location for the bench did not mandate the use of period fastners) and with the front and back sections completed I was able to affix the end aprons for a complete outer frame of the bench in about 30 minutes. So, it went up on its feet for the first of several “up/downs” that were planned for the construction.
If you are counting, that means I went from pile of lumber to up on its feet in about an hour and fifteen minutes.
Up next – the front apron backer, rear nailer strip, and the cross battens for the top.
With the writing box and drawer addressed and set aside it was time to move on to the fanciest work awaiting me. The veneering of the “legs” of the desk provided the showiest detailing for the entire project, and frankly consumed the most time and energy. Since I hope to continue building copies of this desk into the future it was worth spending the time to really get the process nailed. I got pretty close with this one after a considerable amount of prototyping.

As a recap, all of the materials for this project, including the veneers, were hand sawn and prepped. The highly figured veneers for the faces of the legs came from several crotch mahogany slabs I had obtained several years ago. In the meantime they had warped enough to make sawing them a challenge, and the exuberance of the grain made planing and prepping them a hassle. In the end I decided to leave the veneers ultra-thick and thin them once they were attached to the substrate.
As with all decorative pattern veneerwork the layout was the crucial thing. And, since the patterning for this project was almost exclusively circles and arcs my tool of choice would be based on a compass/divider, or in this particular case, a trammel set. Given the thickness of the veneers being cut for the pattern a stout cutting edge of the end of the trammel was called for. I first tried a utility/scalpel blade but it was not beefy enough. Ditto my LNT Latta cutter. After a fair bit of trial-and-error I settled on one of my striking knives and concocted a way to mount it to a trammel bar. This tool served to provide 99% of the work moving forward.
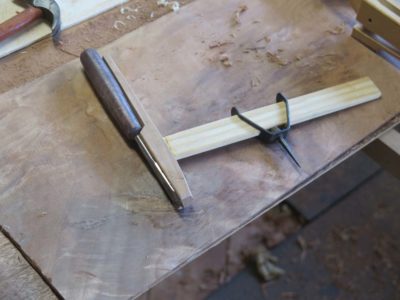

I mortised the trammel beam through the vertical block that would hold the striking knife/dovetail chisel and excavated the block such that the knife fit snugly, and attached it with hose clamps. Worked like a charm.

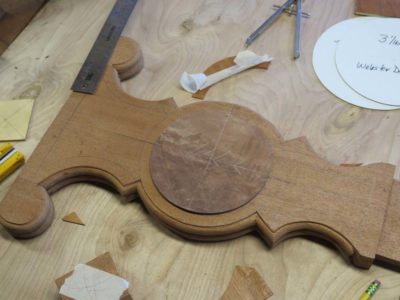
My first task was to true the outlines of the arcs on the legs. With my layout lines firmly established I taped a 1/8″ plywood square over the center point a struck the arc. This was a technique I used throughout the process.


I then cut the individual veneer elements themselves (sorry for the dearth on pictures, I was too busy working to take more). These were glued in place with hot animal hide glue.

Starting first with the central crotch veneer elements then wrapping up with the outer straight grain pieces cut to fit, the composition was completed. I have no idea why I left this camera in the center of the image.

This post does not fully convey the time consumed in this aspect for both the testing and execution, but it was many days worth of work (almost two months if the camera codes are to be believed) to get it to where I was not unhappy with the end result. After the veneers were all cut, applied, and trimmed, the full surface was toothed and scraped to a uniform thickness of approx. 1/16″. .
PS I have no idea why the final picture is rotated. It stubbornly resisted my efforts to present it otherwise.
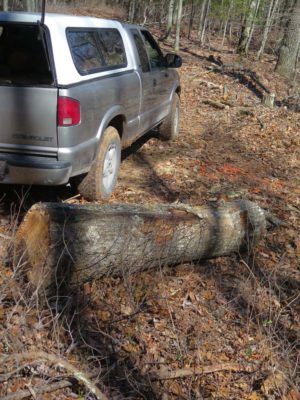
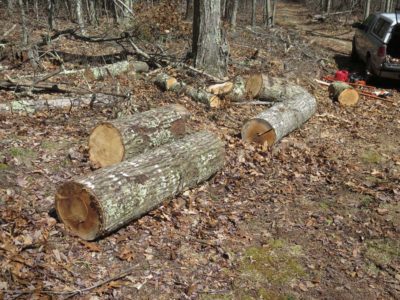
As a practice session for the impending commencement of the second video, “Making A Gragg Chair”, I trekked up the mountain to the pile of “good” logs I had culled from the firewood-harvesting sessions. One in particular caught my fancy, a large red oak about 24″ in diameter, looking straight and true for its seven-foot length. I decided to work it with “wedge and sledge” to both get my stamina up to speed but perhaps even yield enough material to make a pile of useful things.
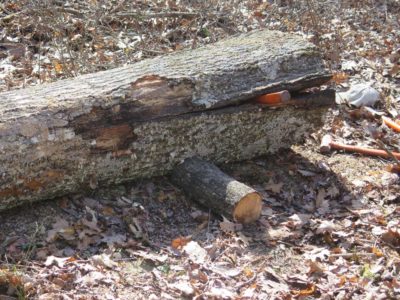

Within ten minutes I knew all I had was a pretty spectacular pile of firewood, albeit unprocessed. After I opened a nice split on the end grain and started working down the sides of the log the core of the log separated, essentially ruining it as a workpiece.
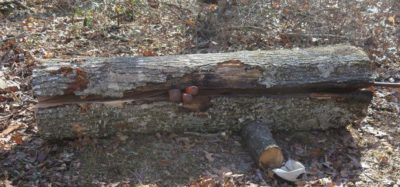
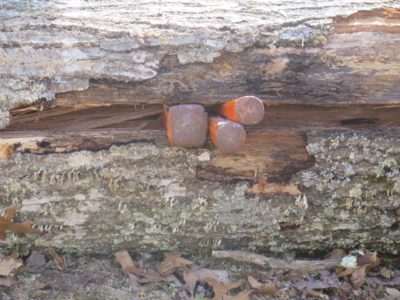
To make matters worse, the intertlaced grain inside the log caused it to start eating wedges. It took me more time to extract the wedges than anything else.
Oh well, as the Gump of the Forest says, “Sometimes log is like a box of chocolates.” And this one had something unpleasant inside. At least I’ll get another thousand pounds of firewood from the experience.
A life of woodworking is a humbling one.

Recent Comments