When I first installed the hydro turbine fifteen (!) years ago I cobbled together a temporary pyramidal doghouse cover from XPS to keep the direct weather off of it until I got the permanent housing cover made. Over the years my incentive for making the new one was low as the old cover lasted much longer than expected. This past winter was the final straw as the old “temporary” cover started coming apart, so I commenced to begin the new, final one. I took advantage of a heavy dew the other day, making me wait for my daily dose of mowing, to finally assemble the new cover.
I began some time ago with making a laminated arch using exterior grade adhesive and copious crown staples. I then screwed on a section of Ondura corrugated asphalt panel roofing for the, well, roof. The unit is light and stiff due to the corrugated arched construction. Once installed I recognized an unintended benefit. The corrugation makes it stiff, yes, but also acts as a sound diffuser on the underside reducing the sound to almost zero once I get more than a few feet away.
If the “temporary” cover using scrap materials lasted fifteen years, I can only imagine how long this one will be doing its job.
I had another invigorating conversation this week with my long time friend (almost 40 years) broadcaster Brian Wilson, who though retired can’t quite kick the habit. It’s posted on his podcast Now For Something Completely Different. No, I will not provide the link to avoid the accusation of imposing my worldview on you.
This time we got even more philosophical and metaphysical than usual, with critiques of the current state of affairs in the culture and polity.
As always, if a pungent exchange of radical ideas is not your thing, avoid it. You have been warned.
For the past dozen years I have been mothballing the barn’s microhydroelectric system once we get a few consecutive days with daily highs below freezing, usually in late November, then de-mothballing the system once we get to spring-like weather. I learned a painful lesson the first year when I thought I could keep it running all winter long. The result of that error was replacing 600 feet of spiral fractured 2-inch PVC line when the water inside froze solid. Since following the newer strategy I mostly limp through the winter on the output of the solar panels.
As I reassembled the water line every spring, roughly a quarter mile of 2-inch PVC, and walk it top to bottom every year I would find some damage to repair, from ground upheaval (it is truly astounding how much the ground moves in the creek bed ravine over a winter here), extreme water flow during a heavy winter rain or snow melt, or (mostly) fallen trees. Thus, my bringing the system online was usually a two- or three-day event.
Not so this year. When I hooked up the water line from top to bottom, for the first time ever there was no damage! Yes, a few of the soft joints had loosened and needed to be snugged up, no big deal other than getting pretty soaked, but other than that it was a couple hours of good exercise hiking up and down the creek bed.
This is the original DVD case cover art. I’m leaving the front pretty much alone but reworking the back extensively.
One of the ongoing headaches(?) has been the inability to resupply my inventory for the historic woodfinishing video F&W Media (PopWood) produced several years ago, which I had available on the donsbarn.com website store. The new company that now owns PopWood discontinued the hard copies of the DVD and no longer even had “new old stock” copies in the warehouse. After some back-and-forth the new company released the video to me gratis, for which I am most appreciative. At Handworks 2023 the editor-in-chief made a point of confirming our earlier correspondence; my F&W videos were now my intellectual property to use as I saw fit.
The urgency of me acting on this came to a head a few months ago when my final copy was sold. Since then I have been noodling the revisions of the original DVD cover and am now ready to send it off for reproduction after I let it ruminate for a couple days. While the DVD content was now my property I had no desire to disavow F&W from the picture as they truly deserve all the credit for producing it in the first place. Thus I am keeping the bones of the original packaging, crediting F&W, but revising the content a fair bit to re-brand it as a Barn on White Run product.
As soon as I get copies into my hands I will be fulfilling the two dozen orders that have been sitting in my “Pending” folder.
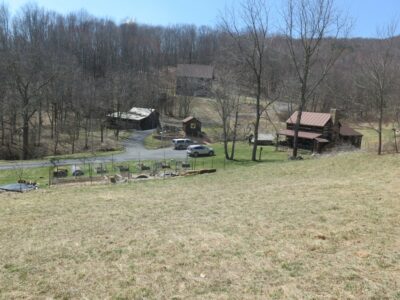
It’s been something of a perfect storm with a very wet late winter culminating in two substantial snowfalls a couple weeks ago followed by warming weather and more rain, and the switch was thrown for everything to get going (we had the wood stove cranking out heat a mere seven days ago but were heating up to the mid-70s and sun yesterday). As a result we are in the midst of mowing, bush hogging, weeding, planting, burning, etc. with not a minute spent in the shop this week. If this perfect cycle of rain and sun continues, we will have to mow at least a part of every day for the foreseeable future. The grass I mowed on Monday is almost three inches higher today.
On top of that the rapid onset of spring/summer means that everything is producing pollen all at once. Combined with a stubborn sinus infection, it feels like I am breathing through jello much of the time.
Last summer we had the great good fortune of finding a college kid home for the summer to hire for the yard work. It was grand. We’re still looking for someone to help this year but so far no luck so it’s up to the old folks to get it done. As I’ve said many times, we work just as hard and just as long as ever but don’t seem to be getting nearly as much done.
As soon as I get this round of yard housekeeping done I will turn my attention to checking the penstock for the hydro system and making the requisite annual repairs, and moving forward on next year’s firewood.
… and here’s why. L’il T now has a brand new baby brother!
We just back to Shangri-la after a month in New Jersey helping with preparations, pitching in whenever and wherever needed, and doing grandpa and grandma stuff. L’il T and I spent untold hours playing with his cars, chasing balls in the yard, swinging and sliding at the park, reading books. Mrs. Barn got a full dose of medicine to respond to the demands of the grandma gene.
Amusingly (?) when I go to visit I always travel with a bin or two of projects to work on during the “down times.” When packing to return home, I realized I had not opened up those bins this trip except to complete some gold leafing (more about that later).
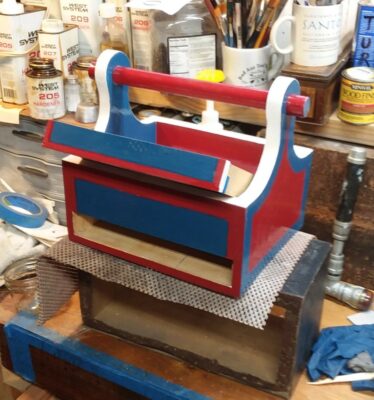
We also celebrated L’il T’s 2nd birthday, and I made him his first toolbox, complete with 23K gold leaf trim and his name. This picture is just before I started the gold leaf trim.
Again, one of the beauties of youtubeworld is the sheer quantity of vintage video on almost any topic you want. Finding it can be a challenge, especially when the titles are in other languages and “alphabets” but lately I’ve ben coming across some jewels from 40, 50, or even 60 years ago.
Here’s a glimpse of the modern master of lacquerwork, Gonroku Matsuda. Enjoy.
One of the thrills of incursions into the Evilgoogle Empire via the satellite of Youtube is coming across an instructional or demonstration video that was at the very least unexpected or unknown. Sometimes it is the result of a long search, that search can be keyword or descriptor directed. But when the subject and title are not English or even Western alphabet but rather Eastern in character it becomes a matter of sheer luck as YouTube cycles through videos of related topics for referral. Sometimes it leads to new videos, sometimes it leads to videos posted years ago that I had no way to know existed such as this one linked below.
For the most part urushi lacquerwork is applied to a wooden substrate, either wooden boxes or trays or turned bowls, with the occasional foray into furniture pieces, for example in the work of Gonroku Matsuda.
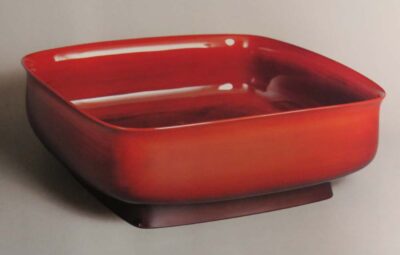
For I’ve long been searching for video about a peculiar lacquerwork technique that fascinates me, the analog to sculptural papier mache’, using urushi instead of oil or paste to assemble the creation. I have long held this candy dish (above) to be one of the most beautiful objets d’art I have ever seen, unfortunately not in person. It was made with this urushi-laminate technique, albeit using fine linen cloth instead of paper. Classically this method involves draping urushi impregnated fabric (or paper) over a previously sculpted (unfired?) terra cotta core, then excavating the terra cotta once the form is achieved.
The technique demonstrated in this video uses sculpting clay and plaster for moldmaking steps in a manner I find both fascinating and fully do-able.
A component of my routine in the shop these days is surveying, sorting, and dispensing of the tools laying here, there, and everywhere. Now that I am in my 70th year and have two handy sons-in-law and soon to be two grandsons I am either dispensing or dispersing many of the tools immediately or presumptively. Genuine tool sets for L’il T and the soon-to-come Baby T (for Baby Tyrannosaurus, the moniker for L’il T’s baby brother in utero, I suspect the final name will be different) are well underway.
One of the treasures(?) I came across was yet another infill plane, a truly challenging project for the future. As near as I can tell none of the adjunct components belong together with the original chassis so I can assume great latitude in the restoration of the tool. It’s raggedy but solid, so the end result should be solid but less raggedy once I get around to bringing it back to life.


Recent Comments