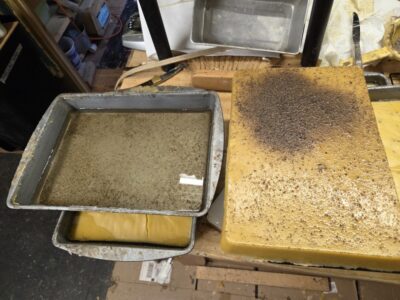
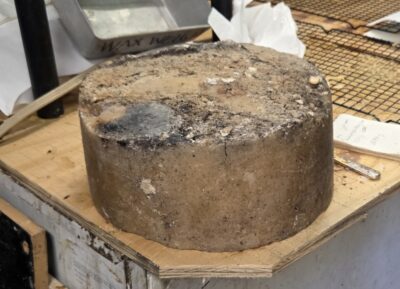
Once the molten beeswax cools in the cake pan after filtering for gross contaminates, the next day I pry out the now-solid blocks from the pan. The contents of the pan are in two phases, the water and the block of wax that forms on top of the water. By not disturbing the molten concoction once it is poured, the contents settle into their respective layers. That which is compatible with water goes into the water. That which is not water compatible remains in the wax block after having settled to the bottom of that fraction.
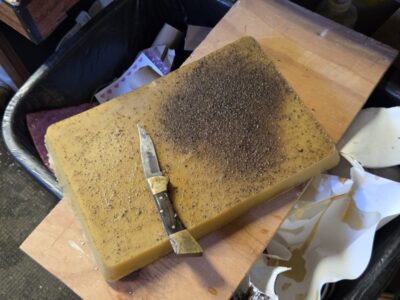
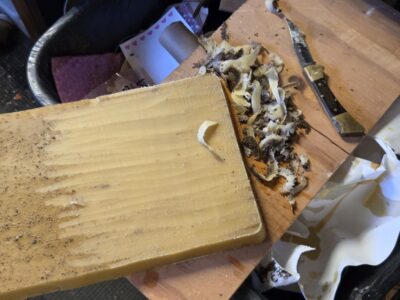
Flipping the now-solid block gives access to the contaminates that aggregate along the interface at the bottom of the wax.
These contaminates are easily removed by ultra low tech methods; I simply scrape away and discard the bottom layer of the wax block that contains the particulate contaminate.
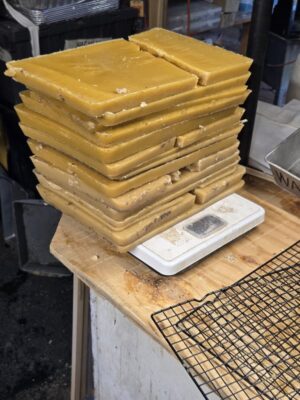
Behold, the almost thirty pounds of partly purified beeswax. At that point the material has had perhaps 75% of the particulates removed and is ready for the next step.
I spent a good deal of time and effort this past week processing beeswax and shellac wax in preparation for the upcoming Handworks 2026 in Amana IA over Labor Day Weekend. My polissoir inventory is lacking and my broom maker is struggling with some health issues so I do not know exactly how that will be resolved.
Since the shellac wax arrives already purified straight from the factory in India, all it needs is to be melted and cast in the silicone molds I made for this purpose.
The beeswax is a different story as it is the opposite of purified when it arrives. My end product is something that is purified using essentially old-fashioned technology.
I start with a block of raw beeswax, straight from the honey processing plant. As I recall, the slang of the bee/honey trade is to call this mass of by-product “slum gum.” It’s got residues of honey, lotta dirt and bee body parts.
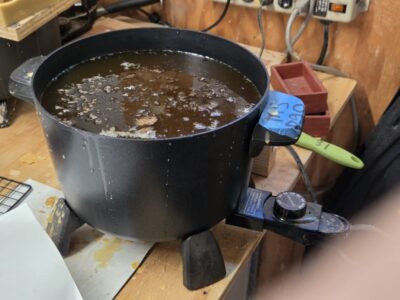
My first step is to break up the blocks of slum gum and melt the mass 50/50 in a water bath in my largest cooking pot.
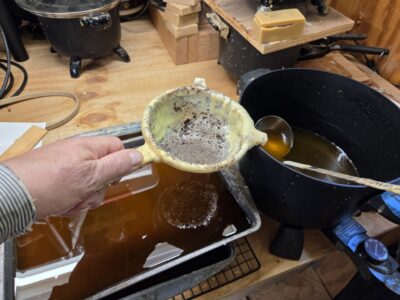
I then pour the molten mass through a kitchen strainer to get the larger particles and body parts out. Downstream from the strainer is a cake pan, into which the remainder goes to cool.
A day of work yields a stack of cake pans that cool over night.
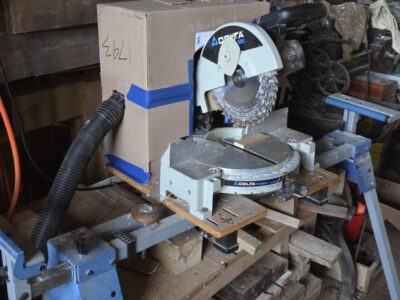
I’ve got a 12-inch radial arm saw down on the first floor of the barn, but it has not seen one second of activity since it was moved here thirteen years ago. I’m just not doing anything that makes it necessary. However, on the second (main) floor I’ve got a 10″ chop saw that gets used regularly to make long boards shorter for whatever reason. For some tasks I use the cross-feed sled on the table saw but far more frequently I’m just chopping something up.
One of the great features of the chop saw is that it is quick and easy. One of the lousy features is that it made a huge mess even when I hooked up the “dust collector” outlet to the shop vac. Even when everything was hooked up properly sawdust went all over the place and it required a local cleanup with every use.
I finally got tired of this nuisance and made and installed the lowest possible tech solution, which reduces the sawdust cloud by about 99%. I looked through my mountain of boxes piled up on the third floor and found one that fit my needs. Equipped with a utility knife and a roll of masking tape I fabricated a box shroud to fit over the back side of the saw, complete with a port for the shop vac hose. At this point the only thing missing is a fitting to glue to the portal for plugging in the hose, but even with just a rough hole cut in the side of the box the collection is magnificent.
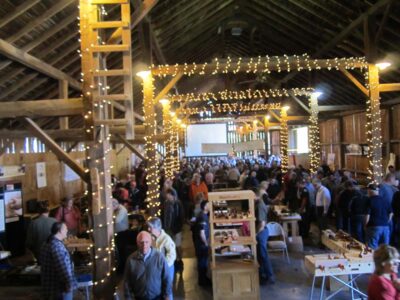
The Abraham boys and their posse are at it again and Handworks 2026 is barreling down the pike. It will be Friday and Saturday of Labor Day weekend, in the lovely village of Amana, Iowa. I’ll be there again close to dead center of the Festhalle, hawking my wares such as they are. Polissoirs, beeswax and shellac wax, videos, and original c. 1765 Roubo prints, etc.
The Festhalle from Handworks 2013
It’s the most amazing tool festival of hand woodworking you will even encounter with visitors and makers from around the globe if the tradition holds.
I’m already ramping up my truckload of stuff to take with me, at the moment creating a pile on and under a workbench I will be taking and making wax processing part of almost every day from now on.
This just might be my last long road trip other than family priorities. We just don’t have the oomph for drives like that anymore.
I love tales like this. I knew of an instance in some southern swamp where they discovered an ancient sunken cypress trunk that was so valuable the salvage company had around-the-clock guards protecting it until they could find just the right buyer who had just the right project. I vaguely recall it went to a developer who was going to use it in all the public spaces is a huge skyscraper somewhere. I think the dimensions of trunk were 48+” diameter at the top and 180-plus feet long. That’s a mighty big tree.
I’d heard the asking price was $7 million.
Many years ago back in Maryland we had a micro-burst that uprooted a number for mature tulip poplar trees, the largest of which measured 24″ in diameter at the first branch, which was at the 60-foot mark. I was unable to find a sawyer willing to deal with it, so given the cycle of life it has now gone back to the earth.
That’s right, sometimes cleanup is the exact opposite Christmas. Usually in the aftermath of a deep cleaning and reorganizing of the barn I find that I suddenly cannot find something I need. In the “Before” I knew exactly where that thing was even if the overall spatial composition was more similar to a maelstrom. But at least I knew where item X, Y, or Z was.
Yesterday I needed to sew something up but could not find nor remember where I put the stinking sewing kit.
Now that I am in my approximately 4,000th day of organizing, reorganizing, cleaning and tidying the barn I am qualified to declare that Cleaning is Christmas. Unlike my friends MikeM, Ripplin’ John and MartinO I am not by temperament nor habit fastidiously organized in my physical surrounding. This means that combined with my forgetfulness about the details of my surroundings, organizing and cleaning reveals “new” contents of the barn that in truth I had forgotten either 1) that I even had them, or 2) where I put them, sometimes in a “special place.”
My current paroxysm of tidying the joint is just such a reality. Sometimes the revelations are mundane, such as, “Oh, that’s where I put my favorite utility knife.” Other “discoveries” are more meaningful. Just a few days ago at the Plane Wellness shindig I was commenting to someone there that I was running low on the shellac wax I had ordered several years ago directly from the factory in India. I was lamenting(?) the fact that I might need to send another big pile of money there to restock if I was going to continue using and selling shellac wax for more than another few months.
So, there in the corner tucked behind one of my workbenches were two full cases of shellac wax. Enough for two or three years of consumption. Suddenly that was one less thing I needed to worry about. That alone made it a good day. The cases were so embedded in the space (I had to actually cut the boxes apart just to extricate the contents) that I clearly placed them there before I built a storage cabinet and placed the workbench in its current location and then put stuff on top of them.
Then, as I was taking inventory of my polissoirs and packaged waxes underneath the workbench I use for that purpose, I found two full cases of the 190 proof grain alcohol I use for mixing spirit varnishes.
At this point all I have to do is persuade myself that cleaning is something I need to habituate myself toward. Yeah, good luck with that.
Now I just have to concern myself with the fact that my polissoir maker is struggling with some health problems that are disrupting his broom-making output. Yikes.
We recently traveled north to Butler PA for the 2026 edition of the Plane Wellness shindig. What ensued was a terrific weekend of handtool woodworking fellowship. In a way it was a smaller scale version of Handworks and a good tune-up for getting my brain and inventory set up for that venture.
My first impression of the attendees is that they were younger and more beginner-ish than other tool events I have attended, and that is a good thing.
A true delight was spending time with both old friends and new.
I was presenting on historic finishing, which drew an enthusiastic audience, and I was doing demos at my table throughout.
Keep an eye on their web site to put next year’s event in Washington PA on your calendar.
During our recent visit to flyover country to celebrate Ripplin’ John’s MFA exhibit I was able to spend most of a day with him in the shop. John’s fascination with undulation has progressed well beyond ripple molding machines into the realm of Rose Engine lathes, of which he has at least two.
This is a gargantuan vintage machine,
which has been augmented with this modern unit made by Davil Lindell, if I remember correctly.
He let me noodle on the Lindell for a few hours, including the cutting of this pattern on the end of a small box.
What a joy it is to spend time with the people you admire doing stuff that is just pure, unadulterated fun.
My circle of friends is mostly populated with men who inspire me due to their knowledge, skills, talents, temperaments and character. No person better embodies this than my long-time friend Ripplin’ John (you can meet him at my booth at Handworks). Engineer, craftsman, and theologian, his company is a treasured enrichment to my life.
Mrs. Barn and I recently traveled to attend his exhibit as he received his Sculpture MFA safely into his eighth decade of life! He is indominable rather than monomaniacal, a distinction worthy of note. The exhibit attendees were treated to an impressive compilation of work and creativity; his thesis dealt with the question “What Is Art?”
The attendees in rapt attention as John elucidates the purposes of his artworks.
Congratulations, John, and thanks for being my friend and fellow Christian soldier.
Here are some pics from the exhibit.
One of the many beautiful objects crafted by John’s hands and tools
One of a series of miniature turned boxes John created with his Rose Engine Lathe, a creative technology completely unknown to most of those in attendance,
The assignment here was to create a sculptural artwork from a book. John excavated and epoxy-laminated a stack of pages, then turned the resulting block on his lathe.
John was exploring the realm of formed, enameled metal medallions.
One of the many facets of John’s program was to teach a class. This is the student workshop where he instructed the kids in basic metalwork. From what I could see they related wonderfully to this graduate student the same age and their great-grandparents.
No doubt, the most bizarre moment of the visit to the college campus was spotting this dispensary in the men’s restroom. Our culture is doomed.


Recent Comments