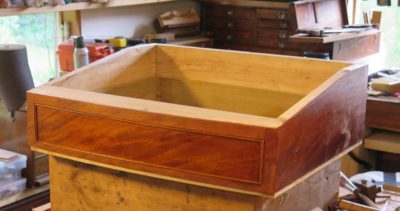
The final few steps of the construction phase of the desk project were to make and fit the mid-level shelf, make install the single and double beading moldings on the box, turn and install the spindles that suspended the shelf from the underside of the writing box, and turn the roundels that adorned the “ears” of the legs. Each of these operations will be dealt with separately beginning with the shelf (I’m not sure I’m getting the blogging order correct, but you’ll get the whole picture by the time I finish).
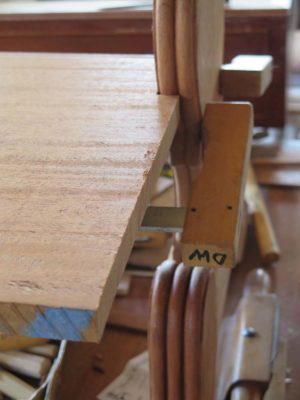

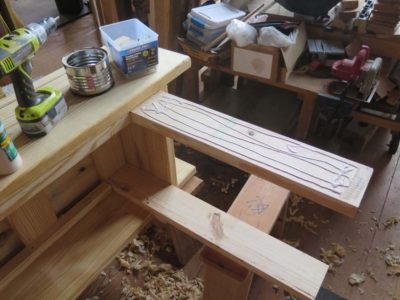
The mid-level solid slab shelf was partly cantilevered off the “leg” units, fitted into notches on the double bead moldings on the edge of the leg and sitting on simple glue-block brackets on the insides of the legs. Placing and affixing the shelf was pretty fussy work, nothing especially complex but the key was working slowly and carefully. I started by tacking a scrap into the location of the support blocks on the legs and rested the shelf slab on them to get the notching on the moldings correct, easily. (The actual finished mahogany support blocks will be visible in the offering about the spindles upcoming)
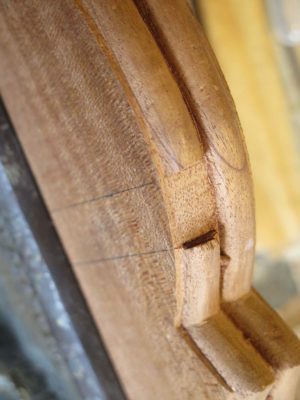
With the shelf slab sitting on the temporary supports I marked the locations of the notches on the moldings with a fine saw, then excavated with the saw and chisels.
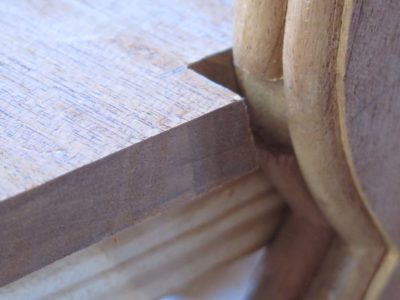
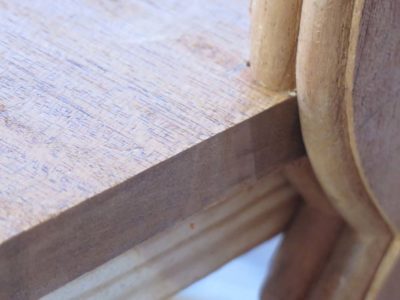
The fit was darned near perfect, especially once I beveled the contact edge on the shelf where it connected with the notch.
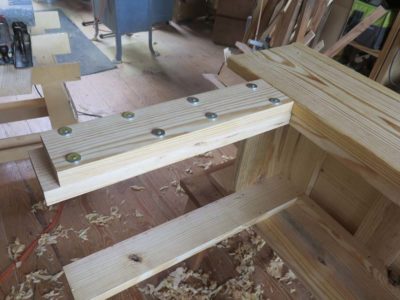
At this point the only further work on the shelf per se was to add double beading on the edges, using a bronze scratch stock tool from LNT, followed by my home made scratch stock to removed the shoulders of the profile.
Recently I hosted my almost-annual three-day Historic Woodfinishing workshop at The Barn. Due to family medical emergencies three of the five registrants were unable to attend. This, combined with some seasonably chilly weather (holding this the final weekend of April was an experiment that will not be replicated), led me to relocate the event into my heated workshop rather than the unheated classroom space. That actually added to the intimate atmosphere of the session.
My syllabus for this workshop is pretty well established after this many iterations. Given the brevity of the schedule I restrict it to only two major finish materials, shellac and wax. Next year I am penciled in to teach a longer workshop at MASW so we can explore the topic more broadly, but for now this is what we cover. As always my objectives are to 1) present finishing as a structured enterprise, to familiarize the participants with my approach to finishing and remove any hurdles of intimidation, and 2) provide some hands-on/muscle memory experiences to impart confidence for once they are back home.
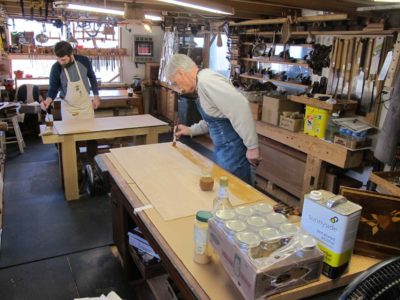
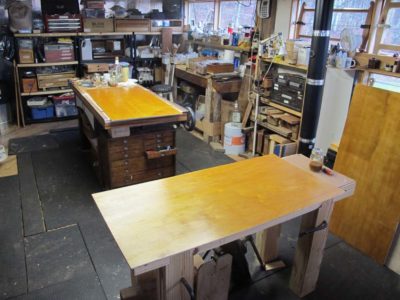
One of the foundational exercises is to brush shellac spirit varnish on a 24″ x 48″ plywood panel that is straight from the bin at the lumber yard with only the most cursory preparations of sanding with 220 paper for a coupe minutes. The objective is to build up enough finish in three sessions, two on Day 1 and one on Day 2, to provide a great base or polishing out on Day 3. Each of the three sessions results in about a half dozen applications of varnish. In between the first two application sessions on Day 1, the dried varnish is lightly rubbed with dry pumice to remove and nits that are there.
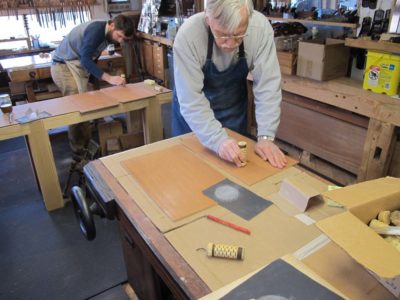

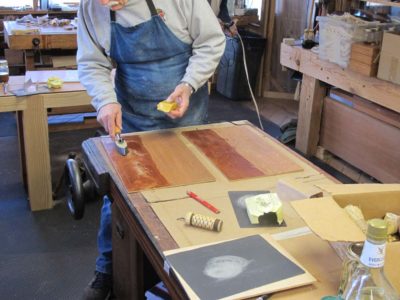
Other Day 1 exercises include burnishing a mahogany panel with a polissoir, with a polissoir and wax, and applying a layer of molten wax to fill the grain and serve as a final coating.
Thus endeth Day 1. Now on to Day 2.

On our recent visit to northern California our daughter had arranged for us to tour the Dick Taylor Chocolate emporium, a successful and growing enterprise operated by two former woodworkers and (still current) musicians, Adam Dick and Dustin Taylor. Dustin gave us the tour, which is normally full but for whatever reason on this day we were the only ones.
Dustin’s enthusiasm for fine craft, whether it be furniture making, house restoring, boat building, or chocolatiering was evident with every gesture and utterance. Learning that I was a woodworker he spent extra time describing their loving acquisition and restoration of much of their vintage equipment.
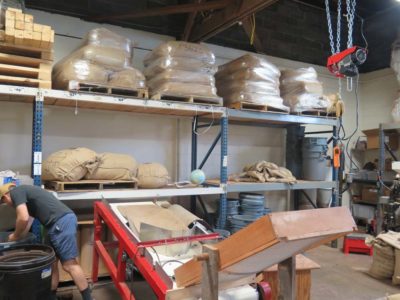
We began in the shipping, roasting and grinding room at the back. The shelves were loaded with raw beans from around the globe.
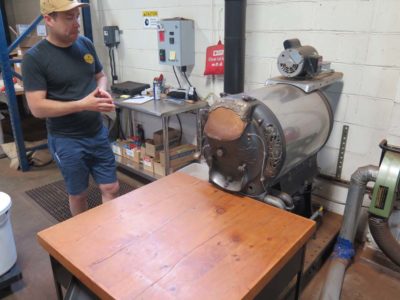
One of their pride and joy machines is this bean roaster, converted from a turn of the century coffee roaster. I got the feeling Dustin could have talked about this device for a long, long time.
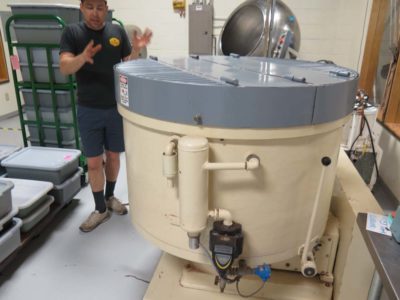
They are a magical blend of “old ways”and “new ways”, combining finely crafted chocolates with state of the art technology. This high-tech chocolate melting vat was the largest glue pot I had ever seen.
I think this was a 5kg block of raw processed chocolate, awaiting further processing into the final product. As were hundreds of its siblings.
One striking artifact in their show room was a vintage letter press. When they first started they decided that they wanted a certain “look” to their packaging and that look depended on letterpress wrappings. They still have a local friend produce all their wrappings on another letter press they bought for her to use.
Given our attitude that “there is no such thing as bad chocolate, just some is a lot better than others” (the darker the better for us) Justin’s recitation of their production and products was fascinating to us, and the treat of being able to sample all their products as we finished the tour was pretty seductive..
We bought their “Chocolate Library” with a bar of each of their products. We’re told that they will be moving into a much larger facility and increasing their product line in the coming months. I think their foray into milk chocolate is unappealing (it’s a waste of both milk and chocolate, IMHO) but given their continued growth I cannot doubt their vision nor marketing acuity.
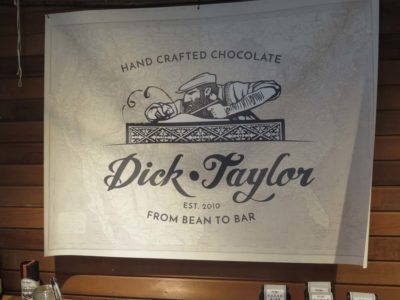
They will be selling t-shirts with this new logo some time this summer and you can believe that I will get me a few.
Woodworking and dark chocolate, a pretty divine melange.
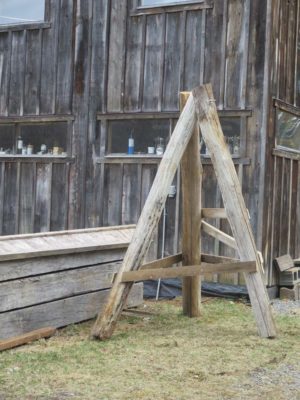
The final 90 minutes of construction for the Nicholson was to finish the legs and top. It was all easy enough to do.

I wanted to get the top planks on first, and to do that I needed to achieve a crisp, straight edges for the center joint. Were my big table saw or jointer up and running I would have simply run them through one of them to remove the rounded edge, but I have not yet installed those outlets in the basement shop (and have learned to live without those machines for more than four years). Instead I clamped the boards one at a time to the front apron of the bench and planed them with a jointer plane until they were what I wanted.
I then screwed the top boards to the cross battens. I made sure to bury the screw heads pretty deep so the top could be smoothed with a hand plane without any concern for hitting them and nicking the iron.
I then rolled the bench onto its back on top of my short sawbench type stools, and glued and screwed the outer leg lamina in place. As with almost every undertaking of this sort, I used decking screws and fender washers as the clamping forces. Once the glue is dry I simply back out the crews and pry off the washers and put each in their proper container for use the next time.

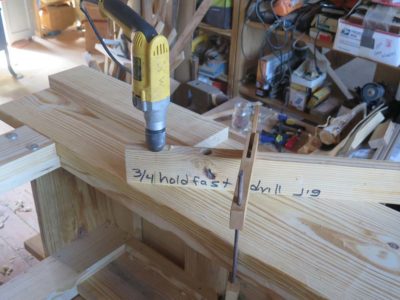
A minute or two planing off the lumber mill chatter marks and I was ready to drill the holdfast holes, for which I used this exotically engineered jig.
While the bench was on its side I trimmed all the legs to length.
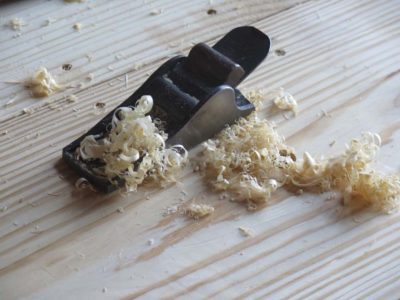

Back up its feet, I checked to make sure the top was flat, albeit not really smooth as there was a bit of mill chatter. I touched it lightly with a smoother plane to get it, well, smooth, followed by a quick covering with the toothing plane.
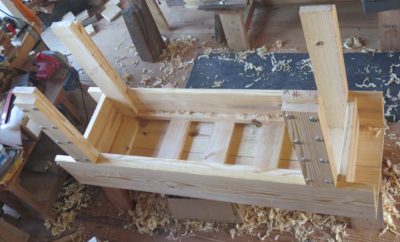
I cannot remember exactly why I took this picture of the bench upside down, but it does give you a good view of the entire undercarriage.
After drilling the holdfast holes in the top, through the planks and battens, and the construction of the bench proper was finished. Now it was time to move on to the twin screw corner vise.
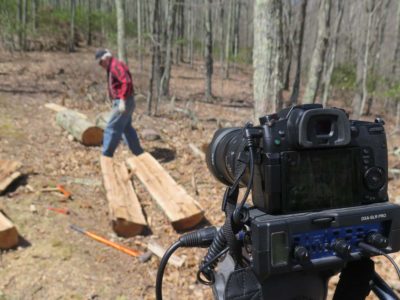
Recently we had our first day of production for the “Making A Gragg Chair” video. We had been waiting for several weeks to get a beautiful day to film outside while I harvested the wood for making the chairs that will be documented in the video. Full disclosure — I will actually be making three chairs more or less simultaneously so that we can use subsequent production days most efficiently, getting several consecutive steps recorded on the same day by having three chairs at different points of the construction.
So this beautiful day was spent splitting wood up the mountain with wedges and sledges, then on to a mallet and froe in the riving brake next to the barn. The setup for the latter was new to me so it was a bit awkward getting into the swing of things, but due to the magic of video editing it might actually look like I know what I am doing.

We also shot the introduction to a Special Feature we will be including on the video, and probably on the web as well, as we record the entire process of me conserving my own damaged chair.
One of the things I am trying to keep track of is the amount of time it will take me to build one chair from start to finish. I would love to teach a workshop on building Gragg chairs but I need to get the time down to seven days max, six days preferably. I suppose once these chairs get down I will build one from scratch as fast as I can to see if it is a reasonable project for a workshop.
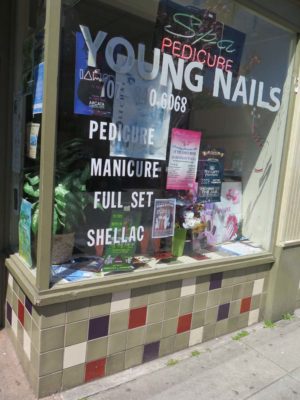
Seen on a storefront window in Eureka CA.

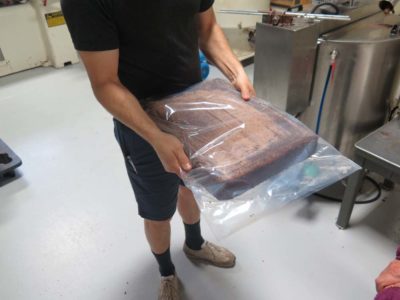
During the time I was working on the fancy veneerwork for the legs, the drawer had been sitting minding its own business at the other end of the bench. Unfortunately and unbeknownst to me in those intervening weeks the finished drawer, complete with matching veneer and bead edge, decided to act like an elected official and go crooked on me. When I picked up the drawer to put it back into the writing box I saw that it had racked and twisted almost 1/2″ from corner to corner and would only go into the runners part way. I could have dealt with 1/16″ with a little bit of shaving and a little bit of shimming. But this require pretty drastic intervention.
The problem was both vexing and perplexing. I had specifically selected a piece of very old tulip poplar for the structure of the drawer, yet here it was, gone all potato-chip-ie on me. At the very least I would have to trim the dovetails and hope I could get it all back together, flat. The edge beading that trimmed the edges of the drawer face was completely sacrificial and I knocked that off with a mallet and chisel in short order. An hour in a water-filled trough released the rear dovetails and the back slat of the drawer, but the front was a trickier issue.
My first and foremost consideration was NOT damaging the veneer on the front of the drawer as that was carefully matched to the surround on the desk. If I screwed that up I would have to saw a whole new piece of veneer from the prized figured plank, and I had zero interest in that. Since the veneer had been applied to the curved front of the drawer with hot hide glue all it took was immersing it in hot water and letting the glue line relax to remove the veneer and get to work solving the problem. No problem, right? We’ve all heard this was the Achilles Heel of hide glue, that it was not robust and prone to failure in high-moisture environments. I placed the drawer face down in a plant trough and poured in the hot water. I checked back in a few minutes and nothing had happened. Well, the finish had bloomed but that was irrelevant. The veneer was holding firm.
I did it again.
No change.
And again.
No change.
I left it in the water trough overnight and checked it again in the morning.
Still firm.
In aggravation I dried off the drawer front and removed all the shellac finish. Using my tacking iron and spatulas I rubbed the heated iron (over a wet rag) on the face of the veneer and gently worked the spatulas underneath the veneer to separate the glue line. It worked, but took over an hour of nerve-wracking time.
I set the veneer aside, undamaged but a little warped as you might expect. But certainly salvageable. I put the drawer front back into the water trough overnight and was able to disassemble the dovetails to see where I could trim the joinery to get it to fit snug and flat.

But for whatever reason this piece of clear, vintage wood had twisted and there was nothing I could do to un-do that. I won’t describe the whole process of trying to re-use and re-fit the original components — I think I have exasperation induced amnesia on this chapter of the tale of woe — but in the end decided to build a whole new drawer front. The drawer sides and back were just fine, but that bowed drawer front was, as my beloved Mom might say, a stinker. (My mother is among the most gentle, even tempered people I have ever met, and I never heard an uncouth word cross her lips. She once, however, described a troublesome co-worker as, “A real stinker,” and I knew he must be The Spawn of Satan.)

So I fabricated new new drawer front from a different piece of lumber, also vintage tulip poplar, cut new half-blind pins, and reassembled the whole. New edge beading, relaid the veneer, and newly finished.
It was perfect, and held true until the desk was finished and delivered. Whew.

A recent vacation in northern California allowed us to experience the majestic scale of trees there in some amazing parks and forests. Compared to Eastern climes everything seems bigger there.
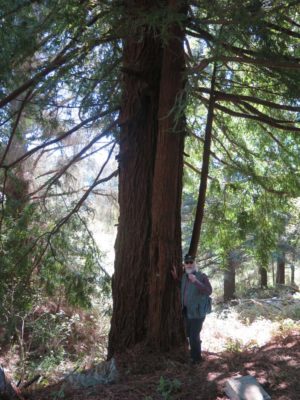
It is often said that the inherent efficacy of a design is its success when scaled up or down. If so, then redwoods and Douglas Firs are winners. The sheer awesome scale of these plants are simply masterpieces.

The panorama of trees taller than skyscrapers is a magnificent thing to behold.

The decaying stumps of ancient trees 40, 50, and even 80 feet in girth simply boggles the mind for those of us from somewhere else on the planet.

When the trees are so tall that looking up at their crowns causes you to lose your balance, you know you are not in Kansas any more.


From a distant viewing vantage the trees seem much like any forest elsewhere, but when you add the contextual element of a human form the factor of scale is jarring and disorienting.


Even the drape of the bark is bizarre in its gigantazoidness.
Now if only the polity there would muster the wisdom and will to reduce the scale of the incentives that encourage the parasitic indolent self destruction (being there is like witnessing the devolution of Homo sapien sapien into Homo sapien slackerous right before your eyes. Even in the forests we could not escape the racket of boom boxes and the stench of dope wafting from groups of dissolute losers.) The civilized folks of California deserve better.

Until then, at least they still have their trees.

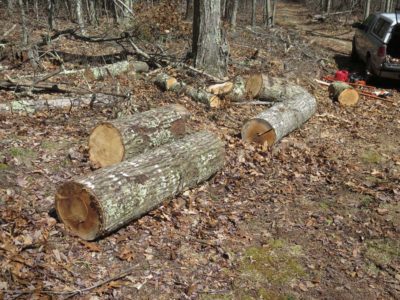
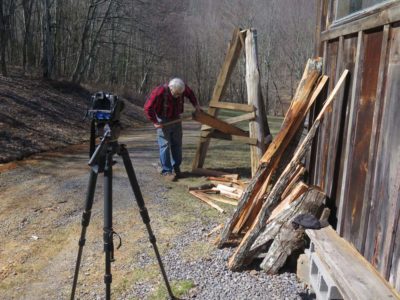
With the commencement of production for the video “Making A Gragg Chair” steaming down the rails I thought it would be good to get back in practice splitting logs I had culled from last year’s harvest up on the mountain. As soon as the mud dried out I drove up there and started wailing away at one in particular. As I already recounted the initial results were not heartening. The last time I split some giant logs was a couple years ago and that went perfectly. Had I forgotten how to split a log?
A second log went much better but I had left my camera in the barn so you’ll have to take my word for it.
I also had long desired to build a riving brake, a tool I had never before possessed. Now was the time to spend part of an afternoon doing so.
When my brother and I rebuilt the lean-to on the lower log barn lat year I was left with a half-dozen ancient chestnut poles. They seemed to be perfect candidates for the project.

Using precision woodworking processes I trimmed the ends of the logs to allow for whisper-fit angled joinery.


That joinery was accomplished with a low-speed high-torque drill and a length of 1/2″ threaded rod and nuts. With some judicious use of leveraging I got the tripod up on its feet.
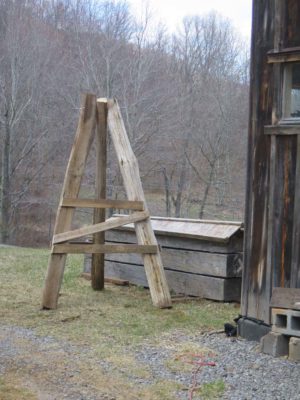
I added the cross bracing and it was ready to put to work.
I’ll see if it is as easy to use as Follansbee makes it look.
For the final session of the SAPFM Tidewater Chapter Spring Meeting I was asked to talk about “matching color” but I took the liberty of broadening the topic to “matching appearance” which I think is more useful. Though my demonstration component did indeed focus on understanding the perception of color and its modification, it occurred within the larger context of “appearance.” Normally this is a topic I like to spend a week covering, so in 90 minutes I barely got to the highlights. In fact, at this fairly late date I have decided to add a full chapter on the topic to my Period Finisher’s Manual book for Lost Art Press.

There are many aspects of appearance of interest to woodfinishing and I addressed each and their interrelation briefly. One point I made repeatedly is that if matching color is a critical component of any projects, that must be accomplished in the finishing layers (or between them), NOT in staining the wood.

Trying to match any color via the manipulation of wood stain on the bare wood surface is a fool’s errand. To get to where you want to go, you must know where you are starting. And that means the wood surface must be sized with enough coating to establish the base appearance and color.
There are times where the selection of the coating itself is a critical component of achieving a specified color.
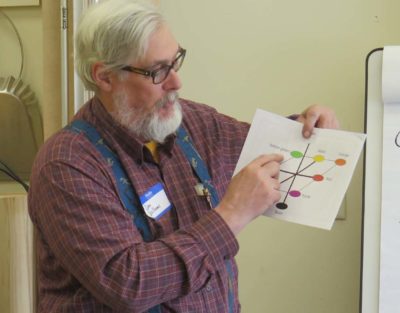
Once you get to the point of manipulating the coloration, I believe that the traditional color wheel is inadequate to the task. Instead I prefer a different conceptual model for color, and that model is known as the “L,a,b” color system. I will not go into detail here as to how I use this system in my own color work, suffice to say it is functionally a subtractive system i.e., if something is too red, I add green, if it is too yellow I add blue, to neutralize the excess color.

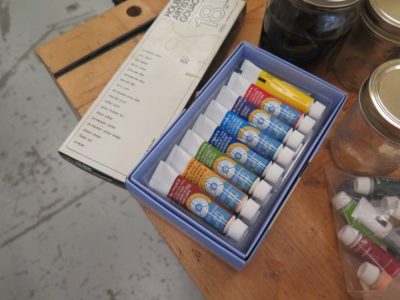
Adding tonality to the surface appearance can be achieved through tinting the coating itself with dyes or pigments. Here I am using some very intense organometallic synthetic dyes that were originally created for industrial and automotive paints, if I recall correctly. These are Orasol dyes and have a somewhat peculiar palette to select from, and are available to the finishing trade at Olde Mill.

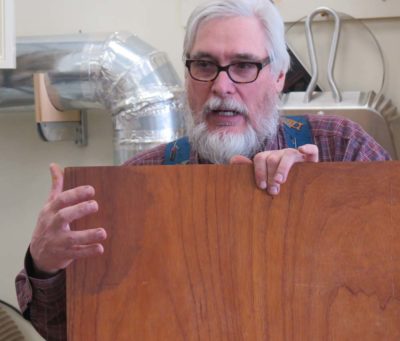
The means of imparting coloration are many, and once again I only use color in or in-between the finish. One of the simplest and most effective techniques — and historically accurate to boot — is a light glaze of asphaltum.

And speaking of glazing, I spoke for a few minutes about how to determine whether or not you have good glazing brushes.


Another glazing technique I demonstrated was using artists’ watercolor paints known as goauche with a waterborne shellac binder that I made right there in the meeting. If you do not get the color or tonality correct, just wipe it off with a damp rag and start over again. You have perhaps a half hour to do this before the waterborne shellac sets, and it is very tenacious once dry.
And then it was time for everyone to go home.


Recent Comments