This summer has seen a frenzied pace on the homestead, with summer lawn and garden activities, family comings and goings, working on the book manuscript and photography, and now, the final sessions for recording the Gragg Chair video. Chris my videographer has been even more occupied than I given that last year he started a new, full-time job, he and his bride bought a new (to them) house with all the attendant time sunk into that as required, and just recently a brand new baby. All that to say it has been almost a year since we were able to get an intersection between our two calendars, and that intersection occurs tomorrow.
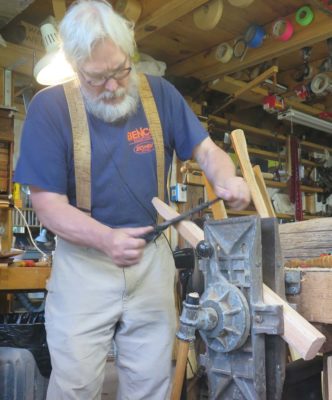
Combining my preparations for that with my ongoing Gragg Chair Challenge I’ve been spending a lot of time up in the attic studio workshop, just as we have been experiencing our summer heat wave with many consecutive days up in the mid 80s. The locals are griping about the heat whenever they get together to chat about anything. One implication of the warm sunny weather is that the attic workshop is crowned by almost 3000 square feet of uninsulated roof, the material of which is heavy corrugated asphalt panels. So, if the sun is shining the overhead ceiling becomes a high temperature radiating panel. My thermometer indicates that the static room temperature is often well over 100 degrees.
To mitigate this effect and make the space useable I have a three-foot low speed exhaust fan. When it is running and sucking cooler air from lower volumes of the barn, the space is a congenial working environment. Then, last week the motor burned out for the fan. Since that motor was one of a group of motors I rescued from a dumpster 25 years ago I was not overly distraught that I only got a dozen years of service from it. I immediately grabbed another, identical motor off the shelf and installed it. Only when I threw the switch did I discover that I had failed to confirm the motor’s rotation before the installation, and the fan was blowing outside in rather than sucking inside air out, the way an exhaust fan is supposed to be set up.
The happy ending to the story is that the fan running “backwards” renders the space even more comfortable than running properly! The robust flow of cooler, outside air flowing over me while working makes my time there even more joyful than I was expecting. I just might leave it that way.
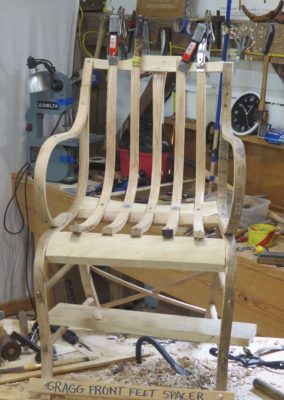
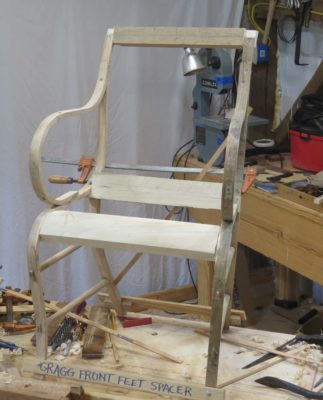
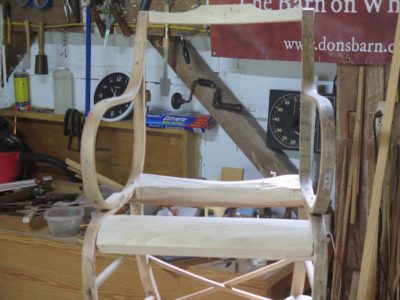
I’ve hit the 24-hour mark of the Gragg Chair Challenge with completing the fitting of the uni-piece bent seat/back elements into the rear seat rail. I’m expecting to finish fitting these into the front seat rail and crest rail somewhere around hour 28, and then chop the mortises for the front and rear rungs. The next big step after that is to disassemble the chair and glue everything together stretchers. After that the only major elements to add are the short seat slats. Then the real sculpting begins.
I’m getting a very good feeling of optimism about a Gragg Chair Workshop in late August 2021. If this interests you, let me know.
I remind you that the goal for the workshop would be the basic construction of the chair. Completing the chair would take at least another week of time. Still, my goal a couple years ago was to get the time expended to complete a chair from raw sticks to delivery at under 150 hours. I’m pretty sure I can get there easily. My next goal will be 120 hours.
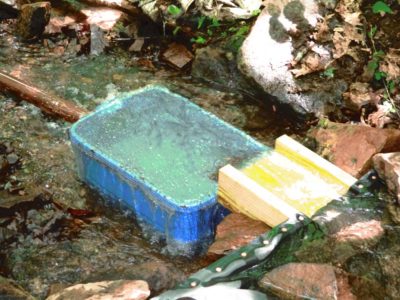
I recently made a tiny modification (with a huge impact) to the hydro weir/sluice to address the imperfect alignment of the sluice and the capturing basin to which the penstock is attached via a shower drain fitting. I was losing a lot of the weir flow because of that mis-alignment which caused a lot of the water to wick back underneath the sluice when the creek flow was a little reduced. The clue to the need for this improvement was the noticeable belching of the water jet at the turbine nozzle a thousand feet downhill, indicating the system was sucking in some air. Normally the turbine is nearly inaudible from the rocking chair on the front porch of the cabin, but the system breaking wind was clearly audible.
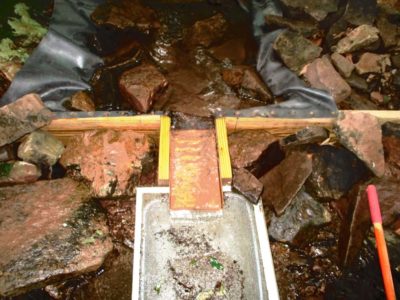
With a piece of copper flashing I bent a liner for the sluice so that the complete channel of water would be directed onto the screen on top of the capturing basin rather than to the closest edge, which was causing the water loss for the system. I had intended to place the capturing basin directly under the end of the original sluice but there was a boulder in that precise spot, preventing me from getting the basin at exactly the right height (by about 1/2″ inch!). This was a minor thing but the improvement was noticeable immediately.
I’m thinking about making a new capturing basin as this one might not be deep enough, Given the weight of the 22 cubic feet of water in the penstock and the siphon function resulting from that 1400 lbs. of water, the flow of the system exhibited an intermittent air incursion into the flow, noticeable as a momentary gurgle at the turbine.
A new capturing tub needs to have the water level a couple inches higher than currently relative to the penstock intake. I might accomplish this easily by simply making a new tub with the shower drain fitting right at the bottom of the tub, or at least as low as I can get it, so the water level would be adequate for minimizing the vortex sucking in air. The space does not allow for a deeper setting for the tub as I mentioned earlier, but I also might make a wooden collection box so that it can be longer and lower in the water at the penstock intake.
Given my practice for photographing projects in the shop (routine things at the bench; the Gragg Chair Challenge, etc.) and the bazillion step-by-step pictures for A Period Finisher’s Manual I find myself ferrying SD cards up and down the hill to and from the barn on a regular basis as I download them to my laptop on the days I do not have it in the shop with me. I can easily just pop them in and out of a coin pocket for safekeeping en route.
On the trips up and back to the barn I often make a few stops to pull weeds in the gravel driveway.
A week or so ago I got back to the barn and found only one SD card in my pocket, so I assumed I left the other somewhere down in the cabin. It would turn up soon enough, I thought. I put another card in the slot of the camera and gave it no more thought.
Yesterday as I bent to pull some weeds I found the missing card, alas right in the path of my truck tires and any other vehicle going to the barn. Apparently I had placed it in my coin pocket but it worked its way out as I bent over several times. Clearly the card had been run over a time or two and was ground into the gravel. It was bent, bruised and battered, punctured nearly all the way through.
It no longer is functional. Fortunately I did not lose any pictures.
When we acquired Shangri-La in 2001 I was especially delighted that there were standing outbuildings suitable for a variety of purposes. The largest of these was a small-ish chestnut log barn that had previously housed livestock. For our use as a storage facility the original tiny doorway was a hurdle, it being only about 5-feet high. In short order I sawed the next higher log section to open the entrance to one that was not an undue burden to use, even though it was still not large enough to pass through without ducking.
After opening the doorway I had a piece of chestnut log about 3-1/2 feet long by a foot wide and perhaps eight inches thick. It had been notched with edge tools when originally built so that log scrap had a flat side from the git-go. Some time around then I saw The Woodwright’s Shop with guest chairmaker Don Weber who described what he called “a bodger’s shave horse.” John Alexander’s 1978 Make A Chair From A Tree, was already a long-time part of my personal library, and his infectious evangelism for primitive woodworking inspired me even though my own work was not centered in this direction. Those two paths intersected with the chestnut log chunk and it wasn’t very long before I took that and a bunch of other pieces from the scrap box and made a short length three-legged shaving horse. I used it for many years as a traveling demonstration tool.
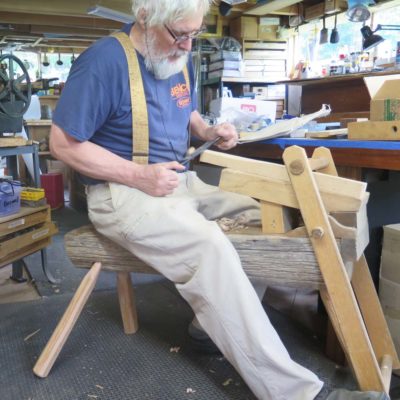
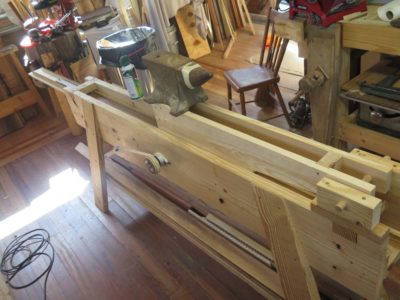
During the ongoing video project to document making a Gragg Chair I was vexed at being unable to locate and use this small shaving horse and instead had to use my gigantic one (6′ long), another almost-castoff I bought cheap at auction since the pivot rod housing was busted. I fixed it in an hour. It is a fine tool but not my favorite.
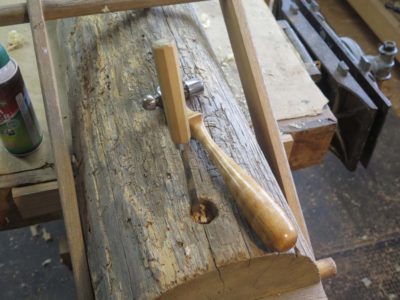
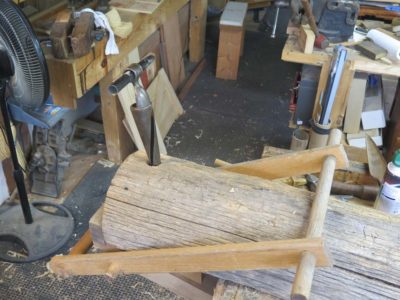
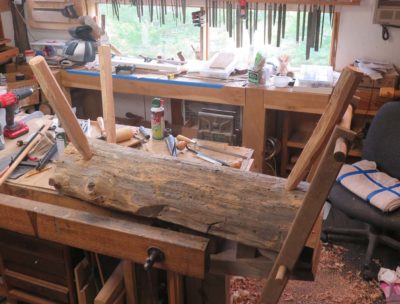
Recently I was rooting around the basement of the barn and came across the remains of the scrap chestnut horse. I do not have any memory of it making the trip from Maryland eight years ago, so I wonder of someone else tossed it into the big rental truck. I say “tossed” because all three legs were missing, and two of them had broken off inside the tapered mortises.
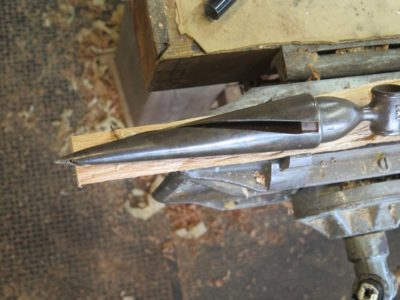
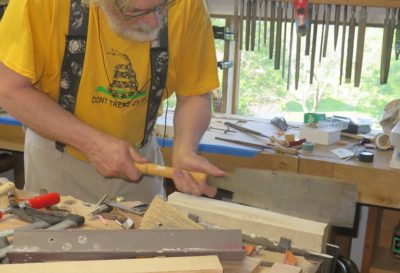
I cleaned out the detritus in the mortises then re-reamed the holes with this sweet tapered spiral reamer I got at a tool flea market for $12. It is beefy, precision-made, and still sharper than all get out. Two or three complete rotations is all it took to get the mortises perfect for new leg tenons.
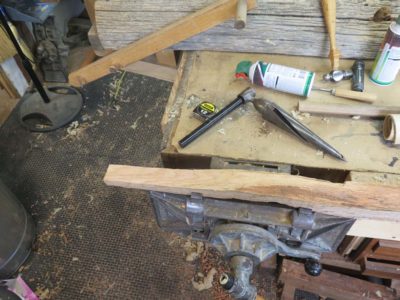
Using the reamer as the pattern I shaved three new legs from waste stock up in the Gragg workshop/video studio up in the fourth floor attic.
In about an hour of total time I had the new legs cut, tapered, installed and trimmed to length. I flipped it over and it was ready to be put to work.
It is good sometimes to have scraps just laying around.
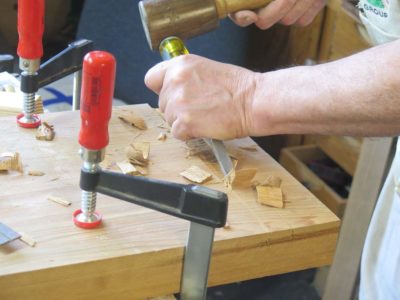
The front seat rail is the easiest so I start there. This is around Hour 9-1/2.
I spent the entirety of hours 8-16 roughing and fitting the cross elements of the chair; the front and rear seat rails and the crest rail. The front seat rail and crest rail are fairly straightforward as their “joinery” is simply shaped lap joints that need very little “fitting other than getting the dimensions correct and the joint faces aligned. Admittedly each presents its own minor challenge, in the case of the front seat rail the lap joint is curved at the frond frame bend, while the crest rail requires shaping in two axes but I accomplished that easy enough with my mni bandsaw. Sawing entirely by hand would have taken another 20 minutes or so.
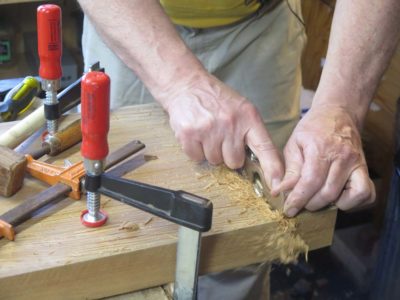
The chair sometime around Hour 13.
Of this second eight-hour set I spent more than half of it making and fitting the rear seat sail, simultaneously the most important structural element of the chair and by far the most difficult to fabricate as its ends are beveled on two axes and the compound curve must be “just right” to fit the five single element back-slat-and-seat-bottom pieces.
@ Hour 16.
As the project proceeds I am growing cautiously optimistic that I can get a chair constructed in 40 hours. Not finished by any means as the final shaping, sculpting, and painting takes another 40 – 60 hours at least, but fashioned and assembled. If I can get to the 40-hour mark and have a completed chair sitting in front of my I will offer this as a six-day workshop next summer. I’ve already had two people reserve spots should it occur, and since there would only be four students for this event it just might happen. The cost would reflect the fact that I would have weeks of preparation for it, but I am enthused nevertheless.
PS – I was asked about my choice of adhesive for this project, and yes I am using PVA purely for convenience. When I build chairs for real I generally rely on hot animal hide glue. Cold hide glue just takes too long to set up for me to proceed at the pace I need for this exercise. In fact, given the temps in the barn attic at this time of year, hot hide glue would present a bit of the same problem since it is so hot up there as you might expect from the heat radiating down from the almost 3000 s.f. of asphalt panel roofing on a bright sunny day.
PPS – The time lapse video is working wonderfully thus far, and my projection of the completed video at a bit more than one hour’s total length seems to be about right. I have to set aside some time to learn how to post to youtube.
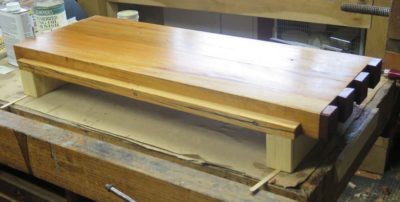
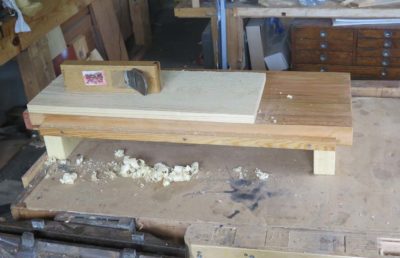
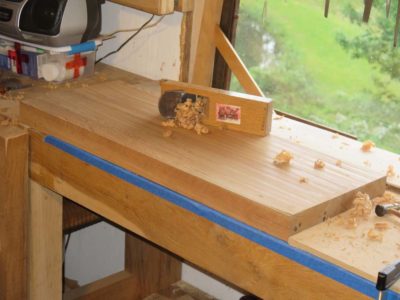
With the sliding-dovetail “legs” installed I trimmed the dovetail tenon flush with the side shoulder and underside of the slab. This allowed me to affix a simple edge-planing shelf.
Rather than punching through a square planing stop or two I opted for dovetailed end risers for my planing stops. I find these preferable in almost every way since they require very little effort or precision (I just set the angle on the table saw and cut everything in about five minutes) and screw one half of them into the end of the slab, spaced according to the tapered risers.
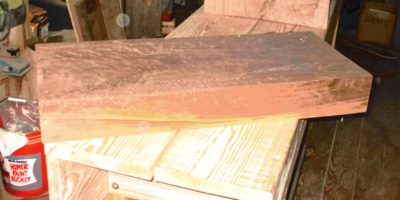
I gave every surface a slathering of some ancient Moser’s Polymerized Tung Oil Varnish whose entry into my inventory is lost in the distant mists of time. Each coat, thinned by about a quarter with naphtha, took three or four days to harden fully but I very much like the result. It really toughened up the cypress surface,
Thus this simple prototype is completed and ready for work. I found out immediately that it to too high of a work surface for actual planing, but when placed on my lower mini-Roubo the work height was perfect.
Now all I have to do is carve out some time to re-saw my walnut slab given to me by Tall Tom and make a pair of workbench accessories, a mini-bench and a planing board.
As our recent week of Ripplemania III proceeded we were both making progress, albeit not entirely unhampered by glitches along the way. John was very much involved in locking in his wave function (side-to-side) while I was dialing in my new swing-arm cutting head for narrow-ish ripple moldings.
Once I got the free weight on the pivoting head right it started producing some very nice moldings. The anvil weighed just the right amount and I could slide it back and forth to adjust the force on the cutting tool, heavy for the initial cuts then lighter for the finishing cuts.
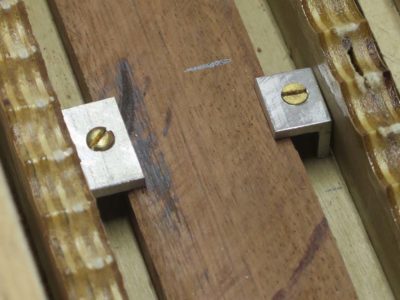
I also wanted to standardize the workpiece-holding aspect of the platen and spent some time making new clamps from a piece of aluminum angle stock, This approach worked extremely well.
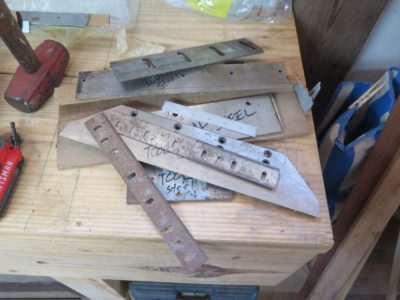
Another thing we did during the week was gather all the tool steel I had in my inventory to begin the work on making new cutters. I had already ordered a variety of tool steel bars over the years for one project or another, when combined with the “used” tool steel I also had resulted in quite a pile. Since I never throw away old planer blades there were a number of them, but the real treasure was the stack of hefty blades (~1/2″ thick) from a book producer’s guillotine that my pal Tom passed along to me. These massive chinks will yield a large number of cutters, probably more than I will ever need. I spent several hours working on a new cutter pattern for my machine but did not get that blade finished during the week.
Even before this week of prototyping John’s machine had ripple molding cutting nailed. So, he pretty much spent the week trying to do the same for the wave molding cutting function.
In working through the problems of wave molding cutting John kept running into the hurdles caused by the elegantly complex head he had created for his machine, one that could do either wave or ripple moldings, and ideally even both simultaneously. This was a really complex problem that expressed itself in a number of hiccups due to the lateral forces being exerted at the cutting edge. He definitely made progress but the problem of the lateral forces and their effect on the cutter-head were not fully solved.
My issues were much simpler, just get a cutter head and workpiece holding system suitable for scratching out a simple pattern. One of the things I decided almost immediately was that my machine was too low to the ground, especially when cranking the handle to drive the moving platen, so I just hoisted it onto a pair of low sawhorse. That helped my attitude immensely.
This is the scene in the shop for a part of nearly every day now. Mrs. Barn gets really distracted if I spend too much time sitting in the cabin living room so even for writing sessions I put my laptop into the bag I carried to work for many years and hike the hill to the barn.
Two or three times a week I begin each day in the shop with a 75-minute session of physical therapy exercises for my back and knee, but then it’s up and to work. Some days I putter for a while at the bench but if my brain synapses are firing well I move into the Eames knockoff easy chair mashing all the words together for A Period Finisher’s Manual until I get all creaky from sitting too long and have to do some physical work. Some days I get two writing sessions (well, editing and massaging is more like it), some days only one, but never three. I’m trying to keep the pace of working my way through about a thousand words a day, on a really good day I might approach 1500-2000 words crafted together seamlessly from a legion of shorter vignettes. Other days? Not so much.
I really wish I was a better and more orderly writer, but at 65 the odds are low for a fundamental change in that regard.
When doing physical work I generally listen to the spoken word on my mp3 player or CD player. Obviously when my task is crafting words this routine would be a hindrance so it changes to one of listening to music. One long-time favorite in my queue is this magnificent version of Handel’s Messiah, a creation I consider to be near the pinnacle of human civilization. In this version the instruments and arrangement are ancient, so it is cool to watch the musicians playing their antique instruments. This version in particular is both comforting and inspiring.
Of course the music is sublime, and the performances utterly captivating and joyous. But the alto, Delphine Galou, words nearly fail me. Ho, lee, cowww! Her voice flows like warm honey. Unspeakably magnificent. I’ve not found if she ever does any recordings or performances that are not classical and I am not a huge fan of operatic music, but if she ever tours the US I will make every effort to go. Well, provided I don’t actually have to travel very far. Or go to a city. ;-)
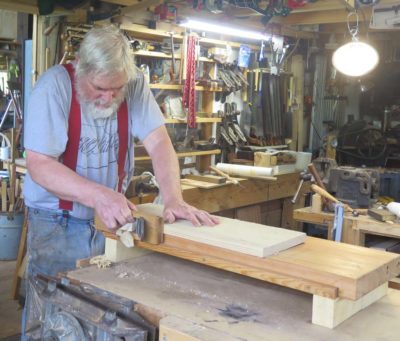
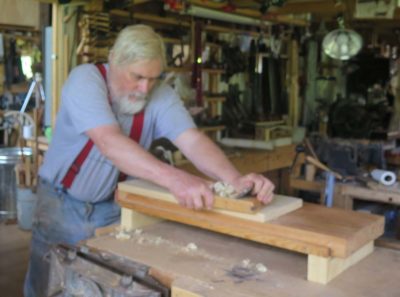
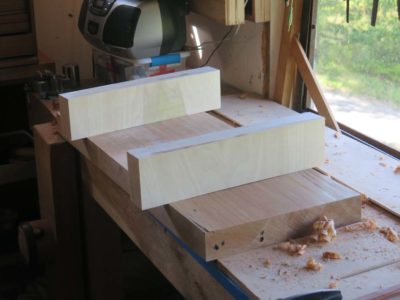
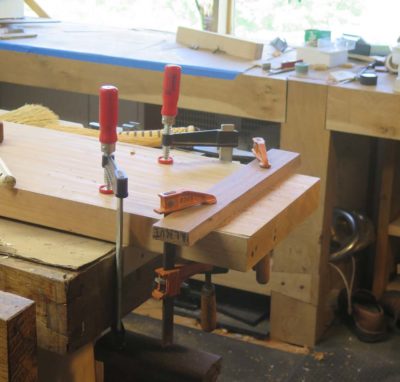
With the cypress slab glued up and the ends trimmed I gave it a light planing using the first Japanese plane I ever bought, maybe thirty years ago. I set the plane to take a beefy cut to get the work done in a hurry, the final planing was still a ways down the road.
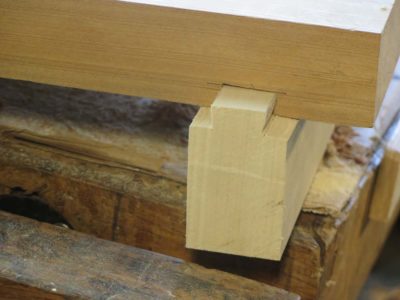
For the feet I had a couple of 12/4 tulip polar off-cuts from my stock of Gragg chair materials. I decided to use this material with the grain running parallel to the cypress slab for the purposes of sympathetic moisture response.
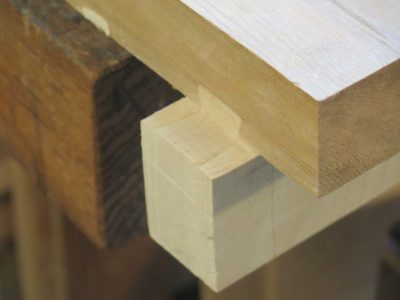
These hunks were set into the underside of the slab with sliding dovetails. I cut the rough rebates on the feet with the ryoba saw and finished them off with my homemade dovetailing plane.
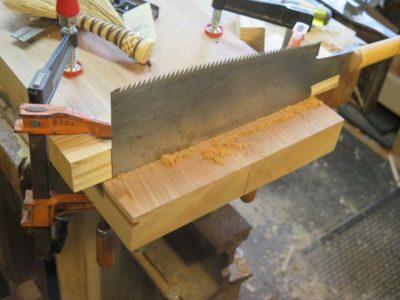
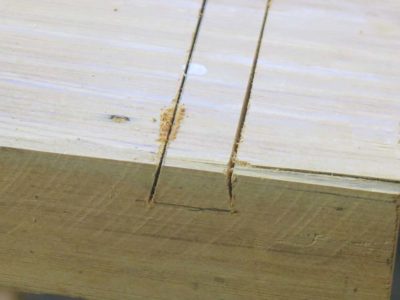
To make sure I cut the sliding dovetail slots with the same exact angle I made a sawing bevel from a piece of waste wood.
Again I used the ryoba saw to cut the shoulders of the slots, the bevel guide made it a piece of cake.
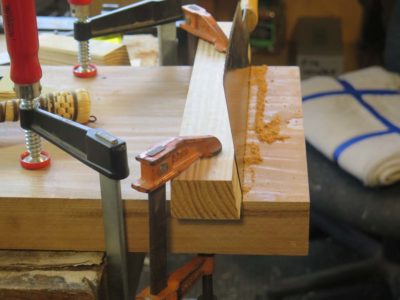
Most of the waste was removed with a chisel and mallet, followed by my dado plane. I would have used a router plane but for the life of me I cannot remember where I left any of the three I use regularly. I hope that fact comes to me in a dream or something.
With a few smart taps from my mallet the feet were seated into the slab.


Recent Comments