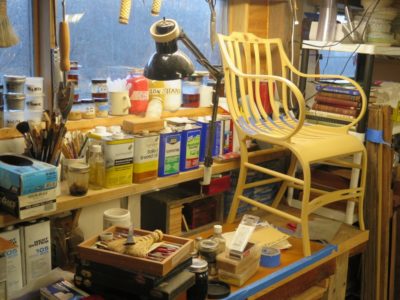
2023 is shaping up as a pretty Graggtastic year in the shop. I am in the home stretch of the copious pinstriping for one chair to be delivered. A second client’s chair is fabricated but I have not yet begun the painting, and a third chair is about half built.
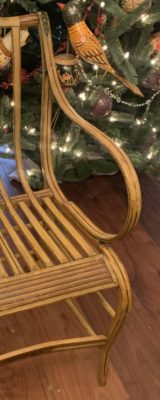
Then last week I was contacted by someone who has a Gragg chair with a broken arm, and based on the images they sent it just *might* be ONLY THE THIRD ORIGINAL, COMPLETE ELASTIC ARM CHAIR known to exist!

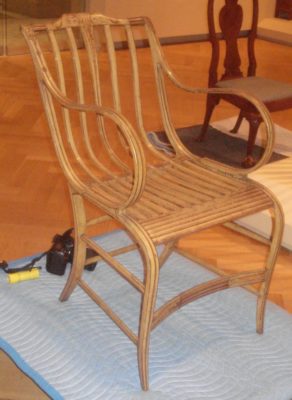
There is the completely overpainted chair at the SI that I kept in my conservation lab for almost two decades, trying unsuccessfully to persuade the curator to allow me to remove the overpaint.
Then there is the beauty at the Carnegie in Pittsburgh, and the heavily restored one in Baltimore. Unfortunately at the moment I cannot find my overall photos of the BMA chair but I have a large folder of detail shots. As I understand it the Baltimore chair was missing some elements that were newly fabricated and integrated to make a whole chair.

This newest chair has a tricky repair to be made to the arm, and the putative client inquired about me making a new chair to make a pair with the old one.
On top of all of this excitement there are several new Gragg-ish projects on the drawing board. Without revealing all the cards, consider that 1) we have a new grandson, and 2) the front porch of our Shangri-la cabin is rocking-chair-tastic.
Finally, I’m at long last seeing the light at the end of the tunnel for the “Build A Gragg Chair” video set. Whether that light is sunshine or an oncoming train I cannot yet be certain, but I remain hopeful. At the moment I am estimating the series to be more than a dozen half-hour-ish episodes, and Webmeister Tim and I are noodling the mechanism for the on-line offering. I’ve had one faithful donor sending me a small contribution every month (THANK YOU JimF!), but we need to come up with a system for processing the $1.99(?)/episode charge without viewers crawling up my back as the episodes are released. One approach I will almost certainly NOT take is a subscription model. I’ve spoken to some subscription-based content creators and they are unanimous in their regret. No matter how much content they create, their subscribers want more, and more often. I want no part of that.

Now the only thing left in the equation is the resolution to the question, “Why am I not as energetic and productive in my 68th year as I was in my 28th?”

‘Tis a mystery. Who knows, if I can solve that problem, I may even want to offer another Gragg chair workshop if there is interest.
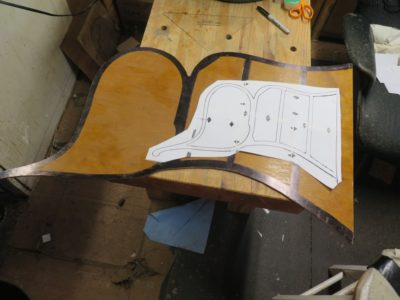
One of my many projects for this winter is creating of a set of full-scale construction drawings of the Gragg Chair to sell in the Barn Store (not cheap), and provide to last year’s workshop students.

I have a number of full-scale drawings and tracings from the Smithsonian chair, in my opinion the best condition of the extant chairs, but these are just working drawings for me to use. I need to create a set that would inform the craftsman out in Topeka or Peoria or even, heaven forbid, California.

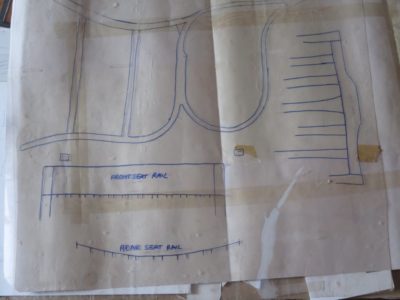
I’ve got the roll of drawing paper, I located a shop over the mountains to replicate them (in the old days these were known as “blueprint shops,” but like film photography this is an extinct technology; it’s all bitmap imaging/printing, now), and I’ve got a big flat space up in the barn attic on which to work. At this point I’m just waiting on some warmer, sunny days to heat the space enough to work there for more than five minutes. Were I less of a Luddite I would probably try to learn SketchUp for the task but at this point I am just trying not to forget the compewder stuff I already know.
An ancillary project that excites me is creating a half-scale version of the chair for my soon-to-arrive grandson to use once he becomes a toddler. That will require a whole new set of drawings and bending forms. I cannot wait to get that up to speed, by my calculation I’ve got about 24 months to get that done.
Sorry, I accidentally posted this headline last week with no content. Here is the content.
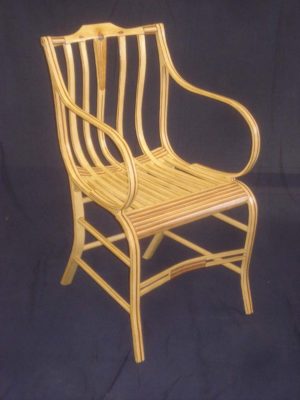
I find everything about the Gragg Chair to be compelling, from its aesthetic sinuous elegance and innovative form to the engineering brilliance and the craft challenge itself. But, could the same form and concepts be taken to different places? What else could be accomplished in the territory of Graggsylvania?
I intend to find out.
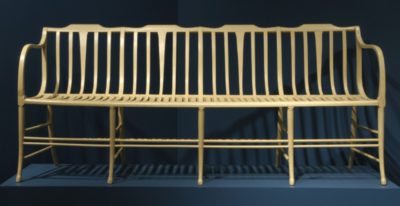
I am not the first person to ponder an exploration down this path, beginning with Samuel Gragg himself, who constructed this unsuccessful (to me eye, at least) settee. I fully intend to make a four-unit settee employing the fully steam bent structural integers rather that the partial one he employed. Actually, that might be a post-winter project as I would have to do it on the unheated fourth floor which I promise you is not someplace to be desired as a workspace once the chills set in, although that might just work for steam bending the parts. If I can clear space in my heated studio, however…
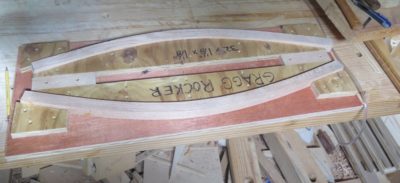
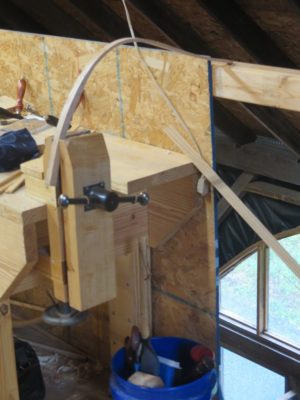
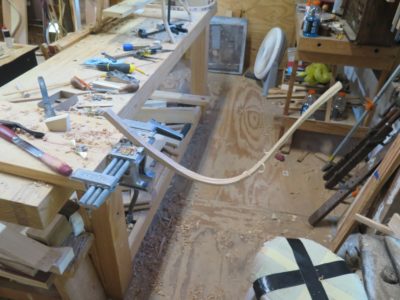
And how about a Gragg Rocker? I’ve mocked one up and have bent the rockers for it, now it only takes time and energy.
What’s next, Gragg porch chairs? Gragg footstools? Gragg plant stands? Gragg child’s chair (now that is really intriguing)? The options boggle the mind and fuel the imagination.
Our final day of the workshop opened with our recognition that no one would be 100% completed with the chair construction, but everyone was close with the demonstrations of the last tasks to be completed.
This list included adding the front stretcher and rear rungs along with all the intermediate seat slats, insertion of four triangular glue blocks associated with the arms, followed by all the sculpting required after all the construction is finished and glued up.
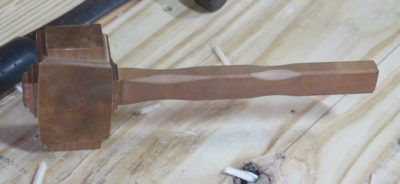
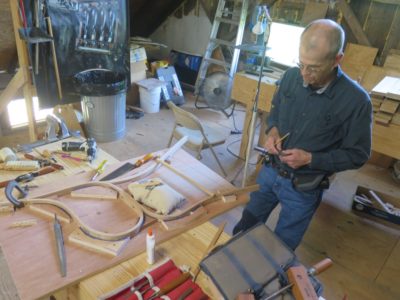
I forgot to mention earlier that one of the fellows brought a nicely finished Studelyesque mallet, based on the castings by Bill Martley that I blogged about earlier. The mallet came in handy a great many times.
It was a great week of fellowship, comradery and loads of creative work. Throughout the six days we jointly noted a number of places in the syllabus where en toto a few hours could probably be shaved off the schedule. So if there is interest I would be glad to offer the workshop again, but even better.
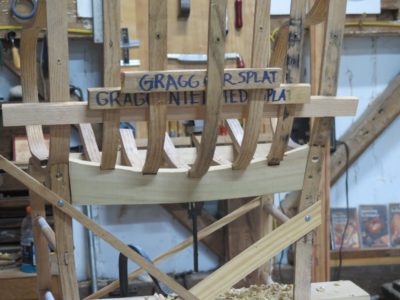
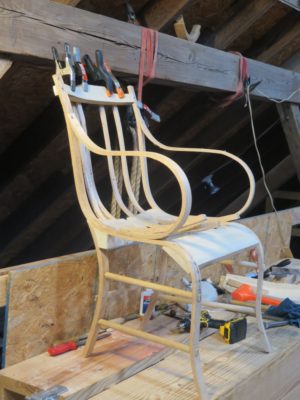
With the incorporation of the continuous seat/back slats the artifacts began to adopt the true character of a Gragg chair.

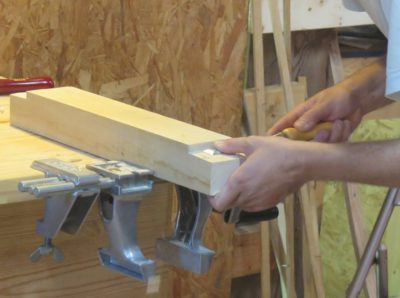
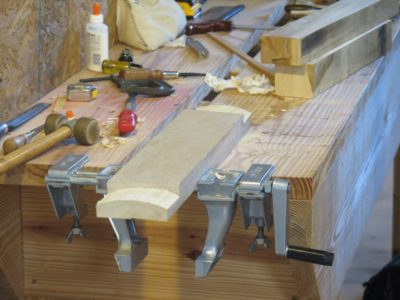
There’s not really a lot to say about the process; you thin the vertical sections to impart the requisite springiness (this is where clamping/vise weirdness is a feature, not a bug), mark, cut and excavate the dado troughs in the rear seat rail, and lay out the half-blind dovetails on the front set rail and the mortises in the crest rail. It sounds so mundane to describe many hours of intense work thusly.

One “complication” is that the slats must be off-set front-to-back so that they are staggered in order to impart the “elastic” leaf spring function to the chair as a whole. The is accomplished by using spacers between the slats just above the rear seat rail. Only after this configuration is achieved can the half-blind dovetails in the front seat rail be layed out and cut.

The dovetails themselves are a piece of cake, literally a minute or two per joint. The pocket mortises chopped into the rear edge of the front seat rail are a bit more involved but still not hysterically complex.

Once this is done the tops of the slats can be marked and the tenons cut.
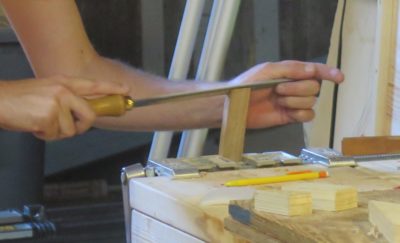
Fitting and shaping the cross-chair elements is at the heart of turning this pile of parts into a structural construct capable of supporting a sitting body. This takes a lot of time.
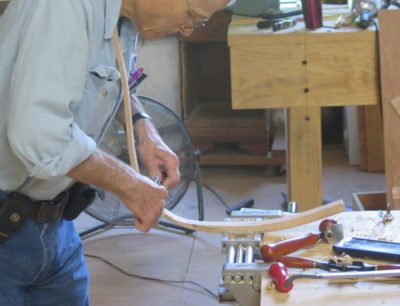
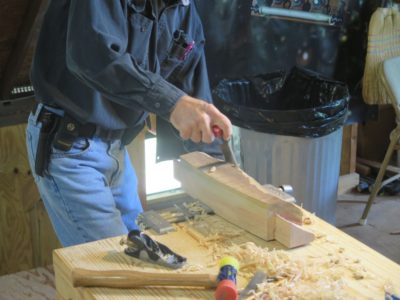
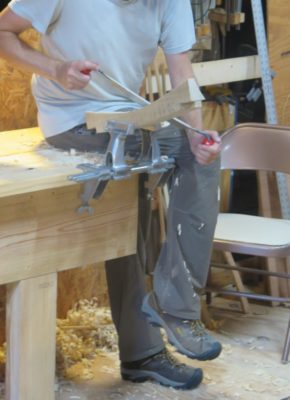
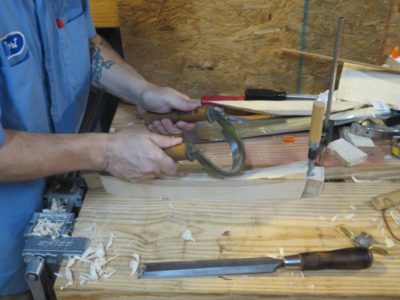
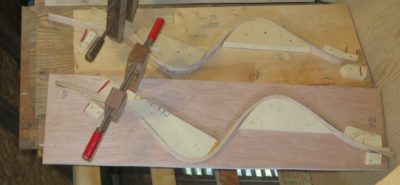
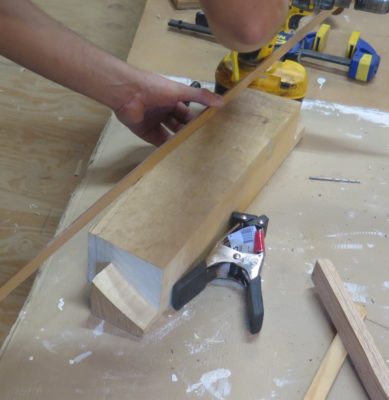
As the cross-chair structural elements were added and shaped it was time to move on to the work of shaping and thinning the continuous seat/back slats. My experience has been that these must be bent full thickness over the whole length, then the section beginning with and above the rear seat rail must be thinned by hand, usually with spokeshaves or drawknives to the point where they are appropriately springy. Concurrent with this step is cutting the dado troughs for the slats in the rear seat rail and there is a fair bit of back and forth getting them to fit properly and be properly springy so that it can all go together in the end.


Since one of the students had very limited experience with steam bending I loaded up the steam box with chair parts and went through the entire process with him so that he could get the “feel” of how each of the parts was cooked and formed.
By Day 3 we were deep into the woods of Fussyville as curved and tapered parts had to be individually fitted to each other. There was no straightforward way to do this, you just gotta nibble away and sneak up on it.
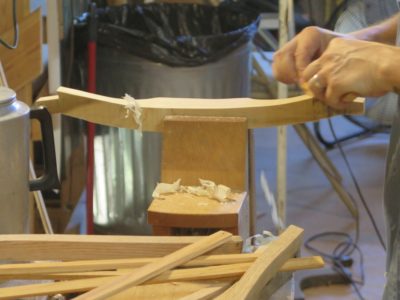
With the front seat rail being the easiest cross chair element to fabricate and fit, it was time to move on to the rear seat ail and the crest rail. One of these is simple, straightforward and only takes a short time to get roughed and begin the shaping. The other is a complete pain in the kiester. These can be addressed in whatever order you choose, and in fact the students chose different orders.

The easier one is the crest rail, which like the front seat rail is a glorified rabbet/lap joint for an element that is afterwards cut on the curve and the profile.
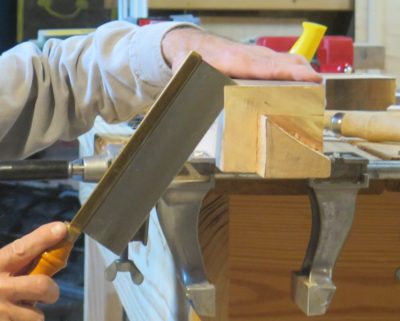
The royal pain is encountered when cutting and fitting the rear seat rail, an exercise that can take the better part of a day. I am convinced Gragg found a simple way to do this, perhaps even an easy way, but I have not yet re-engineered it so thus far. I’ve built eight chairs and every one is a struggle at this point.
Finally the pieces get screwed together temporarily in order to move on to the next steps. Though it might feel like you are on the home stretch now, unfortunately you have just barely arrived at the halfway point in the construction process.

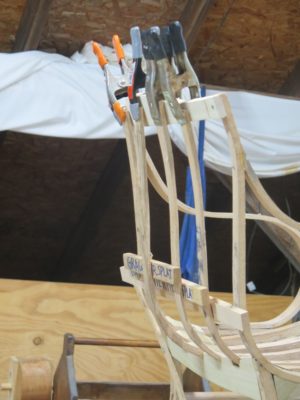
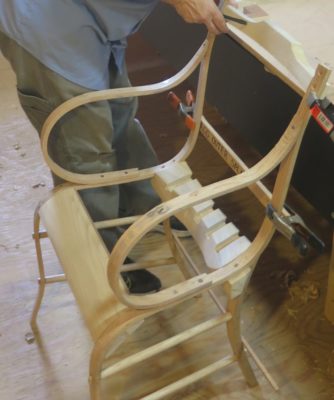
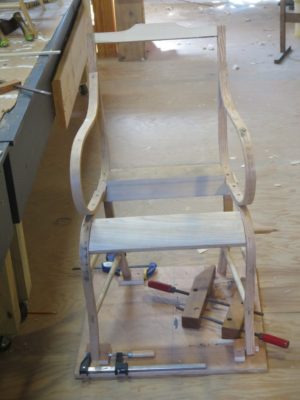
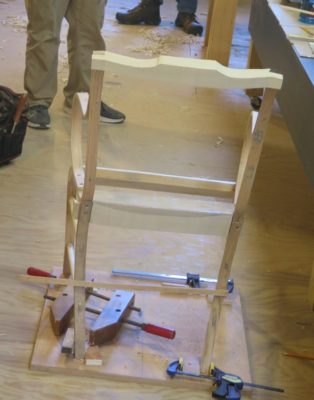
Early on Day 2 everyone had their side units assembled and thus began one of the more frustrating parts — getting the baby up on its feet. As I often say about Gragg chairs, you are not so much constructing a chair as you are assembling curvilinear sculpture in three-dimensional space.
To assist in the process I had constructed for each student an assembly jig including four stirrups indicating the location of the four feet. Combined with a few diagonal struts held in place by spring clamps, the correct posture was assured with the use of a bevel gauge to make sure each side was canting in the proper direction at the correct inclination. Now it was time to start fabricating and fitting the cross-chair elements, the front seat rail, the rear seat rail, and the crest rail. It sounds so simple but when you start fitting structural elements to curved and tapered components it suddenly is much less simple.
I learned two important items today to add to the “To Do” list in case I ever host this workshop again: 1) make a story stick for each student so they do not have to spend so much time measuring and remeasuring, and 2) have a fully dis-assemble-able chair so that it is quicker for me to explain how the parts fit together. I am working on that project right now. Perhaps a third thing is the hindrance of always working alone, repeatedly I would find myself forgetting to say out loud parts of the conversations going on inside my had, conversations that actually yield useful information about the “whys” and “hows ” of doing things.
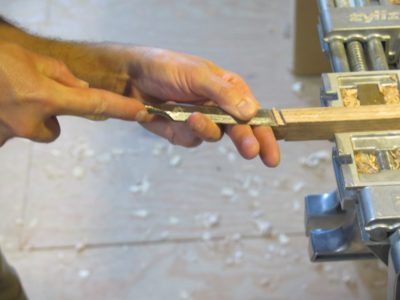
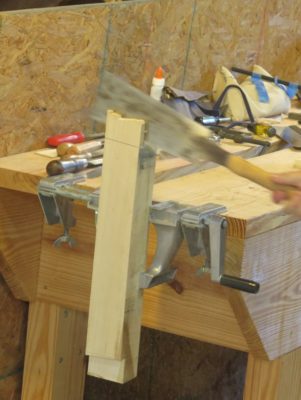
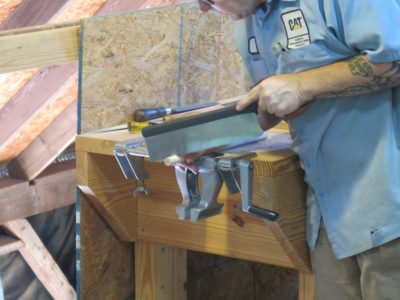
The easiest of the cross-chair structural elements is the front seat rail, so that is where I had the students begin. I had found that using a Zyliss vise is most beneficial to the Gragg chair building process so I made sure each workbench was outfitted with one. By the end of the class each student was a big fan of the tool.

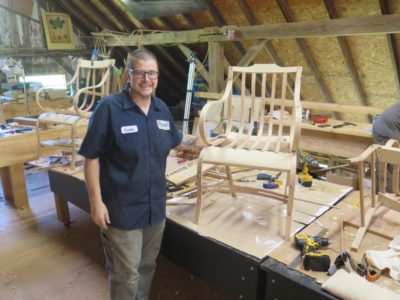
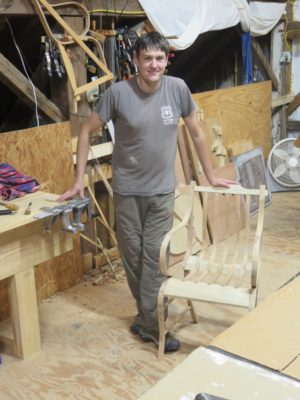
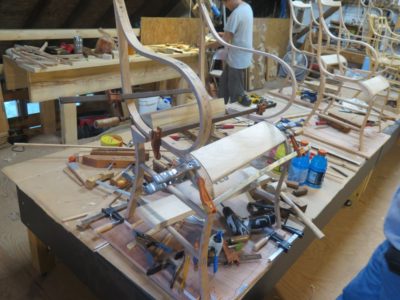
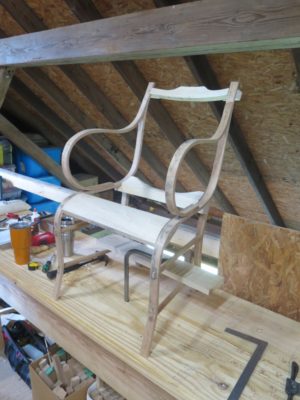
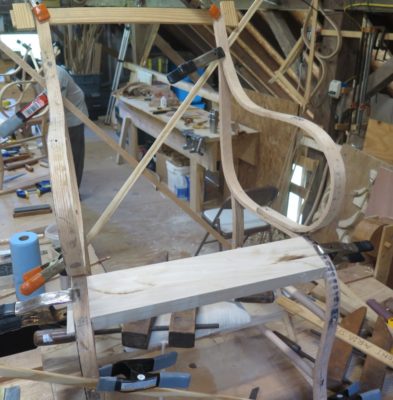
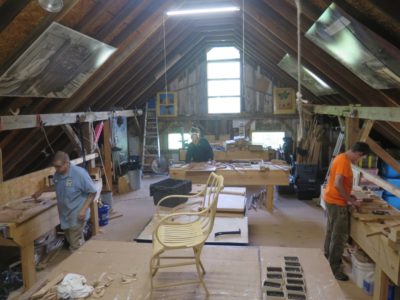
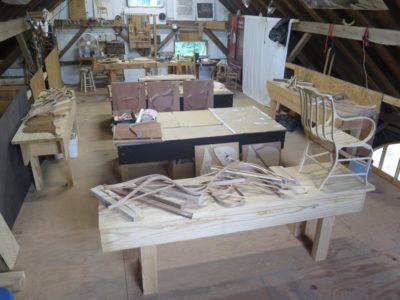
Near the end of the day it was a thrill to see the inventory of chair forms emerging on the assembly table.
Bright-eyed and bushy tailed everyone hit the ground running Monday morning, assembling the two side units that are the starting point for the chairs. I made an assembly jig for each person to use as I do not know how to actually build a functioning and symmetrical chair any other way. Although our records of Gragg’s working methods are scarce, I would pretty much bet the house that he built his chars in a similar manner.
The first steps in assembling the chair out of its multitude of parts were fitting the serpentine, curved arm, and rear leg together, requiring only some trimming with a saw and a rasp, and screwing the parts together.
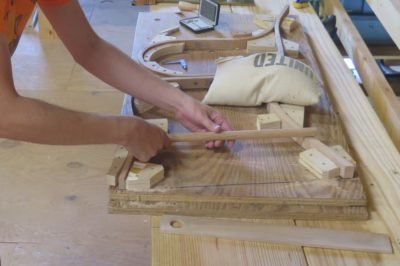
After that comes the first of many fussy stages, although not to the points of exasperation that were awaiting everyone in the days to come. This one involved laying out and cutting the stiletto tenons and their companion mortises for the side rungs. It was one of my improvements over Gragg’s original techniques as this was a much stronger and more robust joint than his full-sized drilled hole through the legs, many/most of which have fractured over the centuries.

Just to make sure it remains that way the joint is glued and pinned with a small brad, a construct I have found to perform superbly.
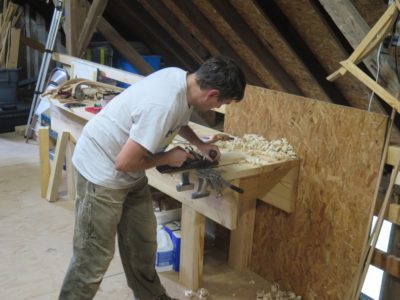
One final but not insignificant issue for the day and week was the heat. When I first contemplated this event eighteen months ago I thought the final full week of August would be a nice fit. Normally here in the mountains the last week of August is more likely to be the first week of autumn with chilly nights and mild days rather than the last week of summer. This was a central consideration given that the only place big enough for the workshop was the fourth floor, immediately underneath the asphalt-paneled roof. We’ve even had frost this week in years past, but not this time. It was the hottest full week I’ve seen here in twenty years. I kept as much air moving through the space as I could but it was just barely tolerable at times. Two participants preferred warm/hot weather, but for us Minnesota boys it was on the edge.
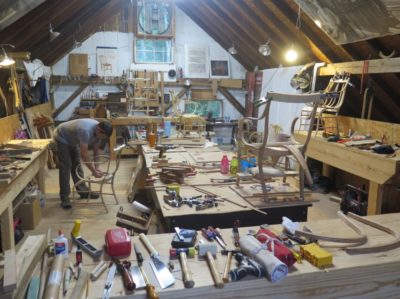
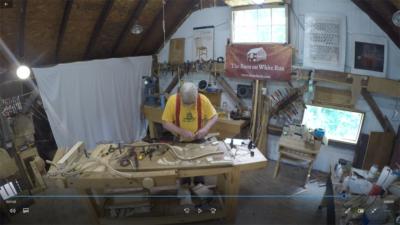
With the three students in-house by Sunday evening of last week, we began with a quick tour of the attic space we would be using for the chair building; it was the only space large enough for the four of us to be building four chairs simultaneously. We were delighting in the acquaintance-making yet tempered with the knowledge that the fourth student, one of my earliest and most ardent Gragg enthusiasts, had died suddenly and unexpectedly last month while I was preparing for the workshop. His memory was never far from my mind through the week.
We then descended to my second floor studio where I treated them to the uninterrupted (except for my commentary) hour-long time lapse video of my “40-hour Challenge,” allowing them to see the entire process from beginning to end. With that, we were ready to hit the ground running Monday morning.

Recent Comments