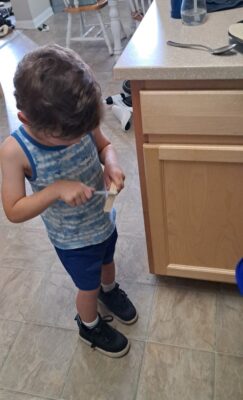
Recently Li’l T got a small rasp and has been going to town carrying it around the house with the rasp and a scrap workpiece from Dada’s latest project. The time has come for Grandpa to think about lighting the torch to be passed to this little guy and his littler brother, Mighty M, who wants to be doing everything his big brother is doing. Littlest brother Wondrous W is only a month old so he is behind the curve for now, as is their cousin Dynamic D who is nine months old. Yeah, walking and talking are helpful in the process.
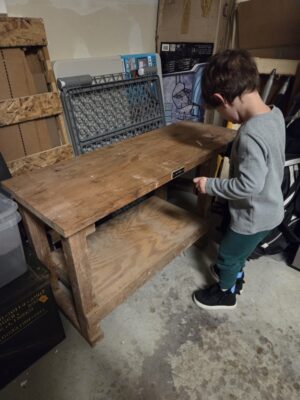
About 35 years ago I made a pair of half-scale but honest to goodness workbenches for my girls. To that end I recently took Mama’s workbench to live in Dada’s little workshop in the garage for Li’l T amd Mighty M to sue to their hearts content.
This new epoch makes tools a part of the equation for every Christmas and birthday from this point on. Whew.
The day began with smoothing the parquetry compositions, first with toothing planes, both manufactured and home-made, then followed by blocks of pumice.
The next step was to lay out a simple banding knotwork design for one corner as an exercise.
Excavating for the inlay came next, followed by cutting and fitting the elements of the design.
In the end everyone went home with examples of the techniques to apply to their upcoming projects.
If this technique interests you I hope you will join me for next year’s class on October 1-3, 2026.
It’s been a banner year for the Barn Clan, with grandson #3 born in February and grandson #4 born last Friday, giving us quite the inventory. As the fates would have us all the grandsons live within five miles of each other, so Grandma Barn is always ready for a road trip.
Good thing Grandpa Barn has bins of tools ready for the new hands.
Opening up the panels glued up the night before is always a thrill for the students to see their work coming to fruition.
The next step is to trim the fields to make them good rectangles for the banding followed later by the borders. A variety of veneer saws were at work, ranging from pricey French saws to inexpensive Japanese ones. They all work.
The perimeter banding was applied and adhered with 192 gws glue, and the banding held in place with aluminum push pins that are surprisingly similar to those used by craftsmen 250 years ago.
Throughout the day and overnight, if a panel was not being worked it was placed in front of a box fan to drive off as much moisture as possible, to harden the glue under the parquetry. That strategy was somewhat successful.
Last month, for the first time in many years, I was able to offer an Introduction to Parquetry class at Joshua Farnsworth’s Wood and Shop near Charlottesville VA. We plan for me to offer the workshop again next year.
I had two exercises in mind for the students, all based on sawn veneer edge strips from boards.
The strips were then cut into identical 60-120-60-120 parallelogram “diamonds” or lozenges with a simple jig and a dovetail saw.
NB/ mea culpa – over the years I have attended and spoke at countless woodworking clubs and guilds, and invariably there is a show-n-tell session, and invariably they feature prominently some elaborate jig a member made to do this or that function. (Yes I know I used “invariably” twice in one sentence. That is a purposeful literary flourish.) In the old days I would just roll my eyes and tell myself, “That’s not woodworking.” Then we started the Roubo Transalation Project. Turns out the world of the ebeniste’ was all about jigs and patterns. To quote LBJ, “I reserve the right to be smarter than I used to be.”
Once the pile of lozenges got big enough, they laid out X and Y axes on a piece of paper to guide them then started assembling the composition by gluing down the lozenges to the paper with 135 gws hide glue.
Once the composition was large enough to cover the “field” of the substrate panel, in this case 1/2″ Baltic Birch plywood, the working face of the parquetry (ultimately the verso) was slathered with 192 gws hide glue, followed immediately by the face of the substrate panel.
Then the wo glued surfaces were brought together and clamped using another 1/2″ panel as the caul and a double layer of corrugated cardboard as a gasket.
A few months ago I posted about a large chunk of a maple tree that came down (about 18″ at the bottom), and my cutting it up.
After I was back home my son-in-law and Li’l T moved the bolts into an abandoned goatpen house I built 25 years ago. It is a better structure than some of the church-camp cabins I stayed in as a yoot. The wood will remain there until I decide what to do with it.
I expect it will mostly become turned bowls but my lathe needs a substantial upgrade for that to happen.
Over Labor Day Weekend I was once again a presenter/demonstrator at my friend TimD’s Historic Trades Fair in the central part of our county. There were several dozen artisans there, including the leather/fur seamstress I shared a tent with, blacksmiths and sheet metal workers, premium woodworkers, gunsmiths, tailors and much more. Tim thinks he will max out with about fifty demonstrators in the next couple years.
And there I was doing my thing, presenting myself as a congenial woodworker with a complete shop while working on a Gragg Elastic Chair and engaging with the many visitors who stopped to ask about it.
The setting is nothing short of spectacular and the weather was absolutely perfect.
Here’s a glimpse of a recent fortnight in Shangri-la.
As is often the case my brother and his wife come for a visit, now extended from one week to two weeks since they are now both retired. I guess that is a commentary of sorts, with my siblings and I all retired including the baby. We are fortunate in that all five of us get along famously and maintain a steady text thread keeping us up to date with each other. The thread activity really ramped up when our Mom was in her final decline a few years ago and it never stopped.
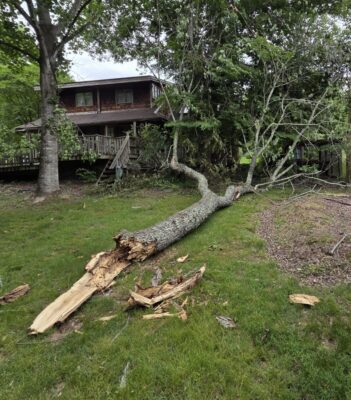
Anyhow, you might remember the post a few months ago about trolling for firewood on the homestead, with a special emphasis on existing windfall waiting to be harvested. Of particular interest this week was the cluster of storm damaged locust trees up at the top of the hill, with several large trees down and tossed about. FYI locust is a highly prized firewood, very BTU dense with a hot burning temp and less ash than other woods. When we got down to it, we realized that in addition to the already-dead trees there were at least a half dozen still-standing (but probably not for long) locusts that could/should come down.
So down they came. It took some forethought as the trunks were intertwined and needed to come apart in a particular order. My brother is really good at that work. By the time we finished the week there were four heaping trucksful of sawn and split firewood to stack up at the barn.
At this point I am well into the firewood inventory for Winter 2026/2027, but I still have a lot of windfall to harvest. By my guess it will be about ten truck loads, so all is good. I will work on those truckloads in between other stuff over the winter. It’s gonna be crazy with grandson #4 due probably next week.
I do not know the setup of the Blacksmith Bolt and Rivet fellow (he’s been getting virtually all of my wood screw business for quite some time) but this video of a “small” Japanese screw making operation tickled my fancy.


Recent Comments