The Lute Player Gets New Fingers
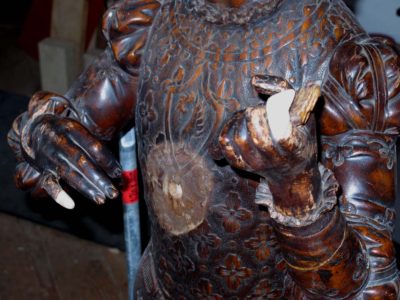
While conserving the wood sculpture “The Lute Player” I needed to carve some replacements for missing fingers on the sculpture. Have you ever tried to carved curled fingers in short grain softwood? Holding them little things is a pain. For a bit I contemplated making some non-wood replacements, such as making a wax maquette on the finger stub, taking a mold, then casting an epoxy replacement in place. In the end I concluded the the approach most beneficial for the long-term health of the object would be to simply carve some new fingers in similar wood. I chose some vintage Eastern White Pine with the exact grain orientation as the unidentified softwood of the original, and with approximately the same growth ring density.
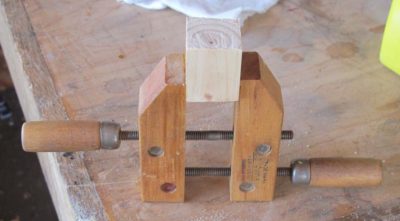
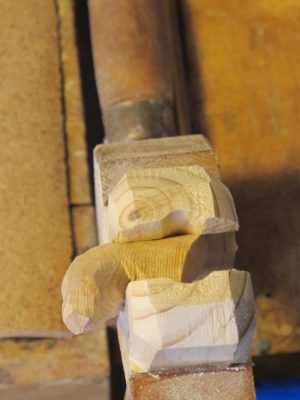
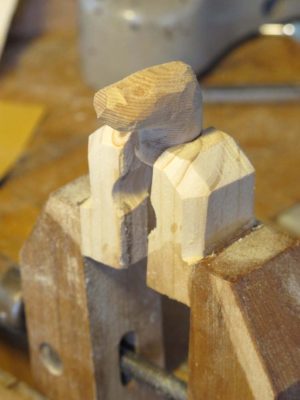
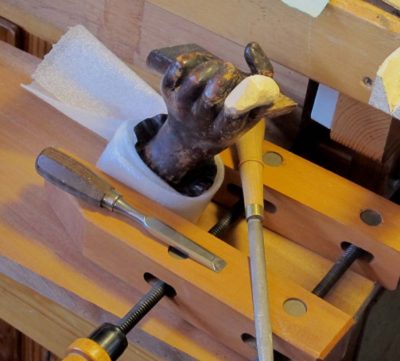
To come to grips with the problem of carving short grain stubs I came up with a nice solution that undoubtedly a multitude of you have accomplished before. I glued some blocks onto the tips of a wood screw then excavated voids in the block faces that fit the fingers perfectly.
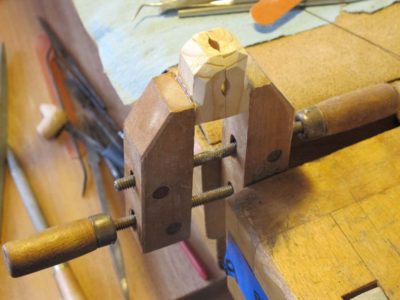
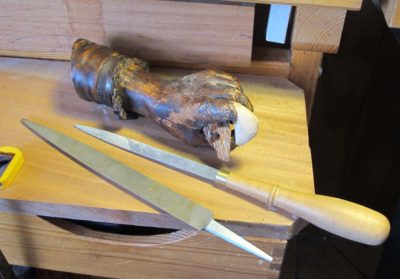
It made sculpting them a piece of cake. Most of the shaping was accomplished with a small Auriou Modeler’s Rasp or a beautiful Swiss file I believe is known as a barrette file I got from Slav the file pusher (just kidding Slav, it’s just that I have a weakness for elegant and exquisite files, and he is my supplier of NOS files).
Once the fingers were roughly correct I fitted their gluing surfaces to those on the finger stubs of the sculpture and glued them in place with 192 gram hot glue. Then I could make the surfaces of the new finger parts fit the adjacent surfaces and conform to the overall composition.

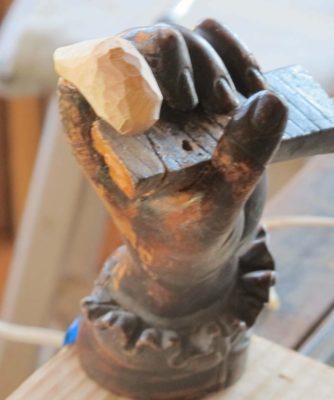
This was especially necessary for the index finger on the left hand; I simply could not figure out its exact proper position and shape until after I had glued the finger blank on the hand, then had the hand set in place on the sculpture. Once that was done the correct shape and attitude became readily apparent.
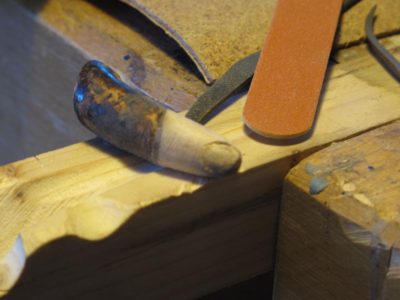
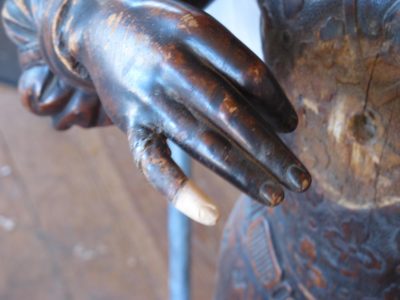

The final steps in this finishing process occurred only after all the reassembly was complete, but I wanted to present the process in toto, so do not be confused by the pictures as they seem out of sequence. Even the pinkie on the right hand, which I could ascertain the size and shape very closely as the digit above it was also detached, required some final shaping in situ. Since the piece was pretty small and mostly short-grained, I placed a felt pad and block underneath the fingertip, gently slid in a clothespin half to provide the exact amount of support, and finished it off.


Join the Conversation!