I was delighted to see that Tod Herrli‘s new video on making an ogee molding plane is ready to debut. I made sure to get my pre-release order in so that it could come as soon as possible. I have long held sincerely that Tod’s first video on making a hollow-and-round pair of planes was perhaps the finest instructional video I have ever seen on any topic.
Just a reminder, Tod will be teaching two workshops at The Barn this coming August 11-17. Drop me a line at info@donsbarn.com if your are interested in joining us.
My friend Joshua Klein reminded me about this youtube.com version of my presentation on “Gap-Filling and Flexible Adhesives for Wood” I made at the Getty Conservation Institute in LA.
It’s not bad.
The paper itself is on my Writings page here.
On Wednesday I got the first production run of the three new models of polissoirs that have been in development for many months. Here is a picture of the whole team, with the original polissoir on the left.
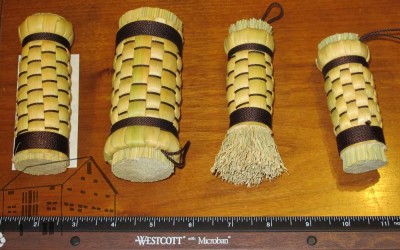
Next to the Original model is the new, Full-Sized Roubo Model polissoir, a full 2-inches in diameter as Roubo first described. It is definitely a handfull. You can get an idea of the comparative size by viewing the 2-inch in my mitt, and the 1-inch in the same place.
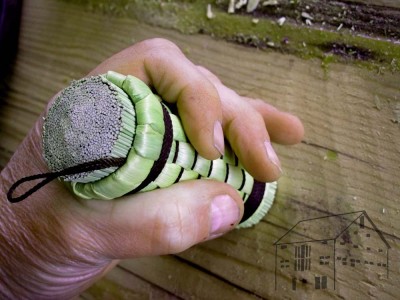
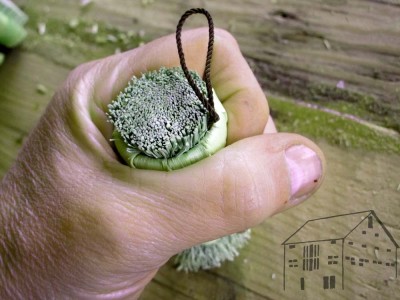
The third player in the line-up is the polissoir made especially for burnishing intricate high-relief carving. This 1-inch diameter polissoir has 1-inch long bristles from the raw end of the broom straw stalk. I was so enamored with my prototype that I ordered these to include in my inventory, rather than just keeping the prototype in my tool box as a whim. With these new polissoirs I found it simple to trim and shape the tip to any desired profile with a pair of scissors. I like to round them a bit more than they are when they arrive.
The final addition, the polissoir on the right, is identical to the Original model on the left except that it has bristles of 1/4″ length rather than 1/8″. This innovation allows you to sculpt the business end to whatever configuration you want. I find this model especially useful for burnishing the insides of concave surfaces and the corners of panels.
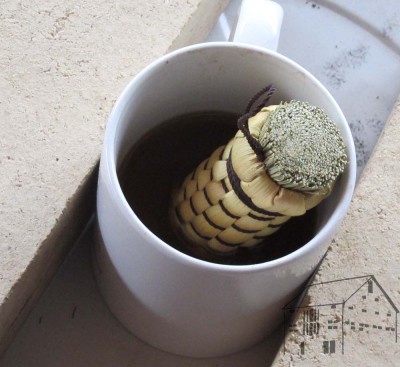
The first step for this is to submerge the tip into molten beeswax until it is fully saturated then withdraw it and allow it to cool.
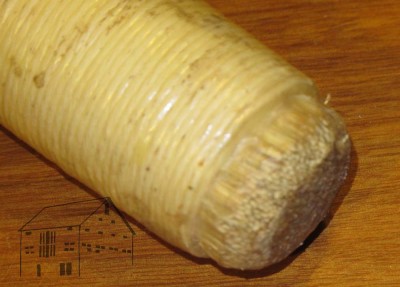
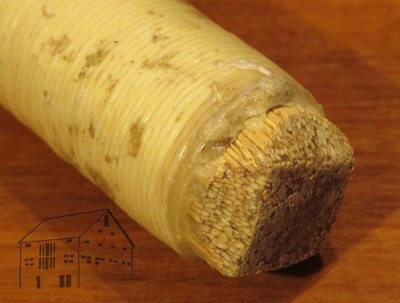
Once the wax is cool and hard you can shape it however you want with chisels and a float. Using images of my prototype, you can see the domed tip, for burnishing the insides of concave surfaces, or the flat square tip for getting into the corners of panels.
Until The Barn store is up and running, which I think will be very, very soon as I sent Jason one last piece of information for the Shopping Cart this morning, you can order these direct from my with PayPal at my donsbarn250@msn.com eddress.
The two new 1-inch models are $24 like the Original, and the full sized 2-inch unit is $42. Just let me know if you want The Original, the Full-Sized, the Carver’s Polissoir, or the 1/4″ Bristle Polissoir. shipping per order is usually about $4-5, double that if overseas.
I think these would make a great belated Valentine’s Day gift, don’t you?
The recent convergence of editing the section of Roubo attendant to Plate 18 combined with assembling additional doors for the book cabinets of the library made me reflect on the nature of the humble pipe clamp, particularly in the ability to make pipe clamps any length necessary for the particular task at hand.
As part o the descriptive text for Plate 18 Roubo waxes enthusiastically about both bar clamps and the devices he calls “clamp extenders” to allow any particular clamp to have its capacity increased.
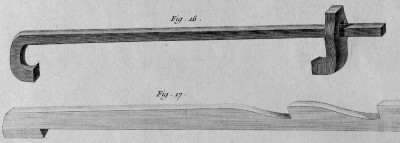
Here is the device Roubo illustrated for this purpose.


Such a concept is not unknown to modern woodworkers especially in the use or even the fabrication of bar clamps with wooden bars, which could be made to nearly any length.
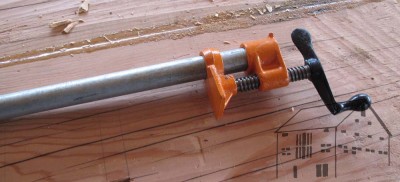
This brings me to the pipe clamp. Like almost every woodworker and handyman in the Western world I have pipe clamps, even several of them. Since my strategy for clamp acquisition revolves around the number “4” (the number of clamps needed for a pair in both x and y axes) I have in my collection of clamps 16 of the pipe variety. For interchangeability all of my clamps are for ½” n.p.t pipes, common enough from the local hardware store.
The down side is that for longer applications, ever longer pipes are needed. And, have you priced threaded pipe lately? Holy cow.
Being a cheapskate who really enjoys finding solutions to problems, while visiting my favorite hardware store and balking at the prospect of spending $50 for four 5-foot sections of threaded black pipe, I instead spent some time browsing the aisles of the hardware store, one of my all-time favorite activities. (every year I spend literally dozens of seconds shopping for clothes, but I can spend practically an entire day examining products at a good hardware store).

There in the shelf in the plumbing section was the 79-cent solution to the problem – a double female-thread pipe coupling. I grabbed a handful and headed home. Sure enough, they filled the bill. Perfectly. For less than a buck I could take two pieces of pipe, one 24″ and the other 36″, with a 5-foot clamp as the result.

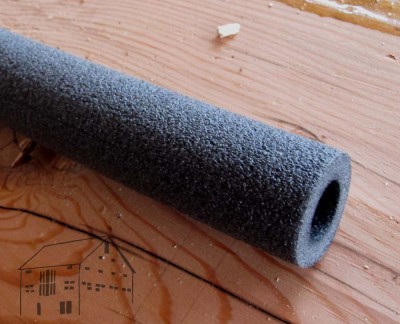
As an additional enhancement for the new, longer vise configuration, I grabbed a scrap of pipe insulation and cut rings to place on the pipe and provide protection to the wood surface from the abrasions of the coupling fitting.
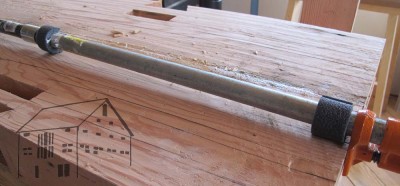
I’d like to think that had they been widely available at the time, we would see elegant engravings of pipe clamps in L’Art du Menuisier.
For a moment, think about that ten-page term paper you had to write in high school, agonizingly struggling to finish the assigned task. Now multiply that ten-page paper by a factor of eighty-two, combined with transforming that much of some old French guy’s arcane verbiage into comprehensible English and you know what it is like to spend days on end working with Roubo. It is not agonizing — to the great contrary – but it is grueling.
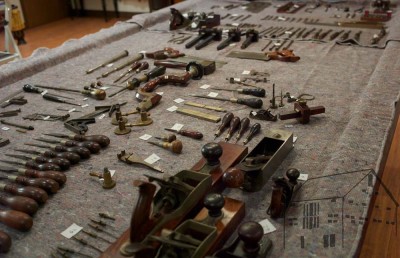
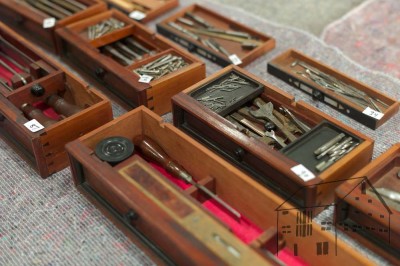
Combine that with a bitterly cold winter (for these parts) and the ongoing chore of relocating after three decades in the same house without ever systematically winnowing the papers residing in multiple file cabinets and dozens of bookcases, and you get some idea why I rewarded myself this afternoon with a delightful diversion — formatting and massaging the manuscript for Virtuoso: the Tool Cabinet and Workbench of Henry O. Studley. No less arduous than Roubo, but certainly a welcomed change of pace.
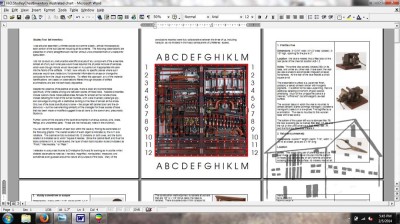
For the sheer fun of it, I spent several hours creating the tool inventory for the cabinet, merging the notes I dictated to Chris during my examination of all the tools individually during our research and photographic forays with Narayan’s exquisite photographs. Sometimes I just stopped to stare a the screen, to relive the moments past. It was and is unbelievably cool.
While shellac may not strike you as a fanciful subject for a whimsical account with a surprising amount of good information, Elizabeth Brownell Crandall did not share your limited vision. Her charming 1924 little volume, “Shellac: A Story of Yesterday, Today, and Tomorrow” is a delightful read that is a treasured piece of my archive.
Enjoy.


Recent Comments