
The last month has seen me working furiously in the studio preparing for two video shoots at PopWood, which took place last week. Dealing with David, Rick, Jake, and Sam was a delight, they really know their stuff and succeeded in making me appear life-like on camera.
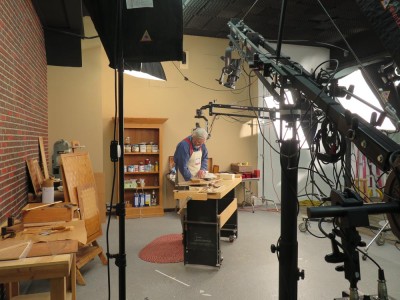
After unloading my substantial inventory of stuff first thing Monday morning (I needed all the tools, supplies, and in-process step-by-step examples to make sure the schedule was realistic) the cameras started rolling around 11 AM.
Because of the logistics of shooting two unrelated videos we spend the next four days moving back and forth between the two subjects. Producer Jake and Director Rick kept me on track. Fortunately, my three-decades-plus as an educator made me keep-on-track-able.
By the end of Monday we were ahead of schedule, by the end of Tuesday even more so. This allowed me to take a long lunch on Wednesday with Chris Schwarz and Raney Nelson as we toured the custom bindery of Ohio Book in downtown Cincinnati, a really cool experience. I only wish I had grabbed my camera before leaving the filming studio to capture some of the images there.
By noon on Friday we were all done. I was extremely please with the project(s) and Producer Jake figured that I had only three verbal fumbles in five days of shooting.
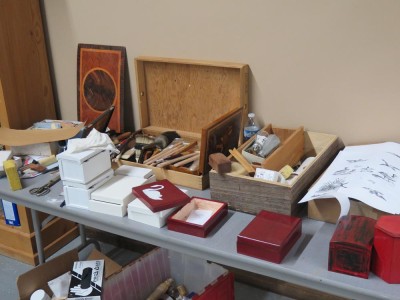
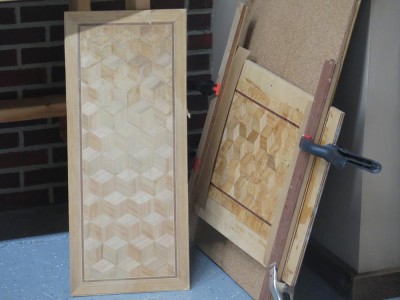
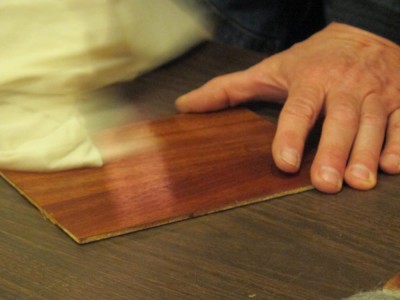
The videos, Traditional Japanning Techniques and Simple French Parquetry, are due out in a few months I think. As for the content, I tried to demonstrate the execution of these techniques as being straightforward and do-able with little fuss and hysterics, requiring the least possible acquisition of esoteric tools and supplies.
Recently I received a cheery note from Mister Stewart telling me that Pete Hardwick had regained custody of a charming little hand-held vise and forwarded it on to him. According to a note that Pete sent along with the vise,
As best I can remember, one of my old fishing buddies was looking at the vise commenting that it would be great for tying flies.

Cool beans. While I am thrilled at the new discovery and addition to the tool collection, another part of me is saddened that not more information about HO Studley has come into the open.
I’ll be hosting and teaching a “Historic Finishing Weekend” at the barn June 24-26. We’ll cover the preparation and application of spirit varnishes and wax finishes. The best experience is if each participant has a small finishing project of their own to work on, otherwise you can work on panels and such.
The workshop will be $375.
Let me know here if you are interested.
It amazes me that it’s been almost 32 years since I was invited to join the Conservation Analytical Laboratory (CAL) of the Smithsonian. I recall asking my Winterthur colleague CoryB about the job offer, he had come to Winterthur from CAL, and he warned me that the bureaucracy would kill me if I let it. Still the opportunity was irresistible, and even though the bureaucracy did drive me crazy I had almost three decades of flourishing there.
CAL was a sort of deterioration-and-preservation “think tank” dedicated to creative innovative processes for collections. Its mandate was delightfully vague, as were the job descriptions. Every organization has tools for identifying and designating job descriptions, and in our system the conservators were known as “Series 1001” employees. While the 1001 Series has changed in recent years, at the time of my hiring we were known as “unique interdisciplinary skills” employees, with each person/slot being defined individually. For CAL conservators, the distillation of our job descriptions was to be productively curious. Oh, technically they were much longer than that phrase (mine was dozen pages long) but in essence they were that brief exhortation; be productively curious. To someone like me with barely-under-control curiosity it was the appointment of which dreams are made.
Truthfully I was not fully prepared for the cornucopia that was the Institution. There was much I did not know but eventually learned, like the fact the the SI employs more astronomers than any other place on earth. Who knew? My colleagues of conservators, chemists, engineers, physicists, and archaeologists were internationally renowned and every lunch gathering was akin to attending a multidisciplinary conference of the highest level. The depth and breadth libraries were truly breathtaking. And the collections, while idiosyncratic, included som of the most amazing treasures I ever encountered.
It was on a “walk through” of the collections that led to my appreciation and pursuit of the ultimate decorative surface. There in the holdings of the Archaeology Division were a number of oriental artworks fashioned from wood, mostly, and oriental lacquer. I was dumbstruck. Sure I had read about urushi lacquerwork, but the in-person experience was life changing. After a career as a furniture finisher I had never seen anything like it. Now this was finishing!

Over the next three decades the books I checked out of the library came and went in my office with only two exceptions. The first was the replica edition of Roubo’s L’Art du Menuisier which remained from the moment I got it from the library of the Cooper-Hewitt Museum library until the day I retired. Ditto the magnificent volume presented above.
Urushi work has been around for millennia, yet here was a celebration of work that was occurring within my own lifetime. Notwithstanding the cost of the volume, like Roubo, once I returned to book to the SI Library I knew I had to buy a copy for myself. So I did, and it remains an unequaled inspiration for me to this day.

Some of the most beautiful artifacts I have ever encountered (in absentia, admittedly) are presented on the pages of this opulent volume. Consider this cypress and lacquer cabinet by modern National Treasure Gonroku Matsuda (1896-1986). I dare you to tell me this is not jaw dropping. And this is not even his most over-the-top masterpiece.
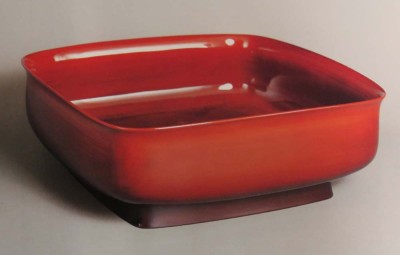
This candy dish isn’t even wood, it is molded lined impregnated with urushi. I cannot recall any artwork I have ever seen that I believe to be more captivating
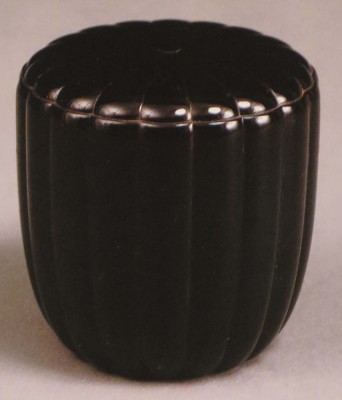
And this tea container is also molded fabric impregnated with urushi.
At roughly the same time as these pieces were being created in Japan, two Art Noveau luminaries were also employing urushi in their own masterpieces with sublime decorative surfaces.
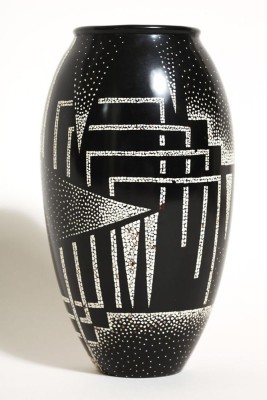
Jean Dunand not only employed urushi surfaces on his vases, he raised them from continuous sheets of copper prior to applying flawless lacquerwork. His production of lacquered folding panels was impressive.
A contemporary and protege of Dunand, Eileen Gray, was applying urushi to an out-of-the-box inventory of creations.
To me the inspired use of urushi results in what is truly the ultimate decorative surface. It is wood finishing from another dimension. I aspire to this level of genius.
So, why don’t I?
There is a hitch. Urushi is the refined sap from the Japanese poison sumac tree. Were I to use this I would probably turn blue and curl up into a ball. But this will not stop me from experimenting with alternative technologies within which I can explore this sublime creation. Over the next weeks, months, years, and decades I intend to obliterate the boundaries of my own experience and creative skills by pursuing these techniques, everything from making and using lacquering brushes and spatulas to applying and perfecting the surfaces.


This is how I hope to grow old creating in the shop, making marquetry, faux finishes, japanning, and lacquerwork.
Stay tuned.
JimM sent more pictures with the following commentary:
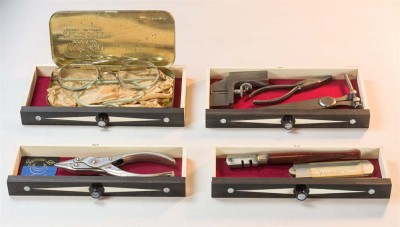
The drawers are Studley's but the contents are mine. Most of the original
tools contained within were specialized for the piano or organ trade. I
replicated those that could be seen on the open cabinet, but decided to
use machinist and wood working tools from my collection to fill the
drawers. They are all vintage and contemporary to the period.


I also never really warmed up to the original design on the small ebony
front drawers and decided instead to repeat the design on the drawer
rails. Adding MOP to the drawer knobs made it look symmetrical.
I also never really warmed up to the original design on the small ebony
front drawers and decided instead to repeat the design on the drawer
rails. Adding MOP to the drawer knobs made it look symmetrical.
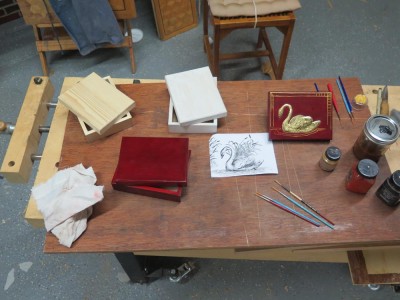
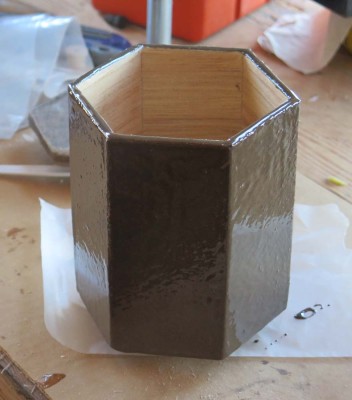
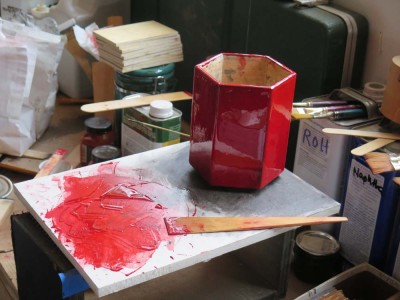
As I work my way through preparing many “in process” samples for an upcoming video shoot on japanning, I am struck by how straightforward good finishing is. It is so simple I have distilled it down to six basic steps. For japanning and the final and ultimate decorative surface the emphasis is overwhelmingly on Step #1: Prepare the surface properly. Japanning requires a lot of sanding, polishing, and preparing. Further, while not especially time consuming (once you know the technique a small japanning project probably consumes fewer than a dozen hours, but those hours are often spread out over a week or two), painted decorative surfaces are analogous to fancying-up a house; if you do not have a good roof, foundation, utilities, etc., painting, papering and decorating are a waste of time. In japanning the “showy” stuff happens so late in the process that it is often a psychological hindrance to any woodworkers who, regardless of how exquisite their craftsmanship in fashioning wood into a magnificent object, simply want to puke out some polyurinate onto the surface and be done with it. And in the absence of any exposure to the effect or its process, it is not considered an option by even woodworkers who might be so inclined.
It is my mission to help woodworkers get over their infatuation with dovetails and mortise-and-tenons, to see them as simply part of the vocabulary rather than mystical workbench liturgy. In my upcoming video I will make it abundantly clear, I hope, that japanning is a spectacular option that is easy to do.
How easy? This easy.
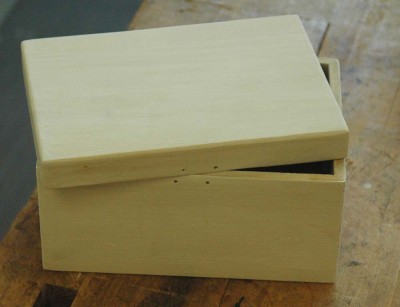
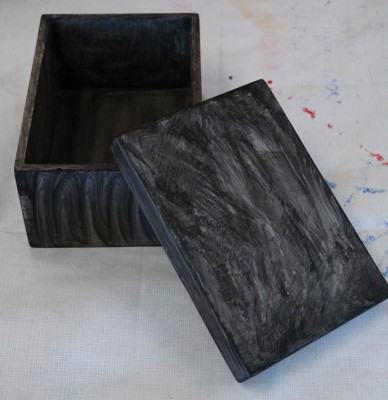
Start with an unfinished box.
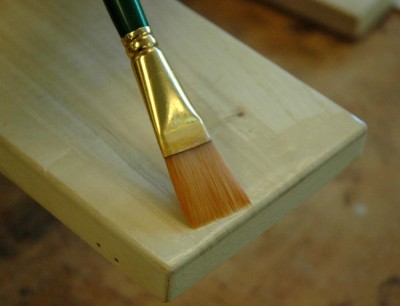
Seal it with glue.
Build a ground with gesso or bulked undercoat.
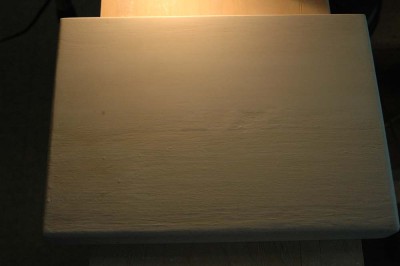
Sand it to make it smooth as a kittens paw.
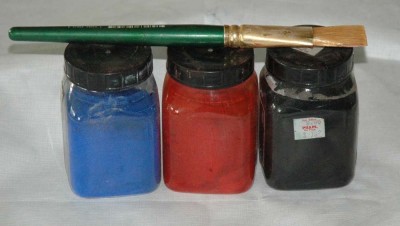
Make a translucent paint with pigments and shellac.
Build up the painted background with pigmented shellac. This usually takes 10-20 coats, each consuming about 30 seconds for application.

Rub it out. Several times, certainly between each of the final two or three coats.
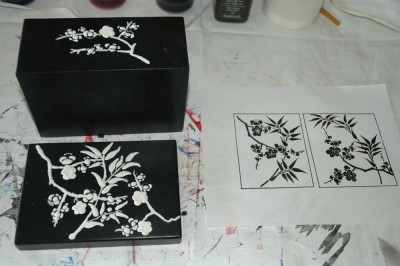
Add decorative figures or whatever stylistic character you want using gesso and copying an existing pattern.
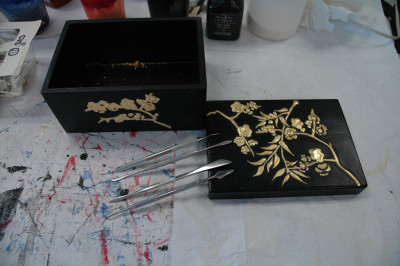
Add gold leaf with oil size.
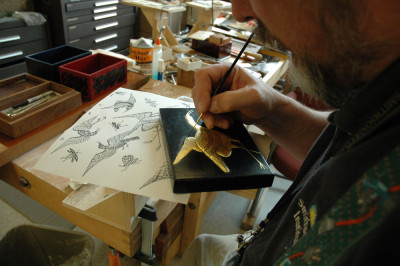
Detail it with an ink pen or ultra-fine brush.
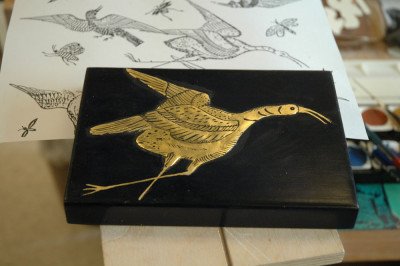
Seal it all in with a varnish top coat.
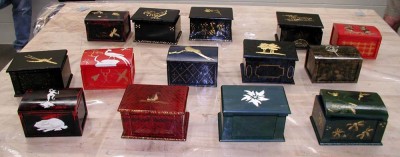
Stand back and accept the accolades. This group of boxes was the result of a group of students, all new to the technique, during a week long workshop.
Which of you are not up to that? I thought so.
Next time, we will finally arrive at the true Ultimate Decorative Surface.
JimM continues to amaze.
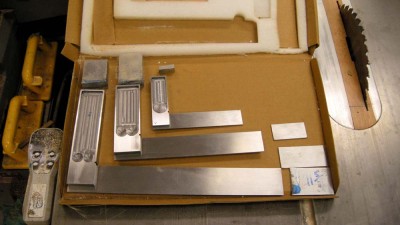
Just like old H.O himself, when JimM could not find a particular tool (and I know first hand the difficulty in finding St. Johnsbury squares in decent condition for less that the GDP of a third world country)
he just makes ’em from scratch.
He is making me feel like a Three Thumbed Sloth.

Recent Comments