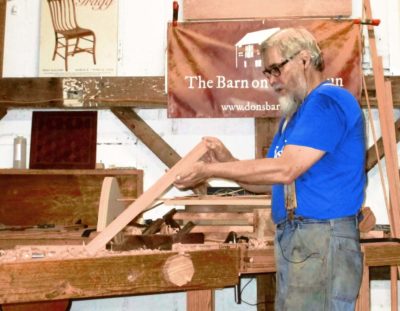
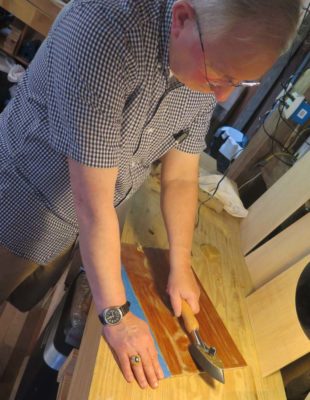
One of the fixtures integral to my ongoing work on building Gragg chairs is this shaving beam I made when embarking down Gragg Boulevard several years ago.
When I am in the heat of battle I need to move back and forth frequently while preparing the stock for the chairs prior to steam bending the elements, checking then by eye and small sizing jig I keep in my pocket or right there on the bench. I found it to be tiresome, and frankly after a while painful, to get up and down from my shaving horse dozens of times a day. Instead I designed and built this fixture that allows me to work on my feet with much less stress to my creaky hips.
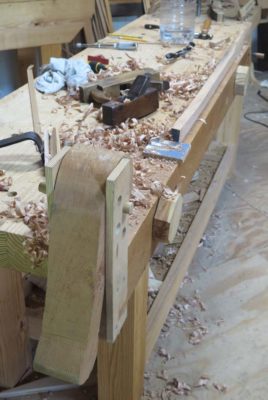
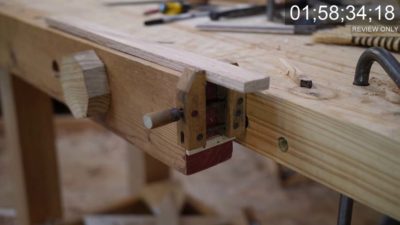
The core of the device is a hunk of 4″ x 6″ Douglas fir from the scrap pile. To that I built a cam clamp head that can grab and hold pieces of split oak (what I normally work with) so that I can shave it close to the final dimension with typical drawknives and spokeshaves, working at waist height while standing.
An additional feature at the other end is a tiny woodscrew clamp with one jaw permanently screwed to the end of the beam. This makes it possible for me to work in both the pulling and pushing directions on the same device. It is nearly effortless to go from pulling a drawknife on a workpiece to switching to pushing either spokeshaves or hand planes getting the piece ready for the steam box.
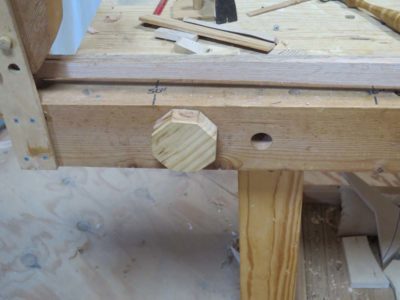
A series of holes for stops helps hold the workpieces in place while I am yanking on them in one direction of the other.
The entire device is bolted to the rear side of the Roubo workbench I keep up in the video studio on the fourth floor. I drilled 1-1/2″ holes through the beam, then horizontal 1-3/8″ holes in the corresponding location on the edge of the workbench slab. I tapped out the holes in the workbench slab and use threaded Moxon screws through the shaving beam to affix it in place. It can be removed quickly and easily.
Like I said, this device has become an integral part of making Gragg chairs AND imparting greater speed and comfort to that process. It may not be an overstatement to suggest that this bench accessory has become so important that my passion to continue down the road of making and revising Gragg would be substantially diminished without it.
Once while being visited by an acquaintance who volunteers at a wounded vet rehab facility he noticed that this shaving beam could be made entirely accessible to people in wheel chairs by simply setting it up between trestles rather than attached to the side of a fixed work bench.
Last time I heard from him he was making some for the shop of the rehab facility, and that pleased me even more as it could be one component of regaining healing and wholeness for vets who had sacrificed so much on my behalf.
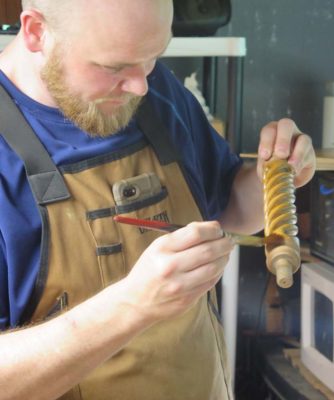
Recently while noodling with one of my ripple molding cutters in preparation for the September “Make A Ripple Molding Cutter” class, which like the upcoming “Make A Roubo Shoulder Knife” has been cancelled due to unanimous disinterest (I will soon write about the future of workshops at the barn, most of which have drawn nearly unanimous disinterest and will likely diminish for the most part), I decided that the underlying design concept for that particular machine was too flawed to rescue. So, I tossed in the towel on that particular journey.
At the same time I was doing some cleanup and organizing on the main floor of the barn — alas when you have thousands of square feet of space the tidying is nearly an endless proposition — I decided to address the “problem” of how my lathe has been set up for the past few years. At the time I thought I would really like having the lathe sitting on a mondo beam adjacent to two of the vertical timbers holding up the third and fourth floors. In practice I realized that I REALLY did not like that set-up. What to do?
Well, with the ripple molding cutter being moth-balled I suddenly had the perfect base available for use with the lathe. So now it sits thereon, and I like the new set-up much, much better. An additional benefit is that the new base is long enough to hold not only my wood lathe but also my micro machinist lathe.
Excellent.
And fear not about the fate of the mondo beam. It now serves as part of a bench outside being used in my ongoing tactical training and practice.
Recently while on my way to Greenville SC I stopped to have lunch with my friend (and frequent barn guest) B and his family. The signage in his neighborhood was, shall we say, lacking, so to compensate for that shortcoming and to help guide my way to his home he parked his truck out at the street with a familiar item resting on the window. He correctly surmised I would notice and recognize it and know to turn there. I chuckled when I saw it and turned up the driveway for a wonderful lunch and time of fellowship before resuming my trip
In one sense the learning velocity for Day 3 is the same as Day 1 and Day 2, but the psychological impact of everything coming together in a beautiful outcome is almost incalculable. One thing I am mindful of is that most Day 3s of workshops are structured to make sure any meaningful instruction occurs by mid-day, as the typical impetus is for folks to start heading back home sometime in the afternoon. Sometimes students will stay until evening, but in this case all three had lengthy drives home (two to central NC and one to CT) and headed out mid-afternoon to get home before dark.
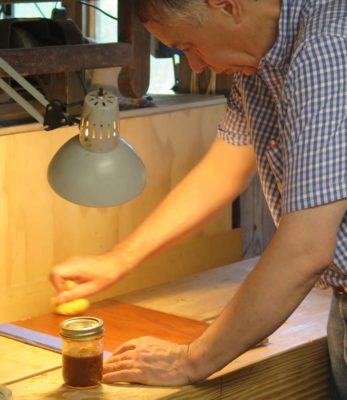
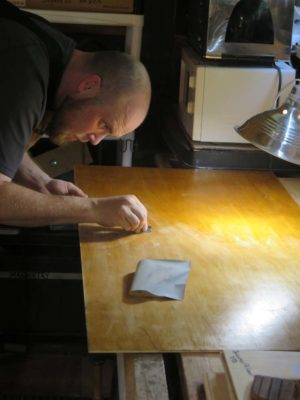
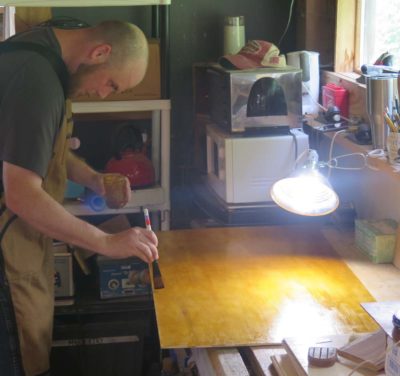
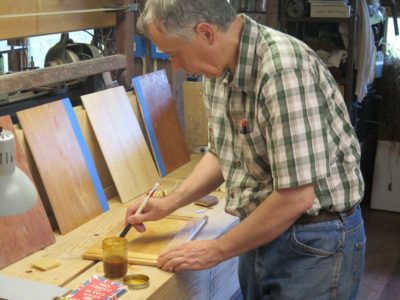
If I had to summarize the events of the third day it would be encapsulated in the word “rubbing.” The central focus of that action was the very large panels that had been varnished with brushed shellac the previous days. These panels were divided into four sections to be finished off with different rubbing protocols, including making and using abrasive pads for pumice and Tripoli/rottenstone, both with and without paste wax. Another section was burnished/abraded with Liberon 0000 steel wool and paste wax.
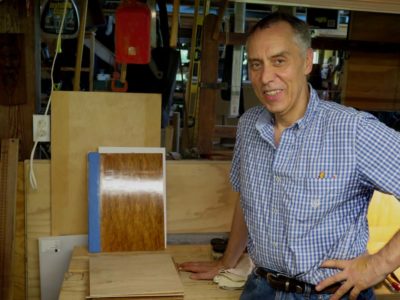
Though I knew the results in advance the students did not, and their excitement at seeing the results of their own hand work was most gratifying.
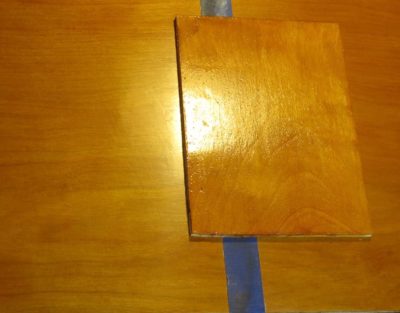
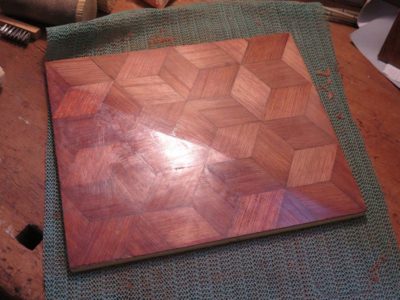
One student even brought a sample panel from his previous finish work and compared it to the panels we completed during the workshop. Needless to say the smile could not be wiped from his face. I didn’t quite get the camera angle perfect but you get the point between the almist gritty, brassy smaller panel and his new lustrous, almost glowing surface.
Our final chapter of the workshop was shellac spirit varnish pad polishing, a/k/a “French polishing.” As with the other pad-based processes, rubbing out with tripoli or pumice, they each made their own spirit varnishing pad. All these pads were made with vintage linen outer cloths and new cotton wadding inner cores, and all these were theirs to take home in a small sealed glass jar. These pads should serve them well for many years to come.
Spirit varnish pad polishing is very definitely a technique requiring an informed “feel” about how it is supposed to progress. Even though this was an introductory effort for all three students, they really took to it with enthusiasm and excellent outcomes being the result. It was delightful to see the smiles and satisfaction of accomplishment.
Though I failed to get a final photo of us all, along with their sample boards going home with them, I believe it was a woodworking-life-changing experience for them. As I told them at the outset, my primary goal was to give them confidence at the finishing bench and dispel any intimidation they might have in that regard. If their notes to me afterward were any indication, it was a success.
I want to thank for your “Historic Finishing Course” at the Barn last week. It was over the top in how it exceeded my expectations; by the end of the workshop I was seeing the process you taught working to a superb result under my own hand. A really cool result–and well worth three days of my time to learn it.
And,
I want to thank you for an awesome class! The fellowship was really great and I came away much more confident applying a lovely shellac finish.
[Yup, my compewder power cord arrived from South Carolina and I am back in bidnez. — DCW]
Day 2 included the continuation of previous exercises begun on Day 1 and the addition of some new ones to fill out the syllabus.
With the large panels having already been built with two innings of brushed finishing the preparation for the final application of brushed shellac was underway with the surface being scraped. I find scraping to be a “lost art” among contemporary finishers for the most part, although it was a very common weapon in the quiver of an 18th century craftsman. For convenience sake I/we used disposable single edged razors from the hardware store that I buy by the hundreds.
For the final application of the shellac varnish I had them switch from a 21st century nylon/sable blend watercolor brush to an oval bristle brush, much closer in style to that of 250 years ago. This gives the students a variety of experiences for similar tasks.
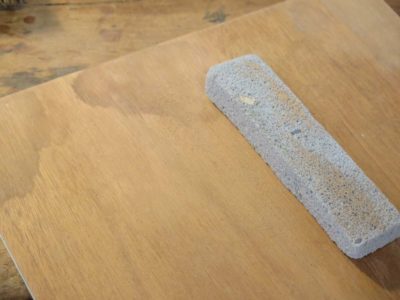
I presented a very brief demonstration of using a pumice block to prepare the raw wood, which yielded a surface that was surprisingly (to them) smooth.
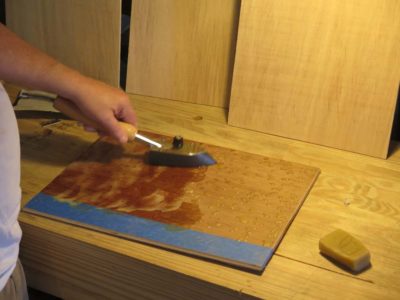
Then on to the molten wax portion of the program, wherein they prepared two sample boards for different purposes. The first was to create a “wax only” finish which I think is the most difficult finish to do well, and secondly to fill the grain for a panel to be pad polished tomorrow on Day3.
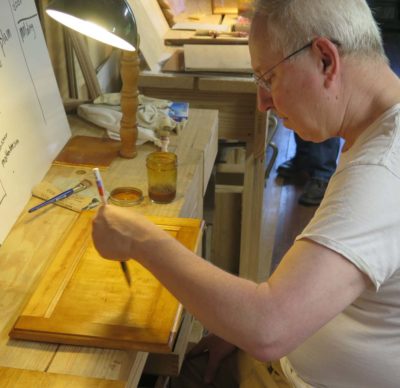
While the wax was cooling the students moved on to a pair of exercises designed to give them facility at complex surfaces. The first was to varnish a carved and turned spindle and the second a frame-and-panel door.
While they were doing that I was playing some more with molten wax finishes. Like I said, it is difficult to get perfect.
Late in the afternoon we saw this “meal on wheels” right outside the shop. Clearly they are terrified of human proximity.
I am a sorta youtube.com junkie, in that a typical week finds me watching many (mostly instructional) videos. I’m even thinking of starting my own youtube channel and posting short shop videos on it, but I have not yet pulled the trigger on that.
One of my truly favorite channels over there is that of Japanese Lacquer Master Maki Fushimi, whose inventory includes hundreds of videos, virtually all with only ambient sound, without any speaking. They are just videos of his hands at work in the lacquerwork studio. This a 60-part(!) series on making a set of bowls, and his virtuosity with a spatula always leaves my jaw hanging open. I tried to make the blog link to video 45, titled HONKATAJI-WAN (45) but it keeps posting this video link. In #45 he uses nothing more than a stick to do amazing finishing. Give it a look.
Still waiting for my compewder power cord to arrive and for that part of the world getting back to normal. For now I am stuck with an ancient laptop from at least a dozen years ago.


Recent Comments