Building Bench #18 – III
With the bench “assembled” I turned it over halfway and rough trimmed the bottoms of the legs. Even though I was handling it by myself, wrestling with a 350-pound behemoth is fairly straightforward if I am careful and make sure I am actually handling half or less of the total weight, which is the case if I am rolling or spinning it. With the legs cut to rough length I rolled it the rest of the way over so I could work on flattening the top for a couple of hours.


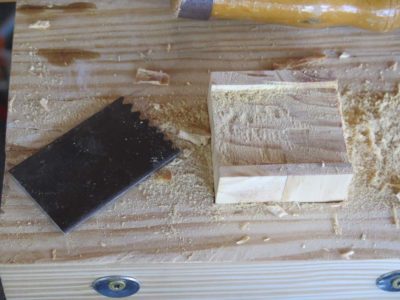
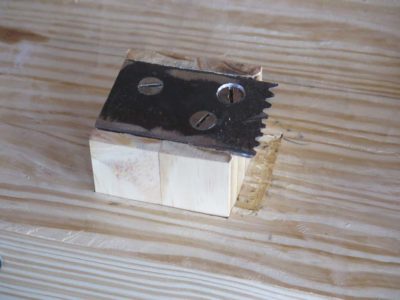
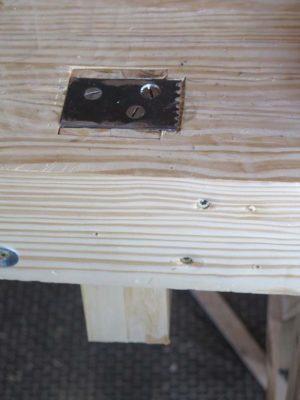
With the bench on its feet, but on a rolling cart so I could move it easily, I set about to installing the planing stop I had already glued up. I planed it such that the fit was very tight, counting on a few humidity cycles to induce ccompression fit on both the stop and the mortise in which it resides in the hopes of establishing a nice firm fit in the end. I’d wanted to put a full width (of the block) toothed tip on the stop but I did not have the piece of scrap steel in the drawer that could suffice so I just used what I had. I filed the teeth, drilled and countersunk the holes for some honkin’ big screws and assembled the stop. I also excavated the top of the bench so the entire assembly is flush.

photo courtesy of J. Rowe

photo courtesy of J. Hurn
With that I cut and affixed temporary(?) stretchers to the legs to support the shelf, Kreg screw style (without the Kreg jig), which on a decently built Roubo or Nicholson bench is the only functional purpose for stretchers. If mortised stretchers are needed to stabilize the bench structure, it wasn’t built well enough. Using scraps from the pile I cut and laid the shelf boards and attached the vise and for now, it was done. Come summer I will flatten the top again and call it quits. As it was the bench served my needs perfectly in Williamsburg to give me both a perfectly functioning work station and a focus for my sermon on workbenches and holdfasts,


Join the Conversation!