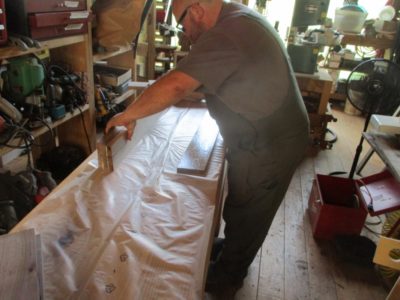
The past three years have seen the dramatic improving of the envelope of our domicile, part of which is a c.1890 chestnut log cabin and the other a c.1985 modern kitchen, dining room, and bathroom. Three years ago we had the stone/block walls of the crawlspace underneath the whole insulated and the ground underneath sealed with heavyweight plastic sheet (depending on your physics literacy the system was either wicking cold in or wicking heat out like a champ, the only thing that was for certain was that before the insulating and sealing the floor was icy all winter long); two years ago we had the cabin completely re-chinked with all the old chinking stripped out and new chinking skillfully installed. The combination of the two improvements made the floor much warmer, room temperature as opposed to refrigerator temperature, and reduced the air flow ~90% or so. Not a small thing when you live in a windy, wintery place.
Last year we intended to continue the trajectory by having all the windows in the home replaced. The extant units were all of modest quality from the 80s, with the sash windows augmented by aluminum triple-track storm windows. One feature of the latter is that they provide excellent ventilation, open or closed, year-round. Ever since we moved there in 2013 I have been taping plastic over the windows every winter just to keep the interior somewhat congenial.
We ordered the new, high-performance windows about eighteen months ago, but given the disruptions to the manufacturing and supply chain the windows did not arrive for more than a year. When they finally did arrive, a local contractor installed them lickety-split, replacing more than a dozen old windows in two days, all finished.

Except for Mrs. Barn’s prized new bay window in the dining room.

That one took four days of work, reframing the opening and installing the new custom unit. It transforms the whole house.
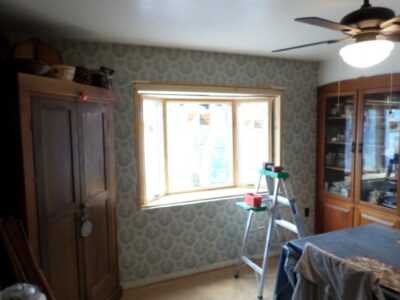
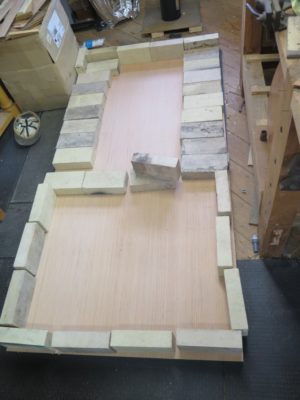
Extending the schedule of the bay window project was the need for me to fabricate all new trim for the unit. We decided to go with some of my vintage cherry lumber to be harmonious with the built-in cherry china cabinet already in the room. The only hitch was that none of my cherry boards were long enough for the upper and lower trim boards, missing the mark by just a few inches.
Next time you will learn about my board-stretching technique.
Stay tuned.
I first met Webmeister Tim during my research for the H.O. Studley tool cabinet book, probably around 2012 or 2013. I got an email from a fellow who said, “Hey, I think I’ve got a vise like the ones you are talking about.” I arranged to meet him in person at a diner in southern Maine and sure enough, he had a vise much like the ones about which I had been waxing ecstatic. Tim was a wood turner but not yet a full-spectrum woodworker, so he allowed me to borrow his vise to study, and eventually, to display in the 2015 exhibit that coincided with Handworks 2015. Of all the piano-lakers’ vises I’ve seen his is the closest to Studley’s.
Our agreement was that he would come and get it, “Whenever.”
Well, after more than a decade of long-distance friendship, including dozens of phone calls relating to the business of the donsbarn.com website, which he now steers, “Whenever” finally occurred last month. Finally aligning the stars of our respective lives, he was able to come to Shangri-la and spend a week with us in the Virginia hinterlands. It was truly a great time of fellowship and productive work together.
Our focus for the week was to build him a heritage workbench that would last the rest of his life and probably any eventual grandchildren and great-grandchildren as well. The raw material for the bench was my slabbed black walnut, the style of the bench a split-top Roubo.
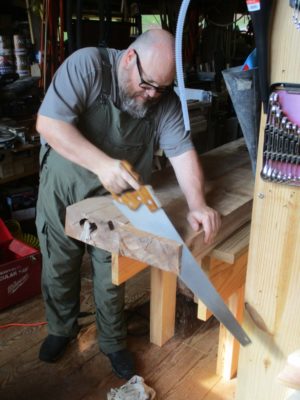
I worked him really hard during the week, beginning with hand sawing the almost 5″ thick slabs to length.
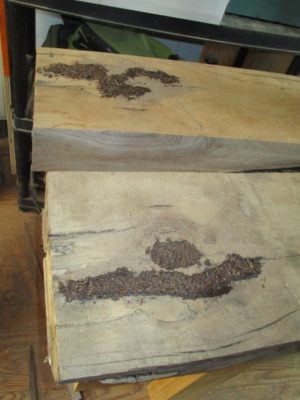
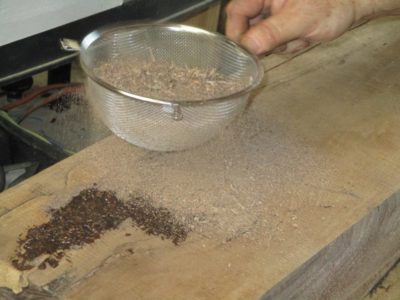
There were a couple of regions of the slabs needing attention, so we saturated them with diluted West System epoxy and walnut sawdust, followed by a top sprinkling of sawdust on top to provide a good surface for final finishing when it got to that point.
I did not have slab stock for the legs and stretchers, so we had to laminate them from black walnut cut from the same tree and some vintage stock I had in my lumber barn. For the newer stock we ran them through my little Ryobi 10″ planer that has been serving me well for about 35 years.

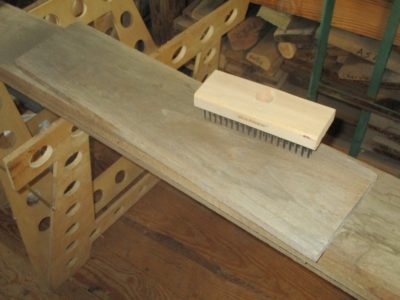
For the vintage stock from my barn, they had been planed eons ago so all they needed was a quick scrubbing with a wire brush to remove any debris and freshen up the surfaces for gluing.
Then glued-up they were with T3 to accommodate any situation the bench might find itself in the future.
Thus endeth Day One of the Great Webmeister Tim Bench Build.
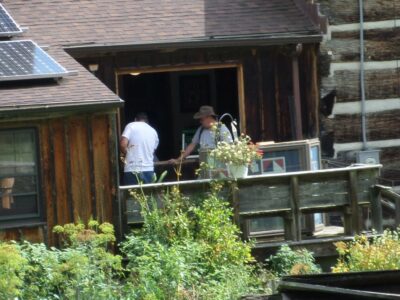
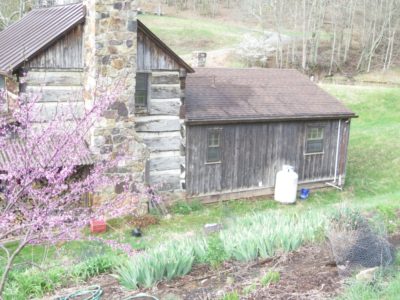
In addition to the first lawn mowing of the year, signifying (we hope) the end of winter (although our frost-free planting date is still six weeks off), our little cabin underwent a transformative few days as the new windows we ordered last summer were finally installed. We can generally work in one big project per year, and this is the one for 2023. Since the weather was sunny we were both working in the yard and did not get to watch/photograph every detail, plus the fellows worked so fast, but here are a few images.
The old windows were inexpensive double hung units with a triple track storm window grafted on to the outside, probably from the early 80s. They were looking pretty shabby but even worse their performance could best be described as providing excellent ventilation, open or closed, year round. Since we moved here I have had to tape plastic sheeting over the windows every winter. Hint – if you have to do this THE BEST material to use is the transparent shower curtains from Dollar General.


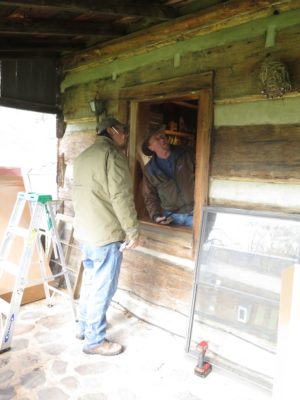
Like I hinted, the fellows hit the ground running Monday morning. They have done a lot of this so knew exactly what to do. Actually, the window units were held in place only by the trim molding directly against them so once that was pried off the units just popped out. I was amazed at the pace of work.
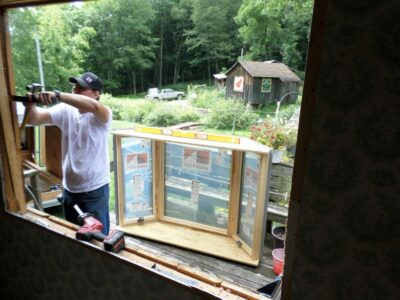
Sorry about the image quality, it was binding bright outside and our usual grotto inside.

The new Anderson units popped in place lickety split, and the trimming out was actually the slowest part of the process. The living room windows went in first, and on Tuesday we were glad for that as the wind howled all day and into the evening, probably 30-40 mph. Working out in the yard was like getting sandblasted. But that evening as we were watching our nightly episode of The Chosen, there was not even a breath of air coming off the windows onto our necks. Superb.

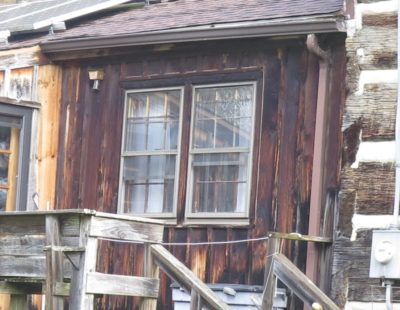
The most spectacular transformation is in the bedrooms upstairs. It seems like the light coming in is twice as much as before. That cannot be literally true but the new visual atmosphere is pretty wonderful. BTW the trunk underneath the window is my suspenders repository, and it is almost full. I rotate them out regularly.
The last part of the project is to replace the double windows in the dining room with a custom-made bay window which will both brighten the space and provide a shelf for some of Mrs. Barn’s plants.
We saved all the old window units and they will be repurposed into hot beds and cold frames for the garden. That is in keeping with the motto of folks in the hinterlands: Use it up, wear it out, make it do, or do without.
As I gently ease myself back into the routine of life on the homestead, especially a life of work in the barn studio (I find that each day adds another few minutes to my naturally recovering stamina), my first few projects are ones that do not require any special level of precision or strength.
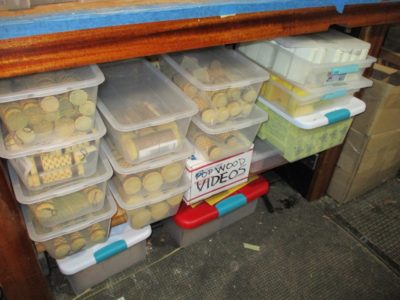
Those first few outings to the barn were spent at mundane tasks like tidying up the workshop and organizing my product inventory. I hope this makes it easier to be prompt in my fulfillment, even though I will still probably only mail things out once or twice a week.
What was most important about these tasks is that I could accomplish them while sitting down.

A second undertaking revolved around the fact that my entryway “steps” to the barn had been, for the past fifteen years, two hunks of southern yellow pine 8x8s left over from the original frame raising in November 2007. Could it really be almost fifteen years? In recent time the timbers had become aged and their corners rounded, making them unsteady underfoot.

Using some pressure treated lumber from the inventory I fashioned a new platform, one much steadier when I step up and into the barn. Nothing fancy, just pure crude utility. I will probably appreciate that even more when this coming week I attempt to hoof it up the hill rather than taking my little truck given that my legs are only now gaining adequate strength and muscle mass. I’ll take it slow, probably 4-5 minutes to ambulate the almost 200 yards, and hope my legs don’t turn to jelly before I get there. It’s quite amazing how much muscle tone I lost with nearly a month of inactivity.
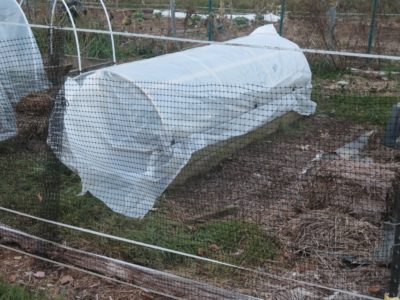
Another of the regular winter/spring/summer rituals here in Shangri-la is to re-think the carpentry needs for the gardens, and this year two new hoops over the raised beds percolated to the top of the pile. There had been hoops before but those were made in haste and only lasted ten years. The time had come for something a bit more robust. They get used year round, in the winter to serve as mini-greenhouses, in the summer to keep out the cabbage butterflies.


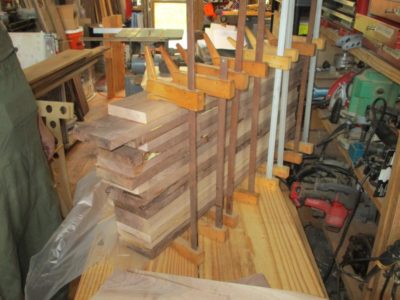
I decided to make the ribs with three lamina instead of two, so I ripped the requisite number of 1/4″ strips from pressure-treated 2x lumber. The actual forming/laminating process began with constructing a form that can serve to fabricate laminated hoop ribs from now until I become part of the landscape myself. I used scrap materials for the form and used clamps for making the first curved ribs. I used up all the clamps I had that would fit and kept them engaged for 24-hours (I used T3 adhesive).

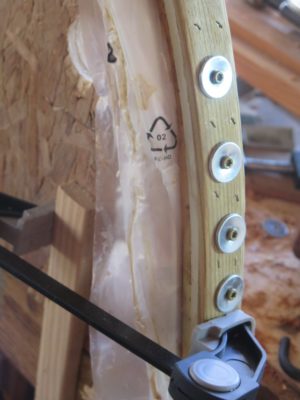
I got smarter. On subsequent ribs I used deck screws and fender washers to clamp the laminations to the form. With the addition of crown staples I was able to assemble two ribs per day.
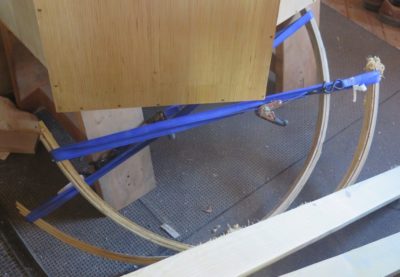
After removing the laminated ribs from the form I restrained them with ratchet straps to keep the correct shape and size, and set them aside. Once I had enough I could assemble the skeleton and cover it with the screening.
Stay tuned.
Sometimes a willingness to venture “outside the box” yields great rewards. This is one of those times.
Like probably most of you I have a number of modern saws with impulse hardened tri-faceted teeth. The upside is that these teeth can be very long lasting. The downside is that they are brittle and prone to snap off whenever encountering an exceedingly hard material, such as a nail. I have several saw blades with a gap-toothed grin. Fortunately, the blades are almost always replaceable. Unfortunately, until recently, my experience had been that they were impossible to sharpen due to the impulse hardening that made the files skate off of them without affecting any improvement. I found this frustration to be true for any of the facet-tooth saws I have, whether actual Japanese saws or the Stanley western style saws that employ Japanese-style teeth.
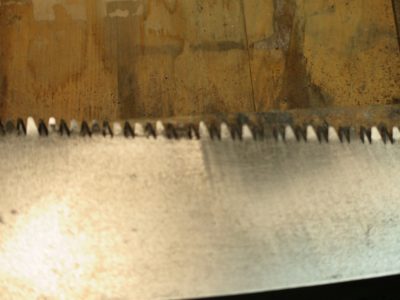
While working at my daughter’s house a while ago with my old-ish Z-brand saw I hit a nail good and hard. Much to my surprise only one tooth snapped off, but a couple dozen were mushroomed (I’m not good enough with that camera to get a nice pic). I had never before seen this damage. Before, the teeth just snapped off.

I certainly had new replacement blades in the drawer, but since the teeth were intact (except for the one) I decided to bring it back to the barn and give it a try to sharpen them. Using abrasives, first sandpaper then one of my small whetstones, I flattened the back side of every damaged tooth. Since most of the saw’s use was for rough carpentry and yard work I went ahead and cleaned it up pretty well.
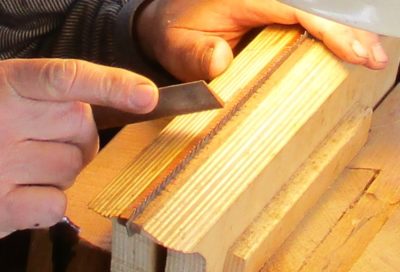
However, when it came to re-shaping the damaged facets even my diamond needle files mostly skated over the hardened tips. But there in my small container of whetstones for my carving tools was a diamond shaped aluminum oxide “India” stone. The cross section was exactly like that of the file normally used to sharpen Japanese-stye saw teeth. I also had a needle-taper stone of the same material. They both came in handy.
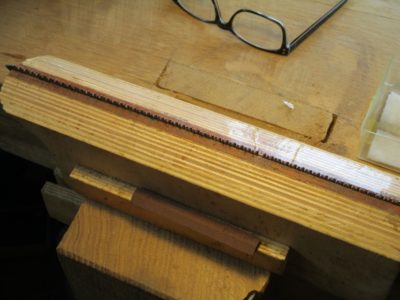

Setting up the sharpening station just like every other saw I’d sharpened in the past umpteen years, “filing” with the “India” whetstones worked like a charm.
In less than a half hour I had the task done. Prior to the sharpening the saw would still cut after a fashion, 51 strokes to get through a 2×4, but after the sharpening it made it though the same lumber in exactly 1/3 of the strokes, leaving a very nice kerf surface.
It is a good day when you can go to bed after learning something you did not know when you woke up that morning.
One of the features of much early work (2008-2012) on the barn was the truth that I was always racing to get things done over a weekend before heading back to Mordor. Since It was weekend-based I was pretty much limited to what materials I had on hand. If I needed some of “X” but only had some of “Y,” well, I had to make do with “Y.”

This pretty much explains the framing around the door to the first floor. It was a Sunday evening, so I had an hour, some scrap white pine lumber, and a tube of construction adhesive, and I had to get a door in place before heading home. Flash forward and it should be no surprise that the doorway was needing an extreme upgrade.
This time I had as much time as I needed, an inventory of pressure treated lumber, a bag of concrete screws, and as much construction adhesive as I might need. The starting point was un-hanging the door and removing the “framing” which took me a half-hour at most.

I ripped and crosscut the pressure treated lumber, grabbed the appropriate masonry drill bit and my Craftsman hammer drill, and got to work. A few hours later I was fitting the final pieces.

Now the doorway is set for decades to come.

I’m not sure I posted the final picture of the second door finished and hung. Like the first door I am still noodlin’ the latching hardware and have not yet come to a resolution.

I gotta say, these simple insulated doors have made a tremendous difference to controlling the microclimate inside the studio, especially since I fitted them with high performance gasketing.

With the door frame laying on the flat floor I slathered T3 on all the gluing surfaces and placed the first door skin on it, making sure to align the edges properly.
My primary clamping mechanism for the glue-up was placing fire bricks along the glue lines. Each fire brick weighs about ten pounds, so I reckon there was just under 400 pounds of dead weight holding everything in place over night.

Once the glue dried for the first skin on the door frame I was able to lift the entire thing up onto sawhorse to work it further. With a Japanese mortising saw and an Irwin detail saw I cut out the opening for the window.


Then came time for some of my stash of foil-faced polyisocyanurate insulation for the void chambers.

Some more T3, bricks, and all the spring clamps I had available and the assembling was complete. All that remained was to remove the second skin over the door opening, trim the edges, and trim and insert the insulated glass panel.
With the first door finished and installed it was time to move on to the second door, which, like the first, would be constructed around an existing panel of insulated glass. This time it was a leftover panel from the 90 I first bought at a building materials recycling center in order to fabricate the windows in the barn with my pals Craig, Dave, and Long Tom. The panel was considerably smaller than the one for the first door so the construction and “design” were markedly different.
On the first door the panel of glass was large enough that it was essentially little more than a frame and glass. Not so with this one, it needed some actual internal framework to hold the panel and thus some spaces to put the requisite rigid insulation infill. As with the first door the skin was nice 3/16″ plywood.

The construction itself was straightforward with the inner frame being made from clear 2x construction lumber, ripped and planed. As for the joinery I used my mortiser to punch square holes where they needed to be and the bandsaw for cutting the tenons. This pic is from the previous door but you get the idea.
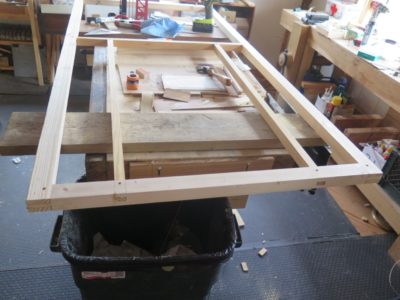

Once the mortises and tenons were finished I assembled them with T3, gluing and screwing each joint together.

And with that the frame was done, ready and waiting for the application of the first door skin. For that step I had to clear a space big enough to work on the entire thing flat and supported. Given the size of the door, that meant I had to clear some space and do it on the floor.

Recent Comments