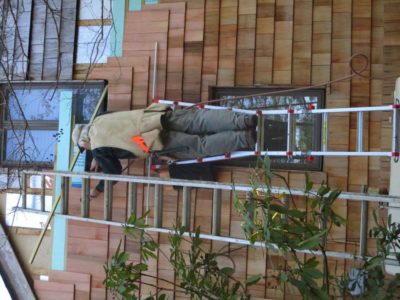
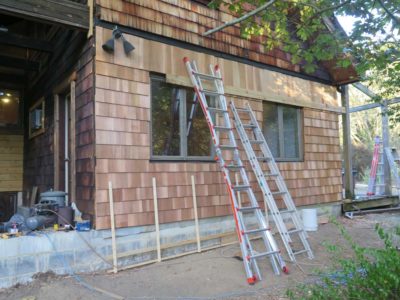
Over the winter and into Spring I was able to go to Maryland a few times to work on replacing the cedar shingle siding on our daughter’s house there. The progress was steady but slow. For starters, a things progressed the work got higher and higher on the ladders and I simply do not scamper up and down like I used to, added to the inherent risk of high ladder work I was exceedingly cautious while working.
In October I noticed that my knee began to progress(?) from a constant dull ache to a sharper twinge and finally to an acute pain that kept me mostly on the coach with ice and heat. Turned out the episodic ice-pick-through-the-knee was due to an inflamed/damaged meniscus, and after almost going down in the middle of a flat parking lot Mrs. Barn put her foot down and directed me to actually to go to the doctor, who prescribed Physical Therapy for a month. The results were spectacular and I continue a 75-minute exercise routine on alternating days and now I’ve been feeling no discomfort in the knee for the first time in 50 years.
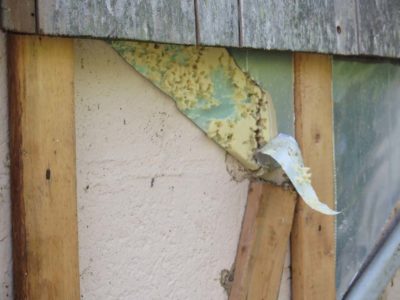
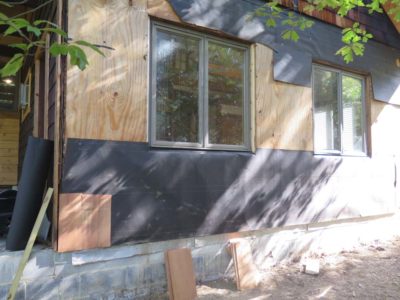
As for the house siding project one of the most difficult aspects was the safe removal of the 2′ x8′ cedar shingle panels I installed 35 years ago. In the intervening period there was a lot of penetration with plumbing and electrical projects, requiring several of them to be cut away in pieces while up on the ladder before carrying them down the ladder and over to the trash pile. While there was very little additional damage from the cockroach’s cousin in the wood there was a lot of nesting/penetration in the rigid foam insulation. I replaced a lot of that and added another layer of insulation in between the horizontal firring strips required by the new cedar shingling.

I evaluated the production of my days by the number of tote bags filled with shingles I used, and a really good day had me installing a half dozen. Now the end is definitely in sight.
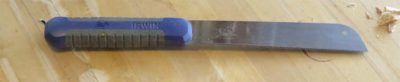
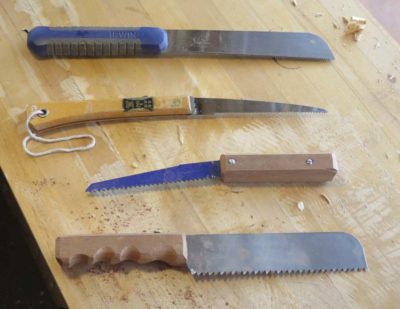
I recently posted about the wonderful little pull saw I bought at Lowes and how I use it constantly while working on the new cedar shingle siding. My only complaint about it is that it is just a smidge too big to fit neatly into any pocket of my old Skillers carpenter vest, a shortcoming I decided to address with other tools. So, I now have three more saws that do fit into one of the pockets, saws that are getting used with ongoing frequency.

The first of these is the little folding Japanese saw that I have had for ages. When fitting individual cedar shingles as one must, I find that there are many times when for several shingles in a row each and every shingle has to be custom cut and fitted, requiring lots of sawing. This is going to occur either on the ground or at the top of the ladder, and given the age and mileage on my knees I prefer it take place up on the ladder. When folded this little beauty fits perfectly in the breast pocket of the vest alongside at utility knife. Perfecto. It is so robust and inexpensive I will probably order another bunch of them so that I can keep one wherever I might need it.
Two other saws were shop made for beefier tasks like localized small scale demo work, which also needed to occur with some regularity as I was cutting away the old cedar siding paneling. Either of them allows me to work efficiently but under fairly delicate control as I was cutting away old materials from around electrical or coolant lines, places where I did not want to fire up the reciprocating saw.
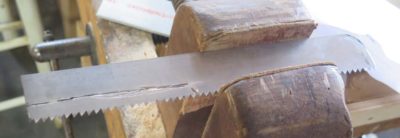
The first of these two saws use a leftover piece of bowsaw blade about 10 inches long. I rounded one end on the grinder and cut the other end of the blade with my rotary tool to remove the teeth and make a shaft for embedding into a handle.

I scuffed the surfaces of the blade handle then sandwiched it between two scraps of wood, using Gelfex epoxy to glue it all together.
I trimmed and filed the handle to fit my hand and it was off to the races, working perfectly for its intended function.
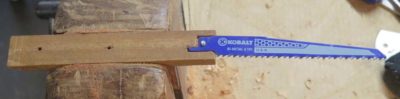
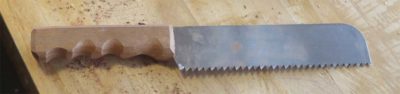
The second shop-made saw employed a blade from the reciprocal saw, the butt of which was inset into another two-piece scrap handle and embedded with epoxy as the handle halves were screwed together.
I now have an elegant sufficiency of little saws with large performance.
While working on the Maryland house I have found one tool that is now integral to my everyday activities in or out of the shop, and two tools re-purposed to even greater utiity for the execution of tasks.

The first one is this superb little Japanese-style saw from Lowes, I think was about $14. I bought it as a semi-disposable tool for cutting cedar shingles as house siding, and before long I was keeping it in my tool belt or my ancient Skillers tool vest all the time, for every project. I went back to Lowes and bought three more so that I have one at my daughters house, one in the cabin in the mountains, one in the studio in the barn, and one more in reserve in the Japanese toolbox.

Then while I was prepping to do a little spackling to touch up the wallboard from when I had to removed and reinstall the cypress trim in the living room, I simply could not find my sheetrocking tools. Exasperated I looked around to see what I could use to “make do” on the shelves of the basement. I grabbed a couple of tools and much to my surprise and delight they worked even better than anything else I have ever used for the task.

First I applied the joint compound with a square-end masonry trowel that I used for a small patching job at some point long ago. It was easier for me to control than a typical taping knife. Then to smooth out the freshly applied spackling compound I used a plastic bondo spreader. It also worked better than anything I have ever tried before. Brilliant!
Now all I have to do is wipe the areas with a damp sponge and they will be ready for paint.
Sometimes we just gotta be Keith Jarrett (more about that later).
I don’t mind working outside when it is cold, within reason, but I prefer to stay inside when it is cold and wet, as during a recent day. Since there was work to complete on the insides of the affected windows that was not a problem.
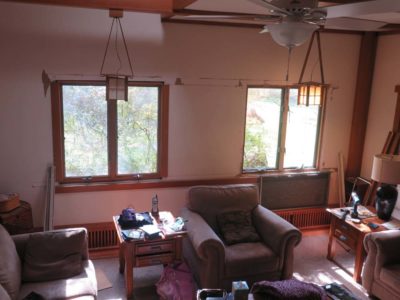
In the living room I had a fair bit of re-installation to complete, mostly because I originally selected a convoluted trim scheme thirty plus years ago. As a result I had to remove considerably more interior trim than would have otherwise been the case when I reconstructed the wall around the one window. Me and my affinity to G&G detailing with select vintage woods…
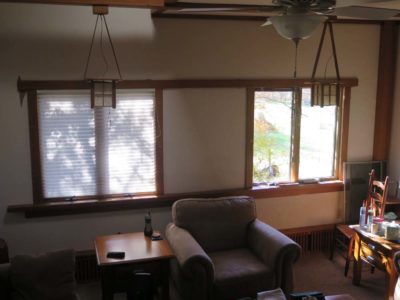
But, it all went back together just fine. A little patching and painting for the wallboard and it will be done.
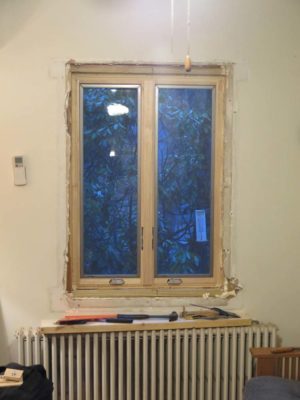
The window in the piano room was more involved as that interior trim was infested and I burned all of that, so I needed to make all new trim from vintage walnut. Which, fortunately, I have a fair bit.
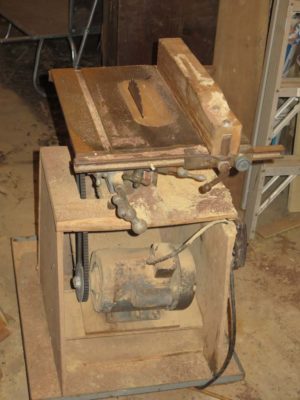
Since my larger machines are 225 miles away in the mountains I had to use these two old reliable beauties from the 1950s, my Craftsman version of the Williams & Hussey planer and the little Homecraft tilt-top beauty that was the American version (precursor?) of the classic Inca 8″ table saw. I have always really liked this little saw, and can see the time when I tart it up once it becomes my every-day workhorse in a smaller shop in the distant future.
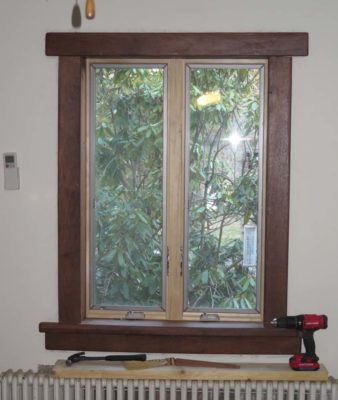
I sawed and thicknessed the boards on the machines then finished them off with hand planes in the basement workshop. Installed the new trim looks just like the old trim, which was the goal.
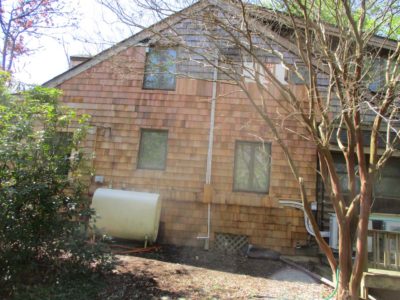
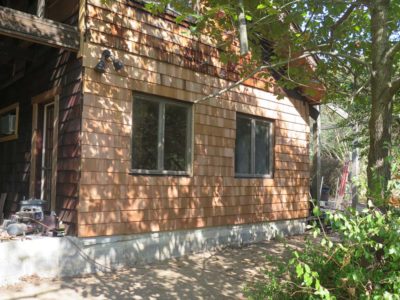
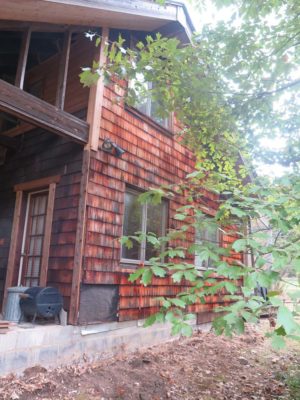
With the south and east sides of our daughter’s living room dealt with it was time to move over to the north wall on the opposite side of the house. I left the old cedar shingle panels underneath the front porch “as is” because even though they were 35 years old like the rest they were protected and still fine even though they had the many years of oxidizing on them.
The main issues for the north wall were that, unlike the south wall of the living room, the north wall was concrete block over which were vertical firring strips for nailing the old cedar panels (yes, we bought a pink concrete block house back in 1984). This is an important point as I now needed horizontal firring for the new individual shingles.

Plus, the window closest to the front of the house was a goner and needed replacing en toto. Once again sticker shock struck, as the window that was somewhere in the $200 neighborhood 35 years ago had definitely gone upscale in the years since.
Also, this is the wall that has lots of spatial disruptions including the phone service, the electrical service, the heating fuel tank, and all the plumbing and electrical for two mini-split HVAC units. Due to these issues and the general reduced accessibility the pace of work slo-o-o-owed… dow-w-w-w-n-n-n… a… lo-o-o-ot…

Nevertheless, even though the weather is turning colder unless it is literally raining on me I am happy to keep the project moving forward. Even when it is raining there is work I can do inside.

With the new window installed the work proceeded. An added benefit was that this new work allows me to enclose all the plumbing for the mini-splits. Much more betterer.

I am pleased with the results, but displeased at the slow pace of the work.
With the repairs completed on the south side of our daughter’s house it was time to start the re-siding. It was the beginning of a process that included singing the praises of the Hughes Flying Boat. It was on that project where the first pneumatic nail gun was invented, which in turn was the grandfather of the shingle stapler I used for attaching several hundred cedar shingles to the house. (A project that will continue through the winter no doubt, making it about six months’ of work intermittently. The crazy thing is I can still work as hard and as long as I used to, but I just don’t get as much done. Huh.)
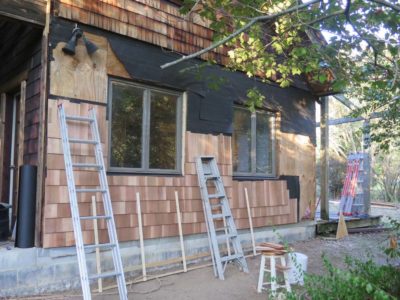
I finished the new shingles up to the top of the first floor, dealing with the area I had excavated to repair and replace the window framing before re-inserting the window.
Compared to the stating point I was not displeased. I will be even less displeased once the entire wall is completed.
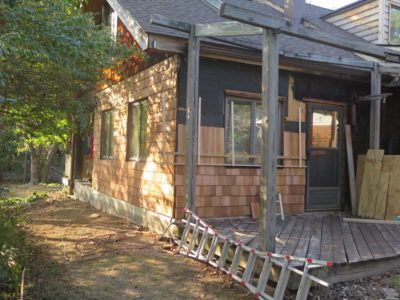
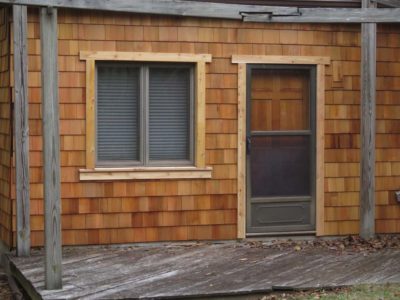
Once that milestone was reached I wrapped around to the east side of the house, peeling off the cedar shingle panels that had served us for the past thirty-plus years, and nailing on the new shingles over new tarpaper. NB – the shingling “mistake” on the right side of the door is simply a “cover up” for a box to the defunct lighting that will be replace. Some day.
Another week of work done with many more to go.

Recent Comments