I’ll be one of the presenters at next month’s 2026 edition of Plane Wellness. If you are in the region of Butler PA May 16-17 and have the inclination, we would love to have you join us. I learned about the organization from a class student a couple years ago and wholeheartedly agree with their mission statement, Improving Mental Wellness Through Woodworking. And who could not use a little extra dose of mental wellness these days?
My presentation will include (of course) the finishing process and the beauties of polissoiring.
The list of presenters is impressive and include a lot of voices I do not know, so I am especially looking forward to being challenged, informed, and encouraged.
I hope to see you there.


The day began with smoothing the parquetry compositions, first with toothing planes, both manufactured and home-made, then followed by blocks of pumice.

The next step was to lay out a simple banding knotwork design for one corner as an exercise.


Excavating for the inlay came next, followed by cutting and fitting the elements of the design.

In the end everyone went home with examples of the techniques to apply to their upcoming projects.
If this technique interests you I hope you will join me for next year’s class on October 1-3, 2026.


Opening up the panels glued up the night before is always a thrill for the students to see their work coming to fruition.

The next step is to trim the fields to make them good rectangles for the banding followed later by the borders. A variety of veneer saws were at work, ranging from pricey French saws to inexpensive Japanese ones. They all work.


The perimeter banding was applied and adhered with 192 gws glue, and the banding held in place with aluminum push pins that are surprisingly similar to those used by craftsmen 250 years ago.


Throughout the day and overnight, if a panel was not being worked it was placed in front of a box fan to drive off as much moisture as possible, to harden the glue under the parquetry. That strategy was somewhat successful.
Thus endeth Day 2.
Last month, for the first time in many years, I was able to offer an Introduction to Parquetry class at Joshua Farnsworth’s Wood and Shop near Charlottesville VA. We plan for me to offer the workshop again next year.
I had two exercises in mind for the students, all based on sawn veneer edge strips from boards.


The strips were then cut into identical 60-120-60-120 parallelogram “diamonds” or lozenges with a simple jig and a dovetail saw.
NB/ mea culpa – over the years I have attended and spoke at countless woodworking clubs and guilds, and invariably there is a show-n-tell session, and invariably they feature prominently some elaborate jig a member made to do this or that function. (Yes I know I used “invariably” twice in one sentence. That is a purposeful literary flourish.) In the old days I would just roll my eyes and tell myself, “That’s not woodworking.” Then we started the Roubo Transalation Project. Turns out the world of the ebeniste’ was all about jigs and patterns. To quote LBJ, “I reserve the right to be smarter than I used to be.”


Once the pile of lozenges got big enough, they laid out X and Y axes on a piece of paper to guide them then started assembling the composition by gluing down the lozenges to the paper with 135 gws hide glue.


Once the composition was large enough to cover the “field” of the substrate panel, in this case 1/2″ Baltic Birch plywood, the working face of the parquetry (ultimately the verso) was slathered with 192 gws hide glue, followed immediately by the face of the substrate panel.

Then the wo glued surfaces were brought together and clamped using another 1/2″ panel as the caul and a double layer of corrugated cardboard as a gasket.
Thus ended the first day.
The exercises proceed apace, building finishes and the skll set to accomplish them.
I fully expect to reprise this workshop at Joshua’s next summer, along with perhaps a couple other offerings. Introduction to Parquetry is taking place the end of next week, so come on and join us.


The description of this year’s class is identical to previous year’s so I thought I’d just have a gallery of student activities day by day.
I expect I’ll teach this again next summer at Wood and Shop.


Recently for the umpteenth time (25th? 30th?) over the past four decades I taught my Introduction to Historic Woodfinishing workshop, this time at Joshua Farnsworth’s Wood and Shop School near Charlottesville. I have already related the transition from teaching at The Barn once my insurance underwriter yanked the plug on liability insurance for students, bringing the “school” component of The Barn on White Run to an end. Joshua graciously invited me to teach at his place, for which I am very much appreciative. I’m teaching a Parquetry workshop in a couple weeks, there are openings.
 33
33
The odd thing about teaching workshops at The Barn is that I still have personal liability insurance, the building and its contents are insured as before, but no insurance for students attending classes. The underwriters would never say why that insurance was being canceled, but my agent thought it was because the nearest full-service hospital is almost 90 minutes away. Oddly enough I can still host visitors for one-one-one learning experiences, and in fact I have one of those upcoming as soon as we can work out our scheduling hiccups.

One of the great benefits to hosting all the workshops in my own Barn classroom was that everything I needed was right there. When I teach elsewhere I have to pack up everything for the course. Everything. All the supplies, tools, workpieces, everything. I learned my lesson the first couple times I taught almost forty years ago and sent the students a detailed list of everything they would need. Every class there was a student or two who arrived unprepared, saying “I didn’t think you meant that,” or “I decided to substitute this or that.” In every instance the whole class was delayed repeatedly while I tried to come up with a reasonable substitute, but it never worked out to my satisfaction.

Now I just bring everything necessary for the full experience of my syllabus. Yes, it takes me a week or longer to compile the pile, yes it takes a day to load my truck to overflowing, yes it takes me about four hours to get set up wherever I am teaching. But it yields the learning experience I want to impart.
And the title of this post? It took me 26 trips to move everything from my barn into the truck, then 26 trips from my truck up the stairs into Joshua’s shop. Three days later I had only 23 trips from his shop to my truck as the students consumed the “missing” three tubs worth.
Stay tuned.
N.B. Things have been crazy busy in a wonderful way and I’m looking forward to a more sedate pace in the coming days. Stay tuned. — DCW
Three weeks ago I gathered with 10 novitiate varnishistas from around the country for a three-day romp down the long and winding trail of historic woodfinishing hosted by Joshua Farnsworth at his Wood and Shop facility near Charlottesville VA. Over the years I have evolved a very tight syllabus to make sure every participant leaves with a set of successful exercises under their belts, or fingernails as the case may be. This solid foundation allows me to work around the edges and incorporate some new things as I did this year, with mixed success.


A large part of the course success is due to the fact that I supply EVERYTHING for the students to use. Though that is a substantial undertaking it does guarantee a greater chance of success than if I mail out a supplies-and-tools list. After a couple experiences of wasting several hours of class time scrounging up supplies, tools, and projects for the students who forgot them I tossed that concept overboard many years ago.
The routine should be fairly familiar to anyone who follows this blog, so this year I will simply be posting a gallery of images to capsulize the three days. There is no way a few pictures can convey fully the richness of the event from either a learning or fellowship perspective, plus there were many portions where I had no pictures because I was, well, teaching. There are entire exercises that were not included in the photos.
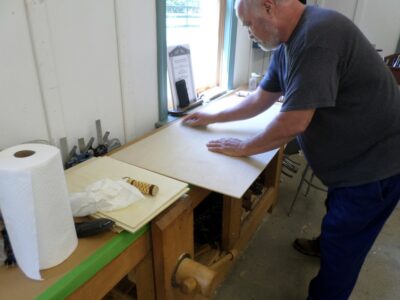
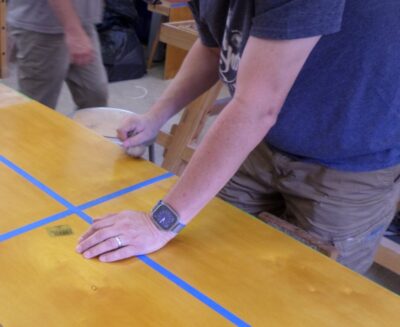
Smoothing the 24″ x 48″ birch plywood panels in preparation for fifteen coats of 1-1/2-pound lemon shellac.

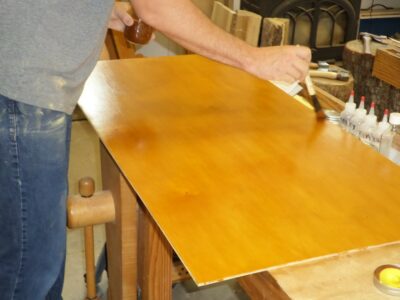
Shellac makes its first appearance
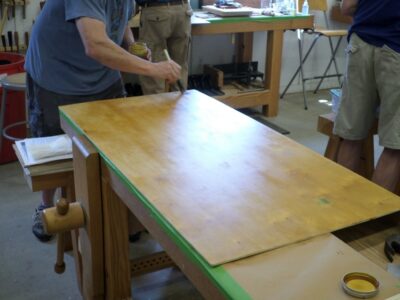
The end of the “first inning” (five brushed coats of shellac)
After drying for several hours, we ended Day 1 with a light scuffing of 220 sandpaper followed by another five brush coats of shellac.
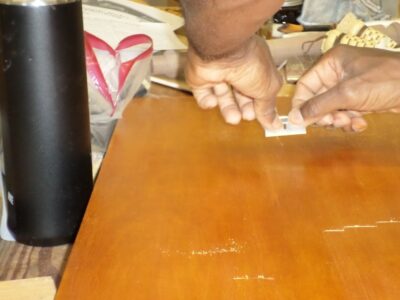
After drying overnight following the “second inning,” the surface was uniformly scraped, followed by a “third inning” of five coats and set aside to dry for 24 hours.

The final steps for the large panel included dividing it into quadrants, each of which was treated differently. This quadrant was dry-pumiced in preparation for shellac pad polishing.
Final shellac varnish pad polishing.
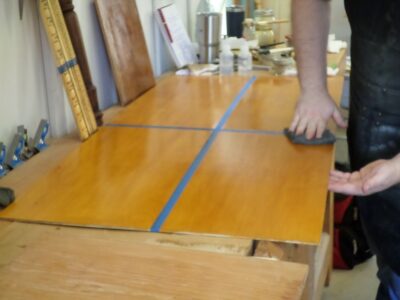
A second quadrant was polished with tripoli (rottenstone) in white spirits, the third was rubbed strenuously with Liberson 0000 steel wool saturated with paste wax, and the fourth was left “off the brush.”

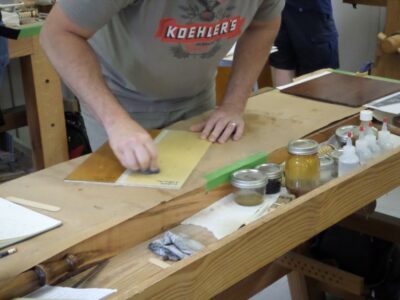
Smoothing a mahogany panel with a pumice block.
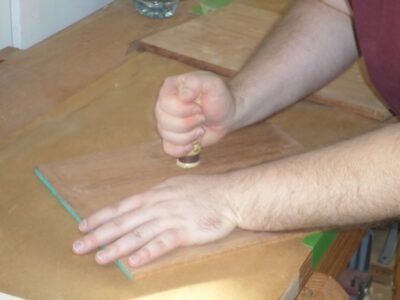
Working the mahogany panel with a 1″ x 1/8″ polissoir, followed by molten beeswax (scraped clean) as a grain filler.

Making and using a linen pounce/pad to apply the 1/2-pound shellac varnish.
Building the padded shellac varnish.
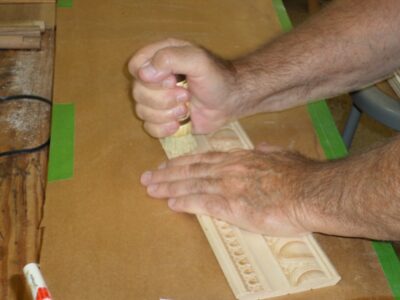
Burnishing an embossed molding with the Carver’s Model polissoir, followed by a few coats of brushed shellac.

Revisiting the shellacked surface with the Carver’s Polissoir.

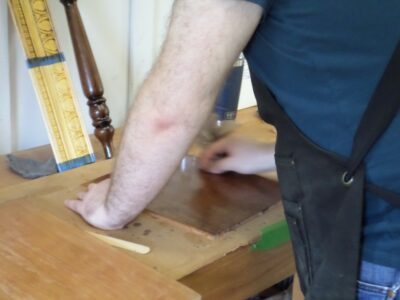
Applying asphalt glazing to half of the molding piece.

Feathering out the asphalt glazing with a badger brush.
Comparing the appearance of five coats each of Bullseye Amber and Bullseye Clear from the hardware store.

A classroom full of busy varnishers.
And much, much more.
So there’s a snapshot (pun intended) of the recent gathering. I know we will have the class again next summer at the school in Earlysville VA.

These are the handouts of the syllabus for the upcoming Introduction to Historic Woodfinishing workshop, honed over the years and the dozens of times I’ve taught the workshop. About the only changes I make any more are if the course schedule is truncated to be shorter than the three days I have here.


In my collection of 3,000+ vinyl albums is the Pink Floyd double live album Ummagumma, with the memorable photograph of their traveling equipment artistically arranged on a landing strip.

It is reminiscent of my own preparations for my upcoming Introduction to Historic Woodfinishing next week in Earlysville VA. As I’ve said previously, I found out long ago that the only way I could make the workshop complete and beneficial for all the attendees was to provide absolutely everything they need, in terms of workpieces, tools, and supplies. And that adds up to quite a pile of materials.
At this point I’m about 2/3 of the way there. All I know is that by the time I pull out of here next Wednesday the bed of my truck will be full.

Recent Comments