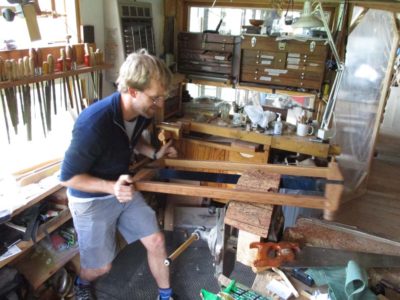
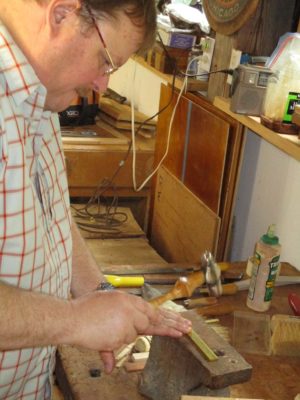
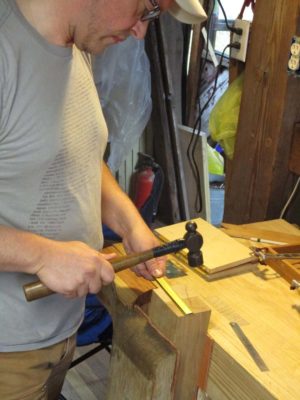
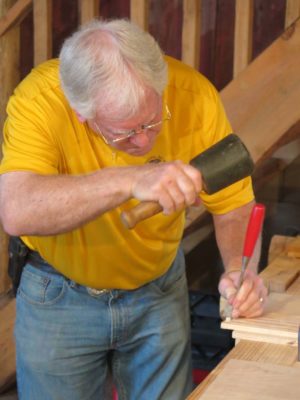
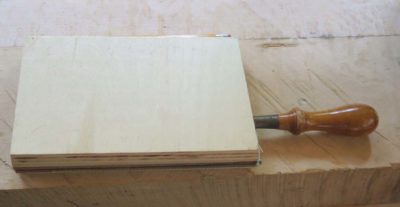
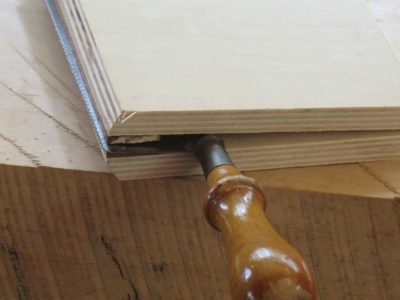
We hit the ground running on Day 3, hammering closed the slot cut for the saw plate.
Once that was checked the stroll through sharpening-land got underway. When we cut the teeth on the first saw at 16 t.p,i, I promised the students that they would get immeasurably better on the second one, and I was right. Though the teeth on the first saw worked just fine, the teeth on the second were really, really good. It is not just because of the wider spacing at 12 t.p.i., but more it was the confidence and muscle memory/rhythm from making some teeth from scratch that worked well.
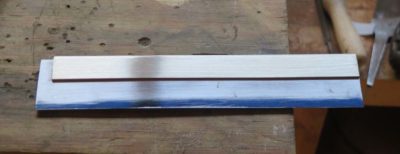
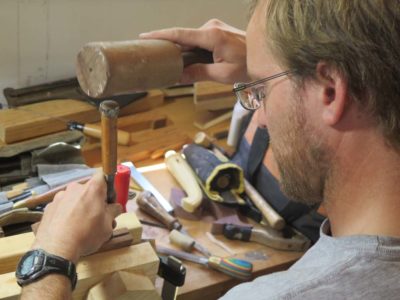
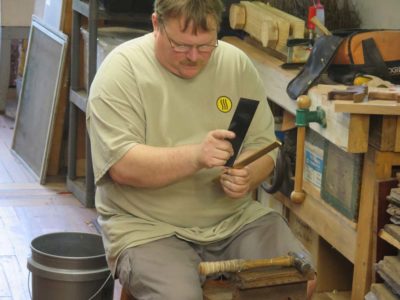
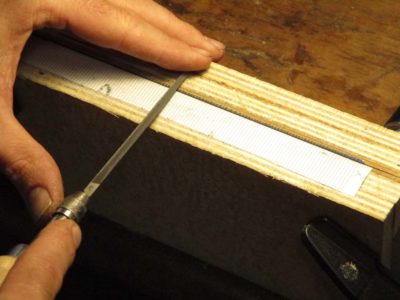
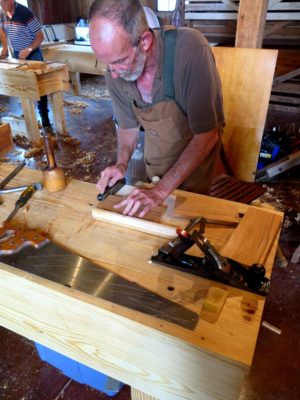
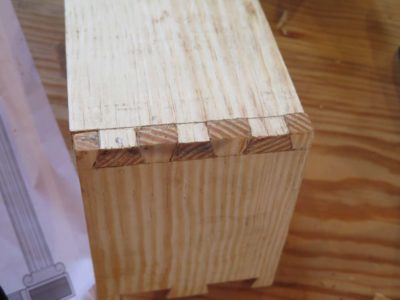
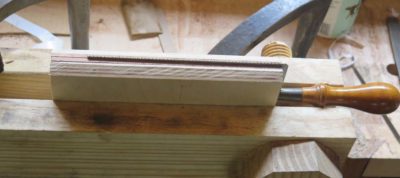
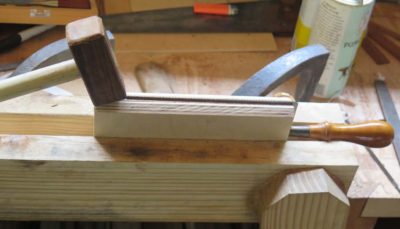
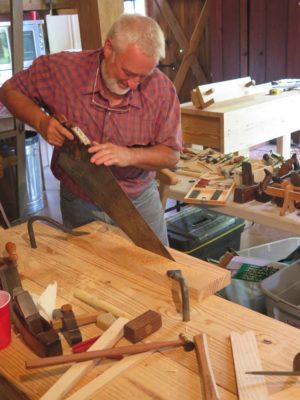
The facets from hammering the backs were more aesthetically displeasing for this crisp rectilinear back as opposed to the more rounded backs earlier so some time was spent cleaning these up. A sharp file, especially a float configuration, actually yields shavings and a nearly polished surface. Finished off with some sandpaper and pumice the appearance was quite nice. (This was a saw I was making when not coaching and encouraging the students; you can see the effect of thinning the bade at the top of the blued plate. I call this “the Blue Tooth look.”)
Absolutely everything went 2x faster on the second saw. If you will recall this saw had a saw plate that was 12″ x 2″ x .015″, while the first one was 8″ x 1-1/2″ x .020″.
By lunchtime the saws were going together. And they were cutting suweeeet.
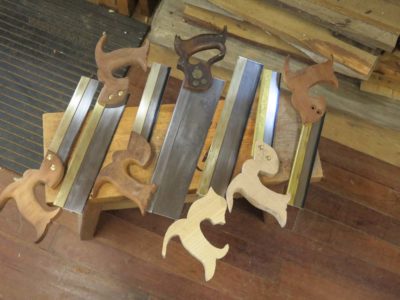
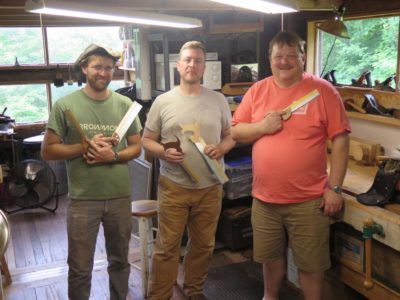
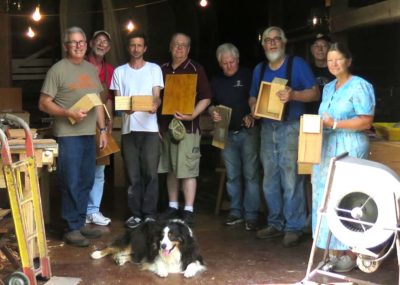
Just before the company of sawyeristas disbanded I took portraits of the weekend’s productivity (somehow one saw got left out). The finishing work on the handles was something they preferred to accomplish at home so they could build the second saw, and I admired them for making that choice to stick with and move forward on the more difficult work while we were together.
This weekend workshop was a whole lotta fun, and I look forward to replicating it sometime.
Note: The darker D-handled saw in the middle of the chorus line was a vintage Disston that I was completely re-working in lieu of building another one. I’ll blog about that project soon.

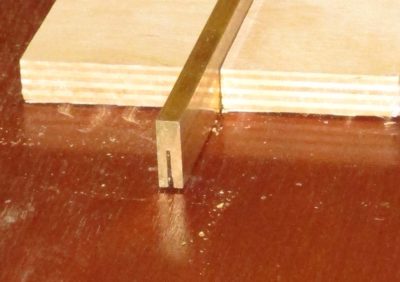
The saws began to take final shape early on Day 2. My strategy for toothing the plate long before anything else is fully completed became clear, as that finished toothed edge with no set was used to cut the slot in the handle for the saw plate itself. It worked perfectly.

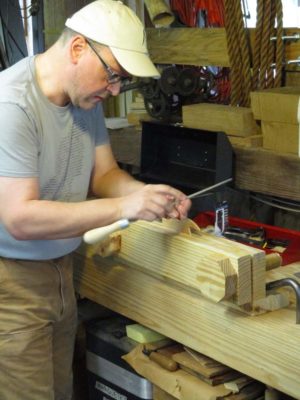
Once the saw plate was fitted to the handle it was time to begin the final assembly process. This meant that the saw plate had to be inserted into the back, and the open mortise for the back had to be laid out and cut into the handle.

Once the pieces were all fitted together temporarily, it was time for pulling it all back apart and undertaking the final finishing of the plate. As I said, I do not set the teeth of these tiny saws. Instead I taper the plates from the top to within about 1/6″ of the teeth gullets with coarse sandpaper or a pumice block, then increasingly finer abrasives until the “look” was the way they wanted. Using blued spring steel for the plates is exceedingly helpful for this process. I’ve measured the effect of abrading the plate such that the bluing is fully removed and the plate polished to a “brushed steel” appearance, and it is something around one-half of a ten-thousandth of an inch.
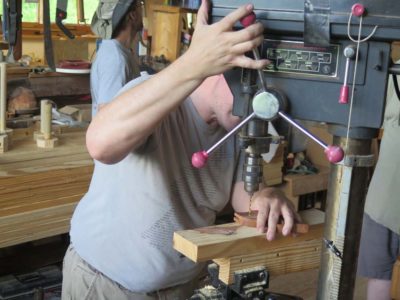
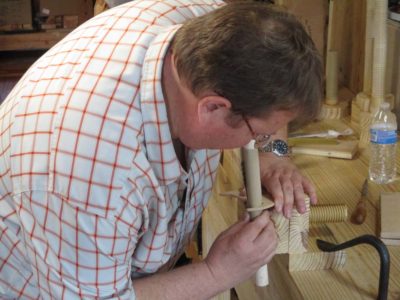
The final step in the assembly is to drill the holes through the handle and the plate to fasten everything together with brass binding posts. I must give a shout out to Chris Cianci for his technique of breaking the initial lay-out hole through the spring steel plate by striking with a center punch, then flipping the plate and repeating. After a couple back-and-forths with this the spring steel shatters in the designated location. This makes drilling a breeze. A slight counter-sink at each hole for the screw heads, and assembly was soon finished.


By mid-afternoon completed saws were emerging from the efforts.

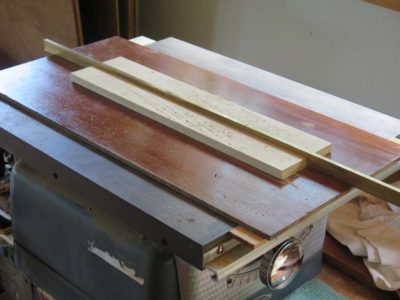
Rather than having the participants take the handles to final completion we decided to embark on a second saw with a 10″ x 2″ x .015 plate, employing a sawn slotted brass back, compared to an 8″ x 1-1/2″ x .020 with a bent spine for the first one. After the first saw, the second went so much faster. Once again there was fitting and pounding to make sure the back and the plate went together well.

Then on to more teeth cutting, this time 12 t.p.i. rather than the 16 t.p.i. for the first one. Much to their delight and in keeping with my promises, the leap in skill of the second sharpening versus the first was notable in both quality and speed.
This is a summer to try new things for workshops. Thus far one was less than successful (my annual traditional finishing weekend scheduled for the final weekend in April; the workshop itself was fine but the timing was just too early in the year), and two that were complete successes IMHO — the Traditional Handtool Woodworking confab in Arkansas and the recent Make A Petite Dovetail Saw weekend. As with the Arkansas shindig, I had taught folks to make a saw one-on-one over a relaxed and fluid timetable but never as a group with tight and fixed time budget.
From my perspective it was a rousing success.
Making a dovetail saw involves integrating three major components: the handle, or tote (I never heard the word “tote” until a few years ago, and now it is everywhere although I still prefer to call a handle a handle), a spine or back, and a plate or blade in which teeth are cut with a file. My technique for small saws is to not set the teeth but rather taper the plate so that the thickest cross-section is at the teeth and tapers off towards the back. I find this method works best for me for making saws to cut very small joints in thin stock.

The first step in any custom-made saw is to fit the handle to the user’s hand. I had my own pattern for the students to examine, and each of them modified my template to their own preference.

A couple of students brought prized wood for the handles, and my sash saws came in handy.
They transferred the pattern to their prepared wood for the handle and sawed it out with a coping saw, then trimmed the perimeter with files and rasps.
Next came shearing the saw plate from coil .020 x 1-1/2″ spring steel to an 8-1/4″ length, cleaning up the ends with a diamond stone and a bench hook. Everything in the fitting and sizing of the saw was determined by this piece from this point on.
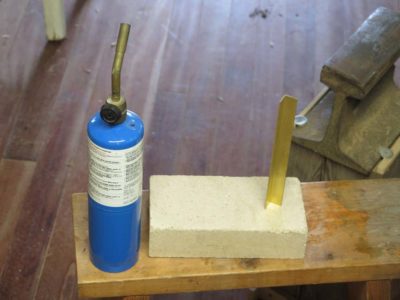
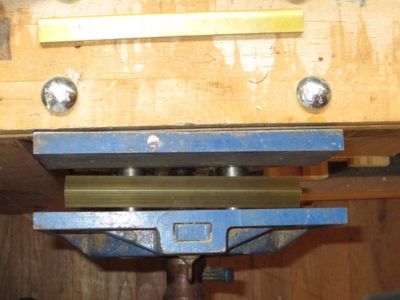

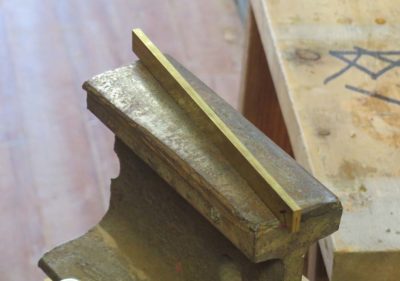
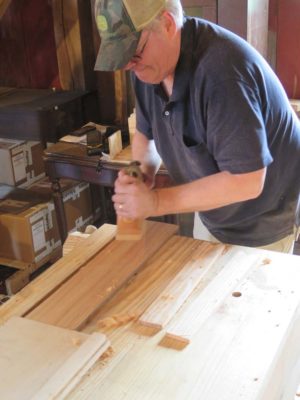
I used to bend the brass backs from flat stock but in recent saws I have switched to 90-degree 1-inch angle bar, 1/16″ thick. It cuts the time down to almost nothing. The angle bar stock is annealed with a torch, then allowed to air cool. Once cool the piece is set on the bottom of a large bench vise and the vise is closed, keeping a careful eye on it to make sure it bends evenly and nicely. After the initial bending it is moved to the top of the vise to crank it down as much as possible.
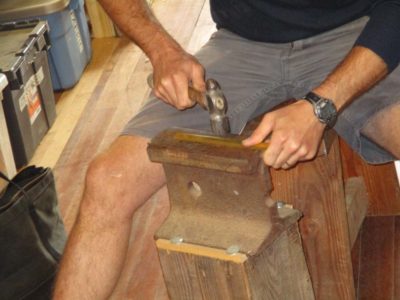
This is followed by a little hammering to close the fold tight to make sure the saw plate will be held/pinched snugly once everything is assembled.
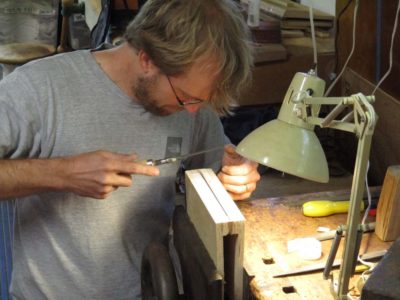
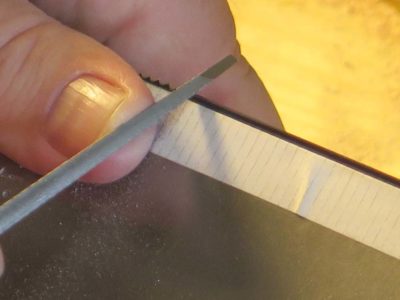
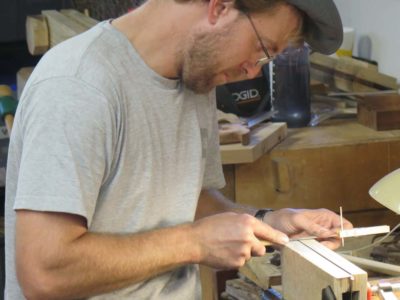
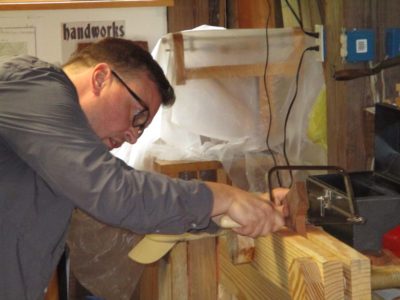
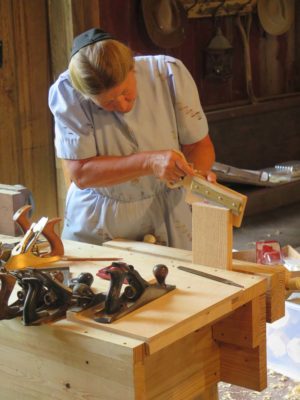
Then came the most intimidating part, cutting the teeth in the blank spring steel saw plate. We used 4″ XX slim taper NOS files (I am always looking for more) at a 16 t.p.i. spacing. I printed out the 16 t.p.i. pattern on my computer so they could tape it directly to the filing vise for easier spacing. One of the fellows brought his new Gramercy saw vise in his luggage, and we ogled it shamelessly.
I used to alternate filing each tooth from the opposite side, but then learned that Andrew Lunn filed his saws all from the same side. Given his results that was good enough for me, and I demonstrated and had the students work in this manner. Since we were not going to set the teeth there was no reason not to try this method.
They all took their time and established a good rhythm, their results were more than satisfactory.
Thus endeth Day 1, ahead of schedule and making me optimistic about a special project for them.
One of the options I wanted to make available in preparation for the “Make a Petite Dovetail Saw” workshop was the ability to use a slotted brass spine for the backsaw. To make the stock for this I ordered the brass bar stock and a 1/32″ slotting saw blade from McMaster Carr.

The issue I had to resolve was that the only slotting saw big enough to clear the table surface of one of my table saws from inventory had a 1″ arbor hole, while the shaft for the saw blade was only 1/2″ diameter. I made a fitted spacer from a standard large washer to allow the blade to be used on the shaft, adding a pair of oversized collars on either side to keep everything lined up.
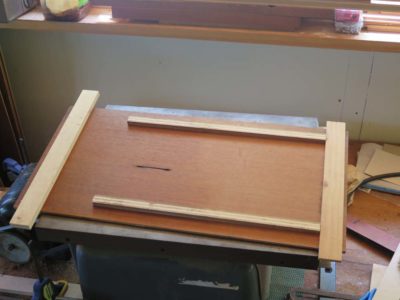
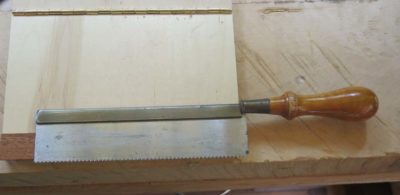
I then had to fabricate a jig to keep the bar stock in the correct relationship to the slotting saw blade in the table saw. Again some stuff from the scrap shelf came in handy. A piece of 1/4″ marine plywood served as the panel, with stops glued front and rear and another pair aligned with the miter-crosscut slots to keep the whole unit fixed in one place and one place only. You can see this panel flipped over here.
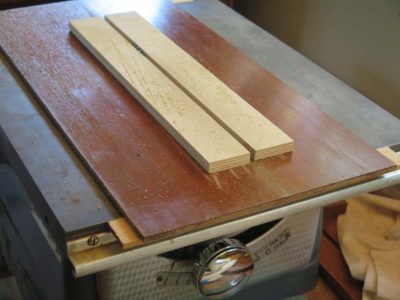
With that finished I glued fences on both sides of the slotting saw blade to bisect the bar stock. It worked like a charm provided I take three light and gentle passes through the saw.

I can now produce as much slotted spine stock as I want.

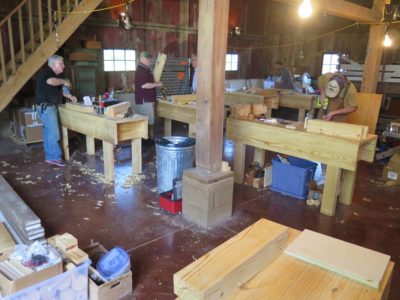
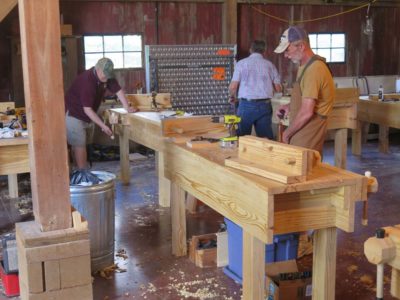
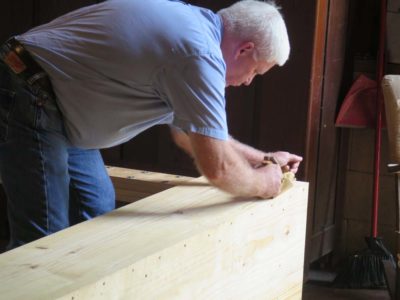
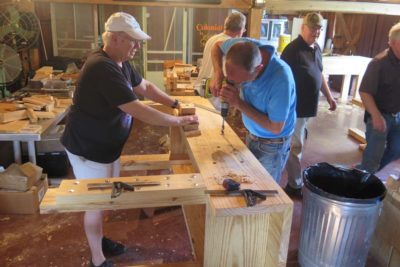
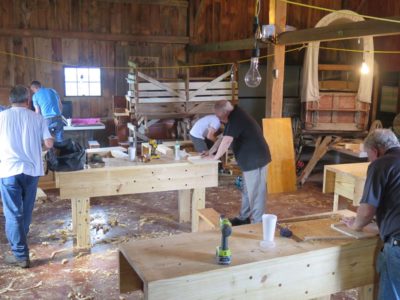
At this point the participants were barreling along, full steam ahead. The project to build a water-tight box for sharpening stones was probably a bit too ambitious on my part, but they were game and worked long and hard. Resawing and planing the vintage cypress soon filled the space with the pungent and pleasant odor of this magnificent wood, still fill of aromatic extractives even after 180 years.
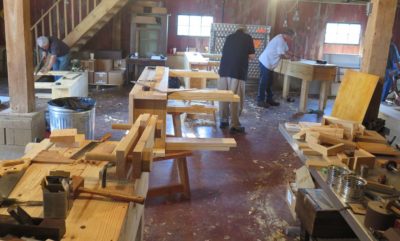
The pieces of the box began taking shape all over the place. The pace of work was intense, and even the friendly chatter subsided a bit as the concentration on tasks at the bench increased.

The fragrance of the wood was augmented with the scents of alcohol and beeswax as the finishing exercises were also progressing.


But mostly it was about fashioning wood into an artifact.
The day concluded with a couple of special events, namely “Don’s Greatest Hits,” a Powerpoint presentation of notable projects over the past decade or so, followed immediately by a rib-fest cookout at Jane and Cam’s house. We ate spectacular ribs until we could not move, and that was followed by gallons of freshly homemade ice cream. We were barely ambulatory by the end of the evening.


Day 5 commenced in the shop much the way Day 4 had ended — feverish work making as much progress as possible. You could tell by the growing mounds of detritus that something was happening in a big way.
No one actually finished their boxes but all promised to do so once the got home with their new benches to work on.
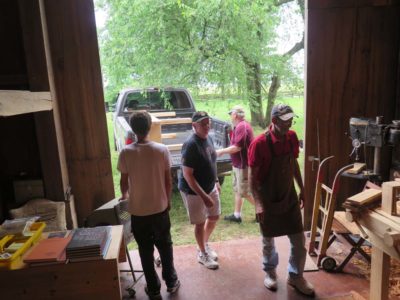
We spent some time loading the aforementioned benches and the place cleared out before suppertime. It was a grand week of fellowship and learning and I departed exhausted and content. I only had two long days of driving to get back home to Shangri-la.
Heartfelt thanks to the students and my longest time friend Rick and Jane and Cam for making this event happen and memorable.
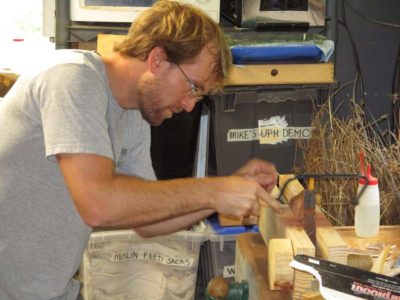
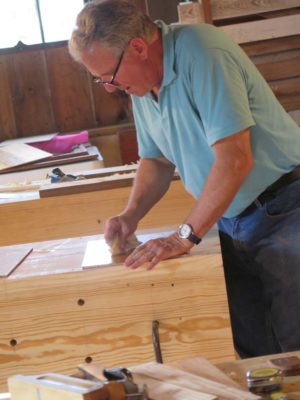
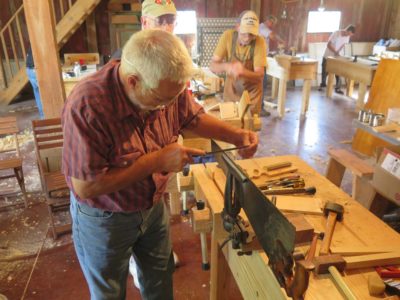
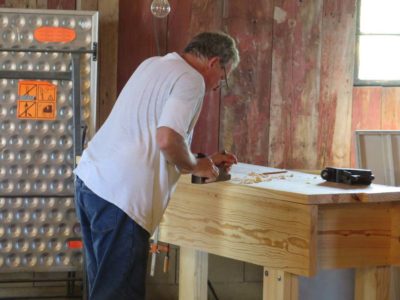
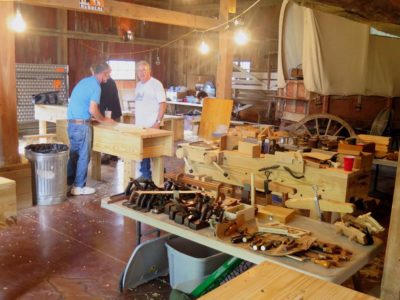
By Day 3 the participants were pretty much on auto pilot. My task was to circulate and help where I could, and encourage at all times. The only deviation from the inertia already established was that I had promised to integrate a little traditional finishing into the mix, and we were so busy on Day 2 that I never got to it, so they got a double dose on Day 3.

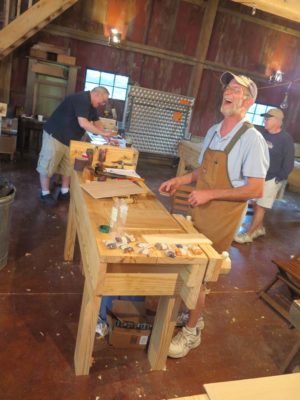
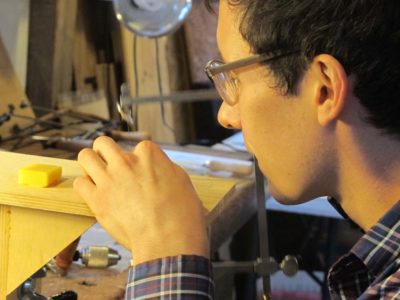
As usual my emphasis was on burnishing with polissoirs, wax grain filling, brushing shellac, and pad spirit varnish polishing. Clearly Dave was getting a good laugh about something, which is entirely appropriate since finishing is about the most fun you can have in the shop.
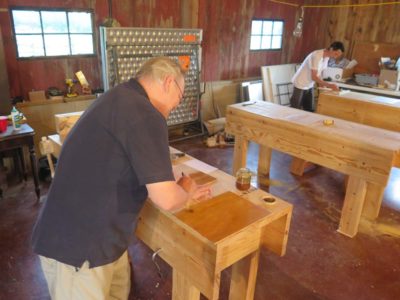
I think everyone was new to the methods I demonstrated for them to mimic.

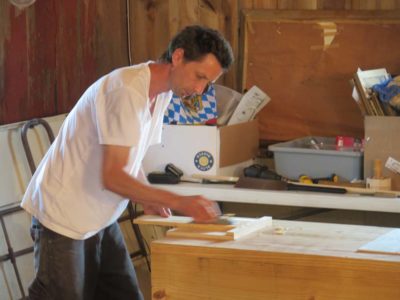
Once finishing time was over it was back to the sawing/planing/joinery exercises for the middle of the day. Jane was thrilled with her first really good dovetails, as she should be. She had the mechanics down pat already, but needed just a bit of guidance to get over the finish line with great results.
Then it was on to diving into the sharpening stone box, made from some of my prized stash of c.1840 11/4 cypress that came from the staves of an old railroad water tank in southern Georgia. The material was resawn and sized for the boxes and progress was made on every front.

We went back to finishing to conclude the day. This group of students was really enthusiastic, some of them arrived as early as 7.30 in the morning and stayed until 7 in the evening.
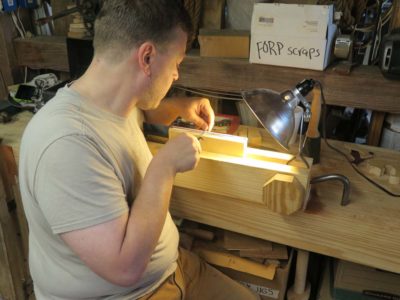
While noodling around the shop getting the classroom and supplies ready for the upcoming (actually, just-completed) “Make A Petite Dovetail Saw” workshop I devised and built several of perhaps the easiest and simplest saw filing vise ever. Like me you can make one in minutes using materials from the scrap box.
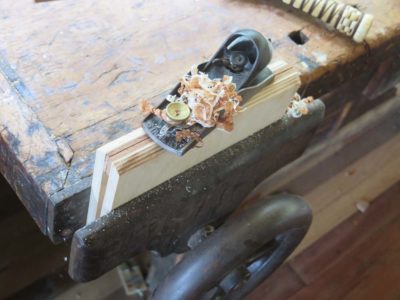
I started with some 1/2″ baltic birch cut into a pair of 6″ x 8″ panels. These were connected together along one of the long edges with a piece of piano hinge, with about 1/8″ space between the panels when the hinges were screwed on. Following this a pair of scrap strips approx. 1/8″ thick were glued to the inside edge at the tops (the hinge was on the bottom). Once the glue was dry I trimmed the top edges with a block plane until they were clean.
The result was a wooden book facsimile that was narrower at the bottom than at the top. This would be important later on.
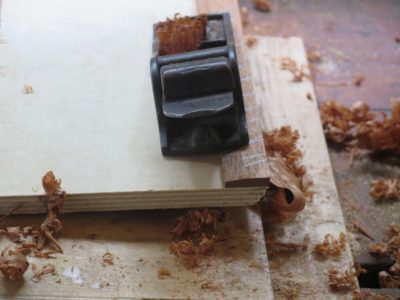

With these top strips in place along the inside edge and the glue hard I planed a chamfer along the bottom of each of them to create bevels that touched at the top of the vise, thus bringing it into intimate contact with the saw plate being sharpened. At this point the vise is finished. Really.
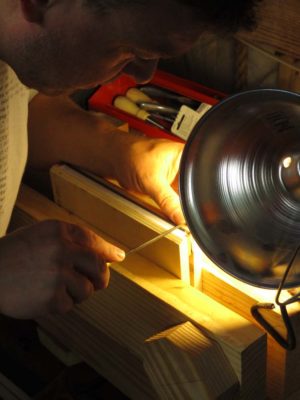
In operation the vise is pretty much idiot proof. Place the saw in the “book” so that the teeth are exposed by the amount you want. I generally shoot for a tad more than the distance between the teeth, but you can use what ever is convenient and comfortable.
The vise with the saw inside are gently pinched together and placed in a bench vise, a Moxon in this case but any vise that fits is an option. By adjusting the Moxon vise such that the thinner bottom of the saw vise slips into it easily yet the saw vise engages with the Moxon jaws a little more than halfway in, this seems to work perfectly. Press down on the saw vise until it is snug in the Moxon and fully engaged with the saw plate. A gentle tap on the top of the saw vise drives it deeper into the Moxon and causes the saw vise to pinch the saw plate so that it can be filed.
When you are finished with a filing run a 3/4 turn of the screws loosens the Moxon enough to allow the saw vise to be easily lifted out of the Moxon.
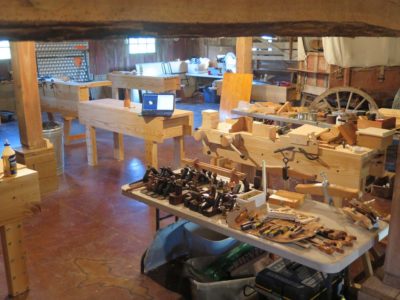
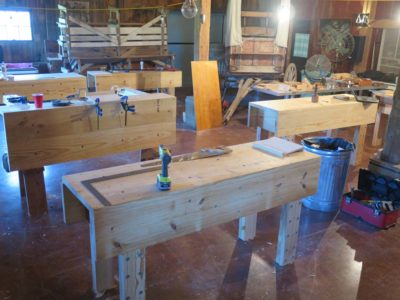
On the syllabus for Day 2 was to finish up the workbenches quickly and get started on the initial pair of pratica, namely the winding sticks and the planing stop. But in the lull of battle preceding the gathering of the students I reveled in just walking around, admiring their productivity yesterday.
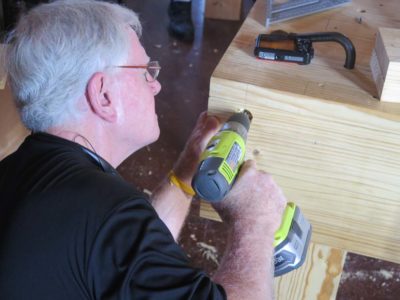
The benches soon received their finishing touches of holdfast holes and threaded aprons to accept the screws for the vises. I learned after the fact that a good drilling jig would have been very helpful for these holes. A few of them were slightly off kilter, and a good jig would have saved a lot of headache in the end. I’ve already got the design in mind and will fabricate it as soon as I get home.

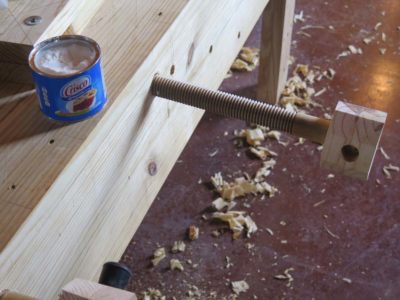
Soon the holes were drilled and threaded and the screws lubricated and tested in them.
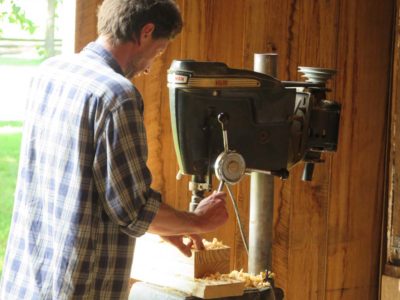
The double-thick jaws were laid out and drilled with a drill press that was brought over from the shop and the vises installed.
After this the Moxon vises were a cakewalk.
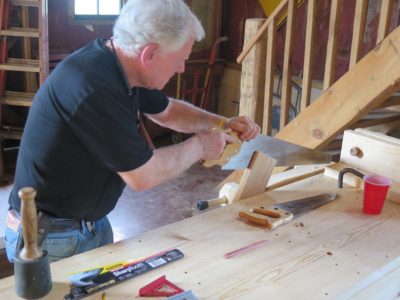
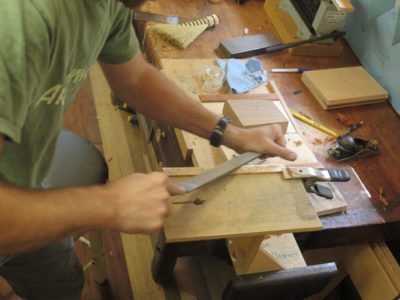
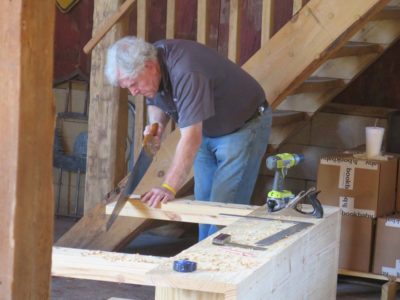
The benches were then given their first real workouts with the resawing, ripping, and crosscutting of the pieces for the winding sticks and planing stop. All variety of saws were employed, with my giant c.1800 two-man frame saw the the new Bad Axe version receiving great acclaim.
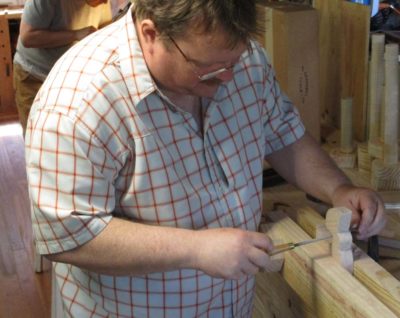
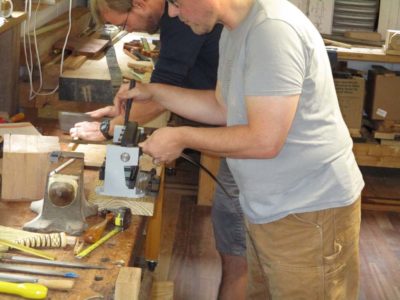
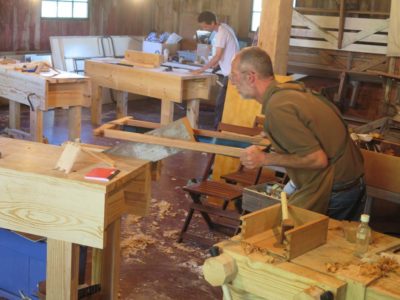
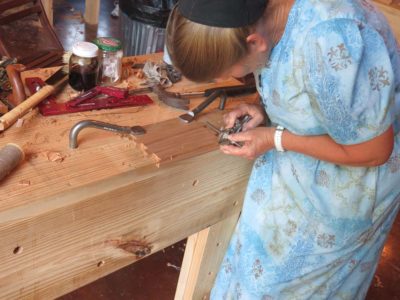
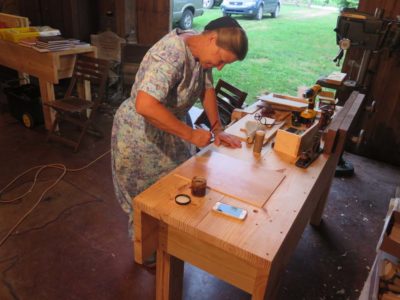
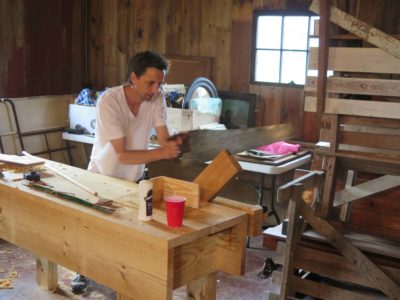
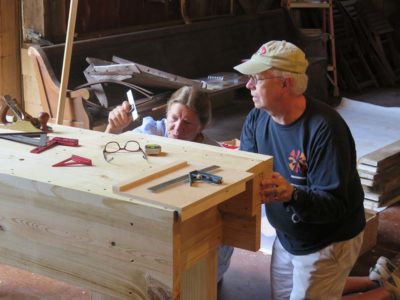
One of my treats for the day was giving Cam a lesson on saw sharpening. He’d finished up his work in the metal shop for the day and dropped in to see what we were up to. Being a skilled metal worker Cam took to it like a fish to water and the results were gratifying.
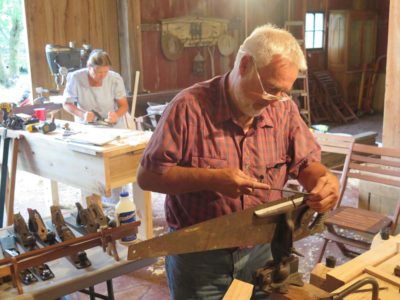
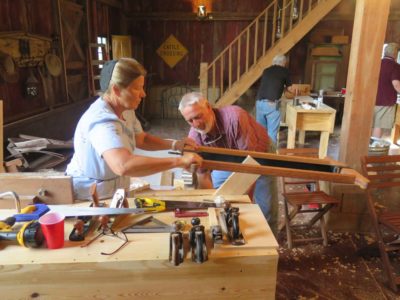
This is one of my favorite images for the week, with husband and wife working alongside each other in their own tasks. A profound model for us all.
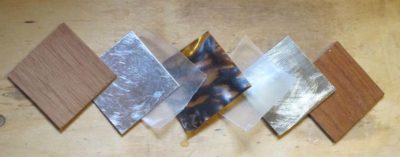
I was making some preparations for next month’s Boullework workshop (July 13-15) and noted that there is still space in it. If you would like to participate just drop me a note.
We’ll be making tordonshell from my own special process, and using already-cured tordonshell and brass sheet to cut a couple of tarsia a encastro designs using a jeweler’s saw and 6/0 blades!
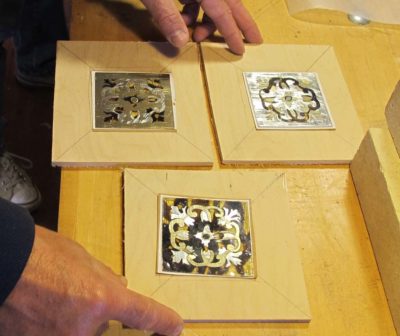
In this technique you will cut both the pattern and the background at the same time and thus create two complete compositions, one being the negative of the other. If we add pewter to the mix it will be three compositions.
I’ll be providing all the tools and supplies for the course.
Hope to see you there.
P.S. There is also still space in the knotwork banding class August 10-12.
The agenda for Day 1 of the workshop was ambitious. We first met for an introductory time and a review of the expectations and projects of the week. I won’t say there was disbelief at the list of things we were going to do, but I could sense some skepticism. Especially that part about everyone building a complete bench on Day 1, a heritage tool that would be up on its feet by the end of the day and ready to be put to work for Day 2.

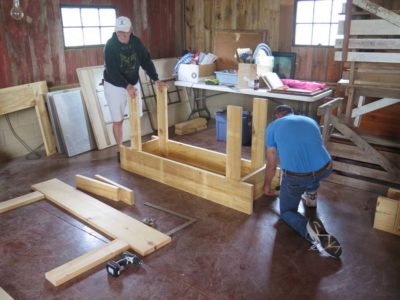
And that is what we did. I described and demonstrated the process of building the Nicholson bench and everyone got to work, with cooperation and fellowship abounding. All the 2×12 SYP lumber had been pre-cut so it saved a fair bit of time and allowed for the students to work more efficiently. As did the use of battery powered drills and decking screws.


Before lunch we had at least a couple of them up on their feet for the first time. There are repeated up-and-downs with these benches as many of the subsequent steps occur (or should) while it is laying over on its side.
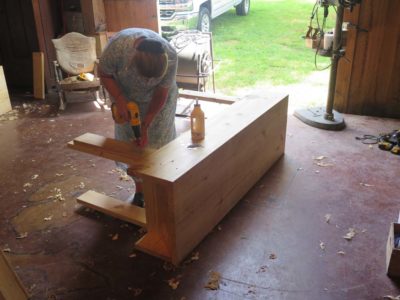
After lunch at Jane and Cam’s restaurant, the best one in the region by far, things got hopping as the tops were added followed by the second lamina for the legs going into place with decking screws and glue.
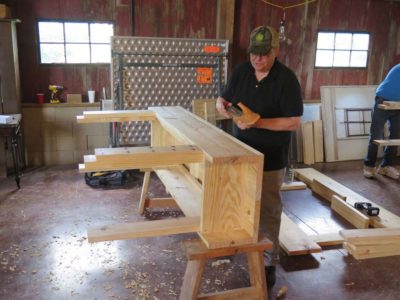
The front edges of the tops were planed flush with the front aprons and folks got the sense that a real live pile of workbenches was about to happen.
Before long the legs were being trimmed to length and the tops flattened, Round One. I recommended that everyone wait until next summer for the final flattening of the tops.
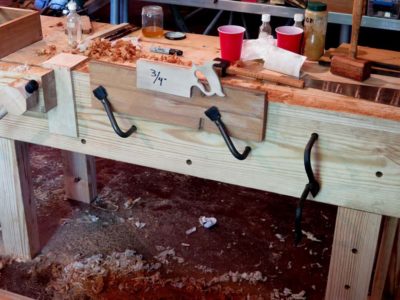
Here are a final few pictures from the day as holdfast holes appeared in great abundance, making the benches fully functional even before the twin screw vises and Moxon vises were completed the following day. It was such a roaring success that it resulted in total buy-in from the participants for the rest of the week.

Recent Comments