Whew! Concluding a few months of mostly traveling we got back to Shangri-la late Sunday evening after driving non-stop from Alabama, where L’il T’s family just moved (we were “helping,” a/k/a grandparenting L’il T and his brother). Travel advisory — avoid Chattanooga if at all possible, the construction and attendant constriction made it a more than an hour of stop and go experience at 97 degrees.
I am looking forward to resuming some semblance of norma life, including full days in the shop. This is made possible by the cessation of travel for most of the foreseeable future, along with finding a sturdy Mennonite lad to do most of the yard work. We were spending 3-4 days a week just keeping the grass cut, brush beat back, and trimming the edges. This young man could do what is necessary in 3-4 hours, rather than 3-4 days. Oh, to have the exuberance and fortitude of the young! That plus a $10k lawnmower makes a big difference.
Other than routine chores around the homestead I’ll be preparing for a Labor Day Weekend shindig at my friend Tim’s place, celebrating the historic crafts of our ancestors. I’ll be assembling a vintage-form tool kit to fit into my antique cabinetmaker’s tool chest which has been used as storage for the past couple decades. So, I’ll be there with tools and one of my Nicholson workbenches, in period costume, probably making a small dowry chest. If you are in the region, stop on by.
And resuming work on my magnum opus tool cabinet, and oh by the way L’il T is now big enough to use a step stool to wash his hands and brush his teeth. The ones I made for his mom and aunt are still in service after 35+ years.
And my traveling tool kit needs completing. As do a couple of Gragg chairs. And those half-finished Studley mallet exercises, and the patterns for the genuine replicas. And the custom oculars for my rifle scopes, bypassing the now nearly defunct right eye (dominant). And the boat load of writing and editing staring me in the face. And setting up a video system to make in-shop vids after I get the Gragg video edited. And tuning my ripple molder.
This is the original DVD case cover art. I’m leaving the front pretty much alone but reworking the back extensively.
One of the ongoing headaches(?) has been the inability to resupply my inventory for the historic woodfinishing video F&W Media (PopWood) produced several years ago, which I had available on the donsbarn.com website store. The new company that now owns PopWood discontinued the hard copies of the DVD and no longer even had “new old stock” copies in the warehouse. After some back-and-forth the new company released the video to me gratis, for which I am most appreciative. At Handworks 2023 the editor-in-chief made a point of confirming our earlier correspondence; my F&W videos were now my intellectual property to use as I saw fit.
The urgency of me acting on this came to a head a few months ago when my final copy was sold. Since then I have been noodling the revisions of the original DVD cover and am now ready to send it off for reproduction after I let it ruminate for a couple days. While the DVD content was now my property I had no desire to disavow F&W from the picture as they truly deserve all the credit for producing it in the first place. Thus I am keeping the bones of the original packaging, crediting F&W, but revising the content a fair bit to re-brand it as a Barn on White Run product.
As soon as I get copies into my hands I will be fulfilling the two dozen orders that have been sitting in my “Pending” folder.
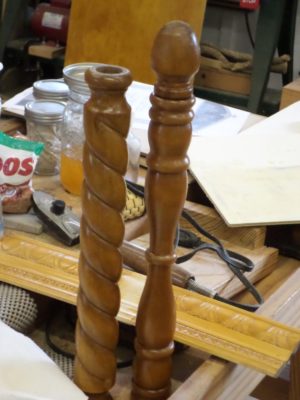
While undertaking some recent reorganization of my basement workshop in Elderbarndottir’s former house (she got married in November and moved to her husband’s house) I came across this nostalgic and beat-up picture from early 1977, hiding behind one of the shelving units. This French secretaire was my first really high-profile/high-value furniture restoration project at Schindler & Son of the Palm Beaches, where I started working in late 1974. Unfortunately I did not take any detailed pictures of projects at this point of my career – had this happened once I was a museum conservator the project would have been documented with hundreds of photographic images to go along with the written reports. I probably took a picture or two of the interior, it was spectacular. Bat that was almost 50years ago and cannot recall that detail.
Somewhere I have a picture of a Riesener cabinet from the same client, but that picture has not turned up yet.
Prior to this I did a lot of run-of-the-mill restoration for “ordinary” antiques along with a boatload of custom finishing and refinishing; before Schindler’s I was a “scratch and dent man” at a couple of furniture stores.
This project arrived in pieces in the back of Ambassador So-and-so’s Mercedes station wagon. The secretaire bore the inventory stamp of the Chateau de Saint Cloud. It should come as no surprise that the culture from which the word bureaucrat is derived should be punctilious about household inventories, but there you have it.
Over a period of a couple weeks, I reassembled it and made repairs to the rosewood and tulipwood veneers, then finally a couple of days of shellac pad polishing. “Pop” Schindler came almost every day to watch and guide me, it was on this project that he introduced me to hot hide glue.
This was a seed for my fascination with exquisite European furniture, especially of the French variety (along with our company’s work at the Wrightsman estate in Palm Beach and their furniture collection), and was truly the acorn from which my fascination with Roubo sprouted. It was also the prompting for me to embark down the career path of conservation; I entered that stream in 1981 at Winterthur Museum while I was a student in college.
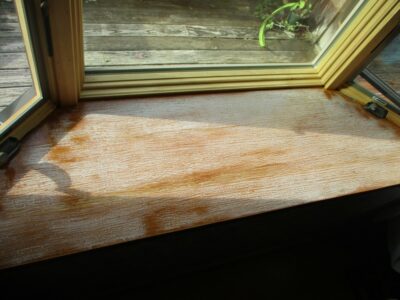
Interspersed between sessions of working on the cherry trim for the new bay window I began the process of transforming the pine-veneer-over-particle-board shelf of the unit into something that is visually cherry-ish. The shelf will be used as a mini-greenhouse by Mrs. Barn through the winter, so the finish needed to be really robust. To that end, I sealed the surface thoroughly with a brushcoat of thinned West System Epoxy for best penetration to get it as impregnated and protected against moisture as possible.
To impart the coloration for the board I used a commercial cherry stain as an intermediate glaze coat, probably an iffy proposition. Actually, in hindsight since it was a complete mess of an outcome — perhaps the worst finishing clusterflunk I have ever encountered — it was way worse than “iffy.” I did not even document the process, I had glazed probably ten thousand surfaces over my career so why document this one? (Perhaps some day I should write a series of blog posts about imparting coloration for matching, and the various techniques — staining, dyeing, toning, and glazing).
The glazing went fairly well but it took three days for the glaze to set before I could recoat, versus the normal 2-6 hours. I abraded it lightly to reduce the effects of dust and bugs and miscellaneous debris that became embedded during those drying days. I followed this with a light brush coat of my favorite oil/resin varnish, Pratt and Lambert 38 (no longer available, alas), just before going to bed. With the varnish seal coat over the stain glaze it looked awfully good.
Imagine my surprise when I got up the next morning and saw the most highly blushed coating I have seen in my 50+ years of finishing. Even more than times when I was lacquering on a sweltering Floriduh summer day with a driving thunderstorm outside. Something in the stain/glaze clearly did not like something in the varnish seal coat. I mean, REALLY did not like it. In fact, I have never before seen an oil varnish blush. Never. And this was an oil varnish over an epoxy base.
Back to the drawing board. Gotta noodle this one for a while. Stay tuned.
During Handworks 2023 I was able to chat with Youtoobers Rex Krueger and James Wright about their channels (I am a subscriber to both and you should too). They were very encouraging about my ideas for producing less formal at-the-workbench videos.
Yesterday James’ video featured polissoirs prominently and was an enjoyable romp through the various techniques underneath the umbrella of French Polishing. My only correction to the content would be that my wax blends are beeswax and shellac wax, not beeswax and shellac. But certainly the effort was earnest and almost entirely on the mark. Well done and thank you, James.
Coincidentally(?) while James was steering people toward this web site, the web site itself was partially hacked. Not the content, but rather the search and redirect from the Dark Star, a/k/a Google. Late yesterday afternoon I began getting emails and texts telling me that trying to get to this site from Google resulted in the searchers being deposited in a gaming/gambling site. I contacted Webmeister Tim who got right on it and had the situation resolved as soon as he got home to his computer. Still, it made for a restless night as I wondered how deep the intrusion was.
Is it any wonder that I have long considered compewder hacking to be a capital offense. I am not kidding. And yes, I know what “capital offense” means and implies.
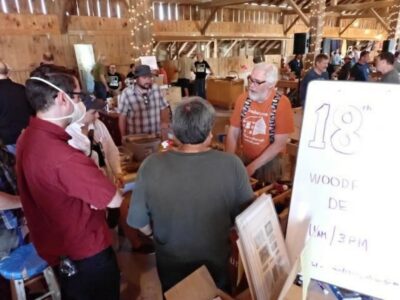
Beginning even before “Starting Time” we were inundated with a constant stream of visitors and the Donsbarn.com booth (the cracks in the barn door opening was soon breached by boomer sooners, who were eventually told to get out until 10 AM). I was working one aisle, John the other, and engagement was spirited.
As I alluded in previous posts I had decided to give two 45-60-minute demonstrations of taking a parquetry panel from the rough to glossy, including the preparation and use of the polissoir. Each of the four demos was well attended — 15-20, which was all about the capacity of my 10′ x 10′ booth — with the observers arriving early and staying until the end. The 11AM demos were focused on cold beeswax finishing with true French polishing (wax and water), while the 3PM demos were all about molten beeswax followed by spirit varnish pad polishing.
Not much more to say or show visually, we were engaged with the flowing audience non-stop through the day, and we did not catch our breath and sit on out stools until 4.50, ten minutes before closing.
Awaiting show time Saturday morning.
Our booth was a perfect location for the Roy Show, but he stood exactly behind the post in the center of the frame.
The only difference in Day 2 was the huge crowd at the beginning of the day as the doors were opened at 9.30 in advance of the presentation by Roy Underhill. The rest of the day Saturday was much like Friday, with the only difference being that each of us were able to do an hour long walkabout to visit all the other venues and toolmakers. I’ll show some pics from my walkabout next time.
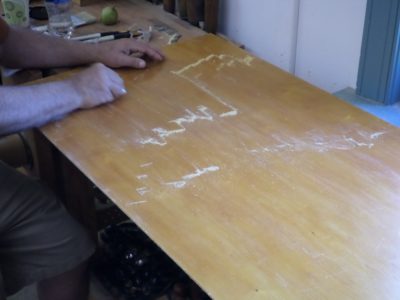
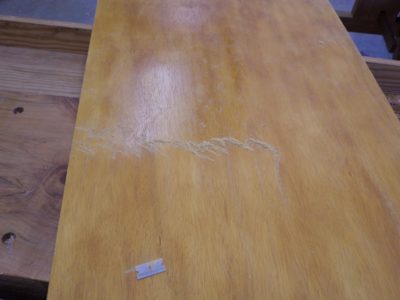
Early on I had decided to incorporate demonstrations to the program at Handworks, and in order to have something on which to demonstrate I made a set of parquetry panels.
I’d begun these some weeks before, you can follow their development in my earlier post about Bandsaw Parquetry. One of the points I was trying to get across was the importance of surface preparation so I was going to start with some surfaces that REALLY needed preparations.
Finally, after two weeks of assembling stuff to go, two days of playing TETRAS loading, unloading, and reloading the truck full to the brim, off we were. After two long days of driving, we got to Cedar Rapids for a good night’s sleep before heading down to Amana for the Handworks set-up. I wish I could’ve said confidently that I prepped thoroughly and tied up all the loose ends but the odds were near 100% that several hours into the set-up or Handworks itself I would remember something I left behind.
John and I showed up bright and early for setting up, the building opened at 9AM and we were there around 9.15. I think we were the first booth to be completely set up
Here is a walk around the Festhalle during the set up time. Upcoming posts will document other spaces and activities for Handworks.
I was in my usual spot, on the center row near the Lie-Nielson booth up on the stage, and between Jeff Hamilton in front and Gary Blum to my rear, with Matt Bickford across the aisle on one side and Patrick Leach on the other. I took the picture of the main space from the stage, where L-N set up very late in the day. While they were working on their display Tom Lie-Nielson stopped by and we had a nice long chat.
My setup took only a couple hours, leaving lots of time to visit with friends from years past. I especially cherished the time with the Bickfords, folks who are definitely on my wavelength.
Across on aisle were Matt Bickford and a chairmaker I did not know (there were actually a lot of exhibitors and tool makers I did not know),
and across the other aisle was Patrick Leach’s seductive vintage tool emporium. Amazingly enough, I escaped the weekend without buying a single tool.
Immediately behind/adjacent to me was Gary Blum with his innovative workbenches and accessories, and hand planes.
Konrad Sauer was just down the way with his spectacularly high-performance planes,
then Lost Art Press. I think Gramercy Tools was between them but had not set up when I was walking about.
Benchcrafted was the booth greeting the visitors immediately on entry. It makes sense, they’re the ones who pulled the whole event together.
Back in the corner was innovative genius Jeff Miller who was showing off this device that hollowed out bowls. It was the coolest thing I saw at the event. Over his shoulders you can see the Lee Valley booth, but they had not begun setting up yet.
Rounding out the Festhalle setups from that time was Ron Brese, closest to Benchworks at the other end of the center row.
With the rest of the day free we had a chance to go visit all the other booths in the three other venues, although some of the booths were not ready until late in the day or even the next morning.
We were girding our loins for a wild couple of days starting at 10AM the next morning.
Day 2 began with scraping the large panels with razor blades to get them really smooth, followed by a final “inning” of 5 or 6 coats of shellac varnish, giving a total application of about 15 coats. These were then set aside for final rub-out at the conclusion of Day 3.
We then moved on to brushing a few coats of varnish on turnings and embossed moldings to introduce the notion of using an oval tip brush on undulating surfaces. The right tool makes all the difference.
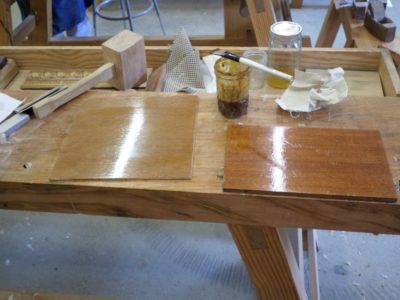
Smaller panels were varnished in preparation for further exercises; the plywood panel was for water/wax polishing (we never got to that one since we ran out of time) and the mahogany panel was for spirit varnish pad polishing.
The final event of the day was applying, scraping, and buffing a molten beeswax foundation to these solid cherry panels in preparation for subsequent pad polishing. Prior to the advent of plaster-like grain fillers in the late 19th century, beeswax was the grain filler for almost all glossy finishes.
It might not sound like much but these activities did fill the whole day.
My friend, planemaker Steve Voigt, has joined me in the rabbit hole of historic varnishes. His latest adventure is about making copal varnish, and you can follow it at his blog.
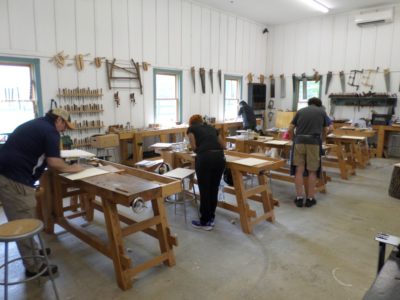
I recently had the great opportunity to teach my 3-day Introduction to Historic Woodfinishing workshop at Joshua Farnsworth’s Wood and Shop school. I have probably taught this class twenty or thirty times, having settled on a base syllabus long ago but continuing to tweak it a smidge every so often. I’ll post it in one of the upcoming blogs once I can figure out how to make a screen capture image.
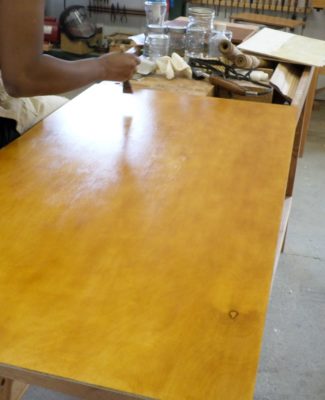
The first day is mostly consumed with my (in?)famous exercise of finishing a 24″ x 48″ piece of birch plywood with a 1-inch brush, beginning the day’s activities with five or six coats of 1-1/2 lb shellac. (sorry, I forgot to take pics of this step)
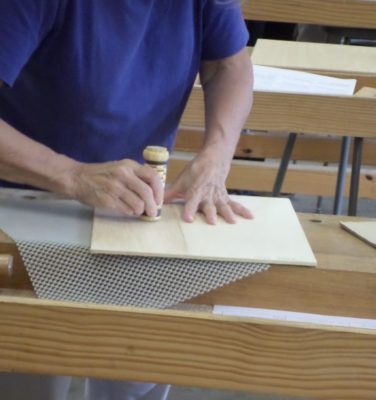
This is followed in short order with exercises in using pumice blocks to “sand” the surfaces, polissoirs to burnish the surface, and a generous application of molten beeswax.
Late in the afternoon the big panels are sanded lightly to remove any fuzz or debris, followed by another five or six coats of the same shellac.
The day was completed with some wax scraping, partly in preparation for processes yet to come.


Recent Comments