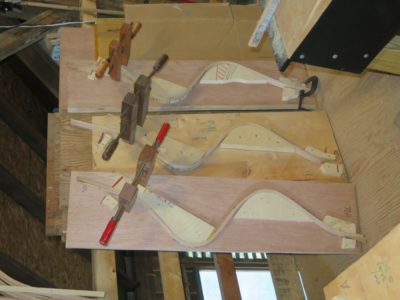
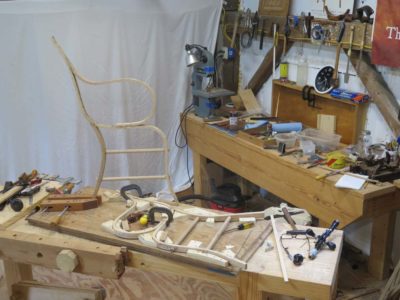
During our recent days of work preparing for next August’s “Build A Gragg Chair” workshop my friend John and I prepped a lot of wood sticks, and bent them to the forms required to become Gragg chair parts.
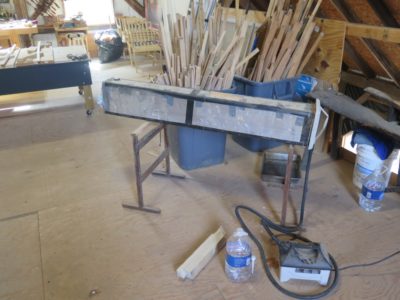
We got the steam box set up, the forms set out, and set to work.
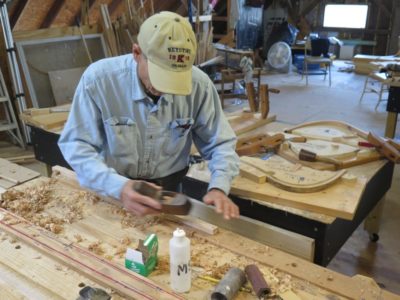
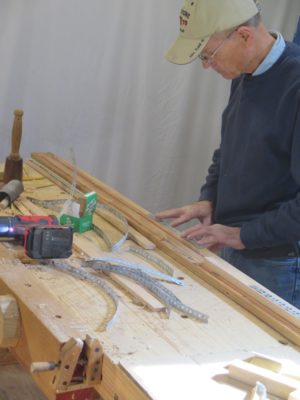
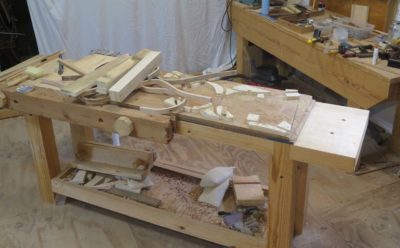
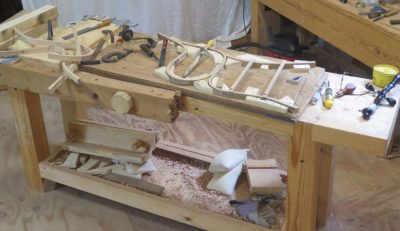
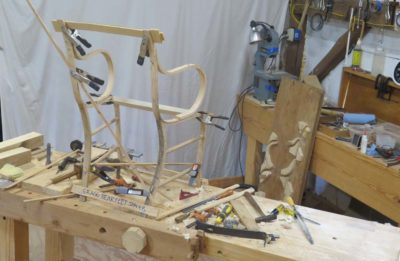
John hand planed dozens of chair pieces to get them ready for the thermodynamic adventure.
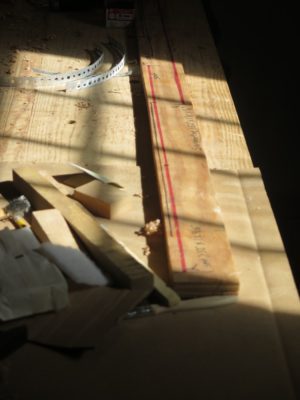
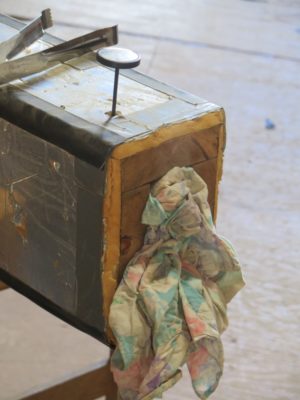
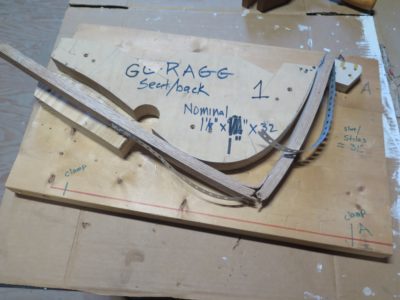
Once he had five or six pieces ready to go, he used the template board I created for this purpose and affixed the bending straps to all the pieces. When you have to execute two 90-degree bends only twelve inches apart in a dozen seconds, bending straps are pretty much mandated. We used flanged sheet metal screws and plumbing straps and attached them BEFORE they went into the steam box because the brief time to get the bending done after steaming does not allow for the straps to be put in place afterwards. And since the chairs get completely painted, any staining or screw holes can be dealt with.
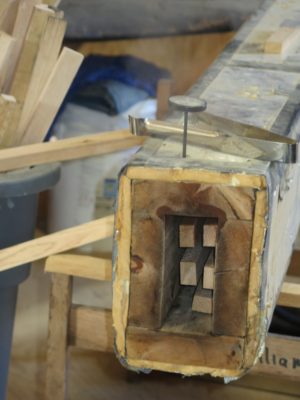
I placed them into the already heating box and waited for them to reach maximum temperature, which in my set-up is about 200 degrees.
Using a state-of-the-art steam box seal we set the timer and waited the requisite time, 25 minutes for the arm and serpentine pieces, 45 minutes for the bent seat/backs.
On the first day we had good success especially with the thin pieces, only one failure out of eight or ten attempts, but on the second day we had a string of failures approaching 50% when bending the continuous seat/back slats.
At that moment we could discern no reason for the degree of failure We needed to re-think our process.
I could probably maintain a steady stream of posts exhorting you to prepare for the ongoing (and upcoming) societal chaos, but since this is a mostly woodworking blog I’ll just keep it there. My commentary on the global status quo mostly remains reserved for private correspondence.
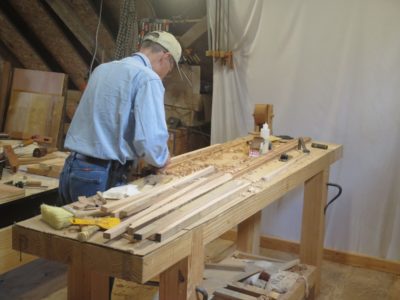
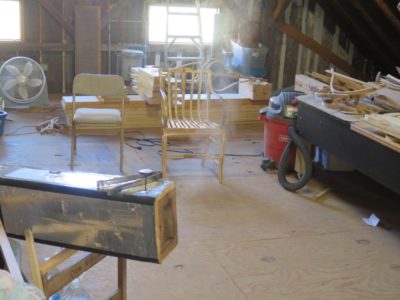
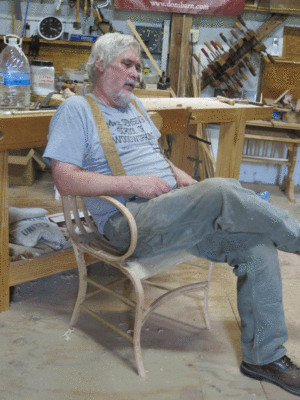
Since deciding to host and teach a “Make A Gragg Chair” workshop next August I have been focusing in on preparing the fourth floor space and the necessary chair-making elements for that enterprise. This week my dear friend John has come to work with me in both aspects, which include the mundane (tidying and reorganizing the space) and the sublime (steam bending all the elements needed for five chairs — I will be making one right alongside the students so they can witness the way I do things, not simply receive my instructions on that).
I described myself to some visitors last week as “someone who is congenial with well-developed social skills but is entirely comfortable being alone for weeks and months at a time with just Mrs. Barn for company,” I find the circle of friends whose company I seek out is pretty small. John is one of those men. Our week will be one of productivity, in-depth discussions of forbidden topics, and maybe even some way-out-of-bounds activities reflecting the fact that I live in a just-barely-free jurisdiction and he does not (some/many/most? “public officials” have clearly mistaken 1984 as an instruction manual rather than a cautionary tale.).

So together John and I will take a pile of sticks and turn them into chair parts.
Stay tuned.
It seems like it was almost three years ago that videographer Chris Swecker and I met over lunch to brainstorm about producing videos in the Attic Studios of The Barn On White Run documenting the entire process of building the premier version of a Samuel Gragg Elastic Chair. Oh wait, it was almost three years ago.
Last week we actually concluded the video capture portion of the project in our 18th (!) recording session, resulting in almost 34 hours (!!) worth of electrons in the can. Or, 68 hours if you calculate the close-up work that was simultaneous to the wide screen shots. Now comes the tedium of my reviewing every second of video to create Cut Sheets which are the road map for Chris to execute the editing and final assembly.
This final session was a bit of a grab-bag as you might expect, completing the project but also juggling in several other elements to be captured in a non-linear schedule for the day. In a conceptually linear recitation of the content, we began with the primed chair, then mixing the fill putty and inserted it into all the spaces that needed a bit of filling.

That was followed by a through sanding of the entire surface in preparation of the final cream-color base coat.


We wrapped up that portion with a discussion of the variety of striping brushes in my kit, followed by a short demo of pinstriping. The entire pinstriping process is too lengthy to record live so we will instead rely on a gallery of step by step still shots for instructional purposes. If you will recall the recorded the painting of the peacock feather by my dear friend Daniela last year.
We wrapped up the content with a final session of our bonus video on the restoration of my first full-to-the-brim Gragg chair from a decade ago that had its arms crushed.

It has certainly come a long way.
I now have to construct the entire contents into chapters, the subjects of which are likely to be:
- Harvesting The Wood
2. Preparing The Stock
3. Creating the Patterns
4. Building The Forms
5. Steam Bending The Elements
6. Assembling the Side Structures
7. Fitting the Seat and Crest Rails and Rungs
8. Fitting and Installing the Continuous Slats
9. Fitting and Installing the Seat Slats
10. Sculpting the Chair
11. Painting
12. Pinstriping
13. The Peacock Feather
14. Bonus – Conserving the Damaged Gragg Chair
My goal is to have each of these sections 45-60 minutes long, perhaps with more detail than a casual viewer would like but more akin to what a maker would want.
I am diligently reviewing the raw videos for an hour or two each day and will forward the Cut Sheets to Chris as they emerge from the process so he can begin the editing and assembling right away.
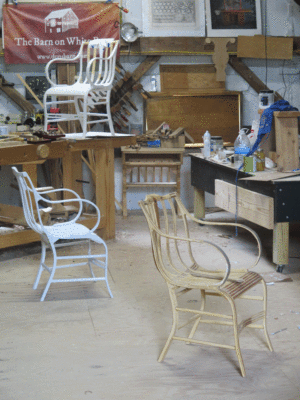
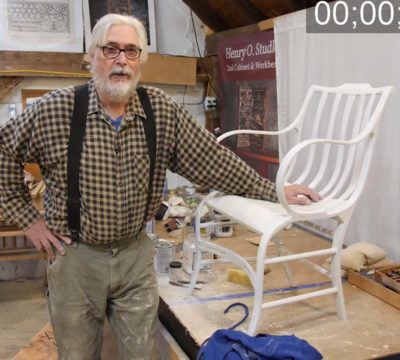
Currently in the studio there are three generations of my Gragg chairs, beginning with the very first one completed in 2011 (nearest the camera), a second one that was one of two begun three years ago and whose construction has been filmed (on the work bench), and a third one from the ongoing Gragg Chair Challenge to be also include in the video project that will have its final in-studio session on Friday. Given the “special feature” of restoring the original chair so badly damaged at a woodworking show all three chairs are integral to the video project.
Though they are fairly close in the timeline, they each mark an important development in my work of making them. This in turn is reflected in the amount of time required for me to make them. The first one took me almost 250 hours as I was working out many of the construction and decorative details. The second one was about half that time and the third one even faster by the time it is finished. Still the greatest expenditure of time on the whole project is the pinstriping, which takes me about four days to complete.
My revisions of the construction process in particular continue to progress, even this week I implemented an approach to the construction that will shave several hours off the construction. Given that all of the construction is reverse-engineered based on examining the painted originals with their hidden and obscured internal details and deducing the assembly regimen, I have broad latitude in recreating Gragg’s work.
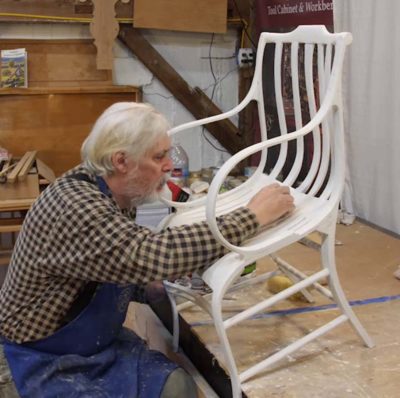
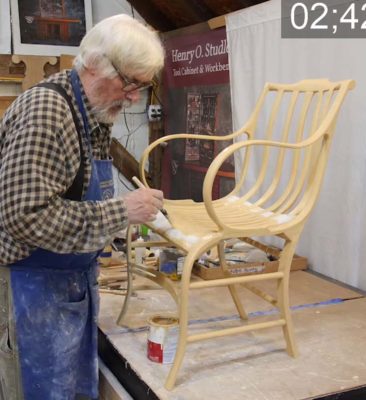
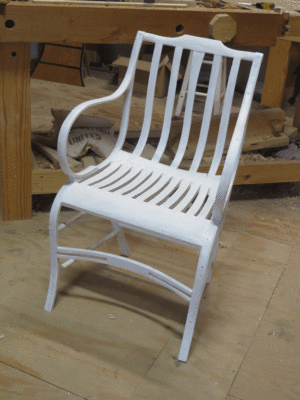
After completing the assembly of the chair structure I moved on to the sculpting of its elements with a variety of gouges, rasps, knives, spokeshaves, spoonshaves, and more, until it was elegant and comfortable (It is. Very.). In another eight hours or so I had it ready to begin painting with a shellac-based primer. This allowed me to see any lines that did not flow as I wanted, and to re-address them with my edge tools. Further, it identified any areas where fills were required.
I make my own fill putty similar to Gragg’s beginning with an oil-based primer and thickening approximately 1:1 with pulverized limestone from the garden center (he used lead white as the filler). Applying that into holes or joints as needed, I actually do not sand the fills, nor the shellac primer for that matter, until after I apply the subsequent heavy oil primer layer. This gives me plenty of body to cut into with sandpaper. My goal at that point is to yield a smooth-yet-faceted surface revealing the tool work that goes into making the chair.
Soon I hope this chair will be ready for me to deliver to my friend and colleague Daniela to paint the peacock feather. Then for me it will be on to new adventures in the World of Gragg.
Stay tuned.
If you are interested in participating in the August 2021 six-day workshop to fabricate a Gragg chair, drop me a line via the “Contact” or “Comments” sections of the web site. At this moment there is one spot remaining. If it is successful I will undoubtedly schedule another for August 2022, 2023, 2024, to infinity and beyond.
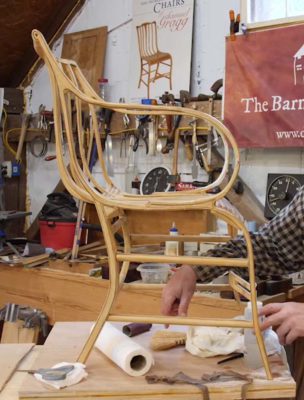
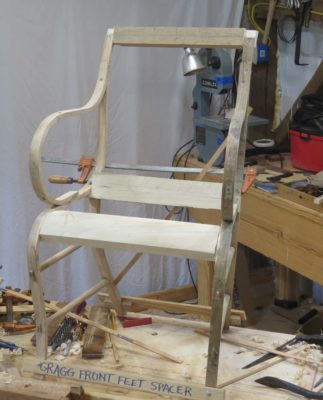
I reached the 40-hour mark of the Gragg Chair Challenge with the construction phase of the chair more than 99% completed. The only construction yet to address is the fabrication of the glue blocks at either end of the arms. These will take another 90 minutes or so as they are tightly fitted into the irregular curved shapes to fit the spaces where the top of the arm fits against the serpentine back-seat-leg element at the top, and underneath where the arm swoops around and is attached to the serpentine element at the seat rail.

So, I am going to call this experiment a success. Indeed there were steps I could have been a little more fussy about (read: slower) but there is the unmistakable structure in place.
This is not to say that the chair is a finished work of art, no where close. There are still the 10-15 hours of sculpting and shaping all the elements into their final elegant form. And the 10-15 hours of laying down the paint foundation for the decorative scheme that is one of Gragg’s hallmarks. After that comes the days of decorating, I would estimate the peacock feather and pinstriping will take about four days. Taking all that into consideration it is fair to say that the finished chair is a little more than 1/3 done. Nevertheless I was heartened to get to this particular finish line with “victory” in sight.
With that, I will confirm and announce a “Construct a Gragg Chair” workshop for late August of 2021. By then the heat of summer should be in the rearview mirror (there are no 80-degree days in the forecast even now, with the warmest day upcoming being today’s 78 degrees), so this six-day class should be one of cool mornings and warm afternoons. I can accommodate four students and together we will work alongside each other, each of us constructing a chair.
Now I just have to figure out how to get four workbenches up into the attic workshop.
And put together the tool list.
And combine all the time lapse segments into one whole video to post on youtube.
And figure out how to even post videos on youtube.
And, and, and…

So there I was working away during my Gragg Chair Challenge, deep in the midst of the most tedious part of the entire project — fitting the seat slats into their dovetailed open mortises. At that same moment I was completely engrossed in listening to an Econtalk podcast wherein host Russ Roberts was interviewing statistician Nassim Nicholas Taleb on the latter’s observations about Covid-19 (Taleb’s observations cause me to stop and pay attention; I cannot tell sometimes whether he is a man of rare insight or a BS-spewing grifter. As Mark Twain said, “There are lies, damned lies, and statistics.” Taleb himself vacillates between statistics-as-analysis and mathematical-esoterica-as-intimidation).
It must have been a particularly compelling exchange between Roberts and Taleb because I sawed the slat cleanly on the wrong layout line. Try as I might, I cannot seem to stretch the piece longer to fit the space it is supposed to go.
It’ll go into the growing pile of kindling that is left after every Gragg chair.

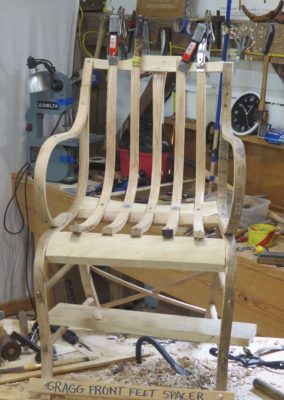
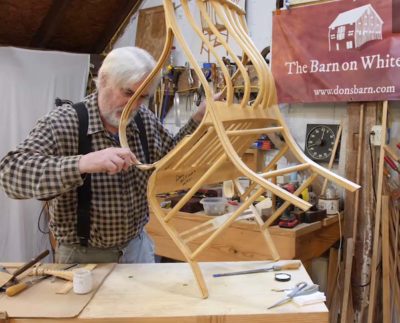
I’ve hit the 24-hour mark of the Gragg Chair Challenge with completing the fitting of the uni-piece bent seat/back elements into the rear seat rail. I’m expecting to finish fitting these into the front seat rail and crest rail somewhere around hour 28, and then chop the mortises for the front and rear rungs. The next big step after that is to disassemble the chair and glue everything together stretchers. After that the only major elements to add are the short seat slats. Then the real sculpting begins.

I’m getting a very good feeling of optimism about a Gragg Chair Workshop in late August 2021. If this interests you, let me know.
I remind you that the goal for the workshop would be the basic construction of the chair. Completing the chair would take at least another week of time. Still, my goal a couple years ago was to get the time expended to complete a chair from raw sticks to delivery at under 150 hours. I’m pretty sure I can get there easily. My next goal will be 120 hours.

The front seat rail is the easiest so I start there. This is around Hour 9-1/2.
I spent the entirety of hours 8-16 roughing and fitting the cross elements of the chair; the front and rear seat rails and the crest rail. The front seat rail and crest rail are fairly straightforward as their “joinery” is simply shaped lap joints that need very little “fitting other than getting the dimensions correct and the joint faces aligned. Admittedly each presents its own minor challenge, in the case of the front seat rail the lap joint is curved at the frond frame bend, while the crest rail requires shaping in two axes but I accomplished that easy enough with my mni bandsaw. Sawing entirely by hand would have taken another 20 minutes or so.
The chair sometime around Hour 13.
Of this second eight-hour set I spent more than half of it making and fitting the rear seat sail, simultaneously the most important structural element of the chair and by far the most difficult to fabricate as its ends are beveled on two axes and the compound curve must be “just right” to fit the five single element back-slat-and-seat-bottom pieces.
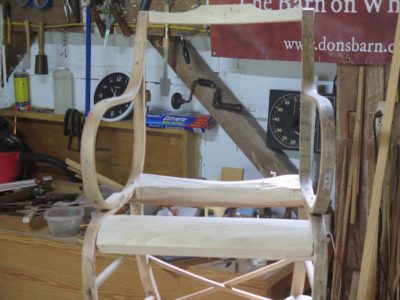
@ Hour 16.
As the project proceeds I am growing cautiously optimistic that I can get a chair constructed in 40 hours. Not finished by any means as the final shaping, sculpting, and painting takes another 40 – 60 hours at least, but fashioned and assembled. If I can get to the 40-hour mark and have a completed chair sitting in front of my I will offer this as a six-day workshop next summer. I’ve already had two people reserve spots should it occur, and since there would only be four students for this event it just might happen. The cost would reflect the fact that I would have weeks of preparation for it, but I am enthused nevertheless.
PS – I was asked about my choice of adhesive for this project, and yes I am using PVA purely for convenience. When I build chairs for real I generally rely on hot animal hide glue. Cold hide glue just takes too long to set up for me to proceed at the pace I need for this exercise. In fact, given the temps in the barn attic at this time of year, hot hide glue would present a bit of the same problem since it is so hot up there as you might expect from the heat radiating down from the almost 3000 s.f. of asphalt panel roofing on a bright sunny day.
PPS – The time lapse video is working wonderfully thus far, and my projection of the completed video at a bit more than one hour’s total length seems to be about right. I have to set aside some time to learn how to post to youtube.
As I embark on the Gragg Chair Challenge I thought I would provide some background rationale for the undertaking.
I’ve never built a chair straight through from start to finish so my original thought was to do just that. I figured if I could get one assembled in five days, then I could with some confidence offer a six-day workshop in making Gragg chairs at the barn.
At issue in part was the starting point. Frankly there is absolutely no way a six day course could have any degree of success and satisfaction if the harvesting, processing and steam bending of the chair components was part of that syllabus. Given that, I decided to see what could be done if the starting point was a full compliment of all the chair parts including the steam bent pieces. Providing this complete set to each student would be a substantial undertaking but I am willing to go down this path provided my success this week.
That is not to say that the harvesting, processing and bending of the chair elements would not be included in the syllabus, just differently than a strictly linear content. If the class happens I will build into the schedule ~two-hour blocks for one-on-one time going through that entire process with each student so they will have the sense of how I got them to the starting point. What they will not have to endure is the two or three weeks it will take me to get them there.
Like them, in this exercise I started with a pile of parts sitting on a workbench. As I proceed I am noting the tool list and also recording the event with my friend Kevin’s GoPro camera in time lapse mode. At this point I am guessing the finished time lapse video will be about an hour long.
The only hitch in my plan thus far was the realization that I will not be able to set aside 40 consecutive work hours for building the chair. Not to be daunted I will simply keep close track of my bench time and note the intervals so I can gauge the progress.
For the first eight hours, a/k/a Day 1, I fitted and assembled the steam bent parts and rungs into two identical side units. Fitting the steam bent parts together is straightforward and pretty quick as everything is simple or beveled butt joints, and at this point, just screwed together in a fitted assembly template (each student would have one). I would expect this process to be complete by lunch during a class.
The first slow-down in the pace is fabricating and joining the side rungs into this framework. I make the rungs first, cutting them to length and cutting the tenons on both ends.
The unit was disassembled and the mortises are chopped though the legs, a fairly quick task as the legs are relatively thin and the mortises only 1/4″ wide. When all the pieces for a side unit fit together it was re-assembled in its entirety then glued and screwed together. As soon as a side unit is complete I can pry it out of the assembly template and lay it flat for the glue (PVA) to set a little.
Once I had the two completed side units in hand I began to fix them in their correct relationship to each other, adjusting the splay angles and using spring clamps and spacing templates to get everything just-so. This takes a fair bit of time to get everything right and can be a vexing task as we are dealing with a lot of parts with no precise joinery to help us out. But getting this right is critical for fabricating and fitting the cross rails, which is what comes next.
I generally start with the front seat rail, mostly because I have direct access to that area while the chair is in its upright mode. I notched and placed it where it belonged, held overnight by a pair of spring clamps.
Thus endeth Day 1.

Recent Comments