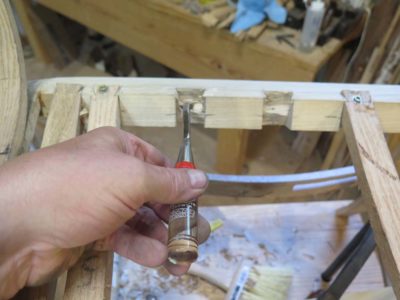
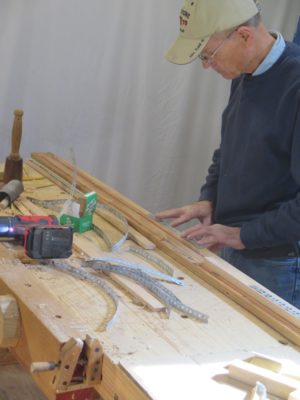
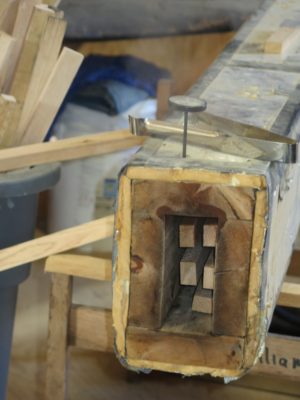
One of the more challenging aspects of building a Gragg chair is the need to chop 17 half-blind dovetails for the ends of the seat slats, eleven on the front seat rail and six on the rear seat rail. Unlike cutting half-blind dovetails in drawers or casework, the workpiece cannot be oriented to be most easy for the workman; these dovetails have to be cut after the chair frame is already assembled due to the fact as I have state before, making a Gragg chair is more akin to composing a sculpture in three dimensions than any other furniture-making exercise I have encountered. Because of this there is no opportunity to adjust the orientation of the workpiece to the tool and the maker, requiring some contorted tool work.


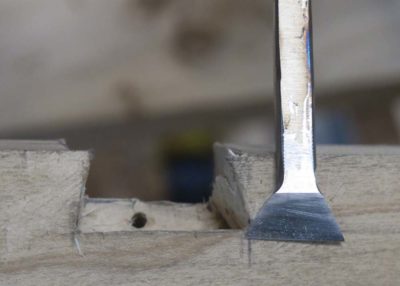
In my development of techniques for replicating Gragg’s work, reverse engineering as he left no account of his own processes, I found the need for a task-specific dovetailing chisel is requisite. I’ve tried working with fishtailed gouges, skew chisels, and probably a host of other tools lost in the fog of memory, but have settled on making my own tool which has now been in use for the past several chairs with excellent results. The key is to make the business end of the tool match precisely the pocket being excavated.
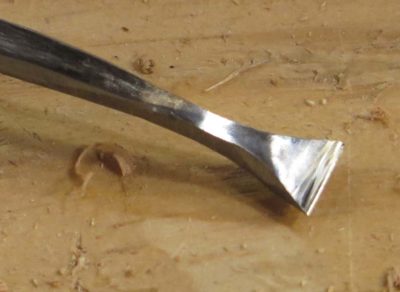
In general there are two primary approaches to the problem, one much more expensive that the other. The expensiver option is to take a 1/2″ curved fishtail gouge and regrind the tip configuration to match the angles of the pocket being excavated. This yields an excellent tool for the task. (Unfortunately, I think this tool fell into a crevice behind the workbench in the video studio and cannot be reclaimed unless I remove the siding on the exterior barn wall, an option I am loathe to even contemplate).
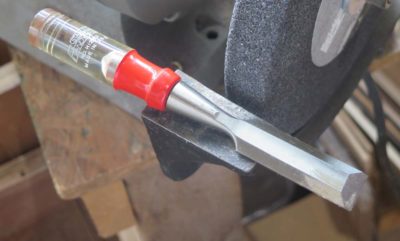
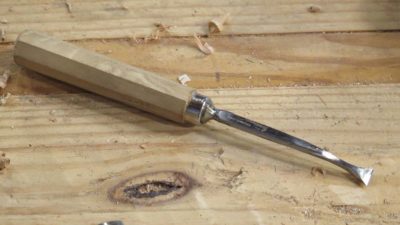
In my case, and probably in yours too, the problem was solved inexpensively by recycling a no-account cheep bench chisel from my scrap tool box. Yes, alas (?), I keep an inventory of scrap tools along with scrap metal along with scrap ivory along with scrap tortoiseshell along with scrap wood… Sometimes I think all our shops should just be call “the scrap yard.” Part of me understands my late father-in-law’s mindset (and my late father’s as well) that it is difficult to dispose of materials that do indeed have utility. Anyway, I took this old cheap Stanley bench chisel, probably available for a quarter at any tool swap or flea market, and ground away all the material I did not need for the final configuration. This was an exquisitely efficient expenditure of time as this one tool reduced my time for cutting the half-blind dovetails in, well, half.
One of my fond memories from my formative years as a woodworker was the period of three years hen I was a patternmaker in a foundry, which is where I learned what “precision woodworking” was all about. To be truthful it is a standard applicable to very little of my work ever since, but it was elucidative nonetheless. Most of our work was pretty heavy machine-oriented, but we did have a selection of hand tools for shaping the forms. Because, another lesson from the patternmaking days was that we were, in essence, fabricating sculpture, most of it being sculpture based on blueprints, but sculpture just the same. But for most of our work we relied on stack lamination and shaping components with large disk sanders, working to the center of a knife strike line.
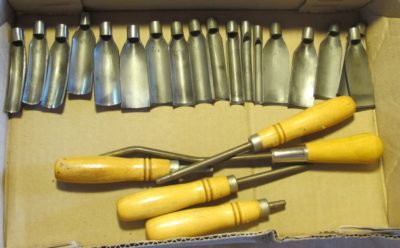
Every so often we had to really sculpt pieces by hand, hence the inclusion in our tool kits of tiny spokeshaves that I find so integral to Gragg chair work. Another peculiar tool set for sculpting foundry patterns was the interchangeable thin-walled gouge set made by Buck. For many years after leaving the patternmaking shop I searched for a set of these gouges, and then all of a sudden I found myself with three complete sets. I still use these tools in the shop with regularity although I am down to two sets. When my dear-friend-I-have-never-met Rob Hanson related the tale of losing his house and shop during the California fires two summers ago, I began sending him “care” packages full of tools to get him re-started, concluding recently with a barely used Record 52-1/2 vise. Somewhere along that trek I decided I did not really need three sets of these gouges and sent one to him. I have not yet figured out how to integrate these tools into Gragg, but I will.

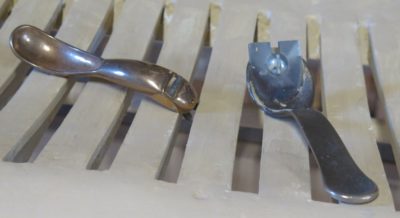
The small spokeshaves are fine for convex surfaces and larger concave shapes, but for concave surfaces with smaller radii we relied on a set of tools we called draw-spoons. For shaping the rear seat rail and wallowing out the seating deck of the Gragg chair tools like scorps, travishers, and inshaves do not work for me but the drawspoon fits the bill perfectly. There were a range of drawspoons in the patternmaking shop, but there was only one set and I never had the opportunity to make another. The larger of my tools came from Garret Wade back in the day, now I think they are available from Woodcraft as a spoon plane. I have a smaller set that came from AMT back in the Stone Age, I do not know if they are available anywhere any more. Lee Valley makes a drawspoon but it is too large for the purposes I need.
I have found that I simply could not make Gragg chairs in any meaningful way without the drawspoon, and if you want to make them you will need at least one as well.
Over the coming weeks I will be posting periodically about the tools I use to make a Gragg chair in order to help next August’s class attendees begin to assemble their tool kits. I will emphasize the peculiar tools and perhaps describe how they are used in the process. The tools will be presented in no particular order, merely in the sequence they pop into my head.
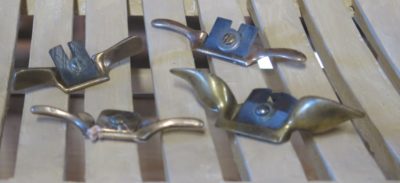
I will say that tool #1, the spokeshave, or more particularly brass mini-spokeshave(s) is integral to establishing the lines of the curved contours and thus spends a lot of time in my hand. I use about a dozen different small spokeshaves, but that is because that’s what my inventory of spokeshaves consists of. Petite wooden spokeshaves are also fine, but I only have one of these and have not been able to find many more. Certainly my favorite (upper right) is one we made when I was working as a patternmaker in a foundry and cast our own tools. As I recall the iron for the tool was made from an old saw blade. Its sole is shallow enough that it can work on concave, convex, flat, and chamfered surfaces.
The spokeshave on the upper left might be the one most familiar to you as it was sold in a three piece set, one flat, one convex, and one rounded, from a number of tool purveyors back in the day. I am pretty sure I bought four sets of them at the time and there are still large numbers of these floating around the interwebz and tool swap meets. The two spokeshaves on the bottom were picked up along the journey over the past 40 years, the one on the left very similar to the one I had from the pattern shop and the one on the right is from a pair of “lamb’s ear” spokeshaves from some auction somewhere.
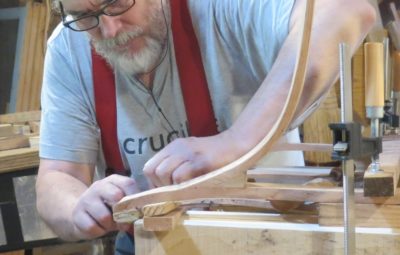
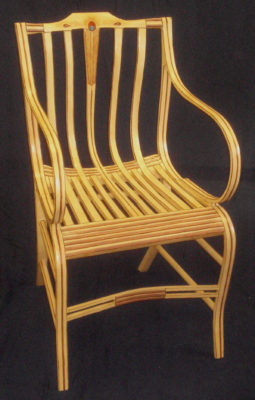
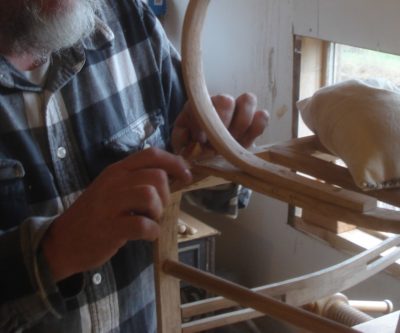
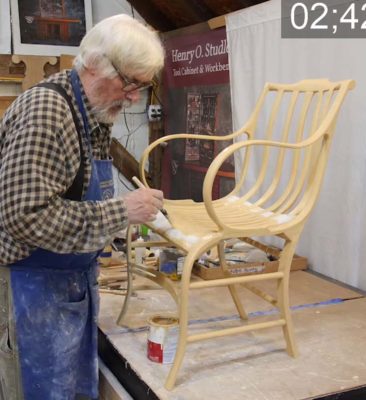
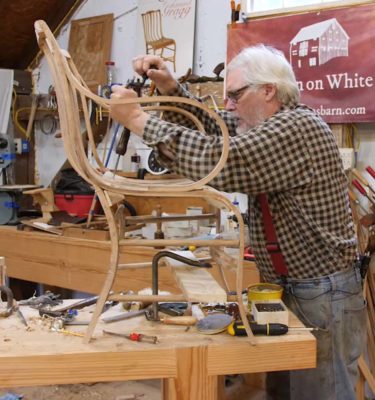
Given that the ultimate elegance of the Gragg chair is only partly due to the sinuous bent elements, much of the remaining contribution is through the further shaping of those elements via spokeshaving. Once the chair is assembled from the steam bent pieces, almost each of those pieces gets sculpted in place with the spokeshaves to present the unified whole. I have tried to shape all these elements prior to assembly but found that even then I had to go back and harmonize them all, so now I just do almost all of the shaping of those cross sections after the chair is all together. This requires very small spokeshaves to get the job done.
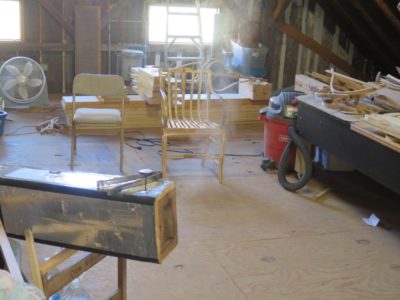
With all of the steam bending done for the Gragg chair workshop John and I spent a little time reorganizing the attic of the barn, now with only the months of waiting for the students to arrive. One more workbench to move across the room and it’s all done.

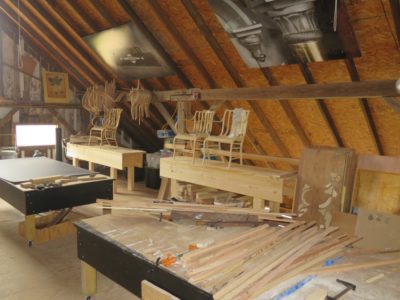
Yes, we hoisted one and made two new benches and began to place them around the perimeter of the space. At almost a thousand square feet it is a grand luxury for any workshop, and I have only Mrs. Barn to thank for it. I had intended to leave the level of the barn un-floored, but she recommended, correctly, that if I did lay down floor I would find it immensely useful She was correct, again.
So, at the workshop every participant will have a fully outfitted bench plus half of a 4′ x 8′ assembly table on wheels, which are themselves re-cycled platforms for the long-passed Studley exhibit.

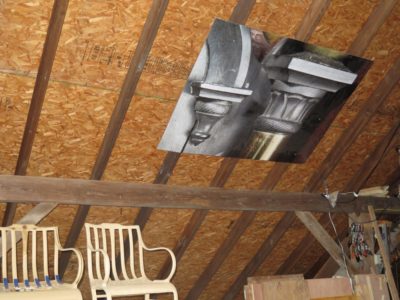
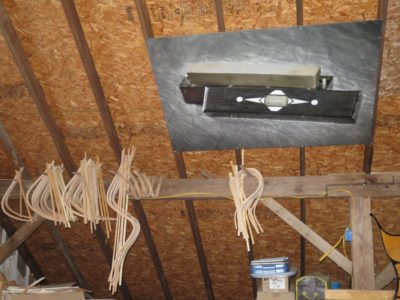
One final decorative touch was to tack the graphic panels from the exhibit over the benches. Whether these inspire or intimidate is yet to be determined.
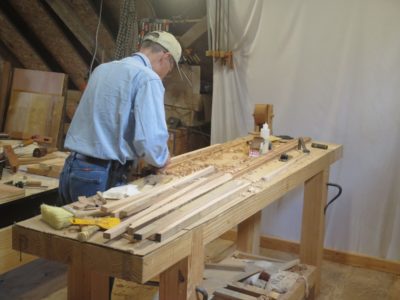
In addition to bending all the necessary parts for next August’s Build A Gragg Chair workshop John and I spent some time setting up the attic for the event as it is the only space in the barn large enough for the activity. I already had two eight-foot workbenches up there, but in order for all the participants to have their own bench we needed three more.
One of them was a simple problem to solve, at least conceptually. Just take one of the benches from the classroom space on the second floor and host it up with my vintage compound block-and-tackle. We did accomplish that but we are definitely not as young and probably not as strong as we once were. Plus John probably weighs about a buck fifty if you put bricks in his pockets. Even with a compound hoist, a 350-pound bench weighs 350 pounds.
But hoist it up there we did.
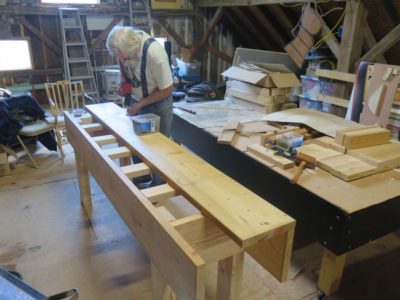
For the other two I made two more Nicholson benches after carrying the individual boards up the stairs one at a time, definitely an easier path to glory. At the moment they are sans vises and holdfast holes but that will be rectified soon enough.
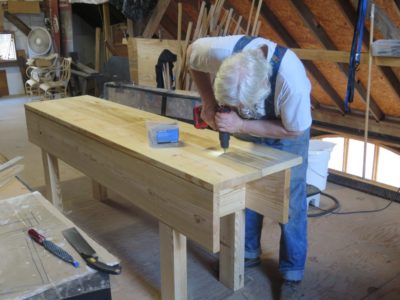
Now my total workbench inventory for the barn is 19, an entirely appropriate number in my opinion. This is probably the end of the run for new Nicholsons or laminated Roubos as the recent prices for lumber have definitely scared me off. For example, I recently needed two ordinary (untreated) twelve-foot 2x8s, they were $23 apiece. The 24-foot 2x12s I’ve been buying for workbenches used to be $54, now they are $97. Fortunately I had just enough of my old inventory to build these two benches.
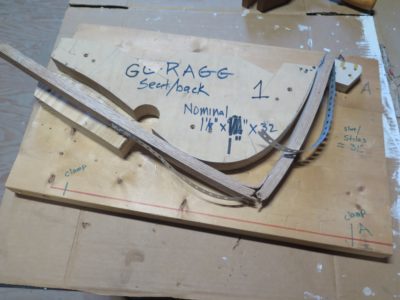
I cannot deny that our spirits were vexed at the end of the second day when we had a nearly 100% failure rate bending the seat/back slats. We re-thought our process and examined the broken elements. It was then that I noticed ex poste all the failed bends were in kiln dried stock that I had planned for a different used and they accidentally went into the “bend” barrel. D’oh! We enacted a couple of minor ex ante revisions and combining these with the proper selection of wood we had perfect results and reveled in a couple days of almost 100-percent success (I think we had one failure and that might very well have been my impatience, bending the piece faster than it could stand).
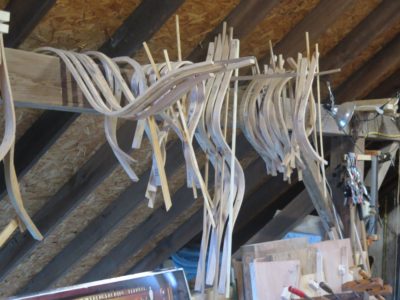
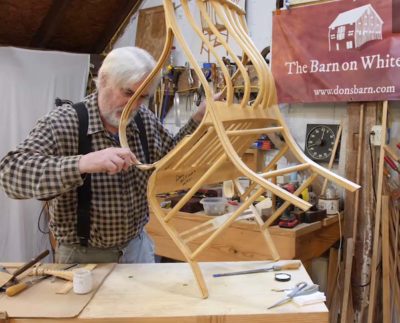
I’ve had good and bad streaks of steam bending, but these were the most stark examples of the challenges inherent in taking wood to the brink of what it can be forced into doing. We rejoiced as the inventory of chair parts grew into that which was needed for next August.
For now the chair parts are just hanging off the beam, seasoning until used by the workshop students. I have some more Gragg projects of my own to work on so there will undoubtedly be more experience interacting with wood, steam, and forms.
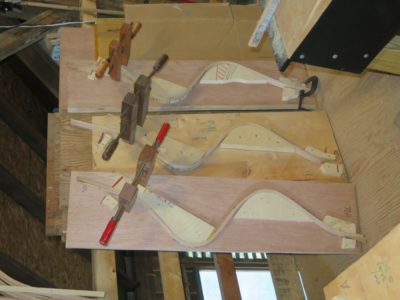
During our recent days of work preparing for next August’s “Build A Gragg Chair” workshop my friend John and I prepped a lot of wood sticks, and bent them to the forms required to become Gragg chair parts.
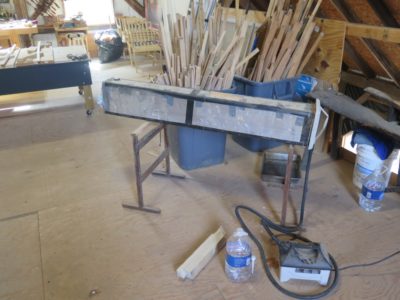
We got the steam box set up, the forms set out, and set to work.
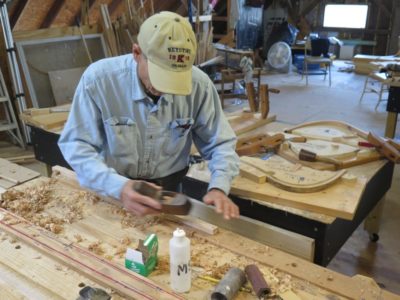
John hand planed dozens of chair pieces to get them ready for the thermodynamic adventure.
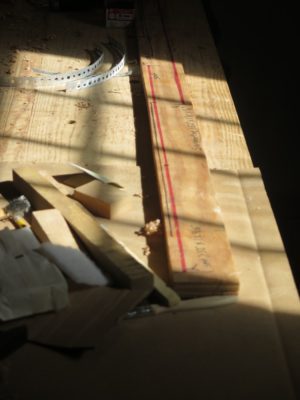
Once he had five or six pieces ready to go, he used the template board I created for this purpose and affixed the bending straps to all the pieces. When you have to execute two 90-degree bends only twelve inches apart in a dozen seconds, bending straps are pretty much mandated. We used flanged sheet metal screws and plumbing straps and attached them BEFORE they went into the steam box because the brief time to get the bending done after steaming does not allow for the straps to be put in place afterwards. And since the chairs get completely painted, any staining or screw holes can be dealt with.
I placed them into the already heating box and waited for them to reach maximum temperature, which in my set-up is about 200 degrees.
Using a state-of-the-art steam box seal we set the timer and waited the requisite time, 25 minutes for the arm and serpentine pieces, 45 minutes for the bent seat/backs.
On the first day we had good success especially with the thin pieces, only one failure out of eight or ten attempts, but on the second day we had a string of failures approaching 50% when bending the continuous seat/back slats.
At that moment we could discern no reason for the degree of failure We needed to re-think our process.
I could probably maintain a steady stream of posts exhorting you to prepare for the ongoing (and upcoming) societal chaos, but since this is a mostly woodworking blog I’ll just keep it there. My commentary on the global status quo mostly remains reserved for private correspondence.
Since deciding to host and teach a “Make A Gragg Chair” workshop next August I have been focusing in on preparing the fourth floor space and the necessary chair-making elements for that enterprise. This week my dear friend John has come to work with me in both aspects, which include the mundane (tidying and reorganizing the space) and the sublime (steam bending all the elements needed for five chairs — I will be making one right alongside the students so they can witness the way I do things, not simply receive my instructions on that).
I described myself to some visitors last week as “someone who is congenial with well-developed social skills but is entirely comfortable being alone for weeks and months at a time with just Mrs. Barn for company,” I find the circle of friends whose company I seek out is pretty small. John is one of those men. Our week will be one of productivity, in-depth discussions of forbidden topics, and maybe even some way-out-of-bounds activities reflecting the fact that I live in a just-barely-free jurisdiction and he does not (some/many/most? “public officials” have clearly mistaken 1984 as an instruction manual rather than a cautionary tale.).

So together John and I will take a pile of sticks and turn them into chair parts.
Stay tuned.
It seems like it was almost three years ago that videographer Chris Swecker and I met over lunch to brainstorm about producing videos in the Attic Studios of The Barn On White Run documenting the entire process of building the premier version of a Samuel Gragg Elastic Chair. Oh wait, it was almost three years ago.
Last week we actually concluded the video capture portion of the project in our 18th (!) recording session, resulting in almost 34 hours (!!) worth of electrons in the can. Or, 68 hours if you calculate the close-up work that was simultaneous to the wide screen shots. Now comes the tedium of my reviewing every second of video to create Cut Sheets which are the road map for Chris to execute the editing and final assembly.
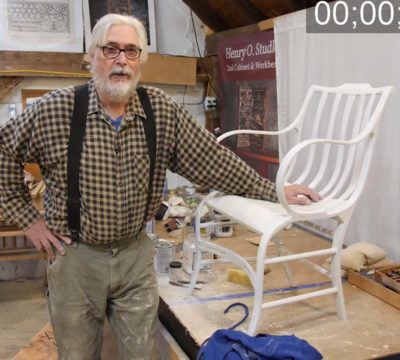
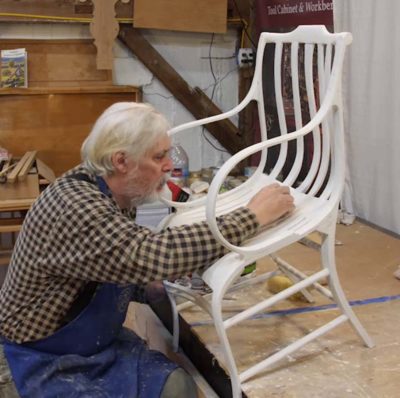
This final session was a bit of a grab-bag as you might expect, completing the project but also juggling in several other elements to be captured in a non-linear schedule for the day. In a conceptually linear recitation of the content, we began with the primed chair, then mixing the fill putty and inserted it into all the spaces that needed a bit of filling.

That was followed by a through sanding of the entire surface in preparation of the final cream-color base coat.


We wrapped up that portion with a discussion of the variety of striping brushes in my kit, followed by a short demo of pinstriping. The entire pinstriping process is too lengthy to record live so we will instead rely on a gallery of step by step still shots for instructional purposes. If you will recall the recorded the painting of the peacock feather by my dear friend Daniela last year.
We wrapped up the content with a final session of our bonus video on the restoration of my first full-to-the-brim Gragg chair from a decade ago that had its arms crushed.

It has certainly come a long way.
I now have to construct the entire contents into chapters, the subjects of which are likely to be:
- Harvesting The Wood
2. Preparing The Stock
3. Creating the Patterns
4. Building The Forms
5. Steam Bending The Elements
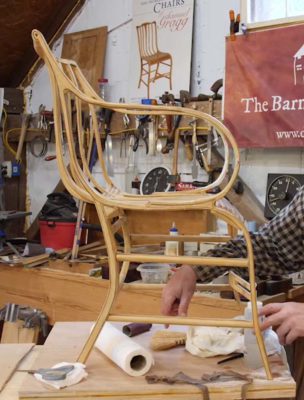
6. Assembling the Side Structures
7. Fitting the Seat and Crest Rails and Rungs
8. Fitting and Installing the Continuous Slats
9. Fitting and Installing the Seat Slats
10. Sculpting the Chair
11. Painting
12. Pinstriping
13. The Peacock Feather
14. Bonus – Conserving the Damaged Gragg Chair
My goal is to have each of these sections 45-60 minutes long, perhaps with more detail than a casual viewer would like but more akin to what a maker would want.
I am diligently reviewing the raw videos for an hour or two each day and will forward the Cut Sheets to Chris as they emerge from the process so he can begin the editing and assembling right away.
Notwithstanding the harried pace of the summer, videographer Chris Swecker and I were able to finally nail down some dates for collaboration in the video studio, a/k/a the barn attic, to finally wrap up the electron capturing portion of the project.

This next-to-last day of recording was consumed entirely with a discussion of the joinery and assembly strategy for the chair overall, and sculpting the edges and details of the chair which gives it the elegance it possesses.
One more session and then it is all editing, all the time. Which gives me two giant projects to edit and massage.

Recent Comments