A few weeks ago Chris Swecker and I spent anther couple days documenting the ongoing construction of a pair of Gragg Chairs I am building for clients, one a renowned furniture historian in Virginia and the other a historic architectural millwork contractor in Georgia. (These clients have been most patient with the timeline of this project, which is why I have not made them pay anything until the chairs are delivered.) Neither my bank account nor the other ongoing projects I have permit any faster pace of work, and we had to take a 5-month break over the winter due to the unheated-ness of the studio space.


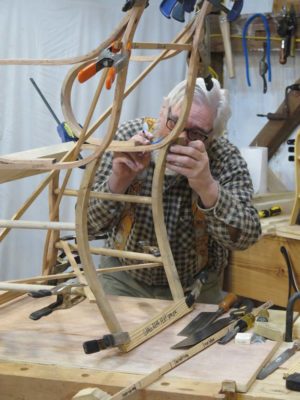
As we were working the chairs began to take shape beyond merely the jumbled pile of steam bent parts. Actually they were never really “jumbled,” but they were not truly assembled either. It was exciting for Chris to see these former tree parts become chair-ish right before the camera. Beginning with the dry assembled side elements I laid out the side rungs and chopped the mortises and cut the tenons. Then I resembled the side units with screws and glue, just as Gragg had done 200 years before.

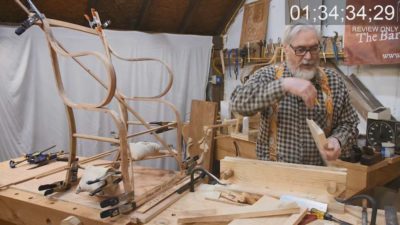
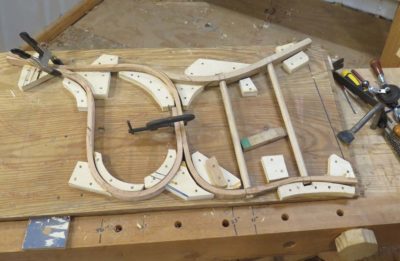
Then came perhaps the most visually appealing portion of the project to date as the two sides were connected with the lateral horizontal elements, becoming something that sorta looked like a chair. This required a bucket full of spring clamps and a few diagonal struts to keep things in the right configuration while moving forward.

By the time the two days were done we had another 7 gigabytes of video recorded. We are working so efficiently that I expect a yield of usable video to raw recording to be about 60%. In reviewing the completed materials I am thinking the finished product to be in the 10-12 hour range.

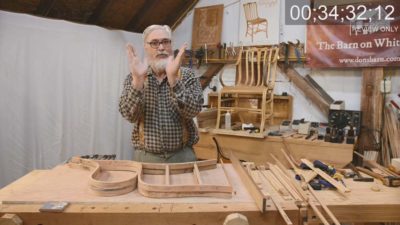
Building up my inventory of Gragg chair parts.
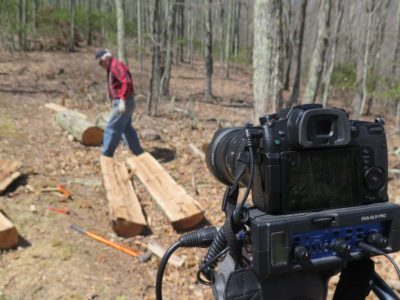
A couple weeks ago we had two excellent days of videoing for my Make A Gragg Chair video. As my pal MikeM observed, doing video slows everything down by at least three-fold.
We are now to the point of actually assembling the pile of bentwood pieces into a chair, beginning with the sides of the chair in an assembly jig (after attaching the side rungs via mortising them into the legs) and then starting to fit the cross elements.
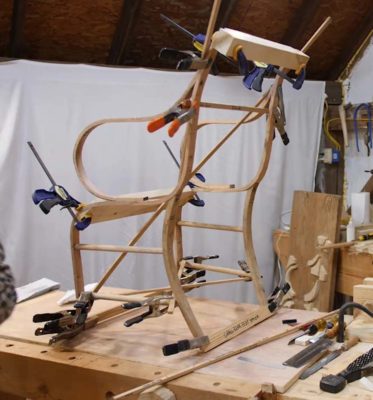
One thing is for sure, it’s pretty important to have a large number of simple spring clamps and temporary bracing to keep everything together.
This is a really exciting project for me, and my earlier projections are falling by the wayside regarding the length and detail of the final product. I’m sorta guessing this might be in the 10-12 hour range once we get all finished.

I am also getting a better sense of how to create a six-day workshop for making Gragg chairs. I just might be able to pull it off. When the video is finished I’m going to embark on a focused exercise to see if it is truly possible.
Stay tuned.

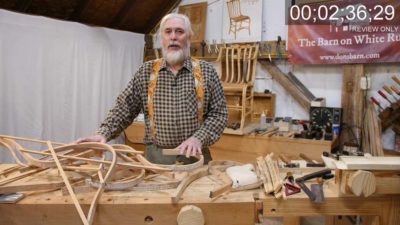
It was an exciting day in the Attic Studio of the Barn on White Run as we finally returned to working on recoding the video of making a Gragg chair. We began the day with a pile of individual steam bent parts, and ended with some assembled side units. It is not “precision” work but it is very fussy to compile a completed unit from a bunch curvy pieces that each seem to have a mind of its own. I placed particular emphasis on the areas where I executed compensations for the flaws in the original design.
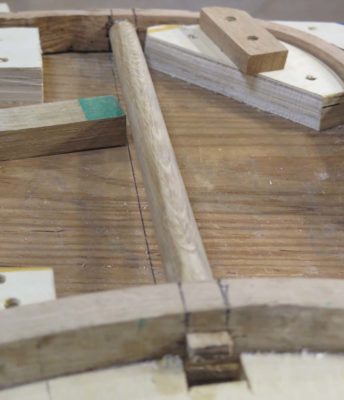
Tomorrow the adventure continues as I show the beginnings of a 3D chair that has nothing square about it.
If all goes according to plan the “principal filming” for the fabrication phase will be done in about two weeks (see how I went all Hollywood there?), with painted decoration and the special added video feature to add on.
PS – we are thinking that the final video will be in the 6-8 hour range; I would rather err on the side of more information and demonstration rather than less.
After struggling with my previous attempt to harvest oak from my own mountain, disappointed by the fact that even those large trees, or at least sections of their trunks, yielded so little usable material, I had for the moment hope for two long, straight sections that I had not yet processed. The tree from whence these bolts came had grown tall and straight in a very dense cluster of trees. Those facts led me to my optimism. So recently I headed up the hill with my implements of destruction in-hand.
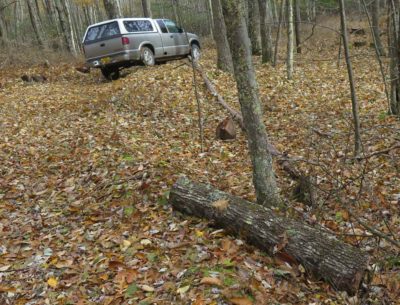

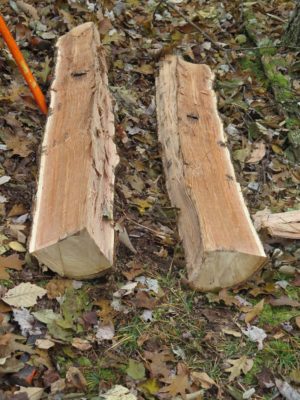
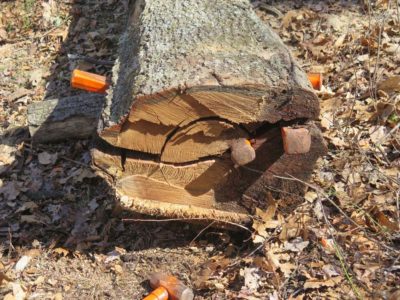
Cutting up the long straight trunk produced the first two segments to be split.
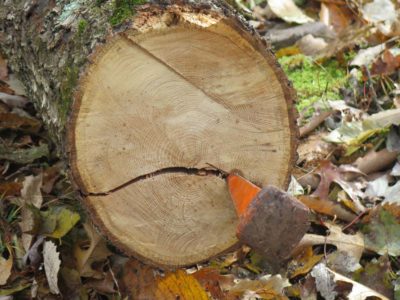
I studied the first of them to decide where to place the first wedge. I drove it in and immediately my heart sank when the split wandered off toward California.

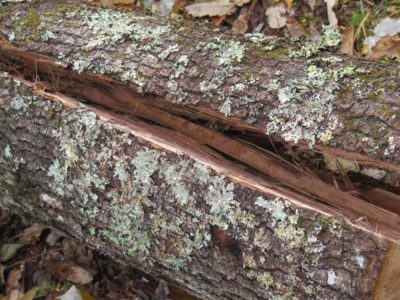
With a deep breath and some impolite utterings under my breath I tried to salvage the situation by putting the second wedge in a place to continue or re-establish the split line I wanted in the first place.
It worked.

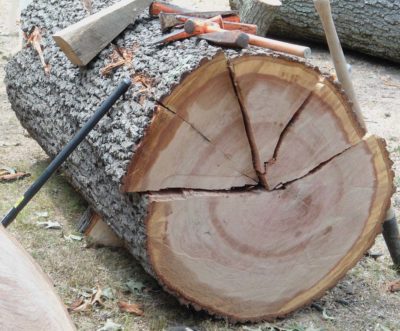
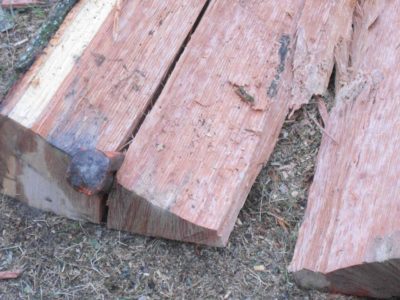
Carefully working down that line with more wedges, a nice split was established.
My only concern at this point was the interlocking that emerged but since it was restricted almost completely to only the pith it was no cause for hysteria. A few whacks with the roofer’s hatchet, my “go to” tool for this task, and the problem was resolved as I hoped. It was only a little loss to a region of the trunk I didn’t want in the first place.
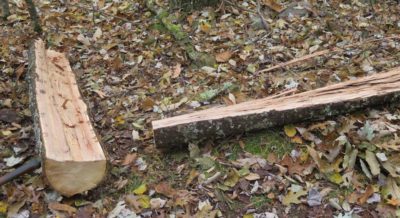
Soon enough I had two halves of a trunk, then four quarters, and in the end, eight wedges.
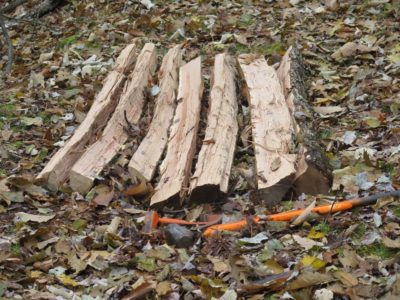
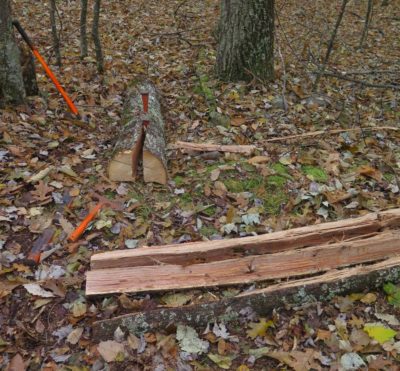
I was pleased with the minimal amount of overall interlocking and wind.
My friends, there be some chairs.
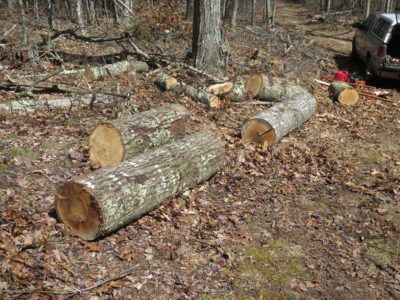
In concert with both ongoing firewood harvesting and shooting a video Building A Gragg Chair I replicated some of the work undertaken at my neighbor Bob’s house five years earlier, this time with oaks felled up the mountain from the barn. There were three large trunks that had nice lower sections and and one smaller but straighter one about fifty yards away, set-aside for the harvesting efforts. Interestingly the larger trees, grown in a dense forest setting, were quite problematic with lots of wind and interlocked grain. My yield from them was about a quarter of what I got from Bob’s “urban” trees. I have no explanation for this phenomenon.

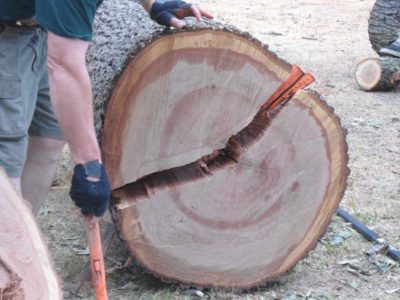
The largest of these trunks was also the largest disappointment. While seemingly sound and straight, the first split caused me to go, “Hmmm.”
As the splitting proceeded the disaster was readily apparent as the entire trunk segmented into an interlocked mass of uselessness, and ate all of my wedges and guts to just get torn apart. The pieces were cut into short bolts for the firewood splitter.
The two smaller of these three trunk sections were better, but still not great. The wood was straighter and more sound, but with more interlocked grain than I expected.

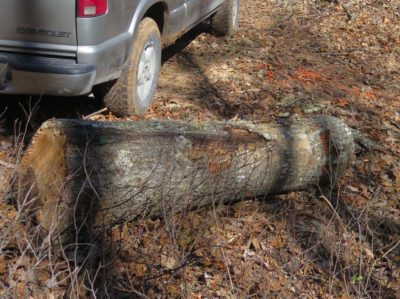
The smaller, straighter trunk was, I hoped, a somewhat different story. It had grown in very tight setting, much, much more crowded than the larger trees and the grain showed it. I was hoping it was more promising than the first trunks, which mostly wound up as firewood. More about that later.

With the trunks on the ground, sectioned and ready for me, I came after supper and lit into them. They were heavy enough that even with logging tools they were impossible to handle so I first split them along a horizontal plane, then halved the top half of that, then halved that again.


With some help from the appropriate tools I was able to extract the long wedges, which were processed further with splitting in half repeatedly.

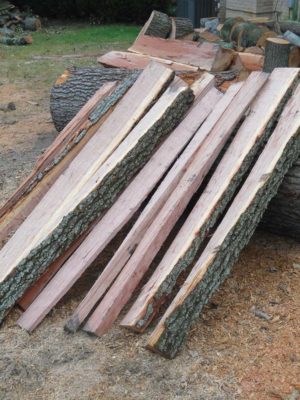
Eventually I wound up using a froe for some riving on some of the pieces, and yielded a great many pieces. Much to my astonishment I discovered zero nails, bolts, or fencing. Quite a surprise for an old tree in a domestic setting.

In the end I wound up with four truckloads of splits, and piled them cross-wise a layer at a time, up off the ground. The final pile was six feet by six feet by four feet high. After a year in the open I sorted them and moved the best of them inside to the first floor of the barn where they remain until I need them. The rest were also useful, they kept me warm.
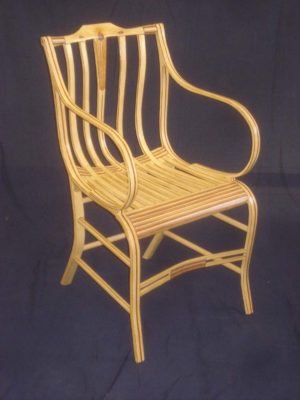
Much like the recently concluded account of replicating the early 19th Century legislator’s writing desk, over the next few months I will run a series of posts recounting the c.1810 Gragg “Elastic” chairs I am currently replicating in the shop. Though I have posted on Gragg chairs several times over the life of this blog I am hoping this series will renew your interest in them.
The story for these chairs (I am building two commissioned by clients and another for myself) goes back to a couple years after the completion of the original replica I finished in 2011. I published the proceedings of the project in that year’s American Period Furniture, the flagship publication from the Society of American Period Furniture Makers, you can read that article here. I am still pleased with that article but en toto these posts should be dramatically more complete in both my descriptions of work, with the continued refinement of technique and process, and my reflections on the challenges of making these chairs.
While reverse-engineering Gragg’s methods I learned a lot about not only how he worked, a combination of sinuous elegance and brute force, but also the kind of wood that would be best suited for making these iconic chairs. Like Gragg I confirmed the material that suited the project best was something like air dried red oak from very large trees (he used red oak, white oak, ash, and IIRC hickory). I remain so fascinated by the form that I continue exploring other routes to the same end point and will comment on those paths as appropriate.
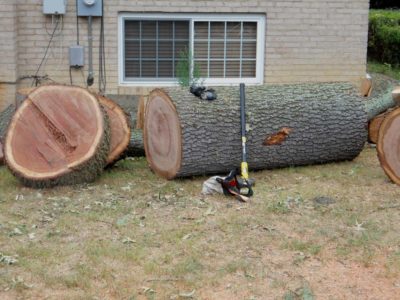
A bit over a year after finishing my first full-blown Gragg my neighbor Bob told me he was having several over-mature oak trees removed from his yard. Though still mostly-healthy their decline was underway and it was only a matter of time before they became an imminent threat to his house. When the lumberjacks arrived I asked if the boles could be sectioned into five or six foot pieces and left intact on the ground for me to harvest. I had to be elsewhere for much of the day so I did not get to watch them bring these behemoths down.
When I returned home later that day I inspected the bolts with anticipation, and spoke with Bob (and his teen-aged grandchildren who were lounging around) that I would be arriving after dinner to begin the harvesting. I’m not suggesting the yutes did not believe me when I showed up with a sledge and a bag of steel wedges and wooden gloats and told them I would be turning these 5,000 pound hunks into manageable pieces from which I would eventually make chairs, but truth be told the looks on their faces indicated they did not believe me. Over the next couple of days their eyes bugged wide more than once.
I have always found making mortise-and-tenon constructs to be more irksome than dovetails. After decades of struggling and countless m&ts I came to realize that much of my animus was due to mortising chisels themselves — they simply were not amenable to the work I was undertaking most of the time. Traditional “pigsticker” mortising chisels seemed akin to sticking a piece of steel into a rolling pin and using that to make a rectangular hole. That approach works for some things, things I do only rarely, but in the diminutive work such as fitting the steam bent slats of Gragg chairs into their crest rails working with oversized pigstickers was not conducive, for me, to good controllable work. Truthfully I got so frustrated that earlier this year I gave my complete set of vintage pigstickers to Steve Voigt.
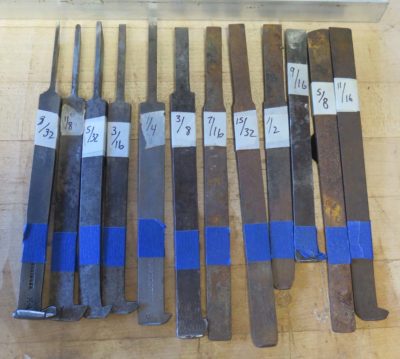
Instead I made myself a new set of mortising chisels more in keeping with the work that I do. And it all started with a derelict bunch of plow plane irons I’ve been assembling in recent years. Such irons are usually available for little money, especially if the ends are completely boogered up. Taking the pile that I had, I marked them all at the same length and noted their width. It was pretty clear I could have a wonderful set of precisely graduated sizes perfectly suited for the work I do, at least 99% of it. For the other 1% I have a couple more “standard” sized chisels, but who knows now if I will ever use them for anything but large scale timber framing.
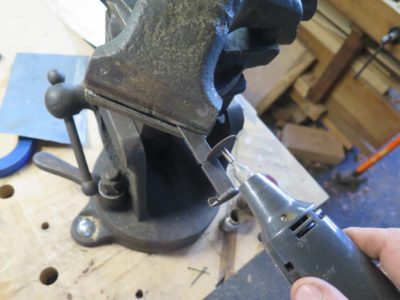
After marking them all to the same length with tape I cut them with an abrasive disk in my micro-rotary (yes, that is my new Emmert Universal Vise; it is real and it is spectacular). It took three disks and fifteen minutes before I had the raw stock to make the set of chisels.
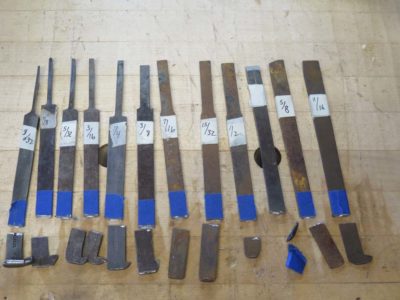
Up next — wood handles from the scrap box. Tulipwood? Bocote? Brazilian Rosewood?
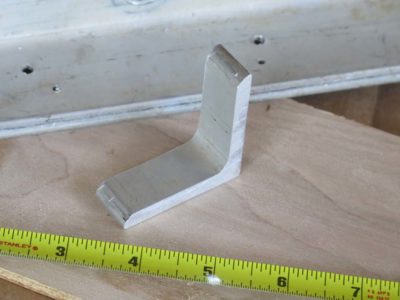
When assembling Gragg chairs I sometimes need to transfer lines from the pattern/assembly jig to the chair pieces. Try as I might all my other squares and such would not work in the restricted spaces of the assembly jig, so I took a piece of scrap 2-inch aluminum angle stock and in about three minutes had a new tool that will become increasingly prominent in the tool kit.

I cut about an inch off the end of the scrap piece after squaring it on the table saw, then cleaned up the edges and put it to work.
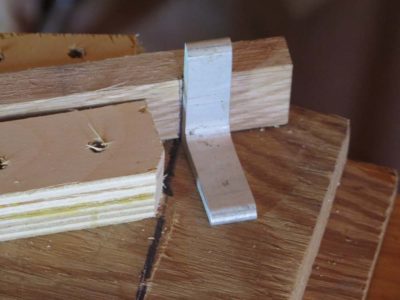
You can see a trace of a previous faulty attempt to lay out the line I needed to mark.
Not much makes me happier than to come up with an elegantly simple and almost cost-free solution to a problem.

Recent Comments