One of the aspects of having a humungous Fortress of Solitude like the barn, four stories of 40′ x 36′ space, is that there are a multitude of nooks and crannies into which things can be tucked, stuffed, crammed, lost, and re-discovered. I call these instances my own “Clean Up Christmases,” when I come across treasures I had forgotten, or at least misremembered.
Such has been the case recently when prepping the classroom for this coming weekend workshop Historical Wood Finishing. As the first class there in over two years, the space had, shall we say, devolved. That pesky Second Law of Thermodynamics; they tried repealing it but it just didn’t take. It has taken me over two weeks to get it ready for the group on Saturday. The level of “rearrangeritis” (full credit to James “Stumpy Nubs” Hamilton for coining the phrase to describe an all-day travail when moving one thing in his crowded shop) has been monumental, and monumentally rewarding on several fronts. It has also given me time for contemplation about future projects, a topic I will address in numerous upcoming posts.

At the moment I am mostly reveling the rediscovery of two caches that were set aside for some future completion. The first is the two sets of brass Roubo-esque squares fabricated before and during that workshop more than two years ago; all it will take is a day or two with some files and Chris Vesper’s sublime reference square to get them up and running.
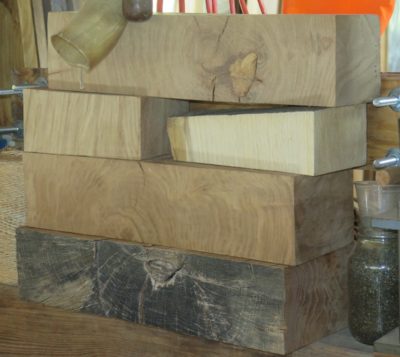
A second trove is the pile of French oak scraps from the multiple iterations of the FORP gatherings in southern Georgia. I brought them home in order to turn them into veneers, probably oyster shell style, to use on some as-yet-unknown project. That “unknown” identifier is becoming more “known” as the days go by. Then, much like my shop being the only one in the county with two c. 1680 parquetry flooring panels from the Palais Royale in Paris, my tool cabinet will be the only one with veneers from some c.1775 oak trees from the forests surrounding Versailles.
Who knows what other “Christmas” presents I might find during the never ending effort to impose order on my space? Stay tuned.
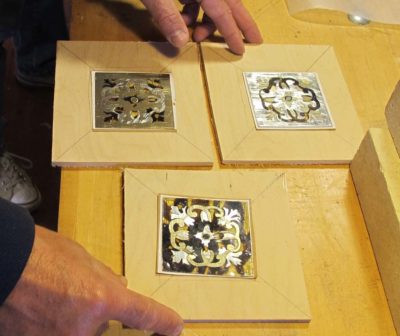
I’ve signed on as one of the speakers for a Spring 2022 conference at the Winterthur Museum on the subject of marquetry. Like many other events over the past two years it has been scheduled, cancelled and re-scheduled, to the point where I am not fully informed myself. (In 2020, 13 of my 13 teaching and speaking gigs were cancelled. It was quite delightful to not travel much, hunkering down in Shangri-la instead [“social isolation” is any day ending in “Y” here in the hinterboonies]) I believe it is in late April but don’t hold me to that. I won’t discuss the other speakers yet as I think the Program is still being finalized, but my presentation and subsequent publication will be on the topic of Boullework.
I have already sketched out my presentation/demonstration in my mind, bringing it into realm of reality will occur over the next eight months. That progress will be documented periodically on this screen.
This is a demonstration-heavy gathering, so if the topic interests you it would be a great opportunity to interact with some very passionate and accomplished folks, both on the stage and in the audience.
Winterthur is a few miles north of I-95 in northern Delaware. I worked there while going through college and have many fond memories of it, both the grounds and museum are magnificent.
Stay tuned.
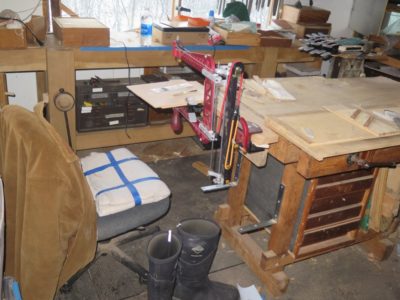
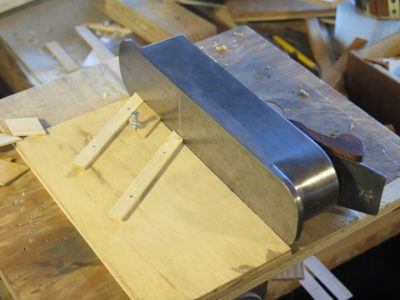
Going back many years I was an enthusiastic supporter of the concept of a vertical marquetry saw as an alternative to a horizontal chevalet, a machine I never got the hang of. I’m not sure if I was the first person to raise the concept to Knew Concepts but certainly I was in there early with encouragement and specific concept and design ideas. The development of the tool took many years and trips down many rabbit trails, not the least of which was the passing of our beloved friend Lee Marshall from Knew and the transition to Brian’s sole leadership and all the logistical and legal details that entailed.

Then came the day several months ago when the very first unit rolled off the assembly line and shortly thereafter arrived on my doorstep. I assembled and used it just enough to get the sense of the tool, then put it away since I had so many other things in my pile of things to get done. Well, I am finally returning to the tool. The first thing was to find a permanent (?) home for it in the workshop. At the moment that location is the end of my oldest and dearest friend in the shop, my Emmert workbench.
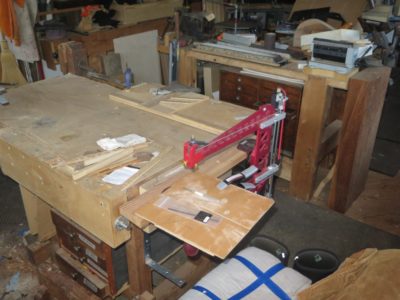
Time will tell if this is the final resting place for this magnificent machine, but for now it is working just fine.

Much of the goings-on in the shop are Christmas-gift related and therefore must wait a while before recounting them on this page. But one recent veneering exercise revealed the foibles implicit in being distracted by other activities, and what happens when you (by that I mean me) lose your concentration.
I was creating a fairly simple pattern from some rosewood veneer and everything went well and I managed to assemble the pattern with one little scrap I had to use.
When I glued down the veneer to the substrate I simply forgot to anchor the composition into the correct place on the panel, and lined it up free then placed the caul and clamps. Of course the whole thing shifted under the weigh pressure and I saw the next day that everything was out of whack.
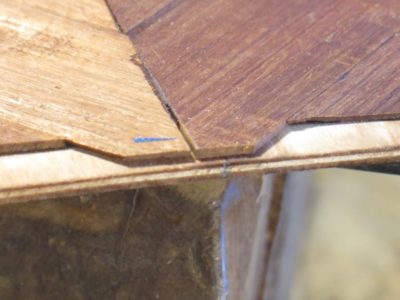
I tried to lift the veneer by soaking it with acetone, but it was too set for that to work. All I accomplished was tearing everything up. It was off and that was that. Now it’s off to the trash can.
Now my only question is, was this simple rookie mistake or a geezer mistake?.
In many instances, cutting dovetailed open mortises through a Roubo bench top for example, a 30-60-90 layout gauge only has to be “close enough,” however you define that term. All one layout line has to do is match another layout line, and as long the two lines are struck with the same tool off the same reference plane all is well.
During last year’s workshop we all made one or two of these triangles, and like I said above, they work just fine. Laying out the hypotenuse with dividers was all that really needed to accomplish (the hypotenuse of a 30-60-90 triangle is exactly twice the length of the short leg), using my Chris Vesper sublime refence square for the 90-degree corner.
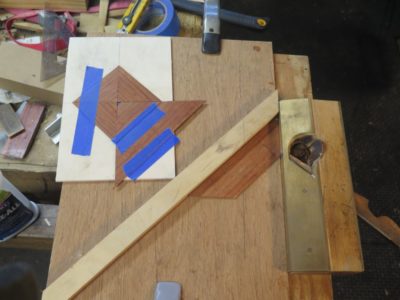
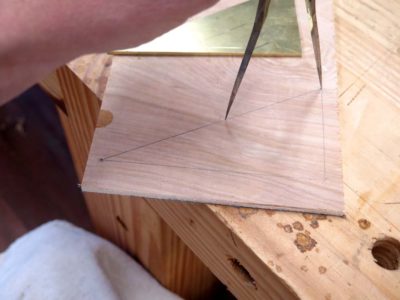
But what happens when you have to create a series of lines coming from different places, and they establish the perimeters of pieces that must match each other precisely? That is exactly the case of laying out a basic “starburst” or “dice” pattern parquetry composition. I used to be content with simply laying out a sawing jig using a small plastic triangle from a middle school geometry class set, but since I have moved to shooting the edges of all the lozenges to minimize the joints even more, I needed to make myself a truly precise triangle square to set the fence for the shooting board.
Starting with one of the brass triangles left over from the workshop two summer ago I determined to make a 30-60-90 square that fit the bill. Once I had the angles perfect I could then solder on the shoe to the short leg of the triangle.
Tomorrow I will show how I did just that with a bench top geometry version of a Covid/PCR test, using a piece of paper and two popsicle sticks.


With the two halves of the Kindle case ready, I glued on band of leather to bring the two of them together. The gluing was only to the faces of the case with the back edges unglued so that the case could be folded open with the two halves face-to-face.
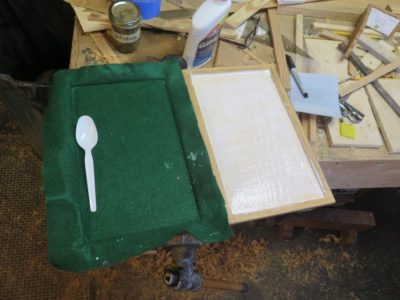

Once the two halves were put together I took some scrap felt from my rag bin and glued that into the cavity holding the Kindle. That was a nice effect, except for where I slipped with the razor blade while trimming the felt and cut off some of the cypress veneer. I hate when that happens, and will repair it when I get a chance.

With everything together and complete I spent a little time padding on some more shellac. I will probably repeat this periodically to build it up a bit more, but I wanted the case to get to work. I stuck on some velcro dots at the two corners to hold it together when not in use and called it “finished.”

A few days ago blog reader (and the Lou Gehrig of the woodworking blogosphere) RalphB asked about my use of the pumice block to smooth the surface of my parquetry Kindle case. The use of pumice blocks is well documented in historical accounts, although explicit or specific details are often missing.
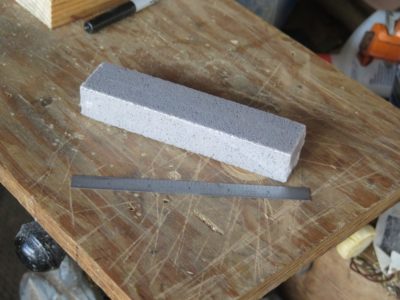
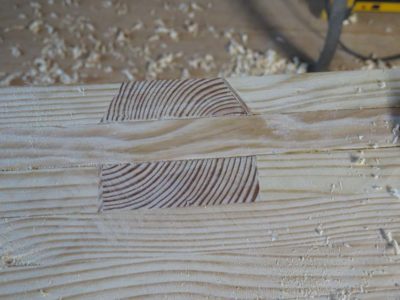
I use a pumice block from the plumbing section of the hardware store (I order them by the case). Normally they are used for deep cleaning of porcelain and enameled fixtures to remove mineral deposits and stains. They work equally well for evening out irregular wood surfaces such as those found when assembling parquetry or marquetry from sawn veneers, where regardless of the care in the initial veneer sawing a fair bit of irregularity is manifest.
I generally use a pumice block as the step following the toothing plane/Shinto rasp, moving the block in a circular fashion on the substrate, yielding a fairly smooth and even surface about what you might expect with 60 or 80 grit sandpaper. Following the pumice block with a card scraper and polissoir, the result is quite pleasing.
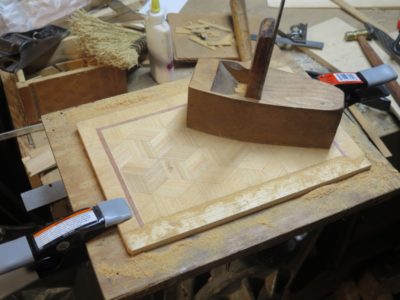

Once all the veneerwork was finished and the banding in place it was time to flatten all these irregular surfaces. Using a variety of tools, including a toothing plane and a Shinto rasp, I soon had things even enough to use a pumice block to smooth everything out.
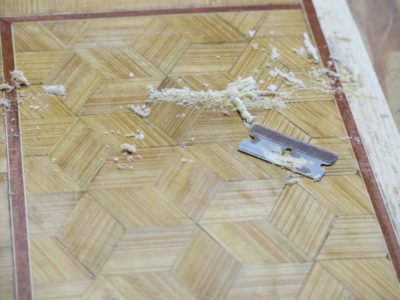
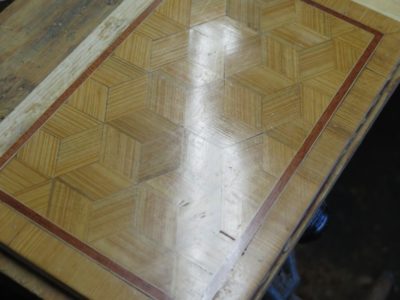
With my tacking iron I impregnated all the show surface with a generous application of molten Blend 31 wax to serve as a grain filler and foundation for a little bit of padded shellac yet to come. Using a fresh single edge razor I gently scraped off the excess wax to get down to the smooth surface, which was evident when I buffed the scraped surface with a piece of linen. Little places of voids were filled in with more molten wax after the buffing revealed them.

The two halves of the Kindle box are different because I was mostly trying to use leftovers from other projects.

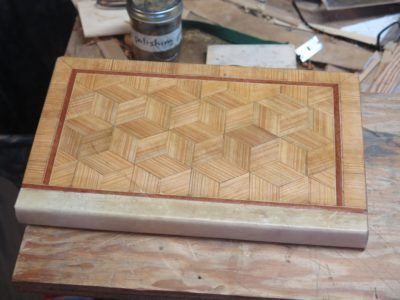
In laying out the first of the parquetry patterns I was finding peace and solitude while listening to an audio book rather than news or similar podcasts. As always I laid out the patterns on kraft paper, gluing the pieces in place with a dab of stick adhesive. Once I had built the pattern beyond the boundaries of the field I flipped it over and glued it “face down,” this time with PVA since I needed an adverse-environment-resistant construction. Using a foam sheet between the paper and the plywood caul assured the pieces would conform intimately with the substrate. Their irregularities on the surface are irrelevant as the surface will be smoothed to a finished foundation.
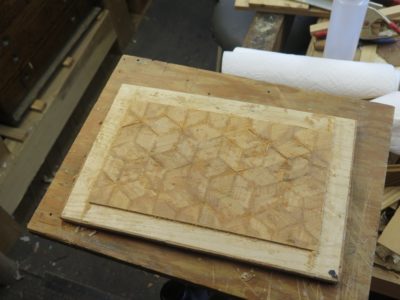

Using a straight edge and my Japanese mortise saw I trimmed the field to the designed size. I noted with interest the amount of curve that was introduced to the homemade epoxy/veneer plywood through the use of the water-based PVA emulsion to lay down the parquetry. Fortunately that cupping diminished in about 72 hours.
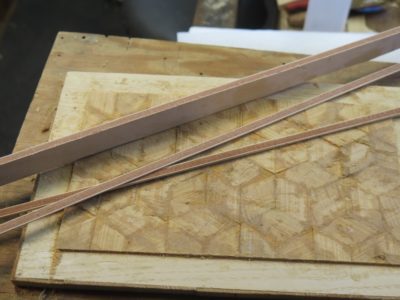
It was then time to saw the simple banding strips from a block I made long ago, fitting the corners with a 45-degree shooting board, then glued them in place along the perimeter of the field.
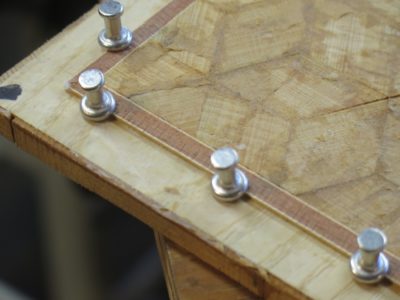
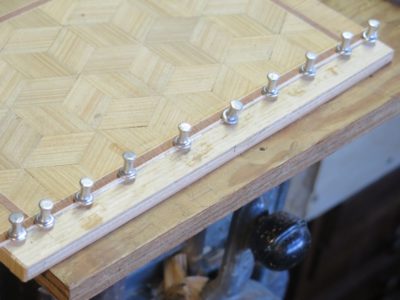
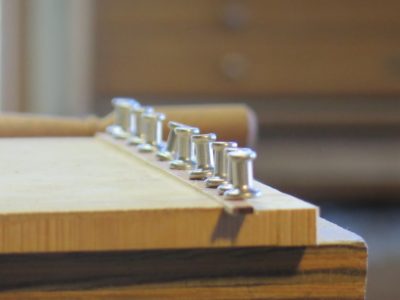
I have found the best method for holding the banding in place during the gluing is essentially the same as described by Roubo — wide head pins.

The next day I laid the edge decoration, which was just thin, cross-grained pieces of the sawn veneer. Once those were done I began the process of removing all the thickness variations and creating the perfect foundation for the finished surface.

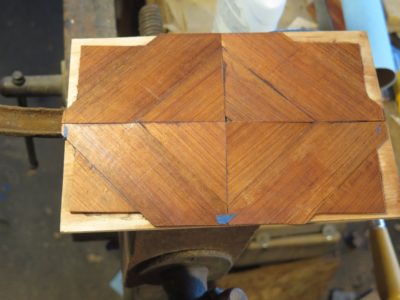
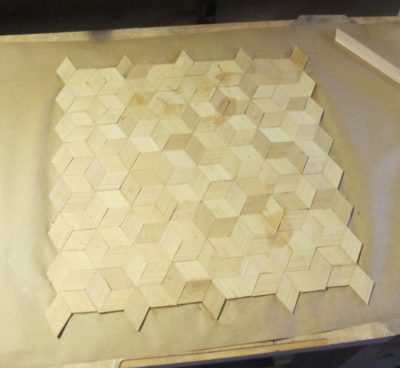
With the slim plywood “box” done for my new Kindle case it was time to move on to the tricked-out phase. That involved the assembly of a parquetry pattern from my inventory of 60-120-60 parallelogram lozenges.

I knew right away that I did not have enough lozenges cut and trimmed to complete the job so I took some of the wood strips from my selection and sawed another bunch, enough to fill my little box to the top. I then shot the edges on my dedicated shooting board, fist shooting one pair of adjoined edges then rotating the lozenge onto the upper station, first planing one edge then flipping the lozenge and planing the adjacent one. I find this entire process of building up a stack of lozenges to be extremely calming, an especially respite in this current week. Plus, it let me put my sublime c.1810-50 Robert Towell miter plane to good use (fortunately for me Towell was careless about stamping his planes, otherwise I could not have afforded to buy this uber sewwt tool. Take note of the near-invisible opening in the sole!) I would have used the parquetry shooting plane I made last year but for the life of me I could not find where I put it. Sometimes having 7000 s.f. and several non-adjacent work spaces can be a curse, and this is one of those times.
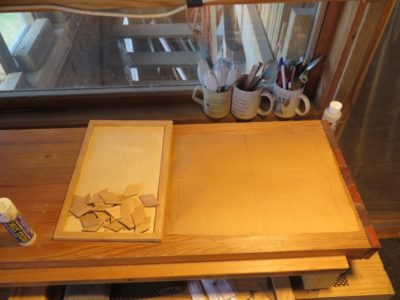

With enough of the finished lozenges in-hand I started setting them down on kraft paper after first drawing right angle bisecting lines to guide the work.

Recent Comments