I read recently that my old friend and Martin Donnelly auction companion Josh Clark is dispersing Tom Law’s inventory of saws. I did not know Tom well but I always tried to find a few minutes to chat with him during the PATINA annual tool extravaganza. He knew more about saws in his pinkie finger than almost any woodworkers know in their whole bodies and was an indefatigable rescuer and rehabilitator of old saws. In a way it does not surprise me that his inventory was roughly one thousand saws at the time of his death. It makes my “collection” of two dozen carpenter’s handsaws puny by any comparison.
All of the saws in my “collection” are or will be working saws, most that I have purchased at tool swaps and the like. I have an approach to selecting a vintage saw for use (or gifting) with the menu of features including the following.
Saws Are Like Pizza
This is a near-perfect candidate for my own tool kit. The plate is heavy, the tip is nearly 3″ wide, indicating it has not been re-toothed, the surface rust is pretty minor (the pitting after cleaning will be minor), and the planarity is nearly perfect. The slight flattening and sharpening will be demonstrated in coming posts. Plus, it was only five bucks at a MWTCA shindig.
Like pizza a vintage saw plate better have lotsa meat. I like saw plates that have not been used or sharpened a lot, definitely not re-toothed. I like them to be not only thick in gauge but also as wide as possible. In other words, in “as new” configuration even if not in “as new” condition.
No Bad Skin Cancer
A little surface rust is fine, maybe even a little more than that, providing the overall strength/integrity of the plate is intact. It only takes me a minute to determine whether the surface can be polished enough to make the tool work smoothly.
Unlike Elected Officials, No Kinks
I know that real saw maestros can reclaim a badly bent saw plate, but I do not possess the skill nor the desire to do so. I don’t mind a teensy bit of bend in the plate, providing it is not literally creased, but a gentle level of un-planarity can be addressed easily and quickly. There are many videos on-line to show how this is done, the best one for me is Bob Rozaieski’s video.
He’s The One With A Full Set Of Teeth.
Many years ago I was trying to identify one of the colorful local fellows to Mrs. Barn, and I was getting nowhere with my attempt. Old guy. White beard. Glasses. Baseball cap. I was having no luck sparking her memory as that list describes 90% of the men in the region. Then I latched on to the descriptor that prompted her memory. “He’s the one with a full set of teeth.” Immediately she knew who I was talking about.
That also describes what I want when buying a vintage hand saw. All the teeth, in good condition. It’s okay if they need sharpening, but they all gotta be there and in good overall shape. Once you master saw sharpening it becomes quite pleasurable to do.
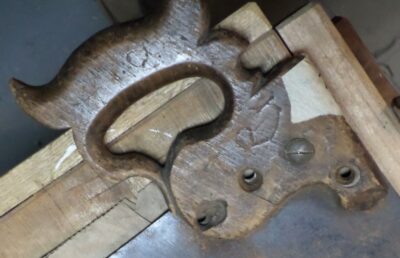
No Need for a Handle
The handle is of little importance to me. If it is in nice condition and a configuration I want that’s fine. The saw handle in this image was somehow married, and mutilated in the matchmaking, to the plate it was on when I got this saw (all the nut holes were wallowed out to somehow “fit” the holes in the plate). What was once a very nice handle has been ruined and ready for the kindling pile.
Making a saw handle is actually a lot of fun and can be a great act of creativity using a piece of wood you want and your own hand as the template.
If a saw meets these criteria, I’m good to go provided the price is right.
Here’s a sharpening tip I have used for the past several years.
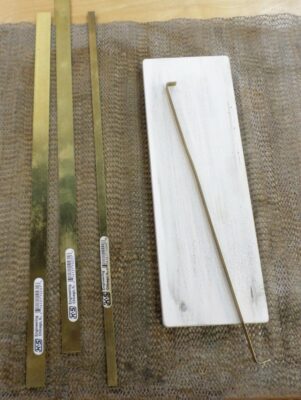
In order to get the back-bevel secondary angle consistent and effortless, many folks use the “ruler method” and rest the back side of the blade on a metal ruler to get the back bevel/micro secondary bevel. Since some of my machinists’ rules have different thickness, in addition to the preference for not using an actual rule since they can move during the process, I pulled out a thin brass strip from my supply box and cut and bent it to fit the stone in question.
By overbending the tips a smidge the metal strip is basically spring-loaded into place, thus the micro-bevel jig stays put during the final few strokes of sharpening.
The brass strips are available at almost any hardware or hobby store, usually for a dollar or two. Obviously you could use any thin strip of sheet metal as well, flashing would work just fine.
Married, that is. Elderbarndottir and her beloved were joined in Holy Matrimony in a beautiful day of bountiful blessing on Saturday, in the worshipful company of several hundred of their friends they have met over the years. Mrs. Barn did a fantastic job of pulling it all together vis-a-vie the reception and we were back at the house by 4.30 to collapse. Quite a divergence from our own wedding 43 years ago, with a dozen folks in my parents living room.
Yesterday was the first day of feeling “normal” in the aftermath, today is our Thanksgiving, and I’ll get back to woodworking today.
The best part (?) of the entire affair is that I now have two magnificent sons, neither of whom I had to navigate adolescence with.
… Elderbarndottir will be a brand new Mrs. We will rejoice and, likely, collapse. It’s been a hectic fortnight, now with her house now being overrun with flowers. The first pile o’ bouquets is cooling their heels on the back porch until they are called into the game Saturday morning.
A longtime friend, great furniture maker, military historian, tank commander SteveD (West Point’76 IIRC), once put this day into the best and most concise perspective I have ever heard.
I wrote a blank check to this nation and signed it with my blood.
Though uttered in a casual conversation many years ago, the sentiment expressed has never left my mind. My heartfelt thanks to him and all those who have made this pledge on my/our behalf, especially my beloved baby brother and my two sons.
For a lot of my routine sharpening I finish off with an 8000 grit water stone, and I recently had a stretch where I did not attend to the stone’s needs as conscientiously as I should have and it got wallowed out. That it was my setup at my daughter’s house was no excuse, but in all honesty I am more attentive out in the barn shop.
Not having my marble slab for referencing the surface to flatten this one, I relied on one of the theorems (or was it a Postulate or Law?) from eighth grade Geometry class. That is, “every circle defines a plane.” Using a concrete block with a piece of mirror I had laying around and a sheet of sandpaper I was able to flatten the dried-out stone face-down on the abrasive by pressing and moving it in a roughly 1-to-2-inch circular motion. Before long I had a super flat stone and got it back to work.
I’m glad that some lessons from 55 years ago took root, allowing me to minister to this stone in need of, well, ministrations.
The cost? One sheet of 80-grit sandpaper, five minutes of my time, and a bit of elbow grease.
If I were somehow told to restrict myself to just one standing/stationary power machine in the shop I would almost certainly refuse to play that False Dilemma scenario. Instead, I would opt for two bench top units, a drill press (probably using my Jet mortiser as it is just an extra-stout drill press with some specialized features) and a bandsaw. Of the latter I would further refine the choice to not one but two, my little Delta 9″ which I find integral to milling veneer, and my Rikon 12″ which is adequate for just about everything else (as long as I keep it tuned and outfitted with a variety of sharp blades). I’ve checked, and even combined they do not nearly occupy the volume of one venerable Delta 14″ bandsaw or similar, probably the standard by which — aside from the near-mandatory table saw clogging the center of the work space — almost any woodworking shop in the US is measured. Plus, to confound the meta-Prisoner’s Dilemma variation even further, the little Delta 9″ is light enough to move easily for use or storage under a bench or table. So, I won’t play that game.
What does this to do with the title?
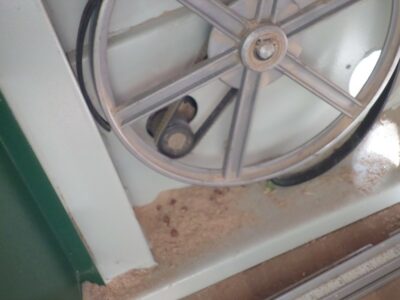
Well, I recently installed a new blade on the Rikon and as I was adjusting it I noticed a little bitty thump-thump-thump as I turned the wheels by hand, centering the blade on the tire crowns and got the guide blocks where they needed to be. I closed it up thinking I would touch the weld joint sides and rear with a stone when at full speed to smooth out the little thumping sound. It almost always does. Not entirely correct. It ALWAYS has resolved the problem before on any of my bandsaws.
But this time, under power the thump-thump thump almost instantly became THUMP-THUMP-THUMP followed by a WHAM! and the sound of the blade becoming a weird piece of modern sculpture.
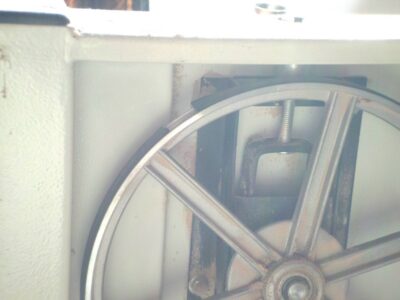
Short and sweet — the original tire on the wheel had finished coming apart and in so doing tore up the blade in the lower wheel box. There was no real damage to the saw, fortunately.
I ordered and installed two pairs of new tires (second pair is backup for if/when the phenomenon reprises). The lower tire needed nothing to get it off, it was already in pieces. The upper tire actually broke as soon as I started removing it, revealing a pre-existing split that was well along the path to destruction of its own.
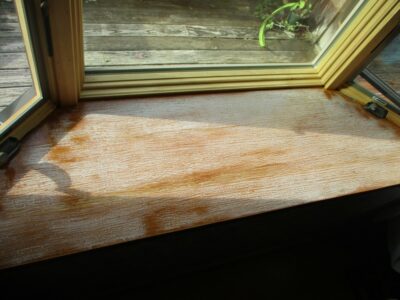
Interspersed between sessions of working on the cherry trim for the new bay window I began the process of transforming the pine-veneer-over-particle-board shelf of the unit into something that is visually cherry-ish. The shelf will be used as a mini-greenhouse by Mrs. Barn through the winter, so the finish needed to be really robust. To that end, I sealed the surface thoroughly with a brushcoat of thinned West System Epoxy for best penetration to get it as impregnated and protected against moisture as possible.
To impart the coloration for the board I used a commercial cherry stain as an intermediate glaze coat, probably an iffy proposition. Actually, in hindsight since it was a complete mess of an outcome — perhaps the worst finishing clusterflunk I have ever encountered — it was way worse than “iffy.” I did not even document the process, I had glazed probably ten thousand surfaces over my career so why document this one? (Perhaps some day I should write a series of blog posts about imparting coloration for matching, and the various techniques — staining, dyeing, toning, and glazing).
The glazing went fairly well but it took three days for the glaze to set before I could recoat, versus the normal 2-6 hours. I abraded it lightly to reduce the effects of dust and bugs and miscellaneous debris that became embedded during those drying days. I followed this with a light brush coat of my favorite oil/resin varnish, Pratt and Lambert 38 (no longer available, alas), just before going to bed. With the varnish seal coat over the stain glaze it looked awfully good.
Imagine my surprise when I got up the next morning and saw the most highly blushed coating I have seen in my 50+ years of finishing. Even more than times when I was lacquering on a sweltering Floriduh summer day with a driving thunderstorm outside. Something in the stain/glaze clearly did not like something in the varnish seal coat. I mean, REALLY did not like it. In fact, I have never before seen an oil varnish blush. Never. And this was an oil varnish over an epoxy base.
Back to the drawing board. Gotta noodle this one for a while. Stay tuned.
A few days ago the weather was grey but unfortunately not raining. (We have not had a decent rain in about six months and my hydro-turbine has become almost a trickle charger rather than a robust electron producer.)
Nevertheless, even on this grey day when I stepped out of the barn to head down the hill for lunch, this explosion of autumn color greeted me and imparted an intense visual delight that brightened my psyche for the rest of the day.
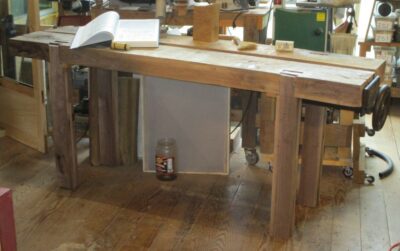
Our plan from the beginning of Tim’s bench-building visit was to fabricate what was essentially a kit, since everything had to fit as individual pieces into his compact station wagon for the trip home.
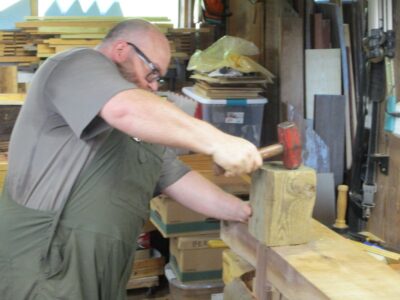
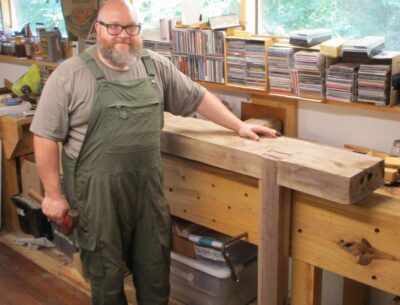
Our final day together was spent sorta assembling the bench to make sure it fit together the way we wanted. Since it was a split-top Roubo, we could each work on one half of it at different work stations. This was Tim’s first big woodworking project so I let him do much of the work.
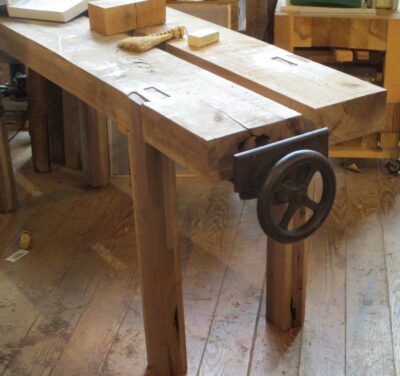
In the end we screwed some temporary cleats to the underside of the slabs in order to get it up on its feet, and mounted Tim’s piano maker’s vise for the obligatory pictures.
The rest of the work, installing the stretchers and cross battens and trimming the legs to length, will be accomplished by Tim once he gets back home.
We made exact measurements prior to beginning the construction so it all fit into his little station wagon, just barely clearing the rear hatch and dashboard.
And with that he was on the road back home to work on completing the bench as time allows.
NB – Tim has been making steady progress but the terminus has not yet arrived.


Recent Comments