I’ve still got some of these left so I am re-posting the offer.
Thrashing around my “mail” closet I came across a stack of leftover postcards I had printed in 2014 to promote the then-upcoming exhibit of the H.O. Studley Tool Cabinet and Workbench I was creating for the following May.
Rather than simply throw them away or use them for notes to myself, I decided to make them available to you for free until they are all gone. I guess I could make some charge, but that seems like too much trouble to me.
So, if you would like one of these cards to post on the wall next to your tool cabinet just drop me a note and I will send you one for free (make sure to include your mailing address!). If you feel compelled to compensate me you can buy me a cup of tea or a brownie the next time our paths cross.
On my first trip to visit the HO Studley tool cabinet I was quite expectantly anticipating the absolute headiness of the experience of being in the intimate presence of this iconic artifact. The drive was a test of restraint as it was a long one and I had to reign in my excitement or I would be exhausted by the time I got there. It was all I could do to avoid the temptation of non-stop daydreaming that would splatter me on an underpass, or calling literally every woodworker I knew to ask them, “Guess where I am going?”
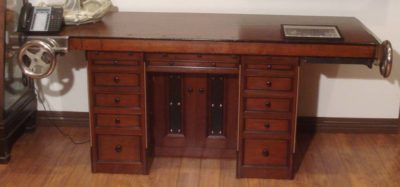
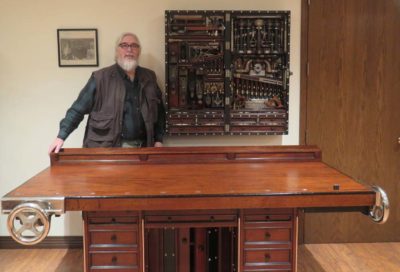
When I arrived and met Mister Stewart, and he ushered me into the room containing the tool cabinet, I literally felt tingles. Indeed, the tool cabinet and its contents were as amazing as I had psyched myself up for, hoping that I would not be disappointed. I wasn’t. But, much to my astonishment I realized that the workbench was every bit the masterpiece that the tool cabinet was. I won’t blow smoke up your shop apron and tell you I spent as much time examining and photographing the bench as I did the tool cabinet, but it was a lot more than I was expecting.
I cannot really see myself using a tool repository like Studley’s for my everyday work, but I definitely could see me using the workbench all day, every day. It was as you might expect from Studley, both ingenious and exquisite and all I kept thinking the day I drove from Studley to Cincinnati for WIA 2010 was, “I gotta make me one of these.” Eventually I worked through Chris Schwarz to acquire a slab of mahogany 4″ thick by 28″ wide by seven feet long to make the top.
I got the slab home and nestled into the barn awaiting the decks to clear so I could begin.
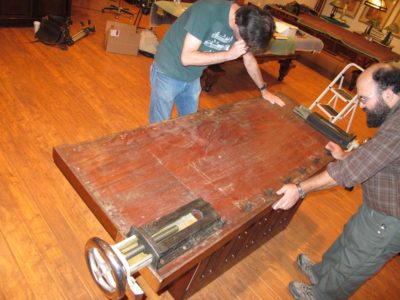
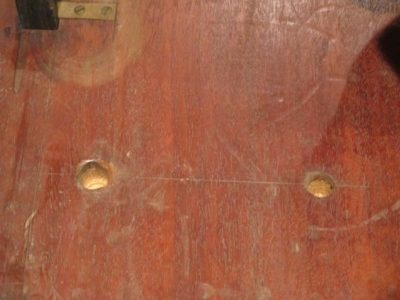
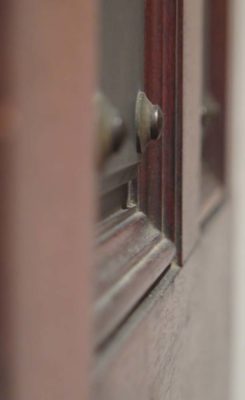
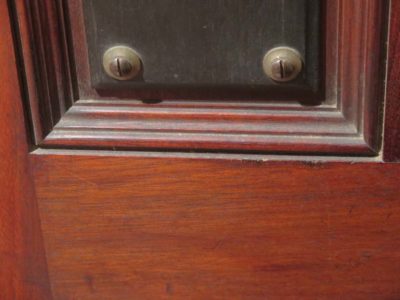
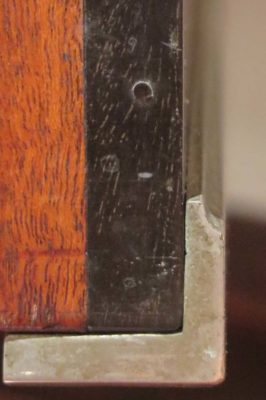
Imagine my surprise when on a later return visit to continue documenting Studley more fully and I was able to study the underside of the bench, and more particularly the holes into which the alignment pins from the under-bench cabinet fit, I discovered that the bench top construction was not what I had expected. Suddenly I had a giant mahogany slab available for another function; Studley’s bench was a laminated construction.
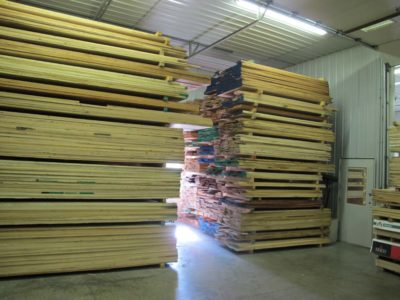
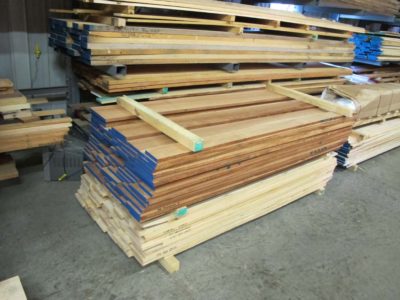
With Jameel Abraham I went to a lumber dealer he patronized and bought what I needed for the bench top. It was select white oak for the core and mahogany for the faces. Notwithstanding the “mahogany” was no such thing, at least I had materials to begin the replica bench to include in the exhibit.
Lest you lose any sleep worrying about the abandoned mahogany slab (it was true swietenia, not the phony pastiche that is often sold as “mahogany”), fear not. I have plans for it in the not-to-distant future.
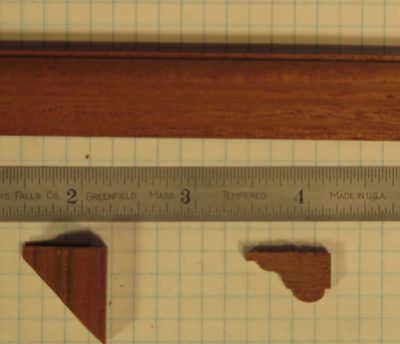
I blogged recently about visiting my friend, Mister Stewart, and his ensemble of the Henry Studley tool cabinet and workbench. One of the purposes of the visit was to get a better picture of the molding profile on the cabinet, but Mister Stewart did one better than that. During his fabrication of the new workbench base he replicate exactly the moldings from the tool cabinet and gave me one of the scraps from that enterprise. I finally got a chance to take a picture, and here it is.
If you would like a better resolution picture of the cross-section, drop me a line here.
A while back I had the opportunity to visit some old friends, namely Mister Stewart and his remarkable collection of artifacts including the tool cabinet and workbench of HO Studley. My impetus for the visit, beyond the obvious, was to examine the newest element found and integrated into the workbench. The rear shelf completed the composition of the bench.
It was unusual for the form in that it was not pierced to hold tools, the typical arrangement for such shelves, such as this analogous bench and shelf.
Perhaps the function of this shelf on Studley’s bench was to simply look pretty?
Another element of the visit was documenting more fully some of the molding profiles on the cabinet. Though I did not have a profile gauge with me, Mister Stewart gifted me with a piece of the molding he made when he fabricated the new workbench base. Once I get that photographed I’ll post that as well.
It has been said that in characterizing the participants for a ham-and-eggs breakfast, the chicken is a contributor, but the pig is committed. While it is not a perfect analogy, I am mindful of the commitment of the many hundreds of folks who took time and trouble to come and see the Studley exhibit. I have a special warm place in my heart for the several dozen attendees who met me with greetings from foreign places around the globe: Finland, England, Germany, Italy, Austria, Mexico, Massachusetts, Canada, New Zealand, and Australia, which sent a substantial contingent.
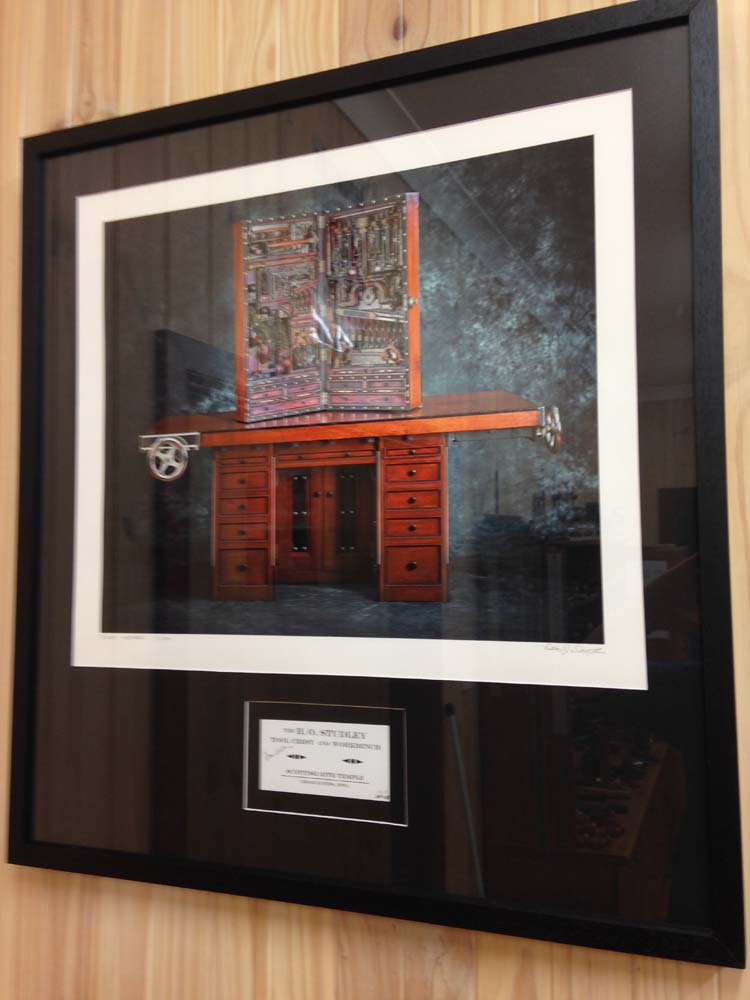
The poster child for this might very well be MattR from Melbourne, who reveled in the exhibit with a gregarious intensity that was infectious. When I announced during his original time period of 11AM-noon on Sunday that given the sparse attendance expected for the final stretch I was going to extend visitor privileges on that final afternoon, he immediately bought another ticket for 3PM and stayed with us until the bitter end.
Recently he sent a note of thanks and congratulations, and included pictures of his copy of Narayan’s poster and his exhibit admission ticket, matted and framed together, displayed prominently in his very cool shop.
Yeah, passionate aficionados like MattR from Melbourne made it all worthwhile for me, so thanks MattR!
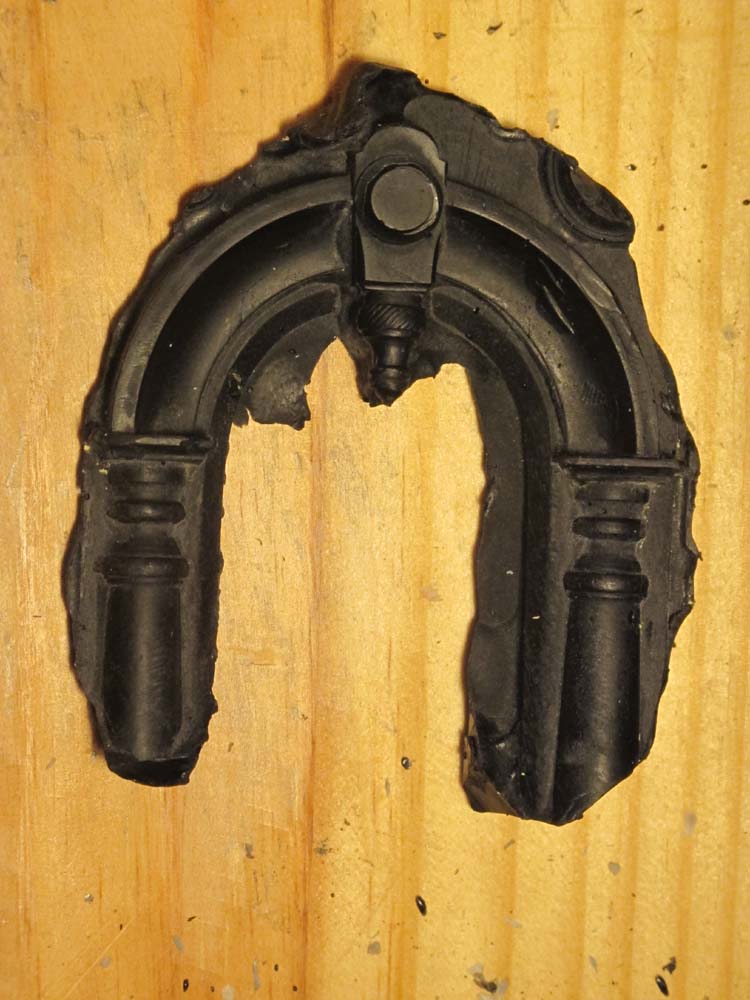
One of my many goals for the upcoming exhibit of the Henry Studley collection is to give the visitor a real sense of the details Studley lavished on his tool cabinet and workbench, including many that are hidden from view but some of which are almost “front and center.” Among these prominent features is the arch and alcove, used as the home for his Stanley #1 plane, perhaps the only instance of this model I had ever seen with honest to goodness wear. Thanks to the permission of the owner and equipped with silicone molding rubber putty I was able to get impressions of the top half of the arch.
Once I returned home to begin the process of making castings from this mold I realized how inadequate my mold was and set out the create a maquette, or master wax model, from which I could make a second mold, and from that second mold cast replicas for the viewer’s interaction.
The mold that I had made was okay, as far as it goes, but it was not as complete as I needed for making three-dimension replicas. To resolve that, I decided to embed the entire mold in a block of molten wax, then carve away the excess and essentially sculpt the maquette from the remains.
I found a cardboard box a little larger than the original mold and lined it with aluminum foil, then filled it with enough pigmented wax to cover all the parts I wanted to work on. I pigmented the wax just so it was easier for my tired old eyes to work it.
Using common bench tools, mostly chip carving knives, I whittled away all the waste to get to the material left in and around the original mold. The resulting wax casting was perfect for sculpting the maquette, so I did.
I’ve been a reader of Popular Woodworking for several years, and in recent times have enjoyed a very congenial working relationship with them. I just got the latest PW Issue 218, which is a terrific and not just because I have two things in it. There are several great articles including the cover project and a long insert.
The magazine features my article on decorative wire inlay (bisected by the aforementioned insert) and the End Grain column about the Studley Tool Cabinet that ran on the Popular Woodworking web site a few days ago.
Mrs. Barn glanced through the issue and said, “Very nice article. (I think she was talking about the Studley piece — DCW) But when are you going to start making furniture for me?”
While many artisans are content to work alone, as I am almost all of the time (an mp3 player loaded with podcast lectures and such is about all the social interaction I need during my work day), there are those magical interludes of fellowship around the workbench with a like-minded soul. Such is the case with my pal Tom, whom I first met by chance at a flea market ten years ago (he was selling, I was thinking about buying). That led to hundreds of Wednesday nights in his first-rate shop where a multitude of tools were sharpened or made, mountains of shavings were made then swept out into the yard, and on occasion, the world’s problems were solved.
Tom even accompanied me frequently on working weekends to the barn, where what we were working on WAS the barn.
Tom visited recently, and is often the case, he tossed out an offhand comment that was a thunderbolt.
While he was making some tapered octagonal legs for a dressing table I had been wrestling with my HO Studley workbench top replica for the upcoming exhibit of the workbench and the accompanying tool cabinet. The grain of the bench surface, African “mahogany,” was just being, in the words of my ever foul-mouthed 98 year old mom, “A real stinker.”
Rob in Lawrence KS had offered his helpful observations, namely that I could use a high angled smoother tuned to a fever pitch. When I mentioned this to Tom with the regretful statement that I did not own such a tool, and that I was going to set things up to make one for myself, he casually remarked that there was a simple way of making a high angled smoother that might serve my purpose. When I tried it, I had to smack my forehead. Hard. The solution was both brilliantly insightful and mindlessly simple and best of all, easy. Coordinated problem solving like this is what woodworking fellowship is all about.
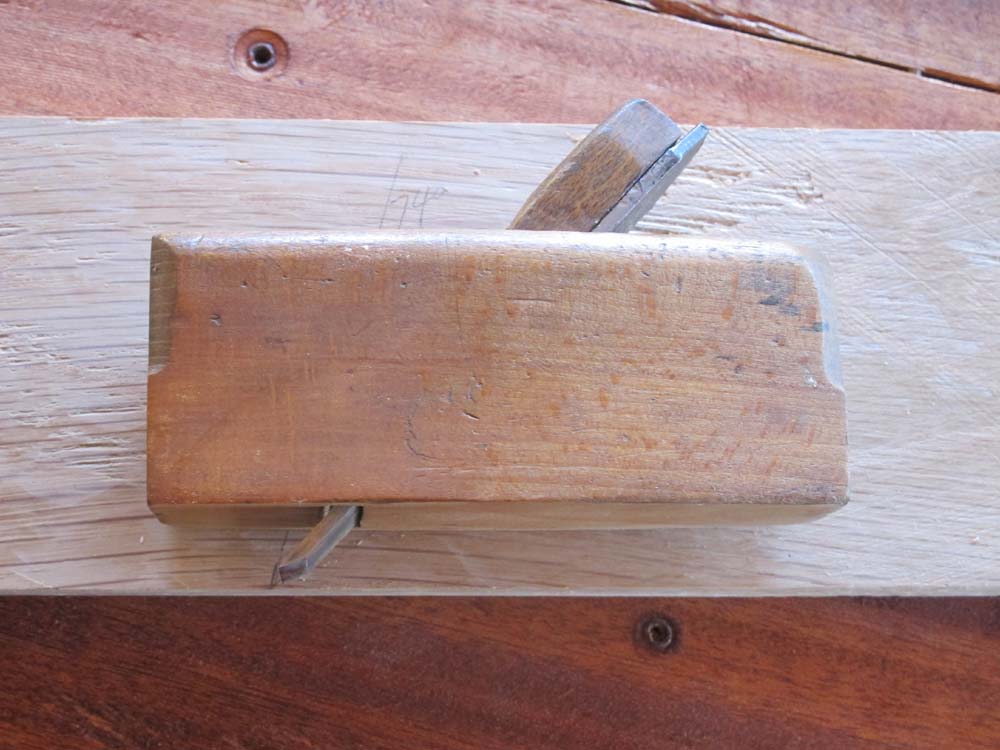
The solution? why, flipping the blade, of course!
I first tried it on a tiny coffin smoother that I had, which was set up to cut at 49 degrees, but when the blade was flipped the new cutting angle was a bit too steep at 74 degrees. Yeah, a bit too steep.
I then looked through my collection of bench planes to see which of them might be a good candidate for this modification. I had a nice little coffin plane with a very shallow angle on the blade bevel. It is set up to cut at about 45 degrees, and simply by flipping the blade over I got a 62-degree cutting angle. Not the perfect setup, but way better than I had before.
The new orientation turns the plane from a double iron bevel-down tool into essentially a single iron bevel-up plane. Yes indeed, I transformed one of my bench planes into a pretty nice high angle smoother in less than 30 seconds. For zero dollars.
A couple minutes to touch up the blade on my 12000 water stone and the tool began its work. It wasn’t pulling off long, gossamer wisps, but did I mention I was planing African “mahogany,” a/k/a braided broom straw?
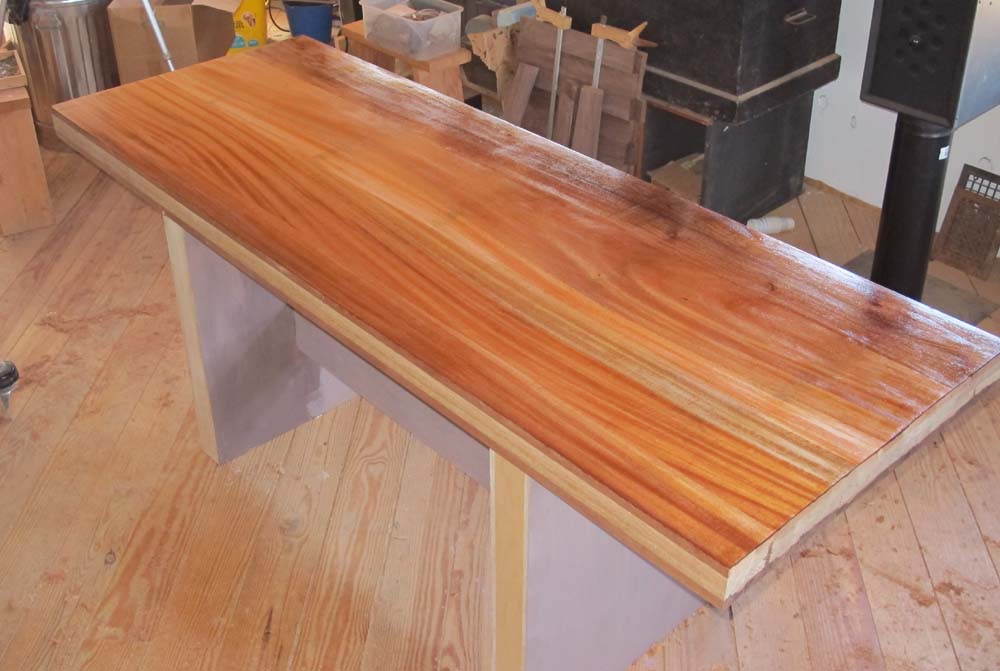
The result in the lower right corner of the image speaks for itself. Following the smoothing with a bit of scraping yielded an outcome that was acceptable, especially since after the exhibit I will be surfacing the bench top with a toothing plane. I remain committed to avoiding African “mahogany” in perpetuity, but for this one problem the result is in the right direction.
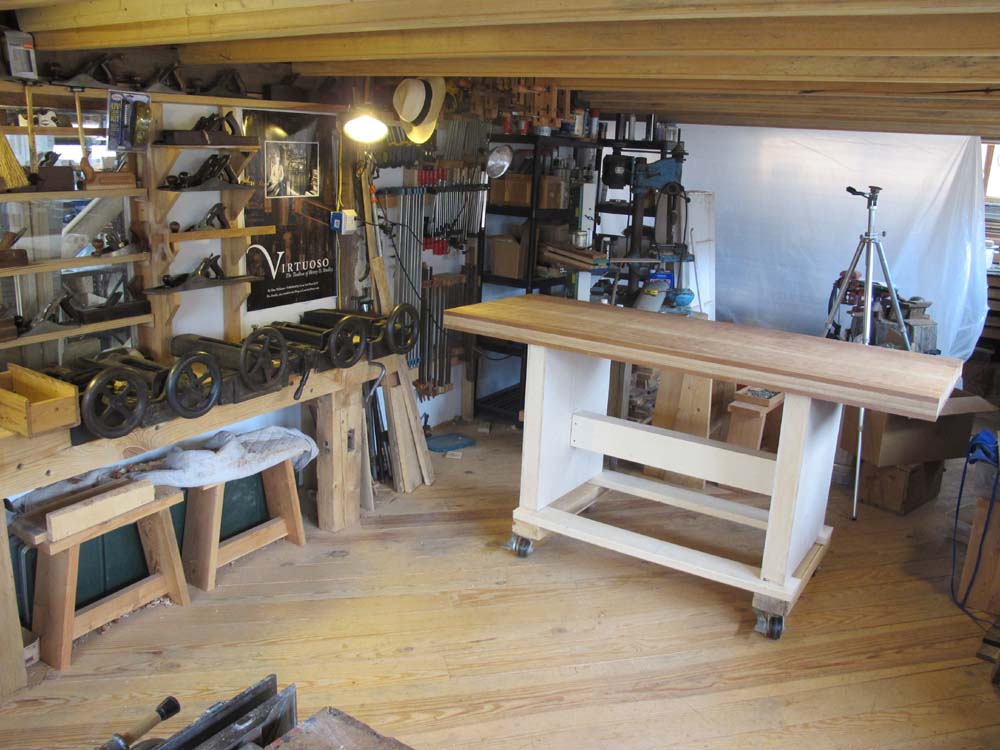
Now that Virtuoso: The Tool Cabinet and Workbench of Henry O. Studley is actually in production, one weighty anvil has been lifted from my neck. However, another anvil still sits there for another six weeks, that being the exhibit of the Studley collection. From now until then I am all-Studley-exhibit-all-the-time as I continue work on the exhibit components and attend to the multitude of details that have to all fall in place perfectly.
The replica workbench top continues apace. I got the top smooth enough (more about that in a day or two) to seal it with my preferred benchtop finish of 1/2 tung oil with 1/2 mineral spirits, and about 2% japan drier.
I like this finish as it soaks into the wood deeply and provides a nice robust seal to the wood.
For the exhibit the top will be pretty smooth, but once it gets back home I will achieve my preferred top surface by cross-hatching it with a toothing plane, a technique I learned from my long-time friend and colleague, and Roubo project collaborator, Philippe Lafargue. But for now it is nice and smooth.
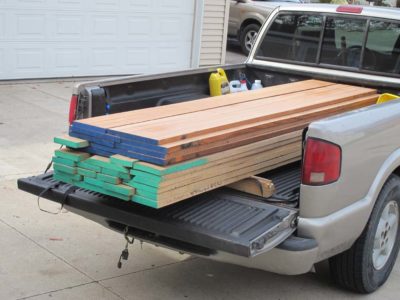
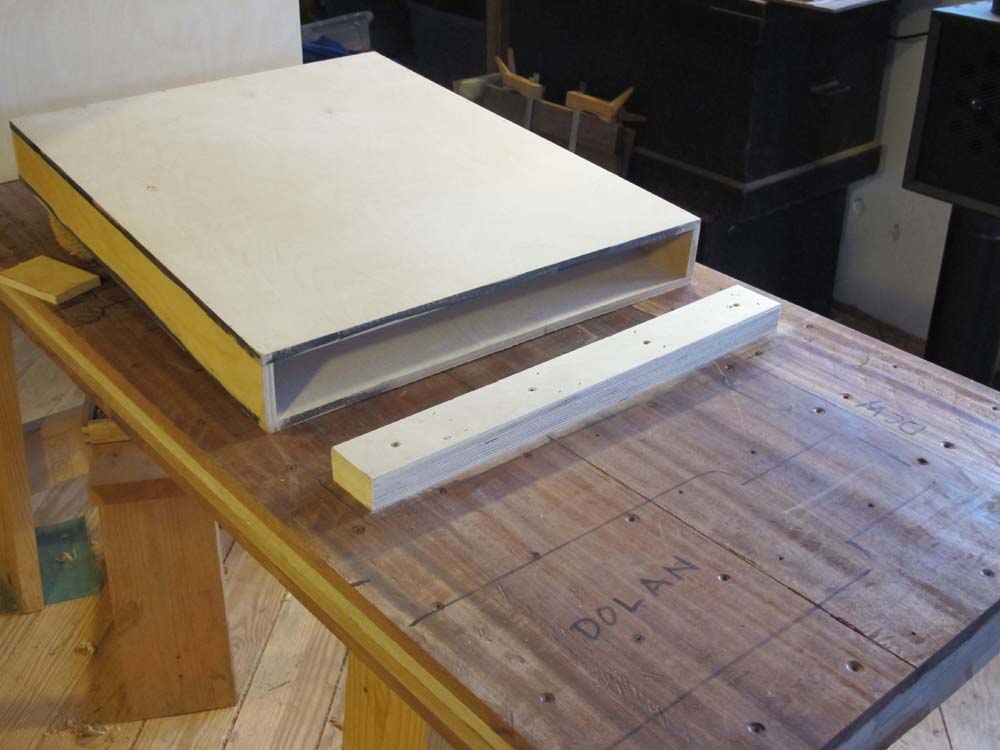
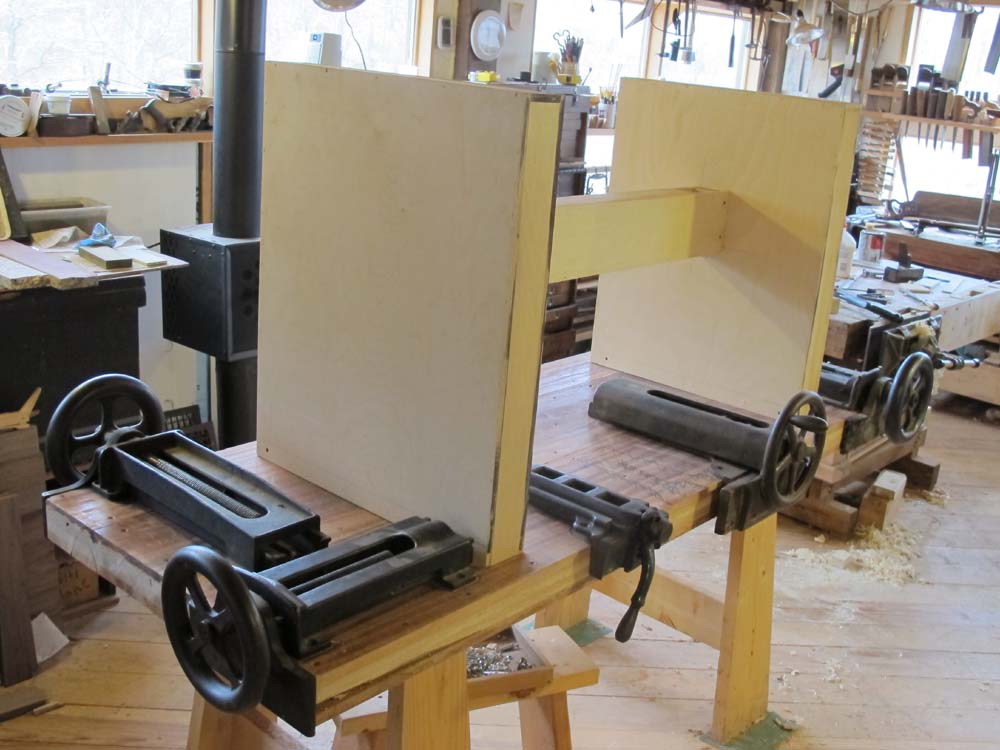
I fabricated the exhibit base for the top from three 1/2″ Baltic birch plywood boxes, fitted them to fastening battens, and temporarily assembled it in order to layout all six of the vises going on it for the exhibit.
One of the beauties of this exhibit is that it may be the only time in their lives that patrons to a museum-quality exhibit will get the chance to touch and manipulate historic artifacts, namely the six vintage vises hanging from the new bench top.
===================================
If you would like to experience the bench top in person, and oh by the way see the entire Studley Collection, there are still tickets available here.
Among the flaming chainsaws I am juggling at the moment, by far the weightiest is my interpretive rendition of HO Studley’s workbench I am fabricating for the upcoming exhibit of the Studley Tool Chest and its companion workbench, now less than two months away. The purposes of this element of the exhibit are basically two-fold; to demonstrate the manner in which Studley built his bench top, and to have some place to hang the half-dozen piano-maker’s vises (which you will be allowed to play with). I realize that not everyone is as interested in these as am I. Heck, outside of Jameel Abraham, nobody is as interested in these as am I. Why do these vises capture my imagination so? Why is peanut butter and mayonnaise my favorite sandwich? Some things are just chalked up to the vagaries of the cosmos.
I’d blogged earlier about my frustrations with the African “Mahogany,” and in return heard from my friend Rob in Lawrence, Kansas, with encouragement. He had encountered the same problem, and instructed me on how to overcome it. I will write soon about my adaptation of his advise –use an ultra sharp high angle smoother and take infinitesimally light cuts — in an upcoming post, but for now all I was wanting was to get the slab workably flat.
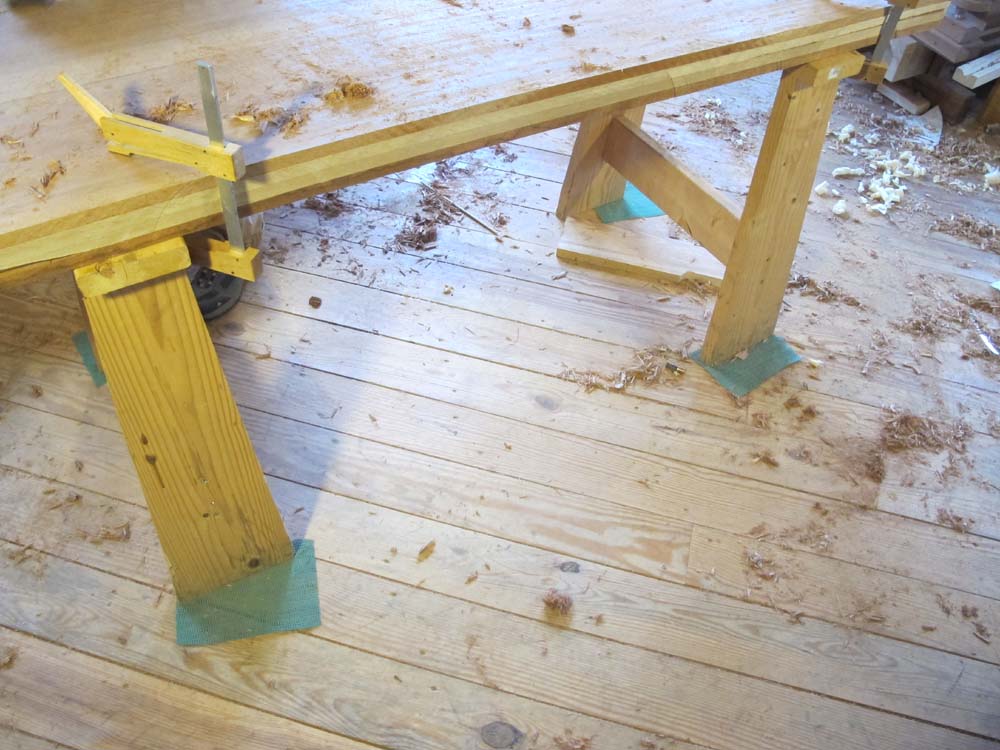
For that I continued working with my newly sharpened toothing plane, which was doing its job admirably. Still, the process was not without problems. I had the slab clamped to the sawhorses in the corners and worked regionally. The issue at this point was the floor. Yes, my southern yellow pine flooring has become “polished” through foot traffic, and at times the entire assembly of slab and sawhorses skidded across the floor. After extensive exasperation with this, I grabbed some of the open webbed non-skid padding I used under my sharpening stones, or when sanding on the bench or something like that, cut it up and tossed a piece under each foot of the sawhorses.
Problem solved. Next?
I then got the slab on edge clamped to my planing beam with a new pair of holdfasts from Tools For Working Wood (they are fabulous and I will order three or four more pairs) and worked the long edges, which will eventually receive the edging similar to Studley’s.


Recent Comments