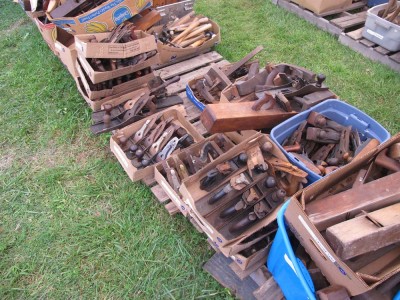
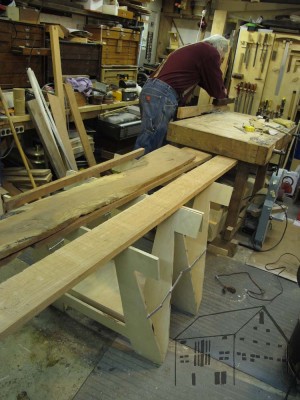
One of the highlights of the galoot’s annual calendar is the warehouse-clearing summer sale by Martin Donnelly at his place in Avoca NY. If you have never been, you should go for the experience if nothing else. This auction of 3200 lots containing perhaps 75,000 tools is a place where tubs of tools exchange hands.

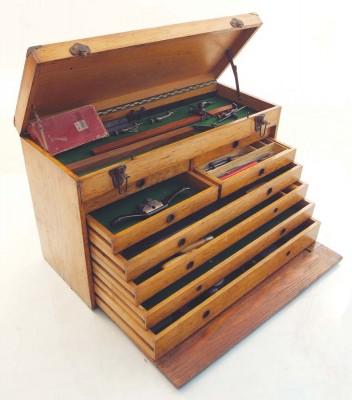
This year three lots drew me there. First was an Emmert die-maker’s bench vi$e which I have $ought to purchase for many year$, thi$ one wa$ I believe the large$t of the line (it wa$ approximately the $ize of a bu$hel ba$ket). Next was a Veritas MkII sharpening unit, essentially new in the box, and third was a craftsman-built patternmaker’s chest with tools. More about them tomorrow.
The tools weren’t the most important things, though, that would be the fellowship with tool comrades including my long time pal Mike who dropped out at the last minute because of an inflamed sciatic nerve that was so bad he could not sit in a car to drive it there.
Instead I had the good fortune to sit next to Josh Clark, purveyor of the vintage tools through his wonderful site. There are many people in the tool world, most of them a pleasure to deal with, and certainly Josh fits this description. He is simply aces.
I was also joined by another long time friend Jersey Jon who was making his first foray to this auction. He was nearly overcome with the shock of seeing tent after tent filled with fully loaded tables and hundreds, no, thousands, of tools to rifle through and gawk at.
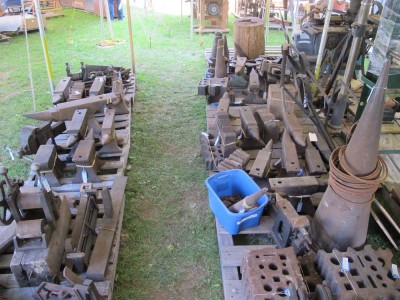
If you were in the market for anvils and swage blocks, this was the auction for you. I almost wish I was in the market, as the prices turned out to be dirt cheap.
The tale continues tomorrow.

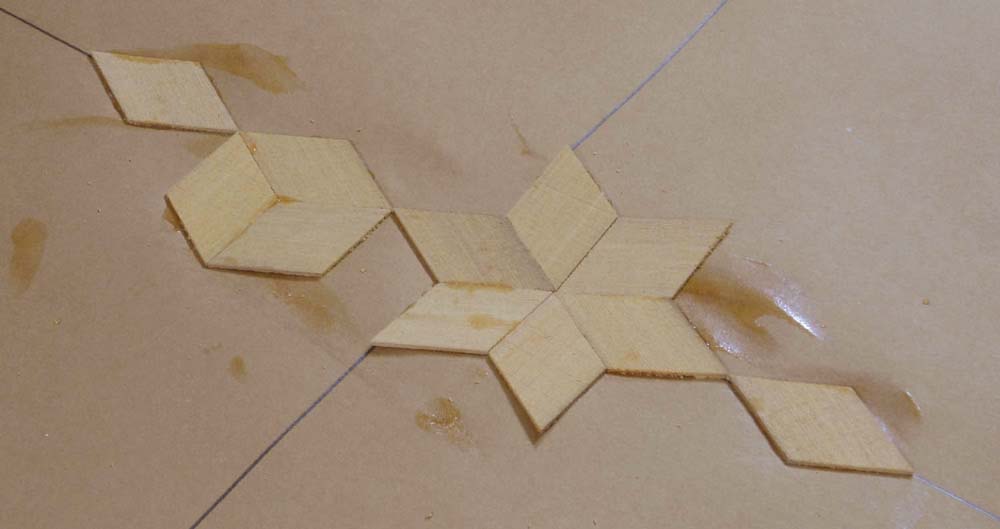
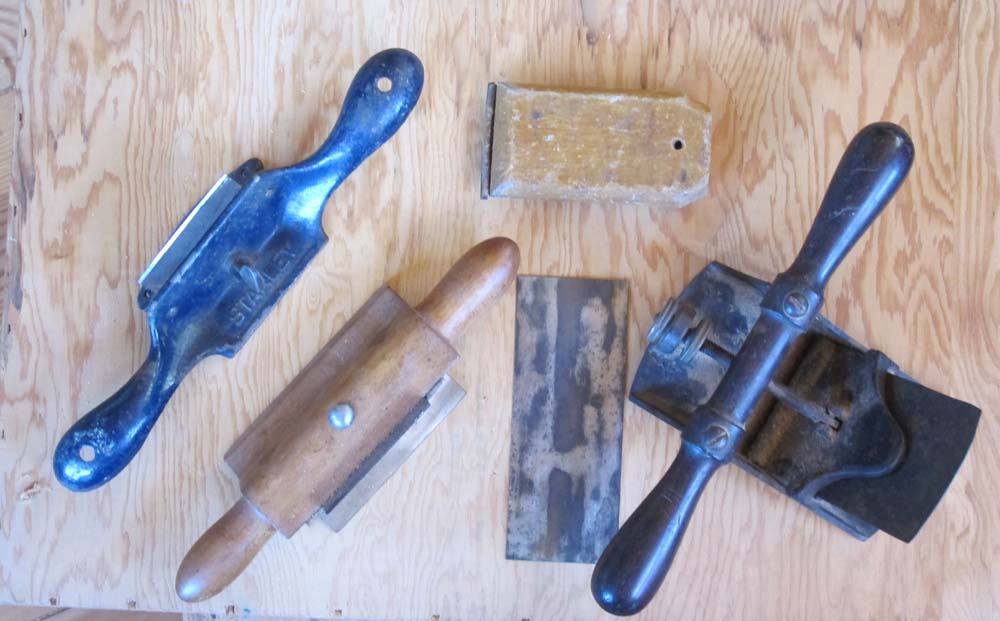
One of the beauties of parquetry, aside from its, well, beauty, is that it is a decidedly simple process requiring only a few tools to get started.
When we gather for the workshop at The Barn in less than a fortnight each student will need only a few tools, none of them exotic or impossible to find or purchase or even make.
These are not presented in any order of importance.
1. Small back saw
The first tool needed is a small dovetail-type saw, used to cut the already fashioned veneer strips into equilateral parallelograms. Almost any kind of small back saw that cuts cleanly will do.
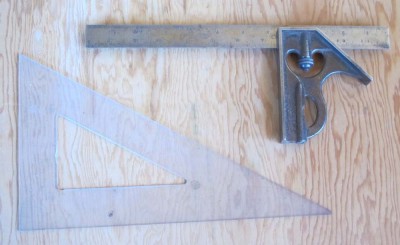
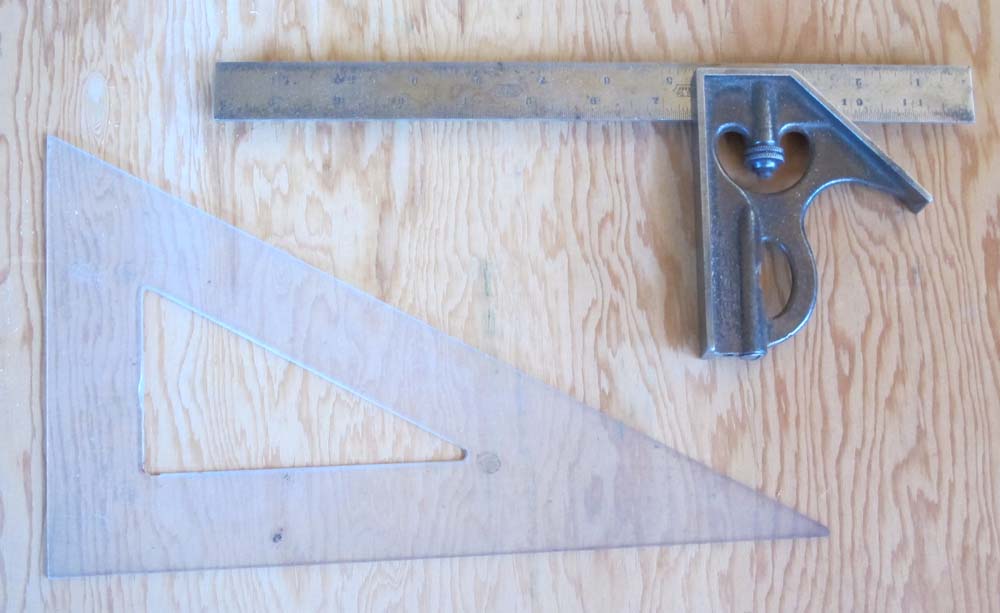
2. 30-60-90 triangle
Since this type of parquetry is based on the 60-120 degree equilateral parallelogram, a 30-60-90 triangle is required. A decent quality plastic one from the big box store works just fine. Or you could do what I do and just pick them up at yards sales for a quarter apiece. That does sorta explain why I have a whole drawer full of them…
3. Bevel Gauge
To both prepare the sawing jig and the layout of the veneer panel, a bevel gauge is needed. In the preparation of the sawing guide it is the fence against which you ride the back saw for establishing the initial kerf. As long as the blade of the gauge is straight and the locking nut locks, you are good to go.
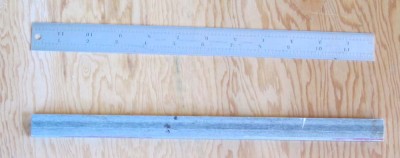
4. Straightedge/ruler
In order to assemble the parquetry pattern properly you have to establish the greater and lesser axes so you know how to assemble the pieces on the kraft paper backing. The straight edge makes this an easy task, especially if it is a ruled bar used in concert with the aforementioned triangle.
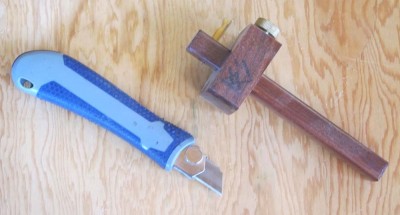
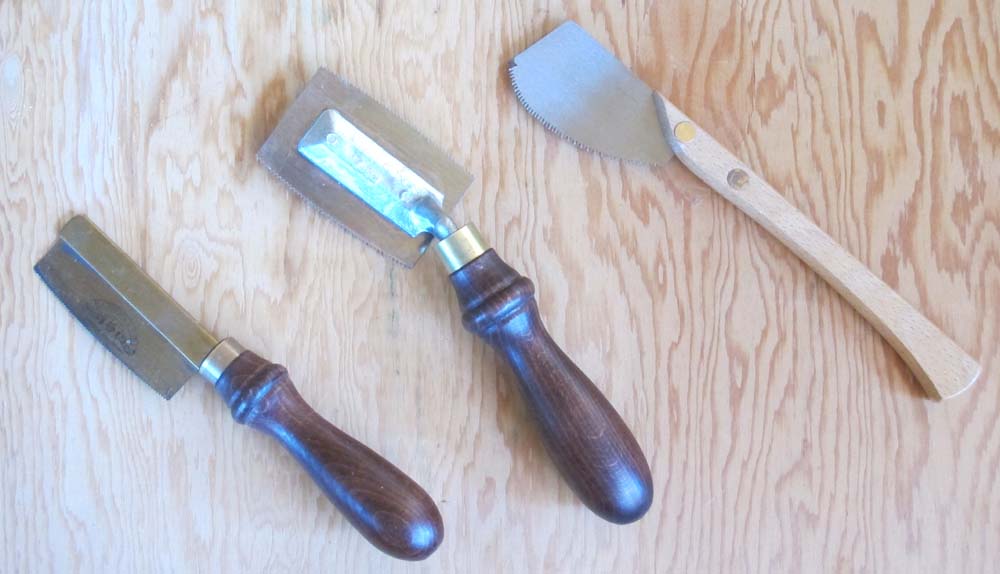
5. Utility knife
Many times in the course of a project you need to cut or trim something, so some sort of utility knife is called for. Equally applicable would be a straight ship carving knife.
6. Cutting gauge
If you are including banded inlay into your composition, a cutting gauge (pictured next to the blue utility knife) is useful for establishing the edges of the channels into which the banding will be glued.
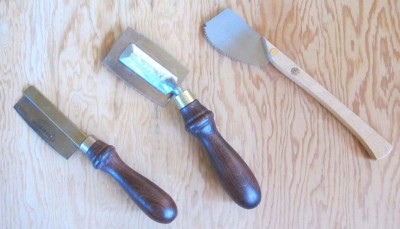
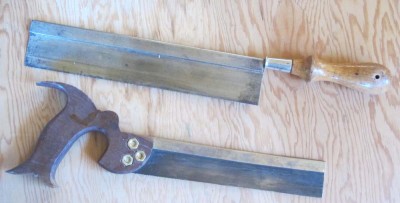
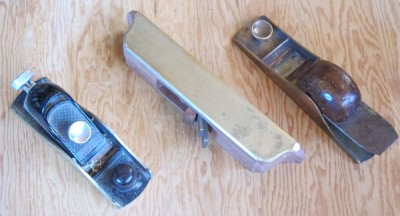
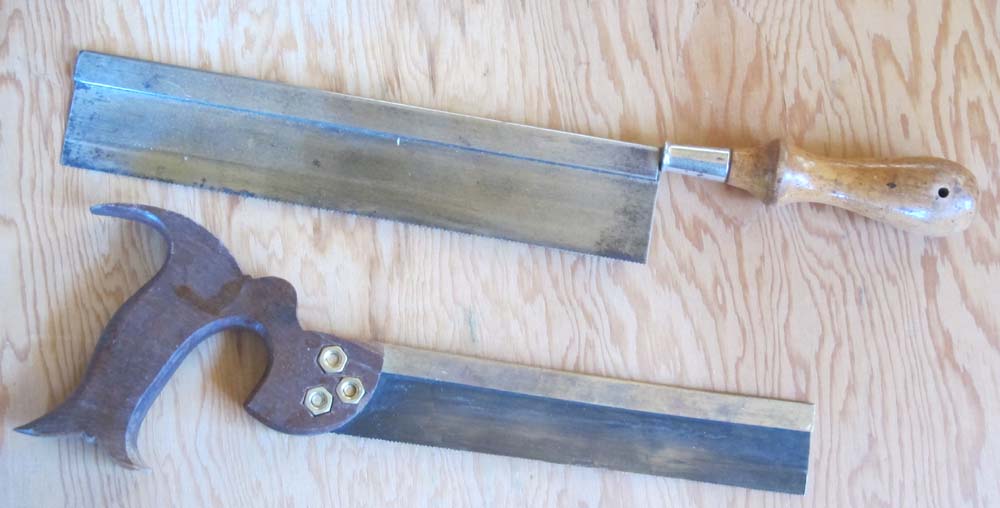
7. Veneer saw
For finishing the edges edges of the marquetry panel, or establishing the channels for the banded inlay, and marquetry saw is a godsend. I show three different iterations; on the left is an “English” style, the center one is I believe of German heritage — both of these saws cut on both the push and pull stroke — and the one on the right is Japanese, hence cuts only on the pull stroke. I have tried but do not yet own the new design from Gramercy Tools, but it is superb. Since much of my future work will be parquetry, I will order one.
8. Small bench chisel
To clean out the channels for the banded inlay.

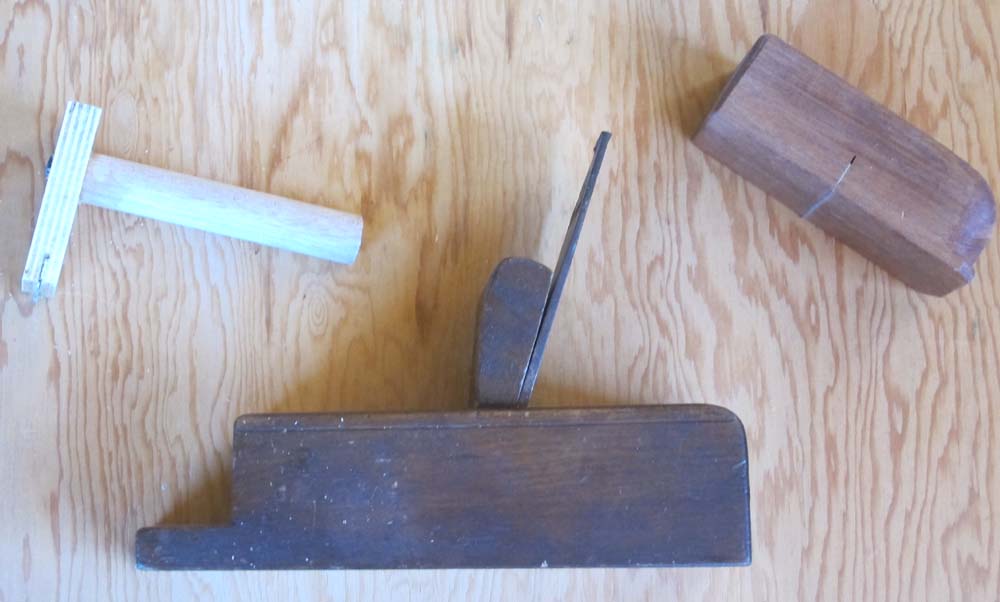
9. Toothing plane or analogue
When the parquetry panel is assembled and applied to the substrate, it will be neither flat nor smooth. A toothing plane will accomplish the former. I have about ten, but if you don’t have one you can make either a low-tech block toother or a squeegee-style toother, both of which employ hack saw blades.
10. Block plane or similar
Often the parallelogram lozenges need just a touch along an edge to make it fit perfectly, and the sharp block plane is just the tool. Later on, you will need the block plane to follow the toother in the finishing.

11. Scraper
The final step of smoothing is done with a scraper. Whether you use a card scraper or a block scraper is immaterial, all that counts is that it be cutting nicely and leaves a perfect surface.
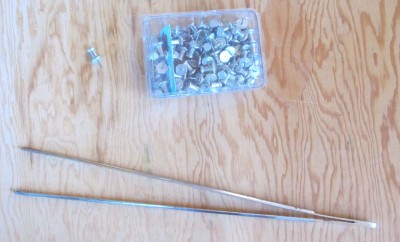
12. Miscellaneous tools
I always like to have a pair of tweezers laying in the vicinity, and a bunch of metal-headed thumb pins, to tack down the banding while the glue set.
That’s pretty much all you need tool-wise to get started. Next time I’ll talk about making and using the sawing and planing jigs.
===================================
If spending a weekend in Virginia’s Little Switzerland making a parquetry panel sounds like fun, drop me a line and sign up for the class. It is a week from Friday-Sunday.
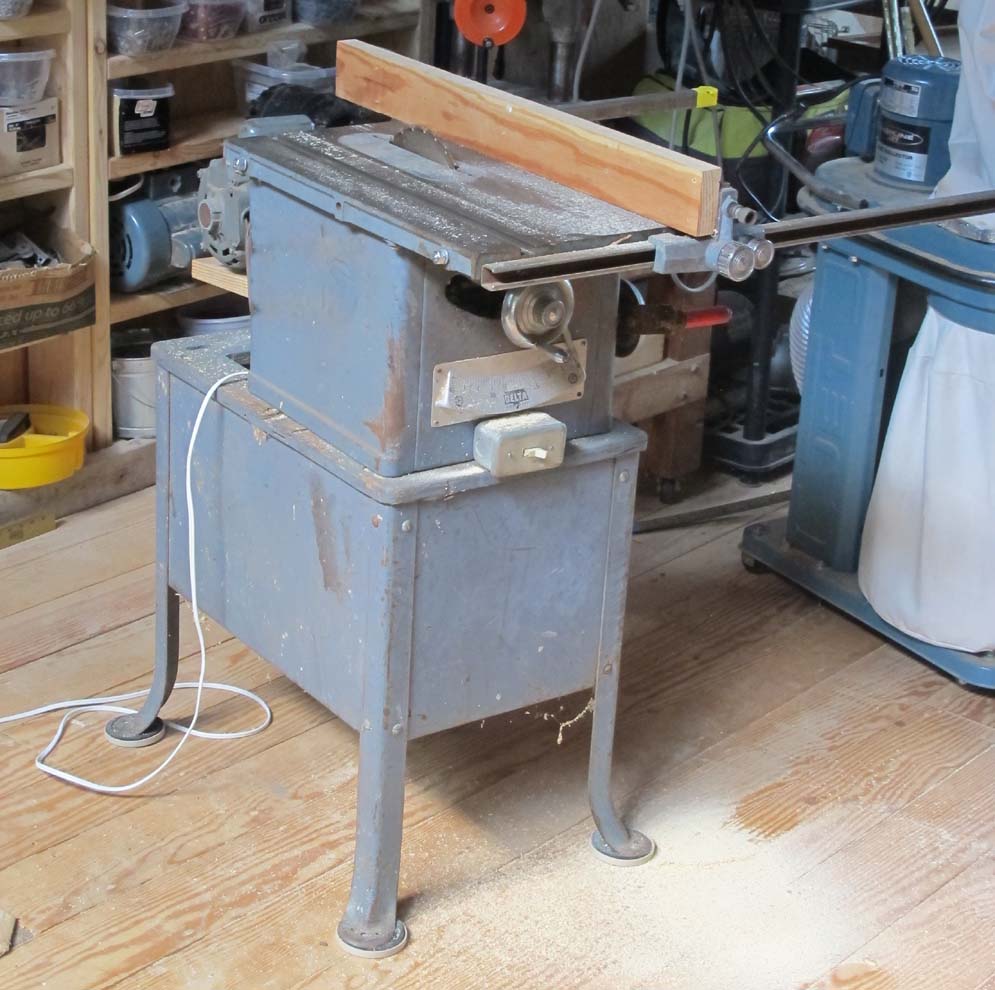
When I began the reconstruction of the Barn I bought a 10-inch contractor’s table saw on Craigslist to use on site, as I did not want then to haul my Jet Unisaw out to work in a pretty wide-open environment. The contractor’s saw was never anything better than a pile of pelosi, but it got me through the worst of the project.
Now that the outfitting of the interior is drawing to a close, and the Unisaw is ensconced in the basement (admittedly sans 220v electrical circuit and outlet right now, but I could wire it up in an hour or so) it was time to put the pile o’junk saw out to pasture and reconsider what saw I wanted upstairs in my main working area. Since I mostly use it for making templates and jigs and other light work, something a lot smaller would suffice.

My friend Tony gave me a motor-less Rockwell combination platform with a 4-inch jointer and a 9-inch table saw on the same base, with a brand new thin kerf blade. I did not need the jointer at this time, so I took it off and remounted the table saw. It had the makings of a fine little machine, everything seemed smooth and tight. It needed a motor and a motor yoke, so I dug out the former (3/4 horse) from my stash of motors and fabricated the latter from a southern yellow pine board and a long bolt.
All hooked up it worked well. My final dilemma had to do with the mobility of the machine. I am not one of these guys who wants the table saw plopped in the middle of the work space. I want to roll it out to use, then put it back when done. The problem is that casters make the thing unsteady and frankly dangerous unless they are high quality -and pretty expensive – double locking locking casters that lock both the wheel rotation and swivel.

While at the hardware store I found the perfect solution for less than 10 dollars. These plastic sliders for underneath sofas are fabulous. In addition to allowing the saw to be pulled out and put away easily on the SYP floor, they are not so slick as to let the saw to slide across the floor as I am using it.
One unexpected benefit is that the sliders have padded tops, so in fact this reduces any vibration and makes the whole setup steady as a rock.
I am not convinced that this is the ultimate resolution, especially with the ridiculous 24″ outrigger bars for the fence. I might just cut those off at 16″ or 14″ and see how I like them.
I have two more options at my disposal. Down in the basement of the barn is a sweet 8-inch Craftsman bench-top table saw almost identical to the one I grew up with, also smooth and tight, and back in my Maryland shed I still have my wonderful 9-inch tilting top Rockwell saw that I absolutely love.
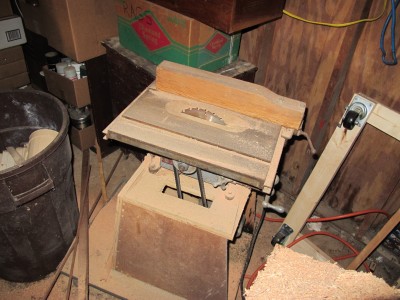
For now I will try this set-up for a good while to see if it fits my needs. It saws effortlessly and true, needing only an outfeed crossbar which I will add soon. If not, I will swap it out for the next option.
Stay tuned
It was more than a week into Spring, and being this Spring the sun rose to reveal an inch of icy snow coating everything the morning we were to visit the incomparable Conner Prairie historic complex, one of the nation’s premier enterprises of historic reenacting and interpretation. Once the slop was scraped from my truck we were on our way; one advantage was that the bitter cold kept the crowd small and we had the place nearly to ourselves.
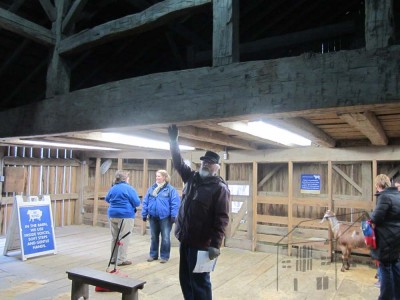
One of the highlights was the timber frame barn in the Conner homestead. The main cross-beam is a gargantuan oak timber more than 12” x 24” x 40 feet long (the historic carpenters there figure the tree trunk was more than eight feet in girth) and the longitudinal mid-rafter beam was an 8×8 perhaps 70 feet long.
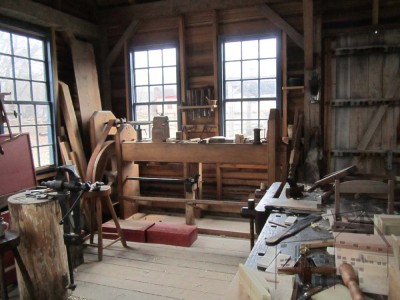
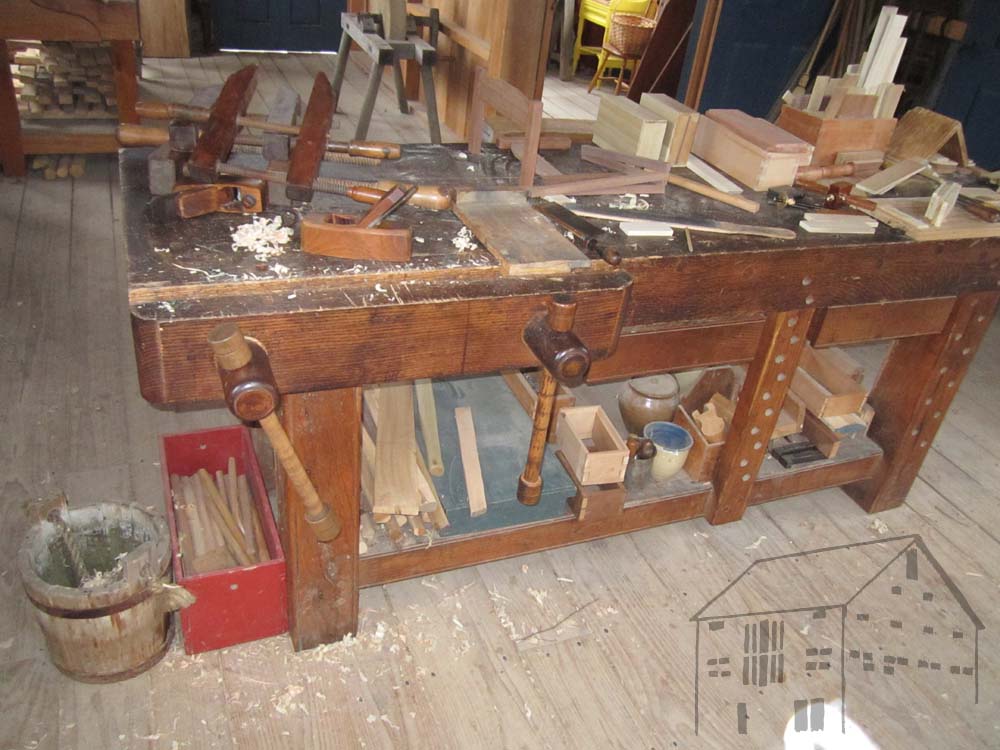
I especially enjoyed our time in the carpenter’s shop, where my wife and I were the only visitors. This allowed for a lengthy conversation with the proprietor about tools, wood, and their lathe. He showed it to me and allowed me a turn.
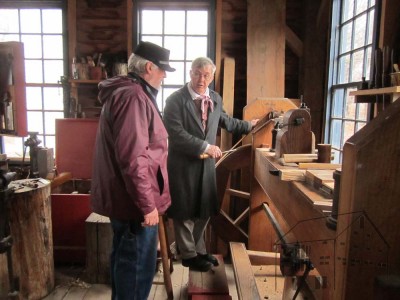
It is a magnificent shop-built machine with a 300-pound flywheel that can get away from you fast! Since I am a head taller than “Mr. McLure” it was very awkward for me, but I could see one of these fitting into the fabric of The Barn.
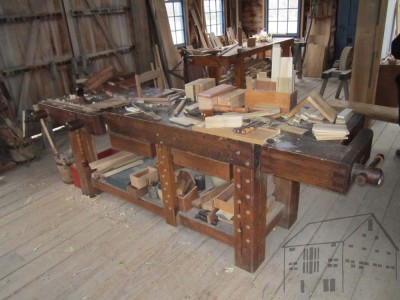

In the center of the one end was the impressive work bench, which had been built in the shop in years past. A copy of no specific documented model, it is instead a combination from a historically accurate vocabulary.
It seems to be about two parts Roubo with one part of Moxon and a dash of Nicholson. The six-inch-square oak legs are capped by a four-inch slab top, and the fixed deadman is stout as well. There is no real woodworker in America who would not be delighted to have this beast in their workspace. I know I would.
If you are going near the Indianapolis area, take a peek.
I have never suffered much from the pangs of “buyer’s remorse.” Perhaps it is a result of me being such a studious financial choice-maker, but the truth is that my spending interests are fairly narrow, relieving me from a lot of this risk. There are simply a lot of areas of contemporary life where I make no outlay. No tobacco. Virtually no alcohol. I do not tend towards gastronomic excesses (other than bitter chocolate). Fashion? Right; since I have a lumberjack’s store and a shoe store bookmarked, I spend almost sixty seconds a year buying my wardrobe, and then get only what I want. Luxury goods? Pshaw. Indulgent vacations to exotic places? To me this sounds like something akin to Dante’s Seventh Circle of Hell.
The two areas where I do often purchase extravagantly are books and tools. Addiction therein is too strong a word, probably. Since books always contain useful information, even if they do not possess the snippet I was searching for I recognize their ability to contribute to my breadth and depth of knowledge. Tools? Since they have the inherent character to increase my skills and capacity for production, I have never regretted buying a tool, even if it is surpassed by a tool more capable than the previous one.
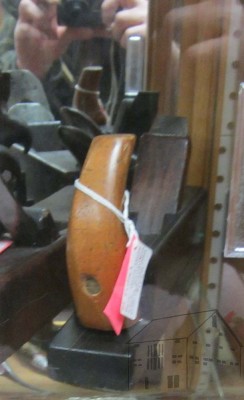
Which brings me to the item of this post – a beautiful ebony and boxwood scrub plane I did NOT buy recently. You see, I am more inclined towards “Didn’t Buy It” remorse.
That miniature set of playing cards made from engraved ivory, housed in a carved tortoiseshell box.
The 5 1/2 acres next door.
That ’64 Chevelle SS, all original with 30,000 honest-to-goodness little-old-lady miles.
This ebony plane might be close to that camp. On our way from Kansas City en route to, eventually, Cincinnati recently we stopped at an isolated antique mall, and there it was. A classic horned scrub plane, identical in form to my beech model resting on the shelf. Only this one had a body of a SOLID BLOCK OF GABOON EBONY, with the horn of carved boxwood. At $120 the price was more than fair. But the fact is I did not NEED it, so I passed it by. (But I did buy a NOS Stevie Ray Vaughan-style felt Stetson for $35 in the original box, which I gave back to the antique mall as space was too tight in the truck.)
Over time this ebony plane may take its place alongside the ivory and tortoiseshell playing card ensemble, the ’64 Chevelle, the acreage next door. But in the end I decided that the one I had was perfectly serviceable, and got back into the truck and hit the road.
No, I will not tell you where it was just in case I change my mind.
Last week I finished the photography for my next article in Popular Woodworking, about “The Butterfly” an innovative sawhorse-type accessory I invented for the workshop or even around the house. I think it will be in the June issue, but don’t hold me to that.
Thus far I have worked with Glen Huey at PW, but he is moving (organizationally) over to American Woodworker. I will miss working with Glen, but the way I look at it his arrival over at AW simply provides me another outlet for woodworking verbiage. I’ve already started pitching article ideas to him, including one about the Ultimate Portable Workbench I invented, and would like to build another one for the article. We’ll see if he bites on it. If not I will chronicle it here.
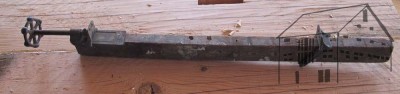
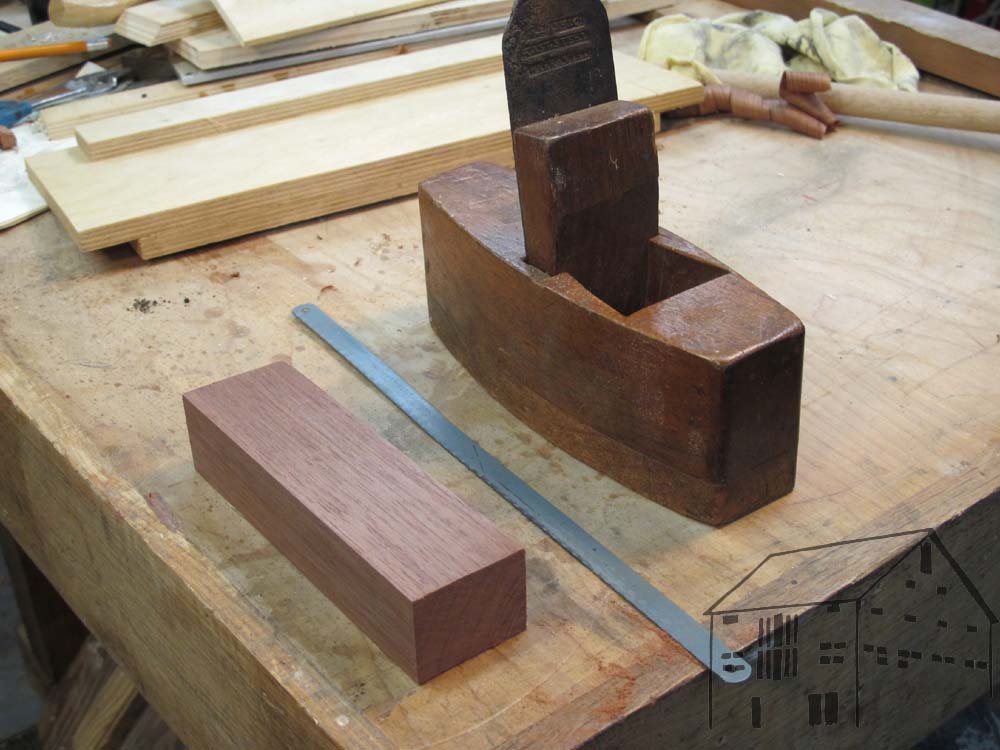
While prepping for my upcoming visit to the Kansas City Woodworking Guild to teach a class based on Roubo’s Plate 286 I was casting about for my inventory of toothing planes. I can find three of them, but the other half-dozen are MIA. If you happen to know where I put them, please let me know.
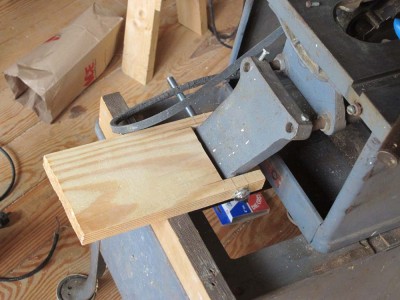
In lieu of finding my remaining stash of planes I revived an old homemade tool idea from the mists of the distant past. A word of caution: this will take almost five full minutes to make it with a cost of zero, so don’t say didn’t warn you. You will need 1) a block of scrap wood, 2) a hacksaw blade, and 3) a pair of metal shears.
Step 1 – Find a block of scrap wood. Cut it to about 6 inches long.
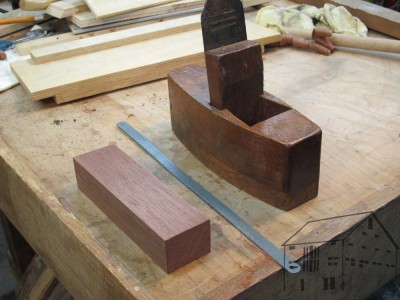
Step 2 – Find a hacksaw blade, and cut off a piece equal to the width of the block.
Step 3 – at abut the center of the block, on the side of the block mark the depth of the blade body to the base of the teeth.
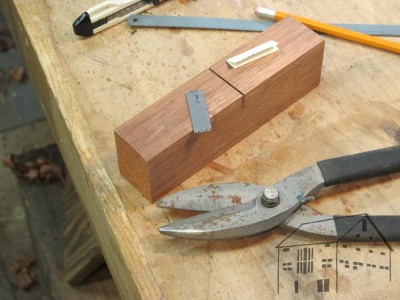
Step 4 – Using a saw (in my case I used my band saw) cut a kerf to the depth you marked in Step 3.
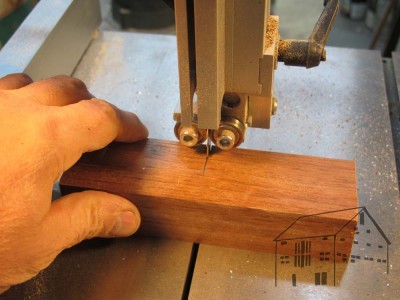
Step 5 – Ram it home. if necessary add a small shim of paper to the kerf to make sure the blade fits tightly. Adjust the blade so that the teeth tips are exposed about 1/16″.
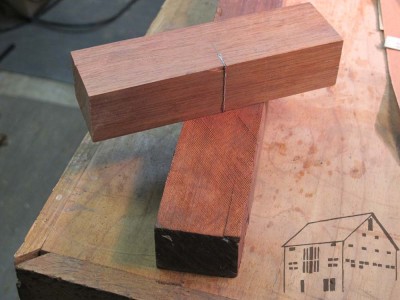
You now have an inelegant but functional toothing plane, a necessary tool for dealing with sawn veneer marquetry.
Step 6 – I will cover this in Part 2.
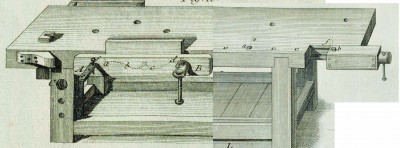
The recent convergence of editing the section of Roubo attendant to Plate 18 combined with assembling additional doors for the book cabinets of the library made me reflect on the nature of the humble pipe clamp, particularly in the ability to make pipe clamps any length necessary for the particular task at hand.
As part o the descriptive text for Plate 18 Roubo waxes enthusiastically about both bar clamps and the devices he calls “clamp extenders” to allow any particular clamp to have its capacity increased.
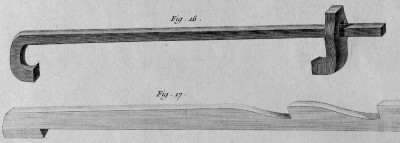
Here is the device Roubo illustrated for this purpose.
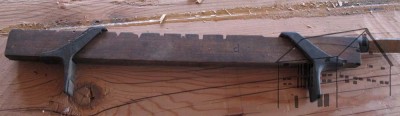
Such a concept is not unknown to modern woodworkers especially in the use or even the fabrication of bar clamps with wooden bars, which could be made to nearly any length.
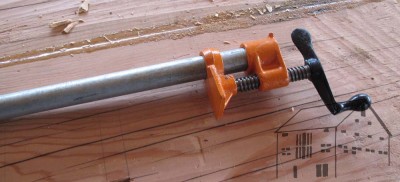
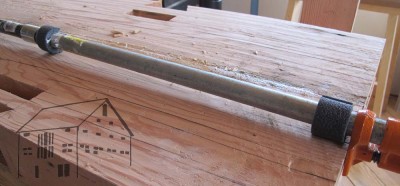
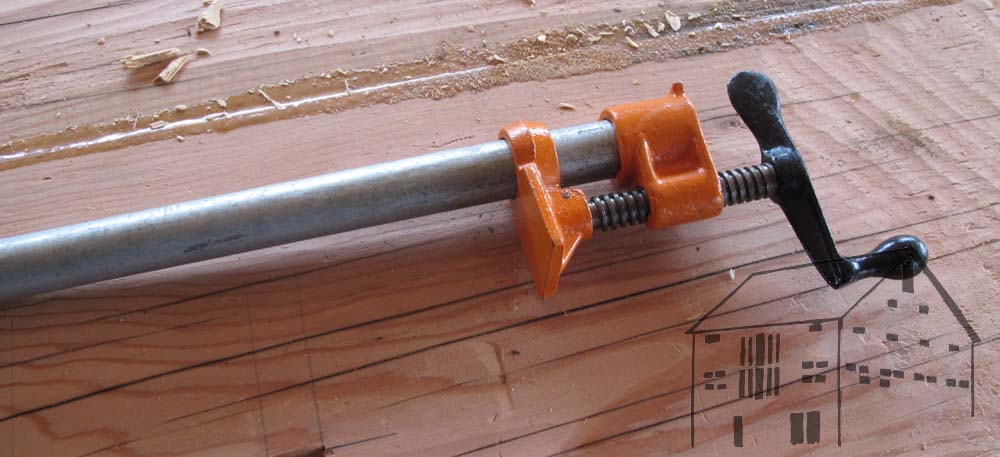
This brings me to the pipe clamp. Like almost every woodworker and handyman in the Western world I have pipe clamps, even several of them. Since my strategy for clamp acquisition revolves around the number “4” (the number of clamps needed for a pair in both x and y axes) I have in my collection of clamps 16 of the pipe variety. For interchangeability all of my clamps are for ½” n.p.t pipes, common enough from the local hardware store.
The down side is that for longer applications, ever longer pipes are needed. And, have you priced threaded pipe lately? Holy cow.
Being a cheapskate who really enjoys finding solutions to problems, while visiting my favorite hardware store and balking at the prospect of spending $50 for four 5-foot sections of threaded black pipe, I instead spent some time browsing the aisles of the hardware store, one of my all-time favorite activities. (every year I spend literally dozens of seconds shopping for clothes, but I can spend practically an entire day examining products at a good hardware store).

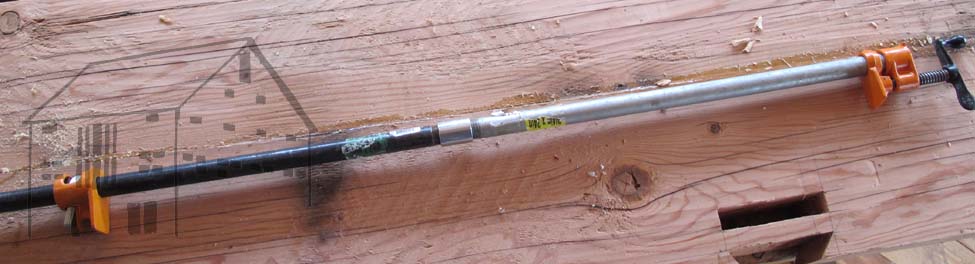
There in the shelf in the plumbing section was the 79-cent solution to the problem – a double female-thread pipe coupling. I grabbed a handful and headed home. Sure enough, they filled the bill. Perfectly. For less than a buck I could take two pieces of pipe, one 24″ and the other 36″, with a 5-foot clamp as the result.
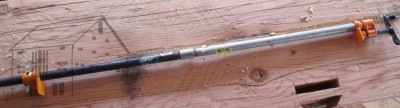
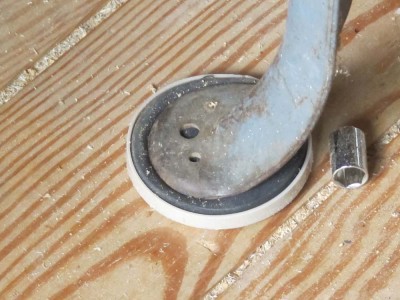
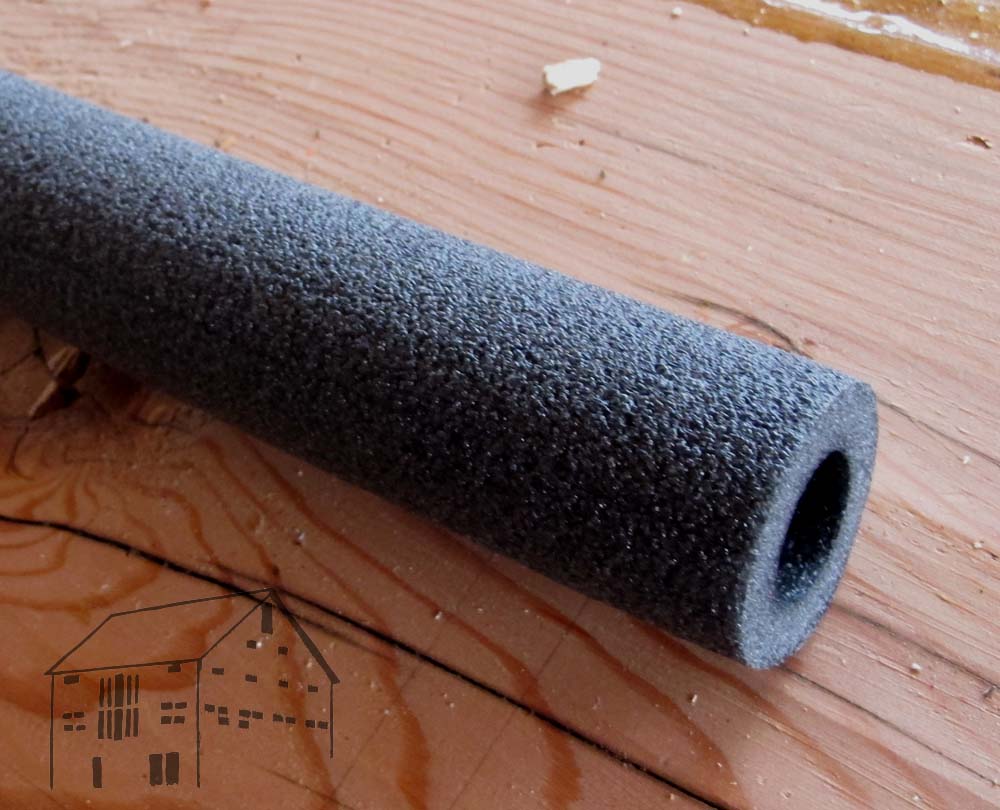
As an additional enhancement for the new, longer vise configuration, I grabbed a scrap of pipe insulation and cut rings to place on the pipe and provide protection to the wood surface from the abrasions of the coupling fitting.

I’d like to think that had they been widely available at the time, we would see elegant engravings of pipe clamps in L’Art du Menuisier.
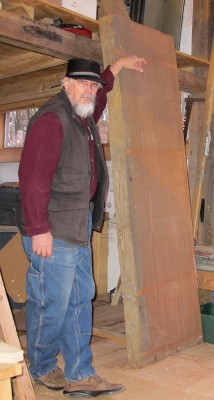
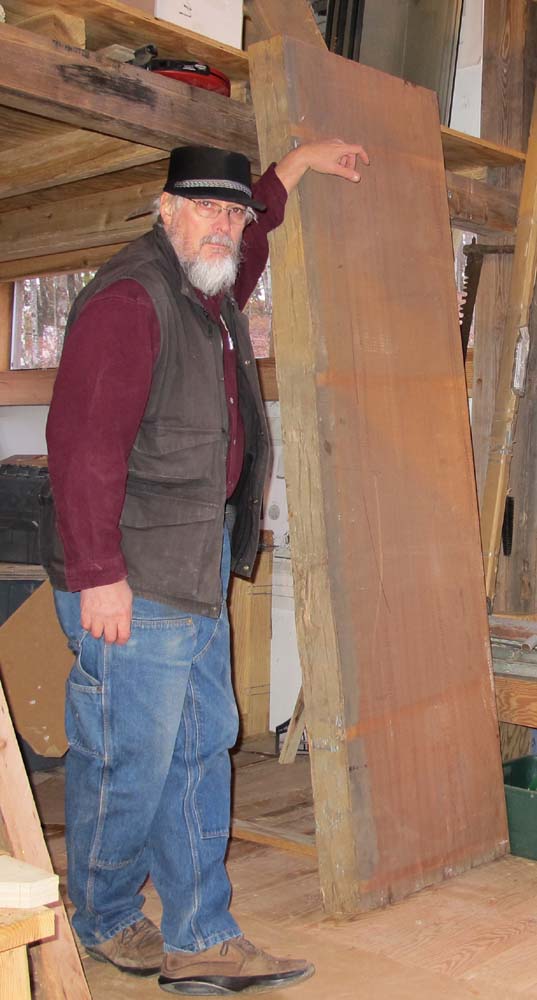
Several months ago when Chris Schwarz blogged about the closing of Midwest Woodworking , a local institution for more than a century, I immediately contacted him about the possibility of obtaining a slab of mahogany so that I could build the Studley-style workbench that I am pretty much morally obliged to make, especially given my acquisition over the summer of a workbench with a pair of wheel-vises (more about that in the coming days).
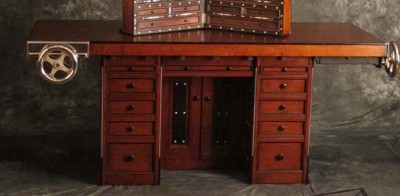
Much to my delight he was able to obtain such a slab o’ wood, albeit in a 14+-foot length that we have split with each one getting a 7+-foot long by 4″ x almost 24″ wide hunk of lumber. Of course, since the time of placing my order those many months ago I have learned through careful examination that Studley did not build his bench from a slab, but rather through stacked laminations with exquisite Cuban mahogany faces.
Since I am metaphysically obliged to follow his footsteps, I now have a massive hunk of wood without a defined destination.
So, I have this massive slab, and some vintage 6″x6″ black walnut, I’ve been thinking about another Roubo bench, using sipo (the mahogany analog) for the top,and black walnut for the legs and stretchers, with an ebonized crozet and planing stop, and a couple of Peter Ross holdfasts. It would be the only one like it in the neighborhood…
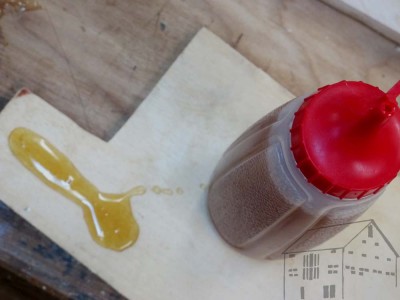
Hot animal hide glue is my standard adhesive in the shop mostly because it is what I used most often in my furniture restoration projects over the past forty years. I find that I use it even much of the time when I am making jigs or other non-conservation projects around the shop.
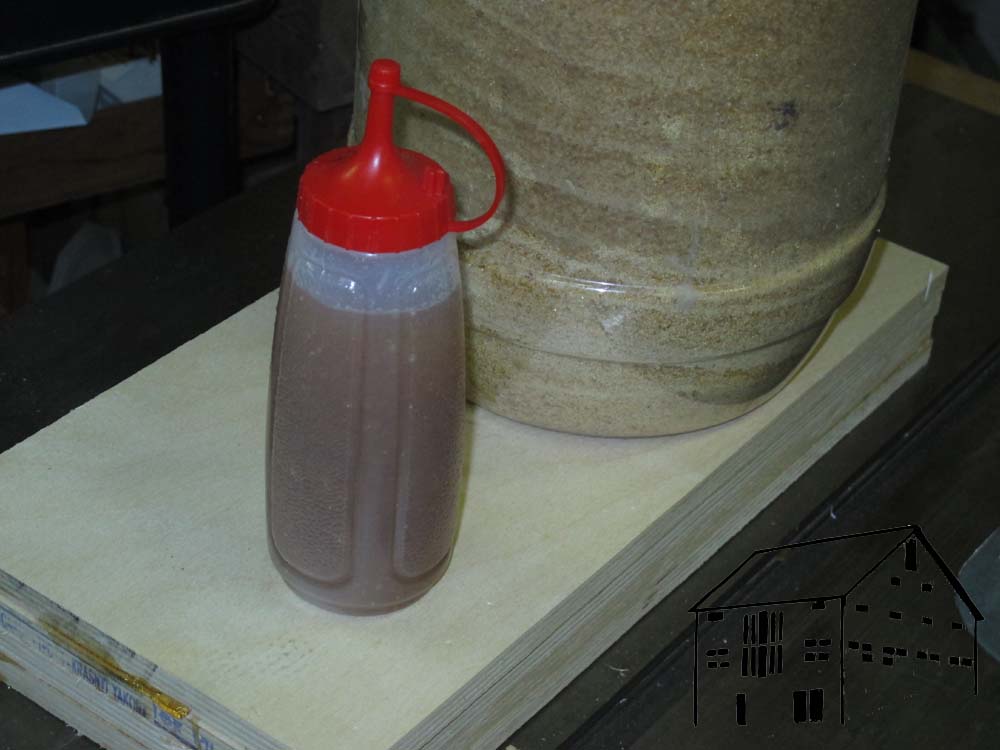
I used to find it a nuisance at these times, mostly because I didn’t want to be bothered with another brush, or wait until the pot heated up, or whatever excuse I came up with. I have come up with a routine that allows me to effortlessly employ hot hide glue for almost anything. The secrets are a ketchup bottle, a microwave set on “Defrost,” and a potpourri crock finally being used for something useful instead of spewing stink into the air.
I generally use 192 gram strength glue around the shop, and here is how I prepare and use it.
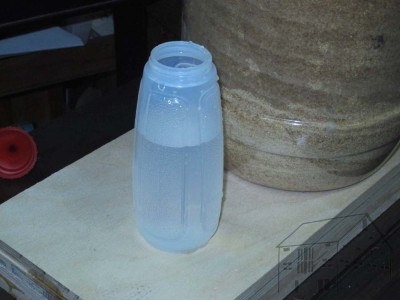
Taking my hardware-store ketchup dispenser I fill it up about 2/3 with cold water. (Cold water makes the glue granules hydrate more quickly.)

Then I add dry glue granules until the dispenser is full to the top with water, and let it sit for a while. Depending on the water temperature and my needs, this can take anywhere from an hour to overnight.
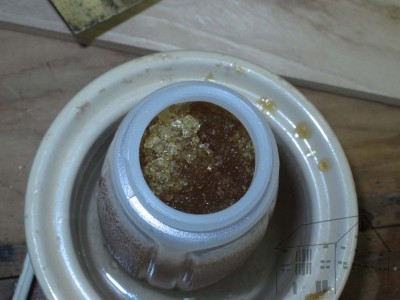
Once it is swelled it looks like this, and I either pop it in the microwave for 2-3 minutes at the Defrost setting if I am in a hurry, or into the potpourri crock if I am not. While in use I simply keep it sitting in the little crock.
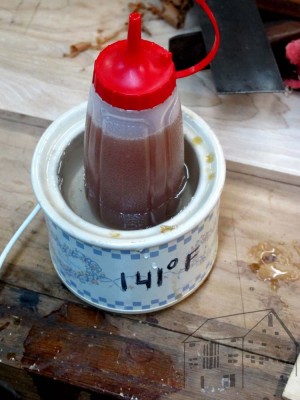
The beauty of the ketchup dispenser is it makes using hot hide glue as easy as using white glue or cold liquid glue. Sometimes if I am concerned about the glue gelling too fast I will toss in a pinch or two of canning salt to suppress the gelling, but most of the time for routine shop stuff I just use it the way it is. Otherwise the mass of the molten glue in the dispenser allows me to keep using it for several minutes even after removing it from the heat source, unless the shop is really cold.
One of the things I especially like about this gluing method is it makes creating parquetry panels so much easier since I can just dab the back of the lozenge with a bit of glue before setting it down on the kraft paper backing. No fuss, but especially no muss.
There is certainly no reason I can think of to prevent you from using an empty white glue bottle for the same purpose, but be careful to keep the nozzle clean or the whole thing comes to a screeching halt.
I’ll write about that more some time soon.


Recent Comments