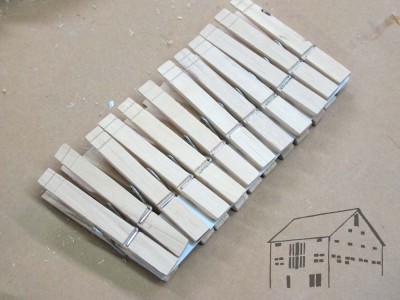
Since a lot of my work involves restoring and conserving historic wooden artifacts, I am often faced with odd clamping situations. One tool I find invaluable in these pursuits is the humble clothespin. Inexpensive, fairly light clamping force, and almost infinite reconfiguring possibilities, I keep scores of these on hand in the shop.
When I open a new pack of clothespins, and I recommend getting the large higher quality ones from the hardware store rather than cheesy ones from WalMart or similar, the first thing I do is to cut bevels on the ends, removing the useless and interfering tips. A quick set-up on the band saw accomplishes this in just a couple minutes. These trimmed clothes pins are now part of the clamping stock.
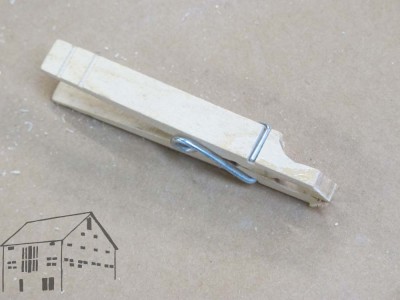
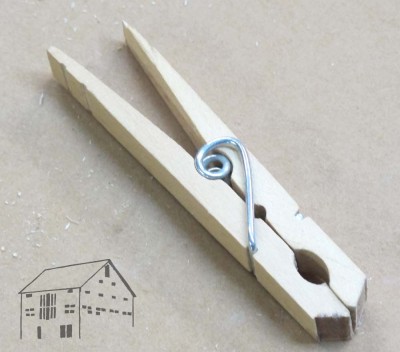
When the task requires it, I shape the remaining clothespin tips to whatever form I need. At about 10-cents apiece I do not fuss about their consumption or destruction.
One enterprise I have been following is this fellow’s project to manufacture high-performance clothes pins. I can’t wait to see them when they become reality. I’m ordering two sets.
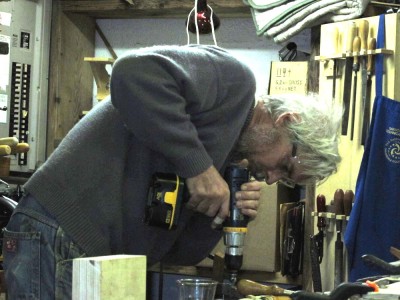
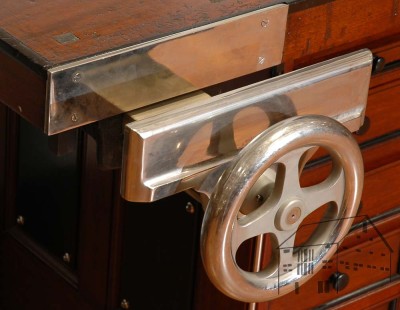
Since returning from my last trip to WIA and the Studley photoshoot I have been spending a lot of time this week completing the photography for an upcoming Popular Woodworking article , in the February issue I think. The article describes my design and construction for the bolt-to-the-front-of-the-bench wheel-handle tail vise I added to my workbench, with enough information so that you can make your own for whatever needs you might have. If you have a table saw and drill press and can order materials on-line, it is a piece of cake.
I needed to make this vise because my existing workbench for the past 30 years could not accommodate a Benchcrafted vise, and I wrote the article because I am surely not the only person who’s bench has the same or similar limiting characteristics.
I’ll be bringing it to next Saturday’s SAPFM Virginia Chapter meeting in Winchester VA for the show-and-tell session before main speaker George Walker‘s presentation.
The crew at PopWood are all woodworkers and a real pleasure to work with. If you have any ideas for an article, just drop a line to Megan, Glen (with whom I am working on this one), Bob, or Chuck. They genuinely enjoy helping you make the idea into an article. Really, let them know
Stay tuned.
Among the multitude of things that I am and things that I am not, two come clearly to mind in this initial recap of my recent foray into Cincinnati/Covington for Woodworking in America.

One thing I am not is a calligrapher, by that I mean someone whose handwriting is legible to anyone but me. Mine may be to penmanship what Jackson “Jack the Dripper” Pollack is to real painting. On the flip side of that truth is the added reality that I am someone who actually crafts a lot of my words with pen and pencil on a piece of paper. I would be pleased if my handwriting were elegant, but not enough to actually practice and accomplish it.
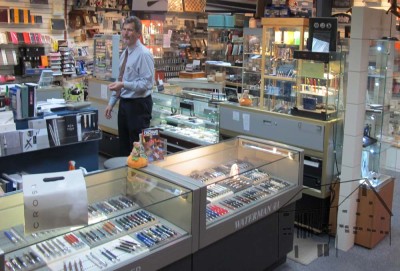
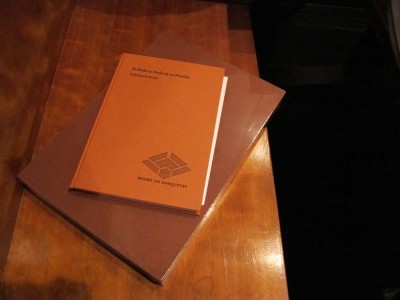
At WIA since I was going to be signing something approaching a literal ton of To Make As Perfectly As Possible books I wanted to make sure I was using a permanent archival pen for the occasion. A quick ask-about revealed the presence of a stationary and pen store called Appointments just over the river in Cincinnati, and I headed across the Ohio River on the Robeling bridge, itself a delightful stroll on a sunny afternoon.

It was at Appointments that I met Douglas Kennedy, a tool geek of the first order. His tools are writing implements. To say that he was interested in writing tools would be like saying I am interested in shellac. While his store did not have the specific tool I was seeking – that was later found at an art and drafting supply store nearby – I nevertheless spent a half hour with Mr. Kennedy looking at and test driving a number of truly wondrous writing tools. It turned out that he had a lot of tools I wanted, and did in fact leave with a couple including a Cross Tech3+ “triple,” a pen body that includes a black stylus for writing, a red stylus for editing, and a 0.5 mm mechanical pencil. In fact, recognizing that I was looking for excellent tools rather than expensive tools he catered to my interests completely. As we parted company I could only think “here was a craftsman fully engaged in the use of fine tools.”
If you are in the Cincinnati area and need counsel on fine writing tools, Douglas Kennedy is the man to see.
As I left Appointments on my way to the art store he told me about, I was walking along the sidewalk and came to the window behind which Gus Miller was crafting hats at the Batsakes Hats shop at Sixth and Main. I was hooked.
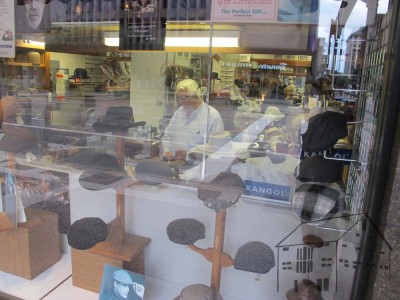
You see, a second thing I am not is a fashionista. On an annual basis I spend literally dozens of seconds purchasing attire, mostly at the local thrift store or on line – I know my body measurements, why should I have to try anything on? – but what I am is a hat guy. The vision of Gus Miller crafting hats and the stacks of inventory in the background compelled me to round the corner and go in. Sure enough, Mr. Miller and his lovely wife had just what I needed, even though I didn’t even know I needed it two minutes before I saw him.
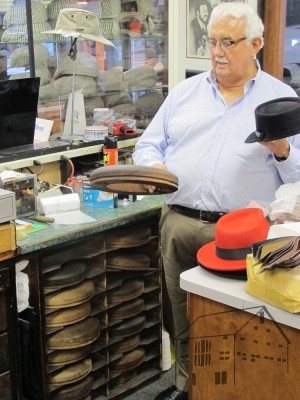
While in the store they showed me not only their inventory but the tools he uses with consummate skill. Another tool geek encountered, but again with a wholely disparate set of tools from my perspective, as he crafts, shapes, and modifies hats for his loyal customer, including this new loyal customer. (Yes, I know that the dictionary says the word is “wholly” but dictionaries are idiotic some times and I refuse to stop using the more rational “wholely” and some day it will lead to a death match conflict with an editor) I walked out the door with a really cool-looking Borsalino “flat” that looks like it was made with my head in mind. It is already my everyday hat. Given Lost Art Press’ proximity to Batsakes the odds are near 100% I will be visiting again.

That evening was the gathering of Roubo-istas at the book release party for To Make As Perfectly As Possible as scores of us crammed into an artisan’s pizza place Chris Schwarz knew about.
The fellowship there was almost overwhelmingly delightful as both Deluxe and Standard Editions were distributed to loyal and patient acquisitors, tool geeks all. I was much humbled by the enthusiastic support for our projects, but none more so than when folks like CraigF and TimH took the trouble to drive for hours to attend and congratulate us, even though they would not be attending the WIA conference.

My appreciation for that encouragement cannot be fully articulated in words, even with a really nice pen while wearing a cool hat.
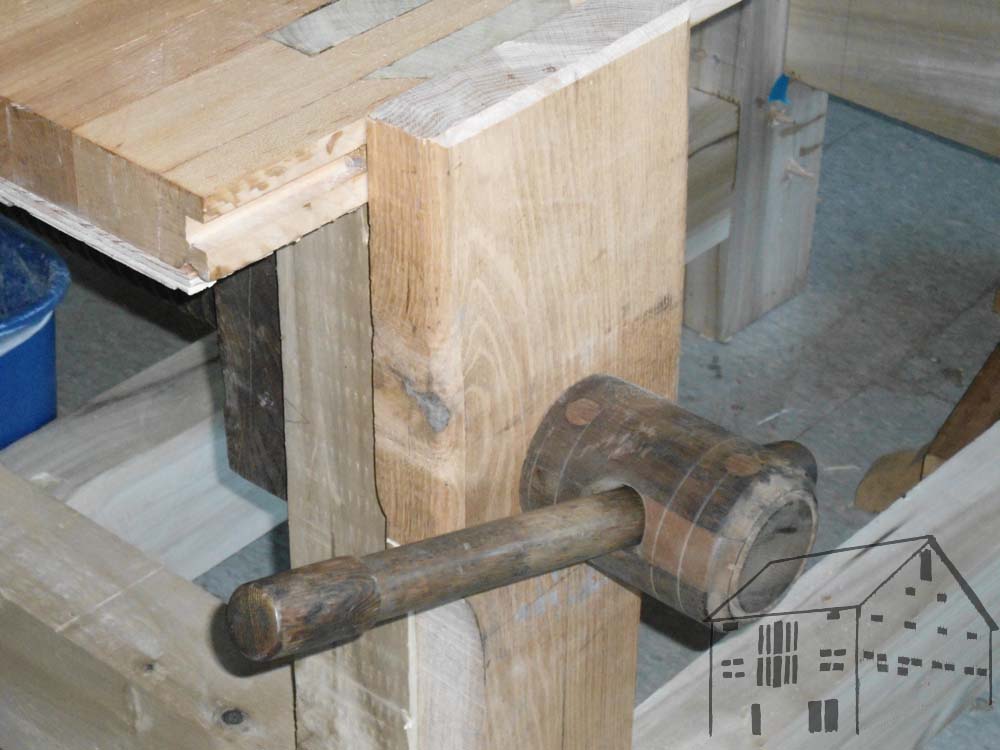
I would not say that I have a vise, um, fetish. I will admit that I have long been fascinated with vises, and own what some folks – for example a bride of 32 years, just thinking hypothetically here — would think is an over-adequate inventory of them. The seeds of her view might have been planted when we were first married and students at the University of Delaware, and I learned about Carpenter Machinery in downtown Philly having a huge stock of Emmert vises salvaged from the recently-closed pattern shop of the Philadelphia Navy Yard foundry. We were poor as church mice, but for one of only two times while in college I took money out of savings and headed to Carpenter’s. I still remember the look on her face when I climbed into a four-foot-cube industrial storage cage and came out with two almost-100-lb chunks of iron to put into the car trunk.

They were complete Emmert K-1s. I built a bench around one, a bench I use daily ever since. The second one remains in the bullpen, awaiting its call to duty some time this coming winter.

In the years since I obtained and even built a number of vises, some based on specific project needs, some on testing out a “what if” idea, some simply whimsical. Machinist vises. Machinist vises with integral anvils. Twin screw face vises (on the back side of my Emmert-bearing workbench, and pretty much a standard feature on many of the workbenches I have built since).

Shop-built end vises (to be featured in a Popular Woodworking article next spring).
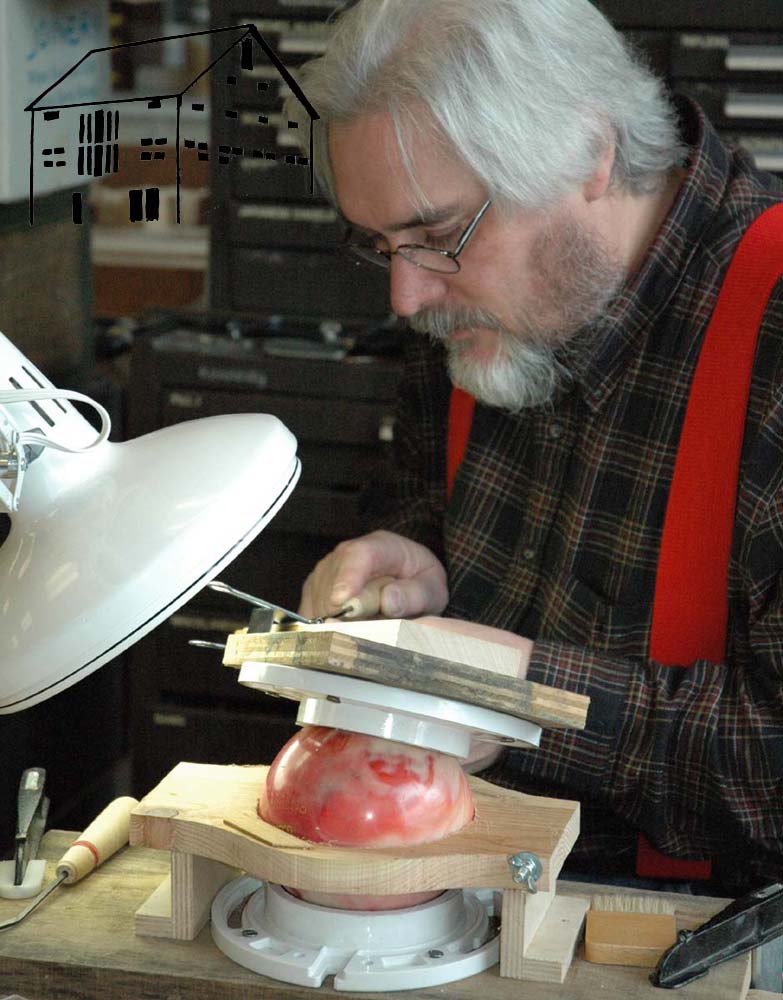
Rotating/tilting engraving tables/vises built with a duckpin bowling ball and two toilet flanges. Zyliss vises, of which I have four and find indispensable. Roubo leg vises. Saw sharpening vises.
The tale goes on.
Then three years ago, within days of each other, I had “in the flesh” introductions to both the H.O. Studley workbench with its nickel-plated piano-makers vises and the products of bench vise innovators Jameel and Father John Abraham. In the aftermath of those episodes what had been an abiding curiosity became something much more energized and focused.
Over the next year or so I will be combining the best features of all the piano-makers’ wheel-handle vises I have been able to examine thus far into a design and set of foundry patterns for making the ultimate vise of the form. Along the way I will let you peek over my shoulder as I travel down this path, hopefully one of fulfillment and not of merely enabling a compulsive addiction. In the end my goal is to have yet another new bench, this one an offspring from the splicng of toolism genes from Andre-Jacob Roubo and Henry O. Studley.
Now that will be something to see.
I hope there are no recessive gene issues…
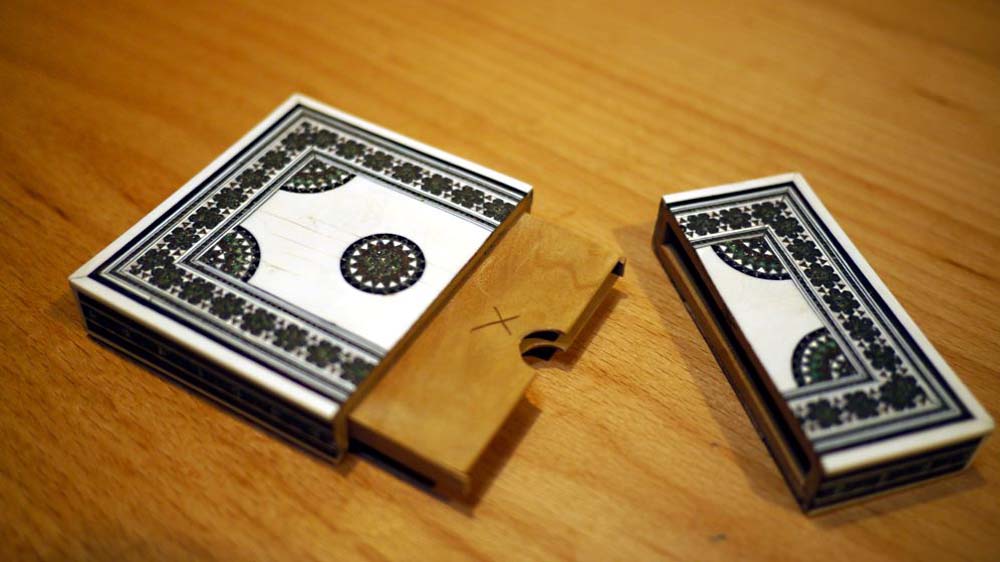
During my recent foray into Georgia for the French Oak Roubo Project I carried a special gift for Jameel Abraham. In great part due to his work with making ouds, a Middle Eastern stringed instrument vaguely like a lute, he has developed a passion for intricate tiny mosaic patterns. In the 19th century a similar art form know as sadeli grew in eastern Asia Minor and in the Anglo-Indian territories of the raj.
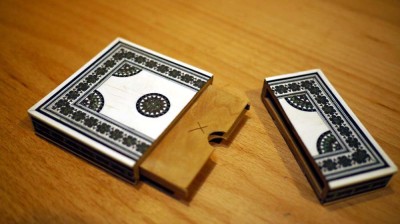
I have several pieces of sadeli, including an amazing lap desk of mosaic parquetry-and-ivory applied to a base of yellow sandalwood. I also had a beautiful little calling-card box of sadeli and ivory (the size appropriate for holding business cards), which I thought should convey to him for inspiration in his work. Not that he needs any; Jameel is perhaps the most inspired and inspiring artist I know.
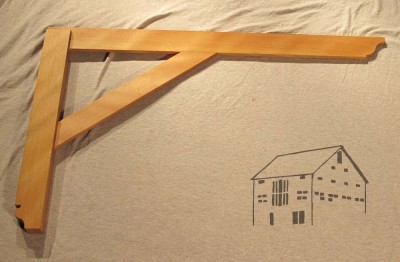
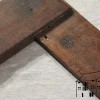
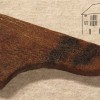
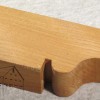
Anyhow, Jameel being Jameel, he was constitutionally unable to accept a gift without giving one in return, and this is what he bestowed on me – a hand made 24” Roubo styled square. It is an extraordinary addition to my tool kit, one that has already been effortlessly integrated in to my work. It is also a terrific companion to a simpler Cuban mahogany square I bought for next to nothing many years ago simply because it had a broken blade. You can still see the remnant of the damage of the blade just before it enters the beam. Fortunately the pieces fit together perfectly and I was able to reclaim it from the burn pile with almost no effort or time.
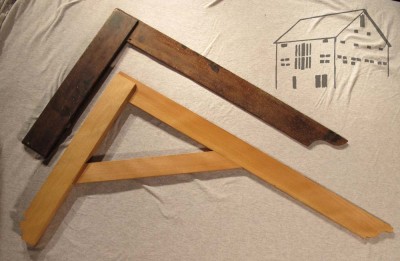
Both squares have magnificent, understated detailing, and are treasures in my tool set.
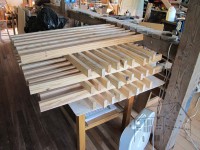
In reflecting back on my very productive recent days, laboring diligently to prepare The Barn to house our several tons of books, I have the nagging suspicion that I was the target of some subliminal mockery. I got some of the two dozen glazed doors cut and a few installed (and the stock for all of them ready to assemble). Still, just beyond earshot I thought I sensed, feeling more than hearing, a gentle guttural Gallic guffaw, cruelly chiding me with, “Roubo, Roubo, Roubo.”
Yes, only steps away from where I toiled from dawn to dusk were the ~600 pounds worth of components for The Bench, sitting patiently waiting for my attentive affections. The top is already bound to a triple block and tackle, as it is the only way I can maneuver it at all. Based on my rudimentary understanding of mechanics and some back-of-the-envelope calculations, the top itself weighs about 450 pounds (my fully-clothed weight of about 230 is just barely enough to levitate the unit, hence the top weighs a smidge less than twice that weight).
Unfortunately given my upcoming schedule it is unlikely that I will be able to focus my efforts on completing The Bench before early October. It is immensely gratifying and frustrating to receive the periodic emails from my fellow FORPXI congregants regaling the group with the tales of completing their shrine, er, workbench, from the recent gathering in Barnesville, Georgia.
My day will come. My only steps thus far are to prepare the space where it will reside. Directly in front of two banks of north-facing windows, it will be the centerpiece of my work for the next three or four decades.
With the exception of my Victorinox Spirit multi-tool, I’ve always had the impression, and mostly the experience, that devices designed for a multitude of functions end up not performing any of them well. To that end I generally avoid “combination machines” for woodworking, even though I have long owned a Mini-Max over-under jointer/planer. Truth be told it was way too big for my current workspace in the basement and has mostly served as a lumber rack for the past 15 years, but I look forward to rehabilitating it in the machine room in the first floor basement of the barn. The Mini-Max’s mortising attachment has never been attached to the best of my knowledge, and I will rectify that shortcoming shortly.
One combination tool that did make some sense to me is the jointer/planer offered by Hitachi, Makita, and others in which the cutterheads for both functions reside side-by-side on the same drive shaft. For much the same reason as the Mini-Max – I simply never had the space for one of the 8” x 12” units – I never looked into them closely. Then came the day some years ago when I went to a garage sale promising “Tools, tools, tools!”
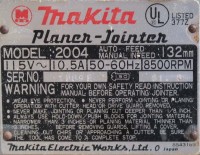
As I approached the garage I saw this petite little version of this machine, a model I have never seen and frankly was unaware existed, and at $100 it was almost my moral duty to purchase it. The capacity is for jointing and planing 4” wide stock and it can plane about 3 ½” thick, which limits the usefulness to very small projects. Or so I thought. It sat around mostly gathering dust out in my shed until I moved it out the The Barn a couple years ago, where it gathered more dust.
Flash forward to the present, when I need to crank out a couple dozen doors for The Barn Biblioteca. I had just returned from the Roubo bench fest in Georgia the night before, and I had this stack of rough-prepped stock to get over the finish line. The mondo oak slab for the bench top is smack dab in the center of the Great Hall of The Barn (I have to work on it in the only place where I had an overhead hoist), making maneuvering with my Ryobi or Dewalt planers problematic. I guess I could have planed everything by hand, but the clock for relocating is ticking really fast. Hmmm, what about the little Makita combination machine? It was dramatically smaller and more nimble, at least when it comes to moving it and the workpieces. I pulled it out and gave it a test run. It passed with flying colors.
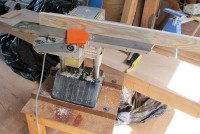
After a quick look-see and cleaning and lubricating I fired it up. No flying shrapnel, always a good sign. A quick edge jointing: perfecto. A quick face jointing – since this was door frame stock nothing was wider that about three inches – and it was still performing just fine. Setting the planer height and immediately planing the other face of the stock and I knew I had a winner. Literally I could prep three sides of each piece in under a minute. I spent more time moving the stock than working the stock.
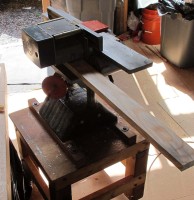
In considerably less than two hours I was able to edge and face joint and thickness plane each stick followed by a finish ripping on the table saw.
It is such a delight when you encounter any tool, hand powered or pigtailed, that performs its function perfectly. This tiny machine is a perfect tool for the task of preparing small, long stock. I expect to give it a real workout in the coming months and years.
If you ever find one, you might think about picking it up.
I don’t know if I am cheap or frugal, or even if I am a tightwad (probably not, given that while I hate shopping do not mind spending) but I am almost always interested in different ways of doing almost anything.
One specific example of this is my use of hot animal hide glue, and the means of cooking it. Glue is available at most woodworking retailers, but I buy mine in bulk from Milligan&Higgins in 50lb. bags, thus saving about 75% over individual 1 lb. bags. Properly repackaged and sealed, dry granular bulk glue is good for a very long time.
 When it comes to cooking glue, commercial glue pots are available for upwards of a hundred bucks but I am disinclined to buy them when perfectly serviceable options are available cheaply. In fact, I prefer these methods to the commercial glue pot.
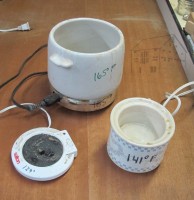
My source for all of my glue cooking implements is a variety of flea markets, thrift stores, and yard sales. Crock pots, especially the smallish ones used to stink up the house with potpourri, are darned near perfect as glue pots. They certainly get hot enough to cook the glue without making it too hot, their ceramic shell is a great reservoir of heat allowing you to take the pot to the work if needed without losing all the heat at once if you have to unplug it, and they are cheap. I have several, and make a point to buy more whenever I find them. I’ve never spent much for one, and mostly they are in the fifty cents to $2 range. The only time I spent $5 was as a donation at the Humane Society Thrift Store.
Another wonderful option for preparing very small amounts of glue is the coffee cup warmer, which comes complete with a ceramic cup at many dry goods stores, but are also available from the same places I buy my mini-crock pots. A small glass jar with glue can be heated directly on the warmer, which works just fine for doing the small scale gluing I need for most restoration projects.
A third tool for cooking glue is the fondue pot. I have a couple and like them very much. Fondue pots have the advantage of getting a little hotter than either the potpourri crock or the coffee cup warmer, plus the cheese pot is usually just sitting on the heater coil and can be easily moved for working elsewhere in the shop.
The mini-crock, the coffee cup, and the fondue can be used to heat glue directly or with a water jacket with the glue in a second container. In fact my most frequent method is to prepare my glue in a small canning jar and place it into a crock filled with hot water.
One thing I do after acquiring a yard-sale cooker is to plug it in with a container of water inside and wait for it to reach full heat, then measure the temperature of the cup of water it has heated. I write that temperature on the outside of the cooker so I know exactly how hot my glue is getting.
One of the grand new pleasures for me has been my fairly recent intersection with the hand-tool-makers world occupied by many new friends and acquaintances, as reflected in the recent gather of toolaholics at the Handworks event in Amana, Iowa. Perhaps most heartening of all was the reality that the riches contained in the Amana Festhalle were by no means the complete community as many other tool makers and aficionados were unable to attend for a variety of reasons.
One of these non-attendees was planemaker Tod Herrli. I first become aware of Tod through my long time friend Bess Naylor, who often hosted Tod as an instructor at Olde Mill Cabinet Shop in York PA. Then I ordered Tod’s brilliant instructional video on making a hollow-and-round pair. Thanks in part to my previous job duties I have seen dozens if not hundreds of instructional videos on a wide variety of topics, and I cannot recall ever seeing one better. Ever. To watch him construct a matched pair of hollow-and-round planes in near-real time is an awesome thing.
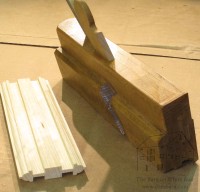 Last spring I had the opportunity to meet and visit Tod on my way to teach at the National Institute of Woodfinishing in Minnesota, spending a delightful afternoon immersed in tool chat. On my departure I indicated my desire for a small sash plane, and asked Tod if he could make one for me. Last month a package arrived with a sample of the output of such a plane, along with the question of whether or not I still wanted the plane I had requested.
The answer was an unqualified “Yes!”
On my way home from Amana I stopped by Tod’s house again for another wonderful afternoon of fellowship, culminating with taking delivery of my new plane. Now I have no excuse for not building small cabinets with glazed doors. A matching coping plan is in the works, and I will wait patiently until my turn for that comes up in Tod’s hectic schedule.
It is my hope and desire that Tod can come to The Barn On White Run for a week of planemaking 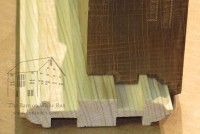 teaching next summer, and perhaps many more summers after that. My plan is for Tod to teach an introductory class on simple planemaking on a Monday and Tuesday, with Wednesday, Thursday and Friday dedicated to a second class on making a more complex tool.
Stay tuned, and thanks Tod for making this new heirloom tool for me.
Chris Schwarz just posted my newest contribution to the Lost Art Press Blog. You can see it here. My ongoing exploration of these vises and my efforts to replicate them will mostly occur ay my blog, so stay tuned.


Recent Comments