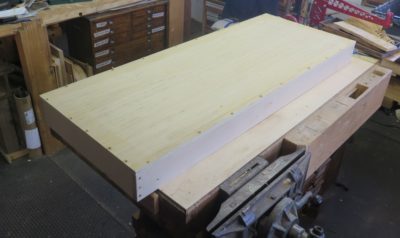
The tool cabinet is really three big boxes, one being the main box of 48″x42″x14″, and the two outer hinged boxes are each 48″x20-1/2″ x 4″. I built the big box first and outsmarted myself some, a lesson I learned in time to change the way I built the two door boxes.
Beginning with four pieces of 48″x24″x3/4″ Baltic birch-ish plywood panels from the big box store, I ripped them all to 14″ wide and sawed rebates on the back edges to accept the 1/2″ back panel. I ripped a fifth 3/4″ panel to be 1/2″ narrower than the outer box elements in order to allow for the 1/2″ back panel since it serves as the center stile.
It was at this point when I outsmarted myself and wasted a lot of time to no great purpose when I decided to miter the corners. This was simply unnecessary and a step I avoided when building the matched door boxes. Given the set-up of my shop the only way I could cut miters on the ends of the box panels was to use my battery-powered circular saw, which is an excellent tool that works just fine. The time sink was in getting the 45-degree cut just right in order to accomplish the 90-degree corner. After some test cuts I got it right and had the four outer panels ready for assembly.
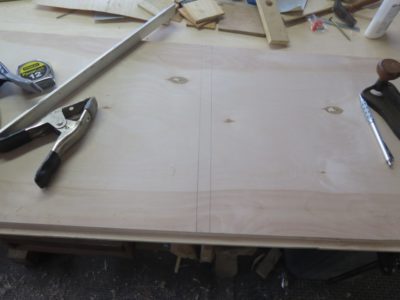
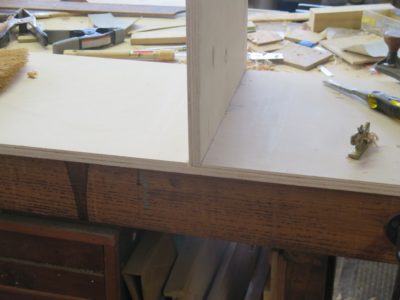
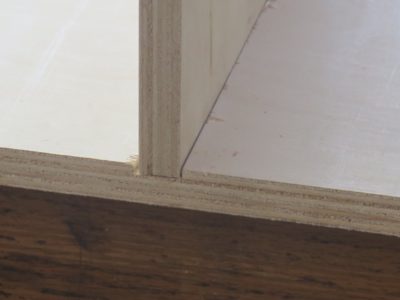
Once that was done I cut the dadoes in the top and bottom panels to receive the interior center vertical panel, cutting the shoulders with a Japanese saw, excavating with a router plane then finishing it off with a small dado plane.
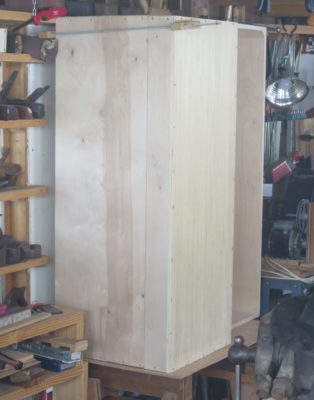
I assembled the back panel from two pieces of 48″x24″x1/2″ plywood, using PVA adhesive and pinch dogs to hold the together while the adhesive sets. Pinch dogs are one of the treasures I discovered in the pattern shop, along with using nails and screws for clamping stacked elements together for painted curvilinear structures. In this case it’s not painted stack laminations, but the surfaces will be obscured entirely by veneerwork.
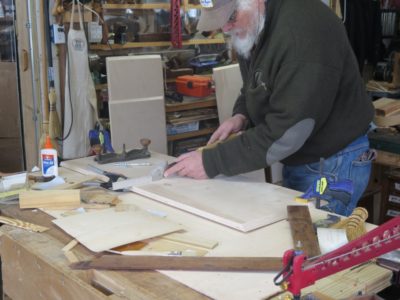
With all that complete the entire structure was assembled using PVA adhesive (I cannot assure that the tool cabinet will always be in the best atmospheric environment) and deck screws. I chuckle with the gasping and pearl clutching I am sensing out in the fruited plain. I augmented the corners with full-length mitered glue bocks using nails and PVA.
I learned my lesson with the bog box so I assembled the doors with butt joints and glued-and-screwed.
Whew, all the pieces fit together. The thing is so big I shoulda called it “the tool closet.”
Like many hand-tool woodworkers I am continually refining my sharpening habits. Not my technique: I don’t jump after any fads since settling on my sharpening protocols a few decades ago (I am mostly a free-hand sidewinder but will use a roller jig to help establish the bevel). Rather, I seek to systematize my sharpening habits to address the cutting edges before they need anything more than a thirty second touch-up. My problem always comes when I am not diligent in this habit and let things go too long, or when I accidentally whack into a piece of store or metal with a keen bevel. Yes, it does happen and once the foul language subsides I grumble my way through the process of essentially starting from zero on the edge.
The only new sharpening tools I’ve adopted over the years are the LNT honing jig to get a badly damaged edge into the right configuration, and diamond stones, which are now the workhorses of my sharpening preps. I still finish everything off with an 8000 or 10,000 Japanese ceramic stone, and occasionally will strop the edge on a rigid board I’ve infused with agglomerated microalumina.
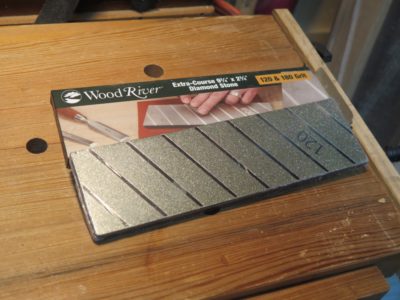
My “go to” approach for a badly damaged edge is to re-establish the bevel with some 60-grit on a granite block. Works just fine. Recently I obtained a new tool that may reduce my time on the trueing granite a fair bit. I am a frequent customer of Woodcraft (I have no other relationship with them) and get their flyers in the mail regularly and I always browse them quickly before discarding. Every now and then there will be a sale for something I’ve wanted and now it’s discounted. The most recent flyer included a tool I did not know they had, a twin diamond stone that is coarse (180) and extra course (120).
Up to now I have always stayed with DMT diamond plates but this time I decided to take a whirl on the Wood River wagon for this utra-coarse diamond plate. If they are of acceptable quality and performance this pair of diamond abrasive surfaces will spare me a lot of time on the granite block which, being dry abrasion, generates enough heat that I have to wear gloves to keep from blistering my fingertips. Given that I will use water on the diamond stone while re-shaping the tip of whatever it is I am working on, heat will not be an issue now.
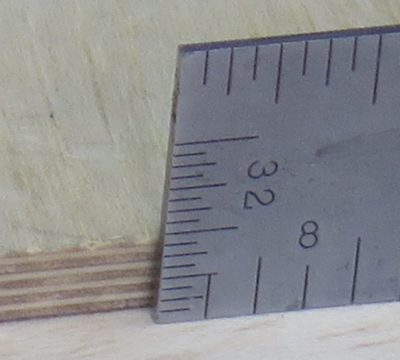
This function will definitely come in handy as I am currently re-beveling a Japanese plane blade that was 1/8″ out of whack. Oh, and some chisels that had unfortunate encounters with screws.
When it comes to large scale furniture making, or at least when there are large expanses of flat elements such as sides, doors and backs of larger cabinetry, one of the constant challenges to makers is adapting to the movement of wood through the seasons by means of various assemblages. Long ago I developed the attitude it would be more efficient and more successful to use wood re-formatted to simply not move in response to environmental moisture. In other words, to use good quality plywood. That might make me a heretic in the fine woodworking world, and I will give that accusation all the consideration it deserves.
Okay, I am done with that consideration. As pundit Mollie Hemingway once remarked, “My spiritual gift is not caring what you think about anything.” That pretty much summarizes my attitude towards plywood as a legitimate fine construction material.
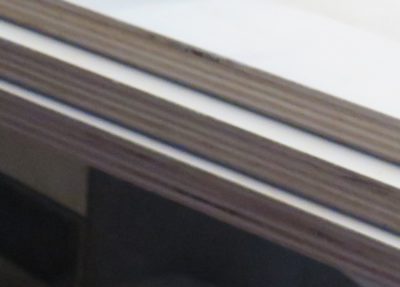
Frankly it is not a concern for most of my projects given the scale of my work. That said I have begun experimenting with home-made plywood even for some of my smaller work, consuming my copious inventory of veneers and marine epoxy to make nearly indestructible plywood like this. I will be blogging about this undertaking in the near future.
Sure, I know how to make frame-and-panel furniture and use it when it is stylistically appropriate, but otherwise I move on using good plywood for the panels of my projects. This becomes even more imperative for me when the ultimate purpose of the project is to express the decorative surface, either marquetry or japanning/fauxrushi. I just want the seasons to unfold with the carcass substrate not even noticing.
Over my 50 years of restoring and conserving ancient furniture I have seen far too many instances of a solid wood carcasses tearing apart the decorative surface to go down that road in my own work, as in this 19th Century French desk. Given the prominence of decorative veneerwork on my cabinet this phenomenon was one I did not seek to replicate.
This brings me to the construction choices for my tool cabinet, in some ways to be the culmination of my “making” undertakings. In point of fact this will be a huge (for me) simple box measuring roughly 48″ high x 42″ wide x 15″ deep. The cabinet has two purposes; 1) to hold as many woodworking tools as I can possibly cram in there on 12 (!) swinging panels, and 2) express the aesthetic of traditional Roubo/Roentgen parquetry (outside) combined with HO Studley’s inspirational aesthetic (inside). For this reason, I need a structure that is both robust and exceedingly stable if I want the cabinet to redound to my descendants. This pretty much means that I build the box and its doors out of Baltic birch plywood, for the most part 3/4″.
When you merge that preference with the additional facts that I am not set up to do large scale millwork combined with the ready availability of 24″ x 48″ “project panels” at the Big Blue Box store, my path forward was pretty self-evident.
Now the only real question is, “How many months with this adventure consume?”
I do not pretend to be any kind of expert in hand saws, old or new. I only know what I like and when it comes to buying vintage saws what I like is a full, meaty plate with no kinks or distortions.
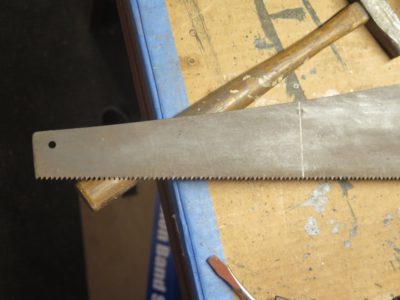
A much used saw being readied to lose its tip and become a panel saw. In this case I will remove the final six inches by striking it repeatedly with a carbide stylus until I can snap off the extraneous material.
If a saw is generally nice but the plate is too thin at the tip, indicating a great many re-sharpens, I might pick it up and chop off the tip to turn it into a panel saw (such a tool will be featured in a coming post about my traveling kit).
Recently while outfitting my under-construction tool cabinet, I was installing the saw rack I had modified from its earlier wall-mounted configuration. This provided the opportunity to once again review my inventory, to see what I was missing or needed to upgrade.
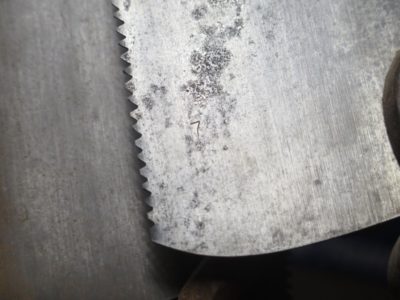
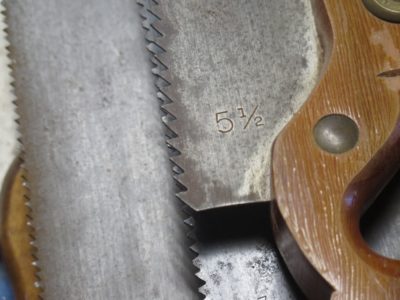
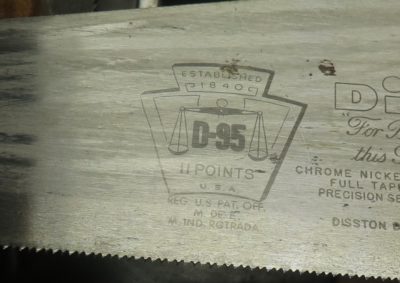
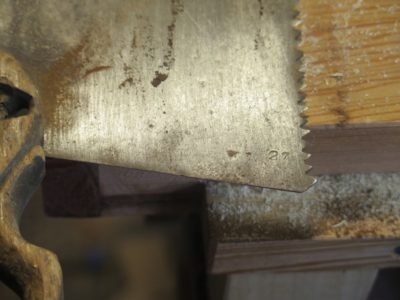
Most saws. old or new, bear some sort of marking to indicate the tooth spacing. This can be either stamped near the handle, just above the teeth, or etched into the plate insignia.
This particular saw plate is a mystery to me. What does the “27” mean? It is certainly not a 27 tpi saw. Perhaps there is a special nomenclature of which I am unaware. In point of fact the saw is an 8 tpi cross-cut saw.
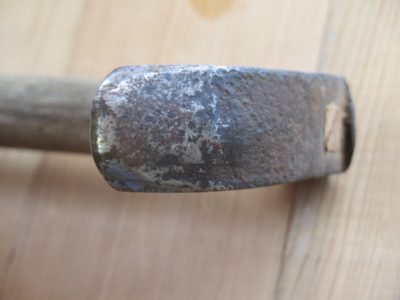
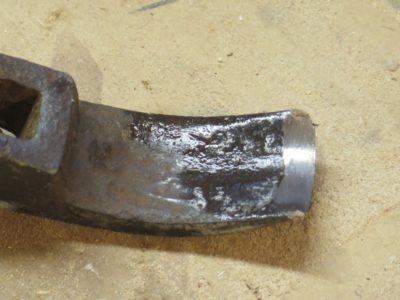
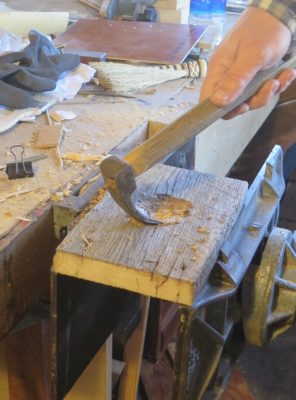
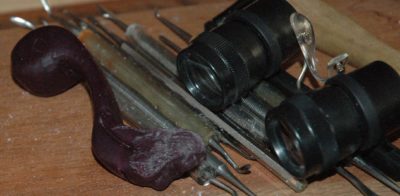
Somewhere in the misty memories of the Mesozoic era I picked up a blacksmith-made petite curved adz head, probably at a PATINA tailgate tool swap. At the time I fashioned a handle from a broken shovel and sharpened the head to a keen edge.
I used it from time to time but not as much as I thought I would. Unfortunately, the tip was convex, rendering it almost useless for any task I might have. So, I decided to reshape the tip into one that would be more useful to be, one that is at least flat, maybe even a bit concave.
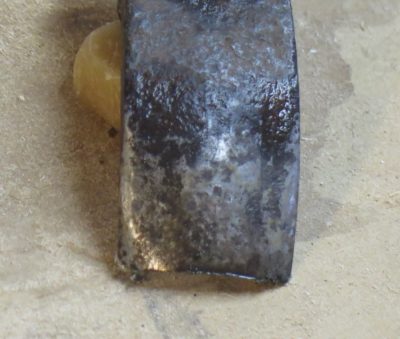
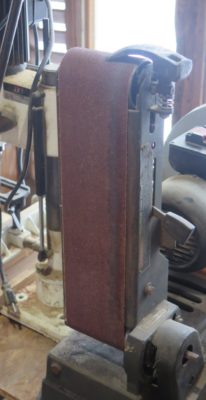
In few minutes on the bench grinder the shape was established, but the ~1/8″ cross section at the new edge was presenting me with the potential of several hours hand grinding and beveling on the inside curve with round slips or sandpaper wrapped around a dowel.
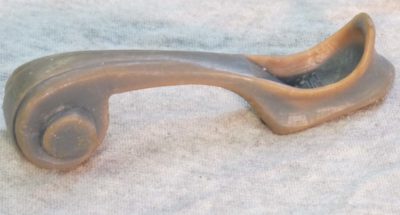
Instead, I had a flash of inspiration and took the top shield off the belt sander in order to access the roller. Miraculously the roller size was absolutely perfect for grinding the new in-cannel bevel. That one thing cut the work time from several hours to several minutes. I like innovations like that!
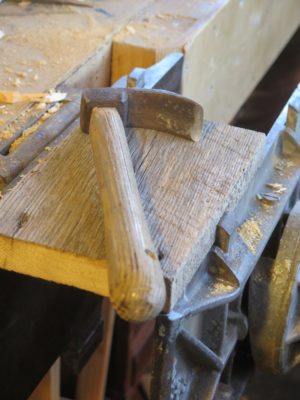
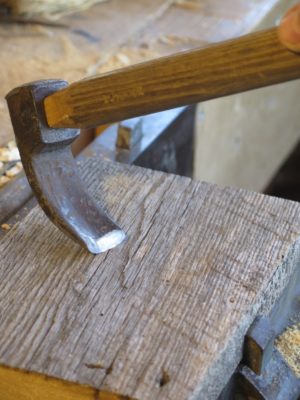
I reattached the handle to the head and gave it a test drive.
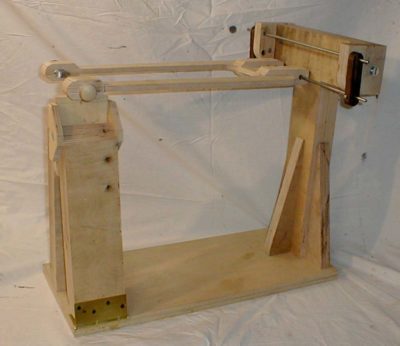
For many years I was/am a friend of Knew Concepts founder Lee Marshall and his collaborator and successor, Brian Meek. When we met at their first Woodworking in America conference they were just beginning to explore branching out from their world of jewelry-making tools into our world of coping and marquetry saws. I think those first interactions occurred around 2010 or thereabouts and I recall vividly an evening of dining and sketching on napkins as I proposed they undertake the design and manufacture of a vertical marquetry chevalet. Sure, this concept was revolutionary and heretical and might raise the hackles of horizontal-chevalet-traditionalists but that did not concern me nor apparently did it do anything but enhance Lee’s curiosity.
I had already made my first foray into the chevalet machine form with my c.2002 benchtop horizontal unit, but to be truthful I already had too much muscle memory dedicated to vertical sawing to ever feel fully comfortable with it. I always kept returning to my tried-and-true bird’s mouth and jeweler’s saw.
So my intersection with Knew Concepts crew was underway. Our ongoing collaborations led me to hold virtually all of Knew Concepts products in my workshop, trying out what they already were making along with many protypes in development.
I was very excited when they brought their first complete proof-of-concept prototype to WIA 2016 and gave it a good long test drive. There was much left to noodle out in the details but the overall concept was in place. Before those details were resolved Lee’s health declined to the point where he died, and Brian succeeded him at the helm of Knew Concepts. The transfer of the company was long and complicated, but eventually the new regime was in place.
Some time in 2019/2020(?) I dropped an email to Brian asking about the progress of the machine. He called me to say that one of the terms of the company transition was that at least one unit of the machine be manufactured and that unit would be sold to me. A few months later it arrived and I set it up just enough to give it a look-see. It is a spectacular machine and as of last month is now permanently ensconced at the end of the third daughter, ready to make marquetry at a moment’s notice.
While I was at it, I made a major improvement to my Knew Concepts Mark I jeweler’s bench saw by adding an oversized working platform, making it all the more amenable to marquetry than it was before, not surprising since it was designed for jewelry-scale work.
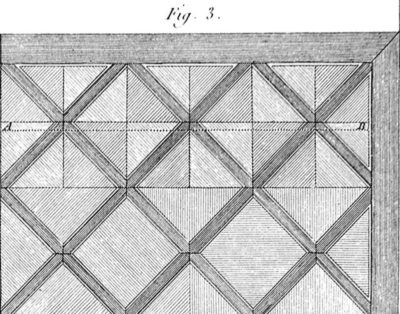
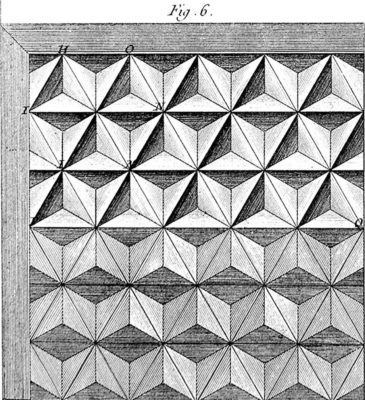
This post might be a long-winded way to say that I have loved marquetry since I first encountered it almost fifty years ago and now have the time and tools to make it an integral part of projects. I suspect my main emphasis will be parquetry, not curvilinear marquetry, but I am now outfitted for either or both. My tool cabinet will be my first big foray into monumental scale work as the outside will be vaguely inspired by the works of Abraham and David Roentgen.
I’m thinking this might be the conclusion of this Winter Projects series and it is time to return to our irregularly scheduled programming.
While watching a Bob Rozaieski video the other day my eye was drawn to the mallet he was using. So I sez to myself, “Self, you gotta make yourself something like that!”
I enjoy precision shooting, a remarkable integration of vision, posture, physiology, skill, tool, and physics; atmospheric, combustion and gravitational trajectory. Our dad used to take us out into the swamps to throw some lead. My brother was a sniper-quality marksman back in the day and like me still loves to make loud noises and ventilate targets. I never did acquire the skill-set of game hunting, although the way things are going I may need to learn.
But I have been plagued by ever diminishing eyesight all of my adult life, to the point where my dominant (right) eye is little more than a hood ornament. For 99% of my day-to-day life the affliction is little more than a nuisance running in the background. Sure, I need to hold my head a peculiar way when executing some tasks at the bench, but it has become so ingrained that I do not even think about it much. It’s just the thorn in my flesh, and I have come to think of it as another opportunity for God to teach me something. I just wish I was not so thickheaded about learning lessons, whatever they are.
Sure, during my quarterly eye exams the doctors all say, “The eye looks great,” and do not always appreciate my response, “Not from my side, it doesn’t!” I am about to be fitted with a new contact lens in that eye which may help, a little. But without surgery to replace the defective polymer lens implant in that eye, which compounds the defective corneal transplant (twice in a row; another data point about which the doctors have zero interest), it really does not matter how much the contact lens can correct the acuity/sharpness since it will not remove the heavy-fog-like haze resultant from the defective lens implant. And, the surgeon is not at all anxious to intrude into that eye any more since I can still function. I guess twenty (!) surgeries-per-eye is their limit. Plus, the cavalier attitude about my glaucoma two ophthalmologists ago has already cost me roughly 1/2 of the vision in that eye on the perimeter of the vision field.
Like I said, a hood ornament.
All that to say that when it comes to long distance precision rifle shooting, I am up a creek without a paddle since that exercise has relied on my dominant right eye for more than fifty years.
Then along came a paddle.
Over the past few years, I have imagined, devised and designed a modified rifle scope that will allow me to still shoot right-handed with the rifle, but use my much better left eye as the steering mechanism for the tool. I have way too many hours of muscle memory/practice to try learning to shoot left-handed, especially with a bolt-action tool, although I did play hockey left-handed. But I was a defenseman, so I also skated backwards most of the time.
Now all I need to do is fabricate the parts in the machine shop, put the pieces together and try it out.
Which means I need to get the machine shop up to speed. That’s what this post is really all about. I’ve got the design. I’ve got the materials. I’ve got the precision machines, just sitting there.
Just do it, stoopid.
Hey, that’s a catchy phrase. Maybe I will register it. If the unit is a success, I will certainly not register the invention, I will simply write it up and release it to the world. I cannot be the only shooting enthusiast betrayed by a failing dominant eye.
Since this list is already getting too long and I still have a large number of items yet to go, I decided to consolidate a half-dozen of my “winter projects (and well beyond)” into one with the identical theme for all the elements — making tools. I have no doubt there will be other additions as time goes on, but these are the ones already on my “to do” list.
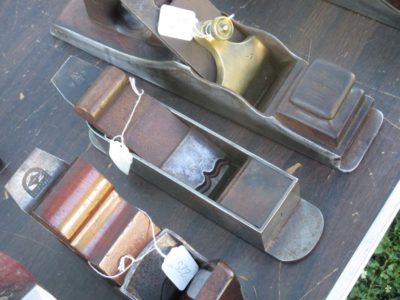
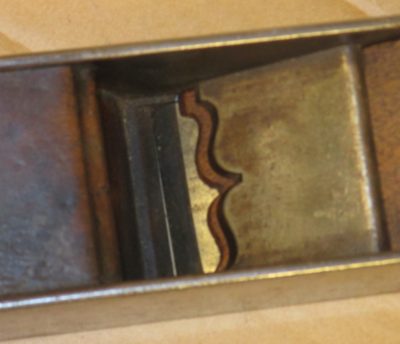
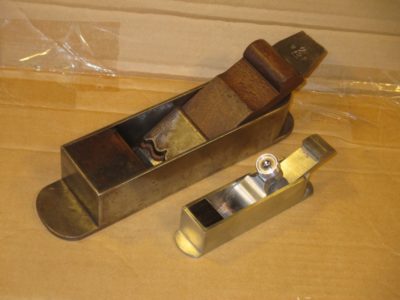
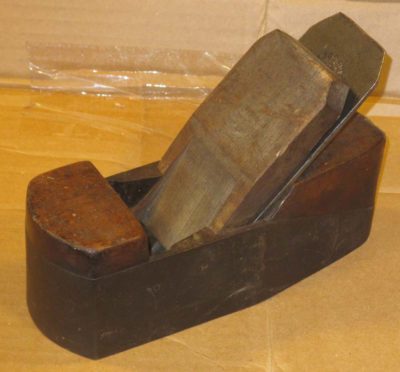
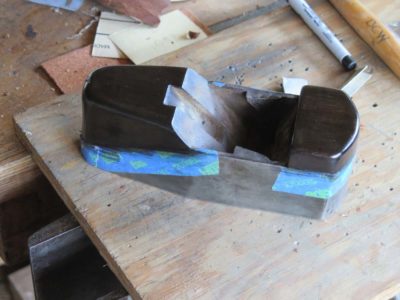
Copying (?) A Robert Towell (?) Infill Miter Plane
I do not own many truly “collectible” vintage tools, but this plane is one of them. Perhaps made by London planemaker Robert Towell in the early 1800s, I bought this very-little-used plane at Martin Donnelly’s several years ago from one of the tailgate vendors.
Though the characteristics of the plane are consistent with Towell’s work, he was apparently somewhat cavalier about stamping his planes and this one is unmarked. Had he stamped this one I would have certainly not been able to afford it. So, thanks to his oversight I was able to become the owner of this superb beauty at a 90% discount (!) off an identical plane with his stamp.
In addition to this full-sized Towell miter plane, I have one of Raney Nelson’s early planes, a miniature scale but similar form. I use it for trimming parquetry lozenges, one of a half-dozen planes I employ for that task (is that too many?). Maybe I need to purge that inventory a bit.
Nah, I’ll wait until I finish and fill my new standing tool cabinet. Check back with me then.
In the meantime, I’m thinking I need to make a third plane to complete this set, one halfway in between the sizes.
You (and I) might ask, “Don, do you really need it?”
And my reply would be, “Butt out of my bidnez.”
The project would give me a chance to invite over my new friend, an Amish blacksmith and newcomer to the county (heck, I’m a newcomer and we bought our cabin twenty years ago! I expect my soon-grandson will be a “newcomer” also, but his grandkids maybe not), who is very interested in this kind of tool making. It would also give me the opportunity to approach the local bladesmith/exotic dancer about fashioning a Damascus steel blade.
What, you think Austin TX is the only place with eccentric folks? We might not be San Fransicko but we do have a lot of competing drummers.
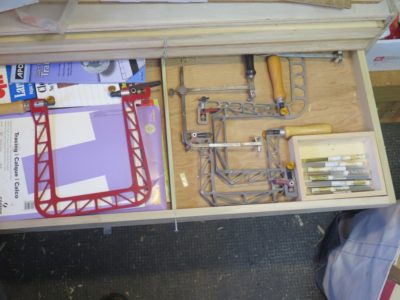
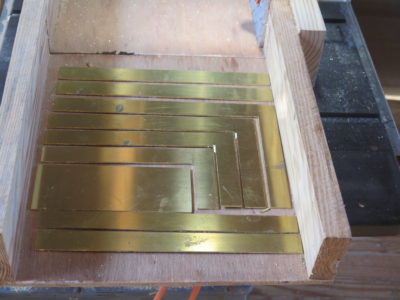
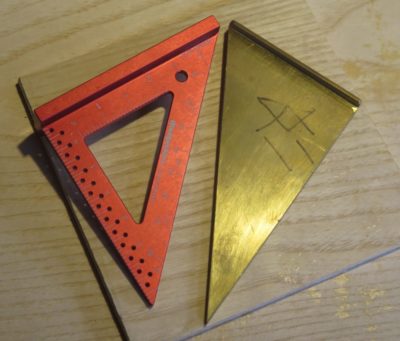
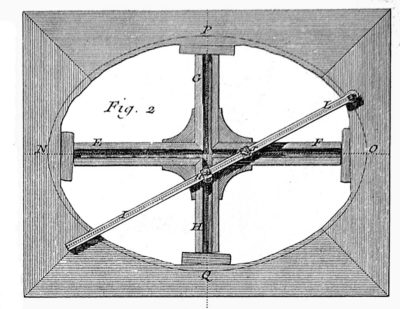
A couple years ago when I was making a set of Roubo-esque brass cabinetmakers’ squares I also wound up with a solid 30-60-90 triangle with a shoe on the short base that I have found exceedingly useful in the intervening period, especially for laying out Roubo bench dovetails and parquetry pinwheels.
As I am about to move even more into the work of parquetry I am thinking that I need a full set of 30-60-90 triangles; one with the shoe on the long base and one with the shoe on the hypotenuse.
In fact, I might need some additional ones as I move past my usual vocabulary of parquetry, including one dedicated to the 45-degree angle and another with a 22.5-degree feature, and perhaps even more. I guess I could use my EDC pocket Delve square for the 45, but a full dedicated brass set would really be nice.
This is definitely one series of exercises drawing on the use of a micrometer caliper integrated with those 10th grade trigonometry sine-cosine-tangent tables I figured would NEVER come in handy.
*************************************************
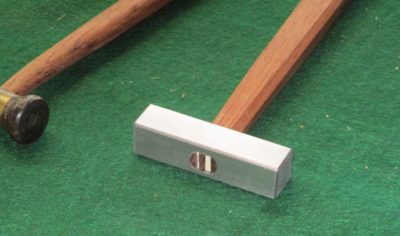
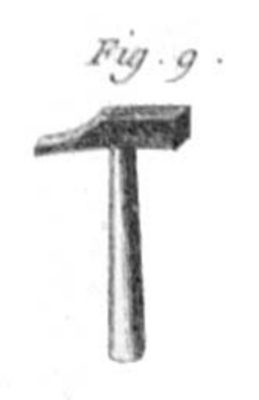
Japanese Joinery Hammer
Two years ago as I was constructing my Japanese tool box I also made a small Japanese-style (sorta) hammer for doing delicate work like driving small nails and pins and adjusting planes. I recognized at the time the void in the kit of a beefier hammer for doing joinery. It will be nearly identical to the smaller one except for the scale, being made from 1″ square bar stock rather than the 1/2″ bar stock of the previous one.
I’ve always wanted a set of stamps/branding irons for marking my new work with my sign, the barn logo, and the date. I would need three separate items, one to create an embossed presentation of my stylized initials, one for the simpler barn logo, and one would be a set of the letters “M, L, X, V, I” for the year/number stamp. Hey, if you are going to live in the past, go way back.
I know there are companies out there who do that for a reasonable outlay, but I’d like to give it a try myself. Actually, I might need two complete sets — small ones, for small objects, and large ones for larger objects such as Gragg chairs. Since I keep plenty of raw metal bar stock on hand that would suit my needs for that undertaking, I’m going to give it a try.
I hope to start these sometime in the next couple weeks, so there may be some posts about that in a month or so.
Years ago, I bought an infill smoother and got part way through its restoration. This is the year to finish it with fitting a new iron (already in hand from Josh) and a new wedge. My only question at this point is, “How ‘over the top’ do I make the wedge?
Expanding My Selection of Tools from Roubo’s Veneering Tool Kit
During the creation of the English translation of Roubo’s L’Art du Menuisier I made a number of tools for completing some of the accompanying photo essays in the books. This did not satisfy my appetite for his tool kit but merely whetted my appetite. The tools I make from the oeuvre will not be for curiosity-only purposes, these will be tools I expect to use in the shop regularly. They worked in 1760, I expect they will work after the Zombie Apocalypse.
In some cases the tools will be even more of the iterations I already possess (bar clamps) and in other cases they will be new to my tool kit (veneerer’s hammer [as opposed to veneer hammer]), and some completely off the grid (oval cutter).
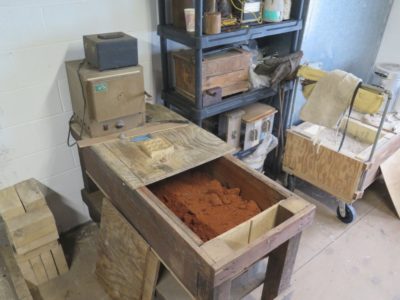
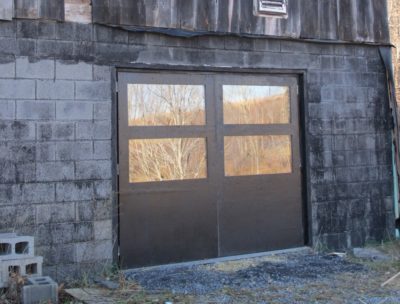
Now that I have the foundry set up on the first floor, I really have no excuse to not start metal casting. Well, except for the need to refabricate the large entryway, allowing me to roll out the smelting furnace from the interior space.
It might be just fine having a thousand degrees worth of hot indoors with a wooden floor above, but I would rather not test that hypothesis as a starting point. Perhaps if there is a streak of ultra-mild days upcoming (it’s been unseasonably warm thus far this winter) I can get that task done.
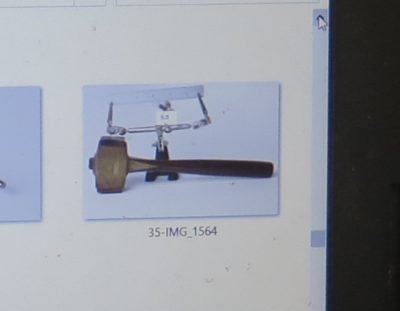
To be sure the first project on the slate for the foundry is to move forward with replicating the infill mallet from the Studley Tool Collection. Having that prototype in-hand would be a great excuse to revisit the collection itself, to compare my replica with the original. Obviously, Mister Stewart gets the first unit off the non-assembly line, should he want it.
Right behind the Studley mallet in the queue is my finger plane project, with its thus-far three models underway. I started working on these models 15 years ago if the date stamp on the images is correct. I do not need these tools from a utilitarian perspective, but I do need them from a creative one.
Once I get the foundry humming along as a routine activity there is no telling what I can imagine making.


Recent Comments