My reticence (inability) to discard wood even when others might see it as decrepit has once again come back to reward me.
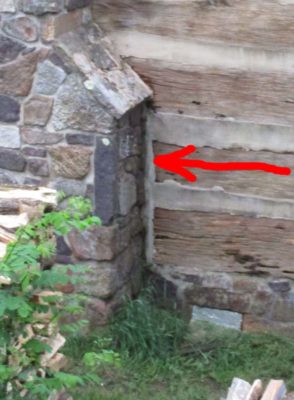
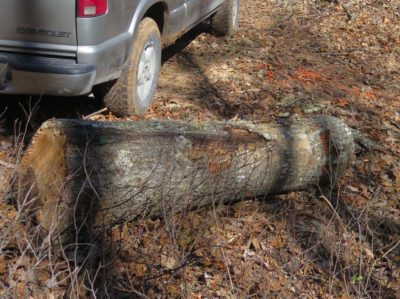
The hefty vertical timber adjacent to the chimney had degraded to the point where it needed addressing and most likely replacement. Tim the restoration contractor really wanted to use a large hunk of vintage chestnut for the replacement, and low and behold I had exactly the piece he needed.
I had salvaged the chestnut posts from the lean-to of the lower log barn on the homestead when my brother and I replaced the aged and failing wasll structure with a new, built-in-place laminated post and beam wall two summers ago. The posts from the degraded wall were approximately ten inches in diameter and seven or eight feet in length. They weighed a ton.
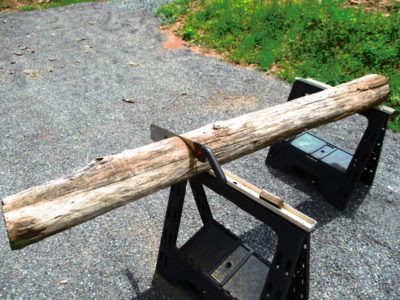
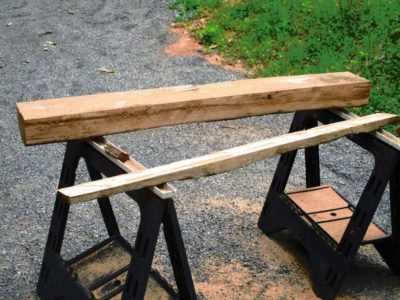
I transported one of them up to the barn and started whacking on it with my 10-inch circular saw followed by a Japanese timber saw. In about an hour I had a piece useable to the restoration crew.
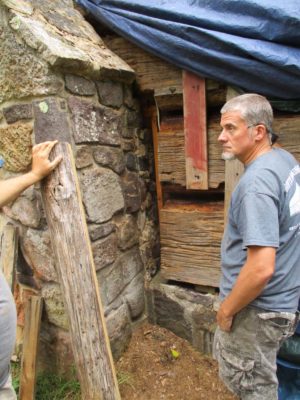
Tim said it was perfect, and after some additional fitting the new piece was inserted into the void left by the rotted old one.

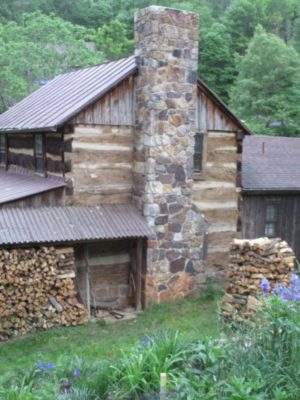

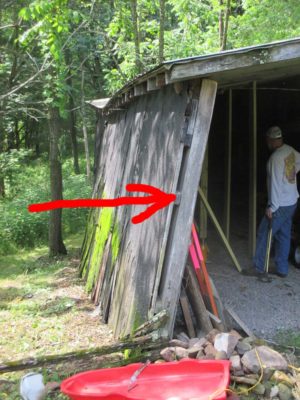
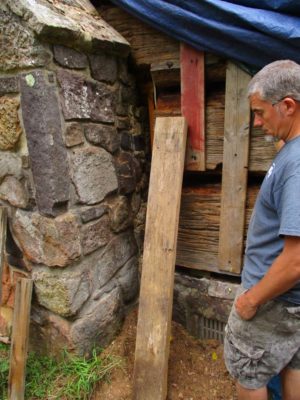
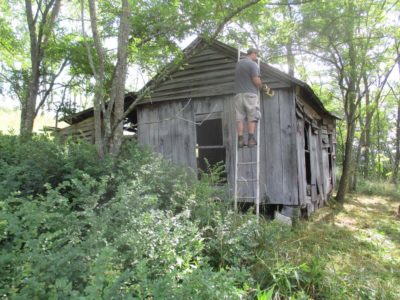
During the process of removing the ancient chinking and other fills on the log cabin, a disturbing find was a fist-sized hole on the north side wall. The hole was not necessarily a surprise as the north side was the most weather beaten with considerable surface lichens and some localized fungal rot, including some pretty substantial damage to some of the structure around the chimney (more about that next time). But the hole was concerning since it went all the way through the log!


After consulting with Tim, the owner of the log cabin restoration company, I decided to have him attempt the localized repair rather than cut out the whole log section or fill it with an epoxy-based composite. Tim thought he had just the right piece of weathered chestnut to make the fill, and the results confirmed his confidence in his skills and my confidence in him.
He had to excavate several inches on either side of the hole to get back to sound wood, and seeing the size of the pocket was a bit unnerving. But, the final results were indeed impressive.

A couple months of weathering and the fill will be invisible. Like I said, impressive.
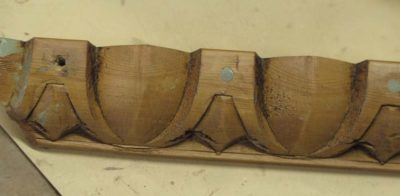
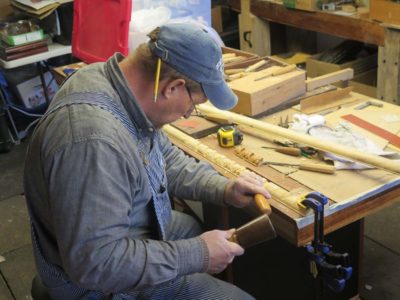
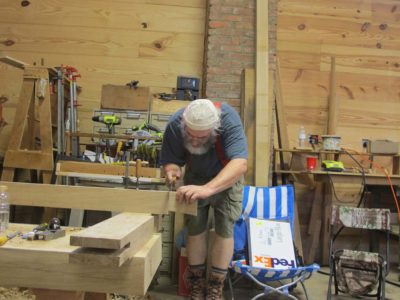
Recently I was called by a nearby acquaintance asking me for a lesson on carving egg-and-dart molding. Sam is a talented restoration carpenter who is a whiz at saving houses old and new, but this project required him to flex a bit and branch out into carving some moldings needed for a fireplace mantle. I said sure and we scheduled a couple of times for him to work in the studio.
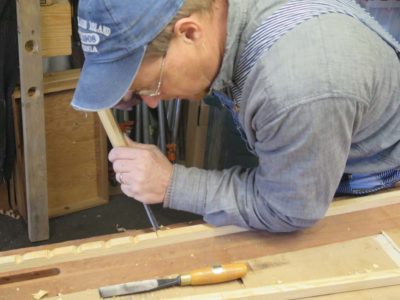
Most egg-and-dart molding involves a very limited number of carving gouges, and the sample he needed to match fit that description. Fortunately for him I had exactly the sweep and size he needed. I sat down and showed him the steps of the procedure then turned the sample piece over to him to, well, practice. I used to carve quite a bit, and there was a period 45 years ago I though about becoming a carver. Not becoming someone who could carve, but someone who was a carver. Big difference. But the lure of the finishing room soon won out, and ever since I’ve only really undertaken carving to replicate missing pieces from my projects.

After a couple of sessions in the Barn, Sam was ready to execute the moldings for real. The initial struggles he had with the fairly coarse-grained workpiece was alleviated the second time around, and the results were gratifying.
With him, I expected no less.
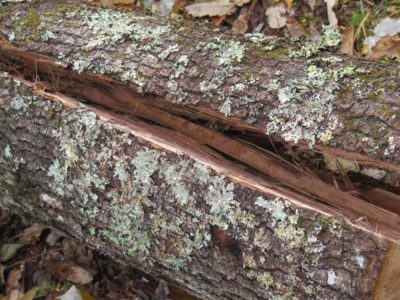
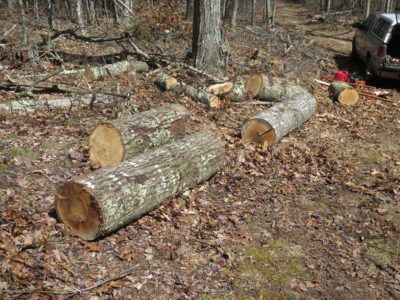
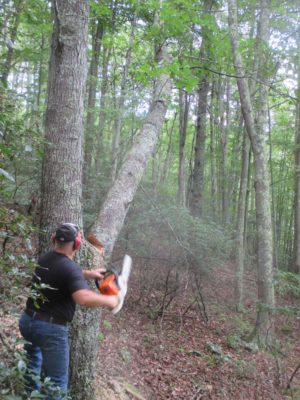
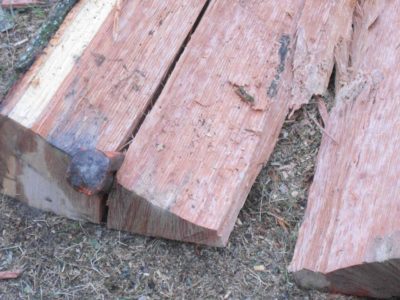
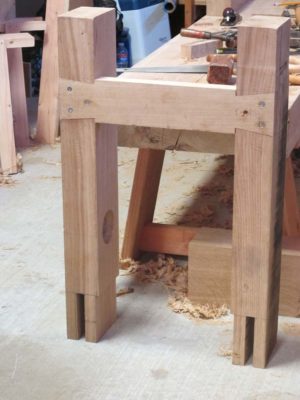
After struggling with my previous attempt to harvest oak from my own mountain, disappointed by the fact that even those large trees, or at least sections of their trunks, yielded so little usable material, I had for the moment hope for two long, straight sections that I had not yet processed. The tree from whence these bolts came had grown tall and straight in a very dense cluster of trees. Those facts led me to my optimism. So recently I headed up the hill with my implements of destruction in-hand.
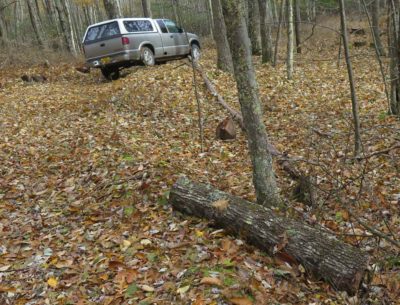

Cutting up the long straight trunk produced the first two segments to be split.
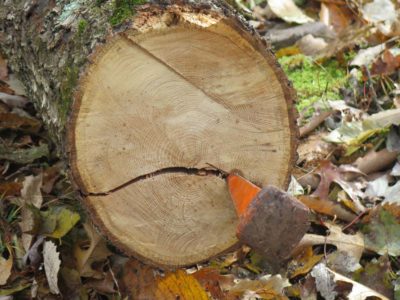
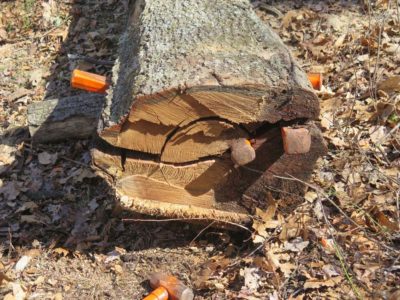
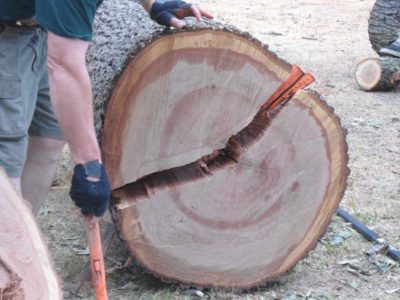
I studied the first of them to decide where to place the first wedge. I drove it in and immediately my heart sank when the split wandered off toward California.

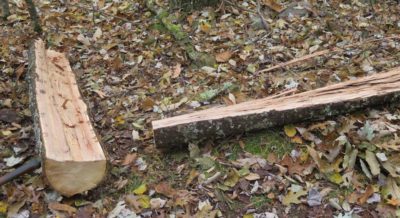
With a deep breath and some impolite utterings under my breath I tried to salvage the situation by putting the second wedge in a place to continue or re-establish the split line I wanted in the first place.
It worked.

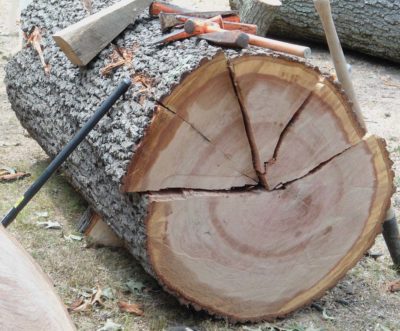
Carefully working down that line with more wedges, a nice split was established.
My only concern at this point was the interlocking that emerged but since it was restricted almost completely to only the pith it was no cause for hysteria. A few whacks with the roofer’s hatchet, my “go to” tool for this task, and the problem was resolved as I hoped. It was only a little loss to a region of the trunk I didn’t want in the first place.
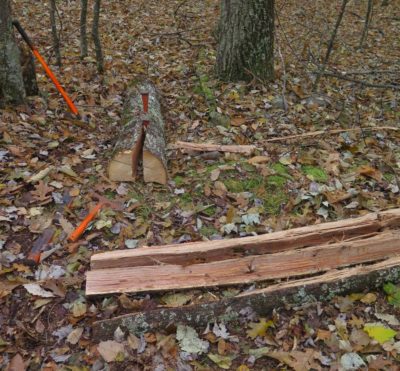
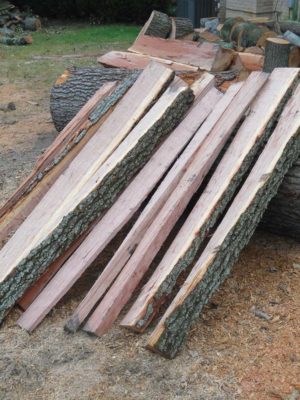
Soon enough I had two halves of a trunk, then four quarters, and in the end, eight wedges.
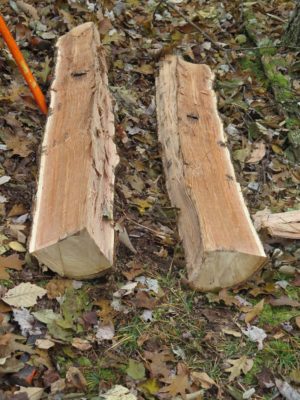
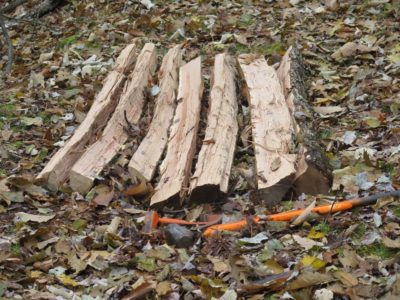
I was pleased with the minimal amount of overall interlocking and wind.
My friends, there be some chairs.
In concert with both ongoing firewood harvesting and shooting a video Building A Gragg Chair I replicated some of the work undertaken at my neighbor Bob’s house five years earlier, this time with oaks felled up the mountain from the barn. There were three large trunks that had nice lower sections and and one smaller but straighter one about fifty yards away, set-aside for the harvesting efforts. Interestingly the larger trees, grown in a dense forest setting, were quite problematic with lots of wind and interlocked grain. My yield from them was about a quarter of what I got from Bob’s “urban” trees. I have no explanation for this phenomenon.

The largest of these trunks was also the largest disappointment. While seemingly sound and straight, the first split caused me to go, “Hmmm.”
As the splitting proceeded the disaster was readily apparent as the entire trunk segmented into an interlocked mass of uselessness, and ate all of my wedges and guts to just get torn apart. The pieces were cut into short bolts for the firewood splitter.
The two smaller of these three trunk sections were better, but still not great. The wood was straighter and more sound, but with more interlocked grain than I expected.
The smaller, straighter trunk was, I hoped, a somewhat different story. It had grown in very tight setting, much, much more crowded than the larger trees and the grain showed it. I was hoping it was more promising than the first trunks, which mostly wound up as firewood. More about that later.

With the trunks on the ground, sectioned and ready for me, I came after supper and lit into them. They were heavy enough that even with logging tools they were impossible to handle so I first split them along a horizontal plane, then halved the top half of that, then halved that again.


With some help from the appropriate tools I was able to extract the long wedges, which were processed further with splitting in half repeatedly.

Eventually I wound up using a froe for some riving on some of the pieces, and yielded a great many pieces. Much to my astonishment I discovered zero nails, bolts, or fencing. Quite a surprise for an old tree in a domestic setting.

In the end I wound up with four truckloads of splits, and piled them cross-wise a layer at a time, up off the ground. The final pile was six feet by six feet by four feet high. After a year in the open I sorted them and moved the best of them inside to the first floor of the barn where they remain until I need them. The rest were also useful, they kept me warm.
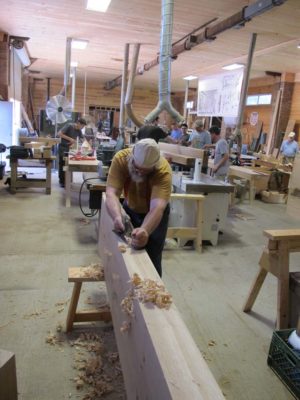
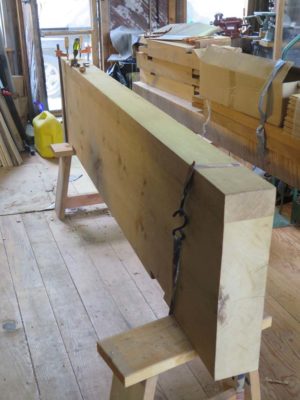
As we tried to acclimate to the choking heat of July in south Georgia the work on our individual Roubo benches took hold. With the slab tops readied by the monster Stratoplaner machine that surfaced all four sides, it was now incumbent on us (me) to glue two of the slabs together to make the top. Unlike the rest of the crew who chose the mega jointer and PVA for any gluing they needed I worked with a hand plane and hot hide glue.
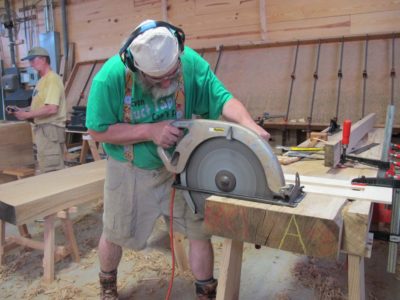
By the next morning I had a complete slab ready for trimming to the right dimension. I must say that operating a 16″ circular saw is a pretty unforgettable experience.
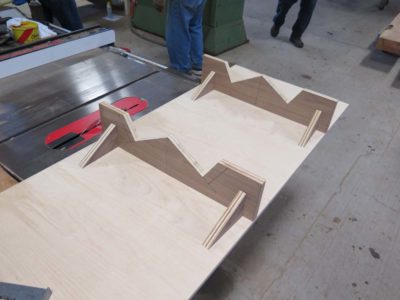
Then it was on to giant joinery, all of the time. Working with Jeff Miller, he and I created a sled jig to cut the dovetailed leg tenons on a giant bandsaw, reducing the time for producing that from a few hours to a couple minutes.
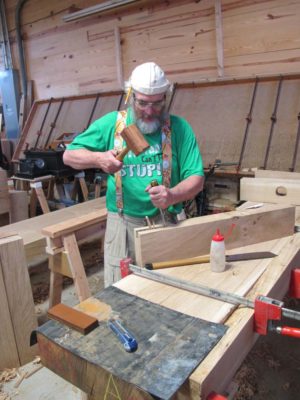
Otherwise the leg-top tenons were simply a matter of sawing and chopping. My old faithful tulipwood mallet was up to the task.
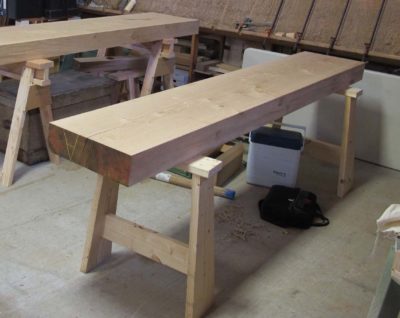
By the third day things were looking positive for getting the unit up on its feet before the week ended. Once again I took a different tack than the others when it came to the stretchers. I inset dovetailed stretchers into the surface of the legs rather than the mortise and tenon route, and idea I gleaned from Bob Lang’s video on his modern workbench. By the end of the day I had the legs all fitted together and was ready for chopping the mortises through the top, which I was set to begin in the morning.
That’s when disruption occurred.
Thursday morning I awoke with my right eye badly inflamed, and told my housemates Raney and Chris that I needed to find an eye doctor. Right now. That eye is my more “at risk” of the pair, having undergone at that point 19 surgical procedures according to Blue Cross/Blue Shield, and inflammation was absolutely an enemy. (The history of that eye proves to me that I’ve got backbone, having gone through all those surgeries and being asleep for only one of them. Nothing proves your stones quite like complying with, “Now Mr. Williams, hold your head very still and stare straight ahead without blinking while I cut into your eye with this scalpel. You’ll feel a little sting.” Yeah, that shows your stuff. Well, that and once facing down a drunk with a gun.) Thanks to Chris’ smart phone we found a surgical/eye clinic about thirty miles away that could see me “immediately” and thanks to Raney’s generosity in setting aside his own day of working on the bench he drove me there for the appointment. It took much of the day to undergo the examination (they found no foundational cause for the inflammation) and after getting some medication we headed back to the shop for the end of the day.
Needless to say my heavy work for the week was finished, having lost the entire Thursday to cultivating the screaming headache that hung on into Friday. I wanted to get back home ASAP to let my own eye doctors on Monday take a look so I spent Friday morning packing up and hit the road that afternoon. By Saturday afternoon I was back at the barn, having arranged with a friend to bring some of his bubba buddies to help me unload the bench top. They were ribbing me about needing hep for moving the top, until they set their beers aside and picked it up. Their grunts and curses soon quieted their ridicule.
The pieces of the bench were ensconced in the barn and remained essentially untouched for more than three years until I could return to it and finish it up.
And they never did find out what riled up my eye. Sometimes the meat machines we live inside of just get cantankerous.
The light at the end of the tunnel was glowing brighter with every day.
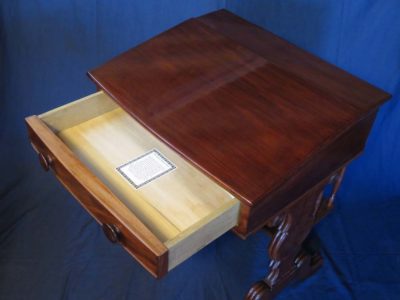
I created an archival label for the desk, describing its antecedent heritage, the making process, the patrons, and me as the maker. I glued it into the drawer and with that the creation of the desk was complete.
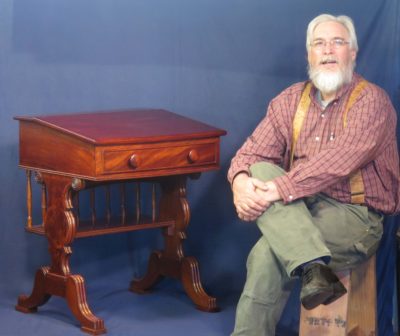
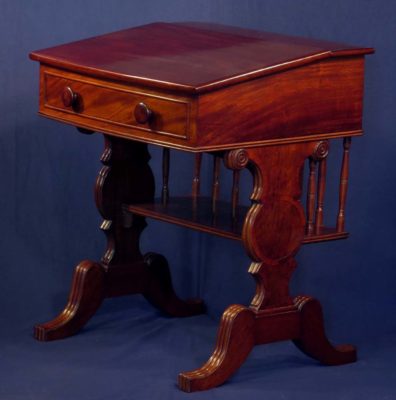
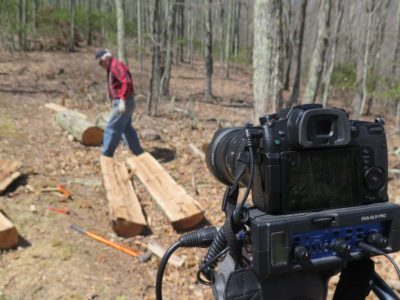
After that the only tasks were the glamour (?) photography, including the obligatory selfie, and delivering it to its new home.

All it took was almost two years from the initial client inquiry, my suffering and recovering from a broken hip the first year and a broken arm the second, a pile of prototyping, and a ton of hand-work as the project mandated.
I was not displeased with the ultimate outcome.
Throughout the project and its aftermath I assiduously acquired enough vintage select genuine mahogany, stored mostly underneath my planing beam, to make another half-dozen of the desks. All I need now are the clients to make it happen. If you know anyone who wants one, let me (or them) know.
One of the challenges of “downsizing” is finding furniture to hold your stuff and fit in the new, smaller space. This was particularly nettlesome for us as we moved from a 16′ x 24′ bedroom to one that was half that size. For several years we had been searching antique shops for a small cabinet to hold some of Mrs. Barn’s clothing (fortunately we are blessed with two large closets here) but never could find something to fit nicely. There ws only one place in our little bedroom for such a cabinet, and the size was very specifically determined by that space.
Instead she did something that had not occurred in more than three decades of connubial bliss — she asked me to make a piece of furniture for her. Not just a piece of furniture but one made from vintage chestnut, a wood she likes very much.
So I did.

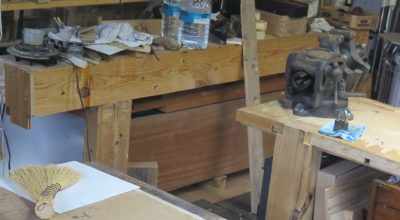
My source of vintage chestnut was unsurprisingly the old shack that my brother, nephew and I tore down three summers ago, a grand week of camaraderie whose ending punctuation was me laying in the hospital with a broken hip. The shack had been a living quarters, probably in the 1930s according to the newspapers pasted to the wall. The entire roof structure was chestnut, and the walls and floors were white oak. The haul was pretty impressive.

In the intervening time the wood was stacked nicely in the lower log barn awaiting my attentions.
Up next – prepping the stock and joinery

Some days you eat the bear…

And some days the bear eats you.
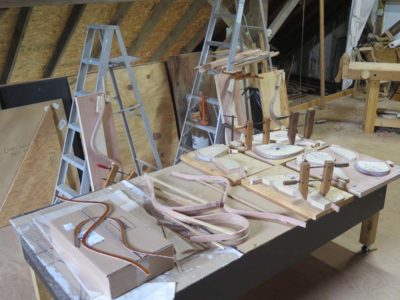
As I dive ever deeper into producing Gragg chairs, currently two on commission and another for myself with hopes of including this item in The Barn Store in the coming months/years (and even entertaining thoughts about offering a Make A Gragg Chair workshop as soon as the summer/autumn of 2020; first, I have to make one from start to finish in a week myself), I realize all the more how close Gragg was coming to the limits of what can be accomplished with wood as the raw material. Given the extremity of the bends involved, including the main serpentine element with two 90-degree four-inch-radius bends within a foot of each other and a180-degree four-inch-radius bend for the arms, working out the routine is a critical process.

I recall the first time I tried this almost a decade ago on the original Gragg repro prototype, in front of my Smithsonian colleagues no less, I broke every single piece of the ash I took from our prized lumber inventory in the conservation studio. Every. Single. Piece. Not to mention breaking several of the bending form elements which had been woefully under-built. It was not my proudest moment of professional accomplishment but drove me on to get it right.
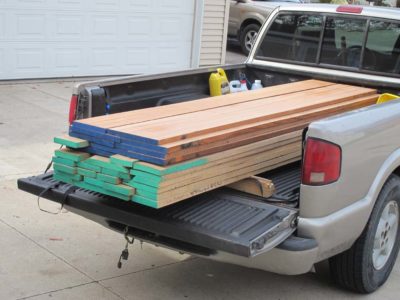
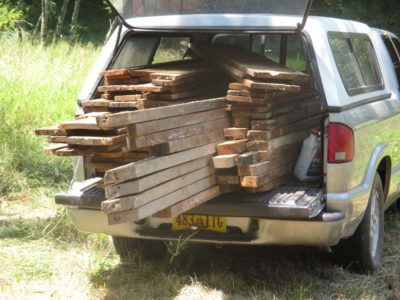
Even now I test the boundaries, trying riven and sawn kiln-dried oak (at the bottom of the pile in the truck), trying ancient/recycled but possibly air dried oak salvaged from a derelict weaving loom,

trying oak I harvested several years ago but have kept from seasoning fully, first cross-stacked outside and now residing in the basement/first floor of the barn,

and finally using oak I harvested this year. Through it all my batting average kept improving.
I’ve heard my friend Bruce Hoadley tell the story of a small manufacturer who was plagued with broken elements resulting from very tight bends after steaming. The punch line was that after going to watch the definitive practitioner for making the identical items, the manufacturer said with a smile something to the effect of, “He breaks most of them too!”
I encountered the same thing with the Gragg chair elements. Some stock bends like taffy, some breaks like crystal. I am moving more toward the former than the latter, but it is exasperating all the same. At least the failures make good kindling.
Yesterday afternoon my success rate was 92% with only a single stick making it into the failure pile. By observing the character of the pieces being bent, the stresses of the bending itself combined with the addition of bending straps, this is an outcome I can live with.
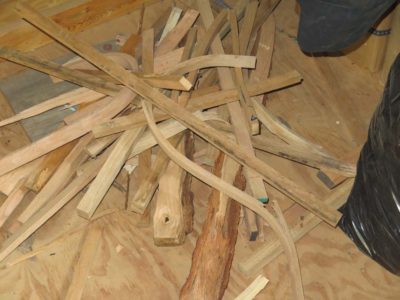
Still, the pile of kindling grows, just not as fast as in the past.
I am definitely gaining ground on the bears.

Recent Comments