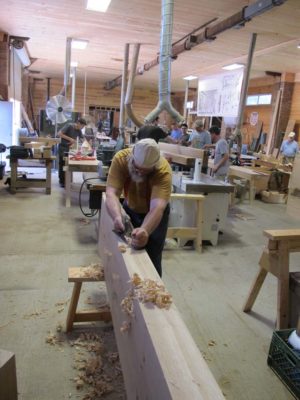
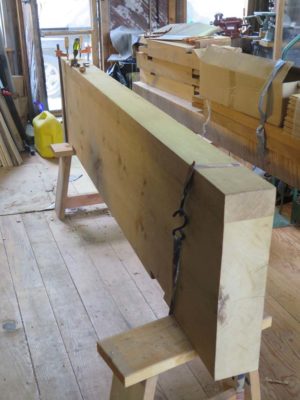
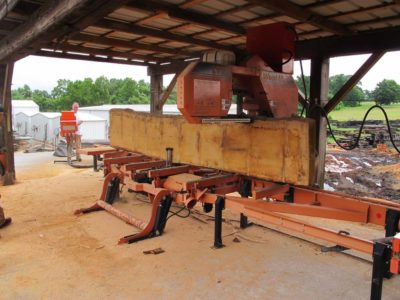
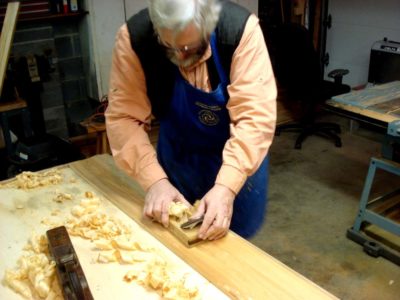
As we tried to acclimate to the choking heat of July in south Georgia the work on our individual Roubo benches took hold. With the slab tops readied by the monster Stratoplaner machine that surfaced all four sides, it was now incumbent on us (me) to glue two of the slabs together to make the top. Unlike the rest of the crew who chose the mega jointer and PVA for any gluing they needed I worked with a hand plane and hot hide glue.
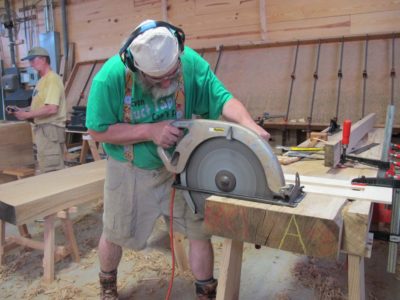
By the next morning I had a complete slab ready for trimming to the right dimension. I must say that operating a 16″ circular saw is a pretty unforgettable experience.
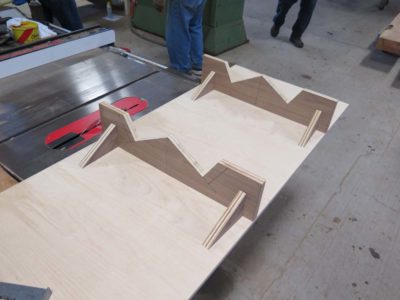
Then it was on to giant joinery, all of the time. Working with Jeff Miller, he and I created a sled jig to cut the dovetailed leg tenons on a giant bandsaw, reducing the time for producing that from a few hours to a couple minutes.
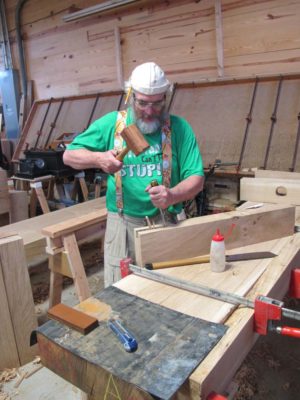
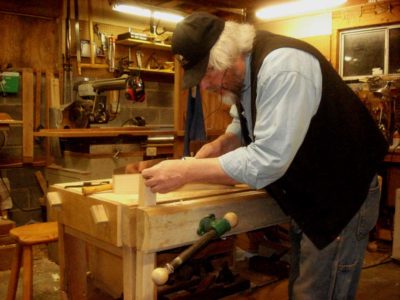
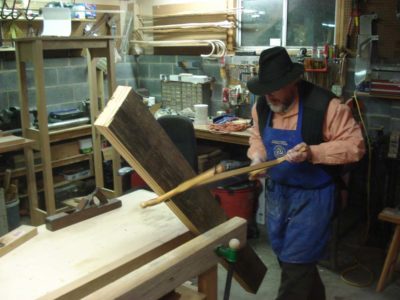
Otherwise the leg-top tenons were simply a matter of sawing and chopping. My old faithful tulipwood mallet was up to the task.
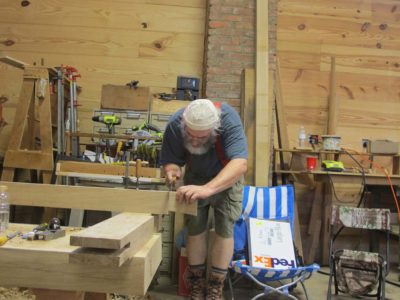
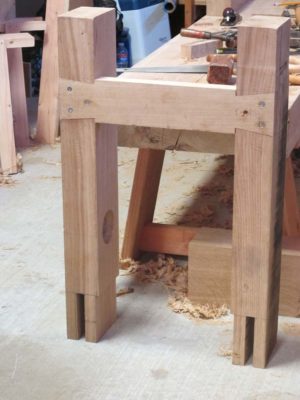
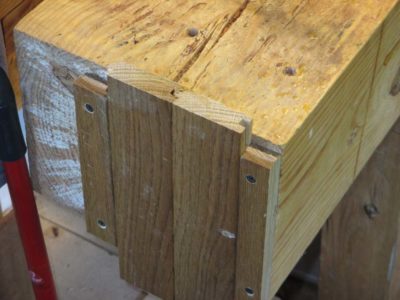
By the third day things were looking positive for getting the unit up on its feet before the week ended. Once again I took a different tack than the others when it came to the stretchers. I inset dovetailed stretchers into the surface of the legs rather than the mortise and tenon route, and idea I gleaned from Bob Lang’s video on his modern workbench. By the end of the day I had the legs all fitted together and was ready for chopping the mortises through the top, which I was set to begin in the morning.
That’s when disruption occurred.
Thursday morning I awoke with my right eye badly inflamed, and told my housemates Raney and Chris that I needed to find an eye doctor. Right now. That eye is my more “at risk” of the pair, having undergone at that point 19 surgical procedures according to Blue Cross/Blue Shield, and inflammation was absolutely an enemy. (The history of that eye proves to me that I’ve got backbone, having gone through all those surgeries and being asleep for only one of them. Nothing proves your stones quite like complying with, “Now Mr. Williams, hold your head very still and stare straight ahead without blinking while I cut into your eye with this scalpel. You’ll feel a little sting.” Yeah, that shows your stuff. Well, that and once facing down a drunk with a gun.) Thanks to Chris’ smart phone we found a surgical/eye clinic about thirty miles away that could see me “immediately” and thanks to Raney’s generosity in setting aside his own day of working on the bench he drove me there for the appointment. It took much of the day to undergo the examination (they found no foundational cause for the inflammation) and after getting some medication we headed back to the shop for the end of the day.
Needless to say my heavy work for the week was finished, having lost the entire Thursday to cultivating the screaming headache that hung on into Friday. I wanted to get back home ASAP to let my own eye doctors on Monday take a look so I spent Friday morning packing up and hit the road that afternoon. By Saturday afternoon I was back at the barn, having arranged with a friend to bring some of his bubba buddies to help me unload the bench top. They were ribbing me about needing hep for moving the top, until they set their beers aside and picked it up. Their grunts and curses soon quieted their ridicule.
The pieces of the bench were ensconced in the barn and remained essentially untouched for more than three years until I could return to it and finish it up.
And they never did find out what riled up my eye. Sometimes the meat machines we live inside of just get cantankerous.
The stage and setting for the 2013 French Oak Roubo Project workbench build has been covered like a blanket around the woodworking bogosphere so I do not need to address it again here. Just do a search for “french oak roubo project” in your favorite surveillance vehicle/search engine and you will get a multitude of responses, probably somewhere north of 25,000 citations including blogs from about a half dozen of the participants including me. Now I’ll spend a couple of posts discussing the making of the bench, then one on the using of it.
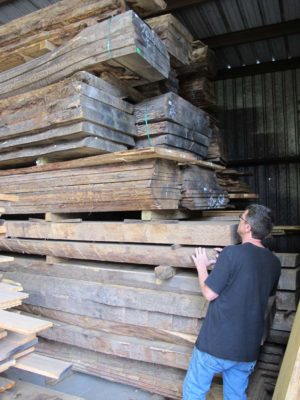
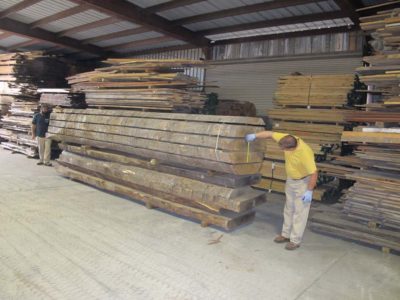
Our raw material was oak harvested from France following the catastrophic Christmas ice storm of 1999, which destroyed over 10,000 trees in the forests around Versailles alone. The trees were harvested and the lumber placed in storage, eventually purchased and exported to the US by entrepreneur Bo Childs, our host for the event who in concert with Jameel Abraham made it available to us. The most mature trees were likely alive even during the lifetime of Roubo himself, and some amatuer dendrochronology on at least one of the slabs put the seedling of the giant timber back to the Napoleanic era. Safe to say that none of us had ever encountered lumber like this before. These imported slabs measured up to sixteen feet long, two feet wide and six inches thick.
Soon enough on that sweltering July week we were coordinating into teams preparing the stock for the battle ahead. The end point? Slab topped benches made from almost 250-year old white oak, weighing in at about 500 pounds. Impressive. Fortunately thanks to his business Bo had the full range of machinery on hand, ranging from the forklifts needed to move these half-ton slabs around and the bandsaw mill to render them into rough slabs.
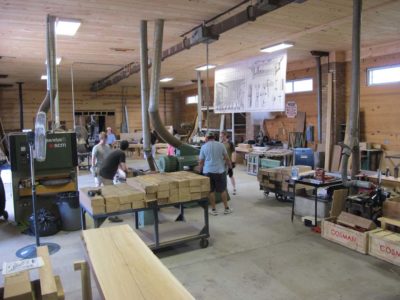
Beyond the material handling aspects, Wyatt Childs, Inc, possessed stock preparation capacity beyond anything I had ever seen outside of a full-scale furniture factory.
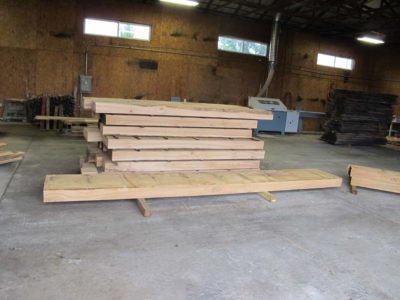
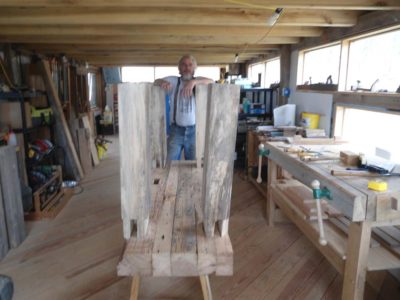
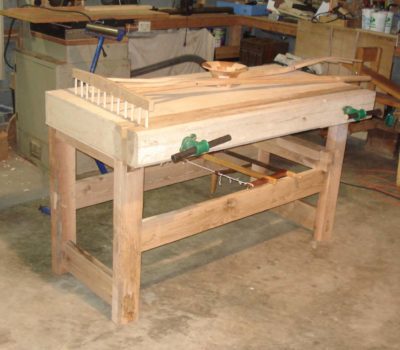
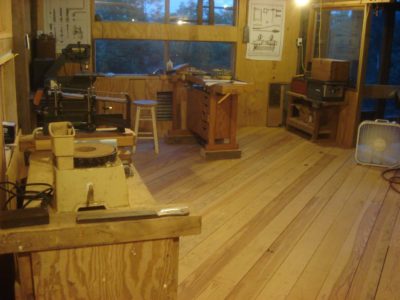
Before you knew it we all had slabs and legs roughed out, ready for us to get to work. Mine is the one farthest from the camera.

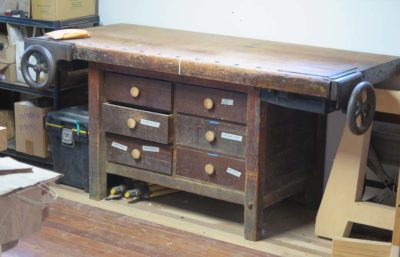
By 2013 the Henry Studley Express was roaring down the rails, building steam and speed with every day. I was driving on long trips to visit the original collection, other examples of similar benches and vises, and compiling research apace. I was almost at the saturation point when, on my birthday, I was contacted by a professor of furniture design who had a piano makers’ workbench that had outlived its usefulness for his work and he was considering selling it. That made for a very fine birthday! He had purchased the bench at a “going out of business” liquidation sale at a piano factory in the early 80s. From what he said, he thought the factory had been there since the 1890s. For years he had worked in designing hand-made furniture but in recent projects he was gravitating towards machine-made/manufactured furniture so his shop was transitioning to reflect these new interests.
We engaged in several rounds of correspondence as the portrait of the bench was clarified, and my interest in it grew by leaps and bounds. Eventually we arrived at a sale price we could live with. Three months after our first conversation I made the trek to upstate New York and picked it up. The drive home was so filled with delight and anticipation that it seemed to take a week to get there, but in reality it was not even a particularly long day of driving.
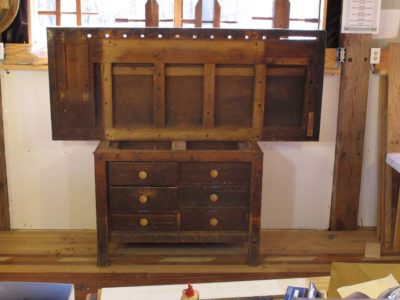
The bench was a modular unit; take off the vises and separate the base from the top and it was a manageable move by myself using a hand truck. In just a few minutes after arriving home it was ensconced in the barn.
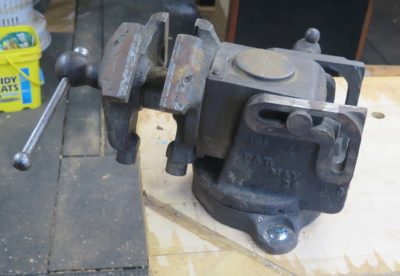
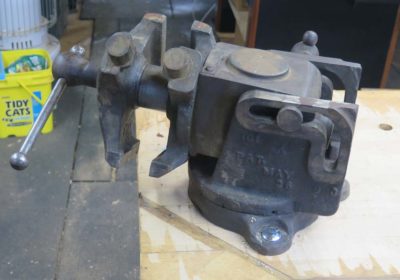
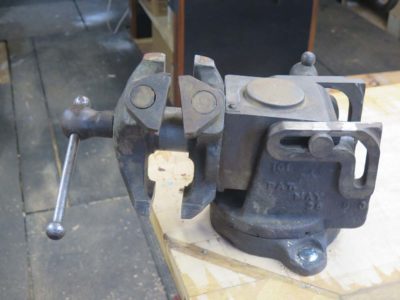
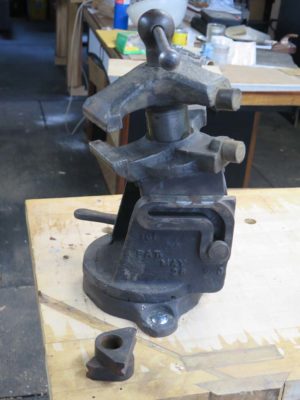
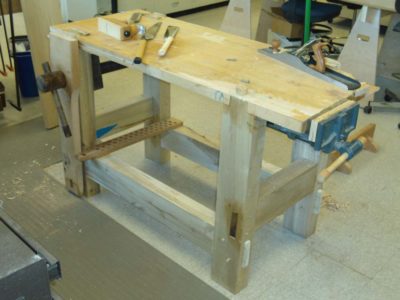
Studying the disassembled bench confirmed my premise that for the most part it was a manufactured work station, probably through the catalog from an unidentified industrial supplier. The base was a run of the mill cabinet that was cranked out for industrial and educational institutions by the tens of thousands, to be paired with a bench top of the buyer’s choice. Did the options include vises? I do not know. The top gives every indication of the same context, but is unmarked regarding its manufacturer.

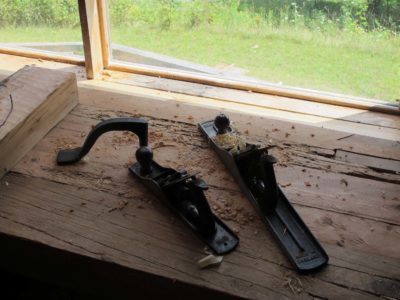
Further, my investigation only heightened the mystery about piano makers’ vises; this pair, like all the others I have seen, was devoid of any manufacturer’s identifying marks. They were a pretty standard pair for this type of ensemble — a typical face vise that opens 15 inches and an end vise with an integral dog.
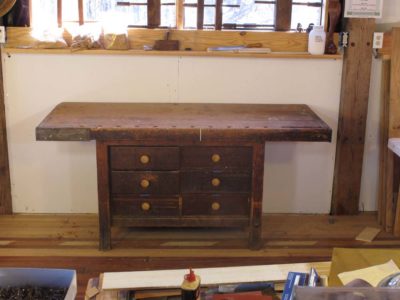
The bench has clearly had a lifetime of very hard use and was/is in dire need of a thorough restoration. That remains on the menu for this winter. But then, it was on the menu for last winter, too. At this point my goal is to install a new work surface on top of the well-worn extant one, getting the vises polished and perhaps plated (I located a nickel plating shop in Richmond, and Studley’s vises were nickel plated, so as an homage I must also, mustn’t I?) and making new bench dogs for those that are missing. I wonder what the odds are that the new dogs will be spring-loaded ebony blocks.
For now the bench serves well for students in the classroom but after the restoration I suspect it might get moved.
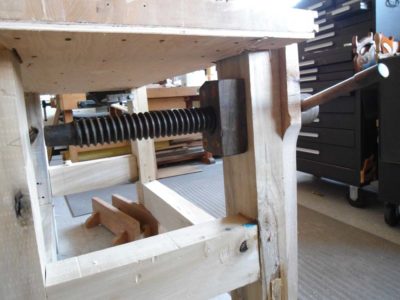
I’ve been intrigued by the idea of a beefy planing beam ever since I learned of the concept by Toshio Odate in his book Japanese Woodworking Tools. With the advent of the barn becoming a reality I knew early on I wanted one here too, albeit slightly modified to fit my work. In 2007 with the barn en route I went to a sawmill and bought a number of large SYP timbers to use if necessary during the assembly and erection of the barn, but the barn broker included several surplus timbers from his inventory so I wound up with a pile of mondo timbers that were partly seasoned by the time I was able to make the planing beam in 2012.
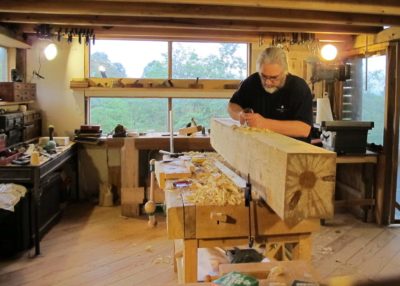
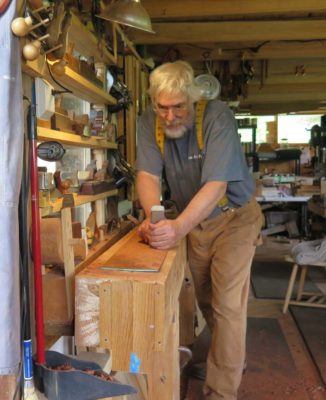
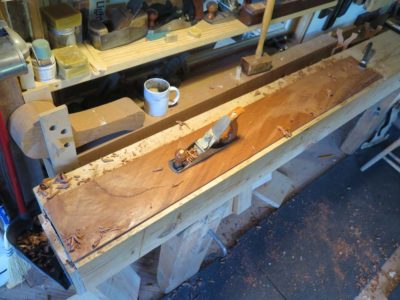
My starting point was one of the 8-foot southern yellow pine 8x10s from the pile. Since I had none of the industrial scale machinery needed to handle the work piece I just put it up on my bench and started to make it square, flat, and straight by using hand planes. It was heavy enough to stay in place all by itself, and hand planing was a real workout.
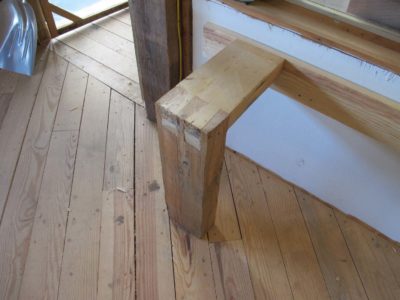
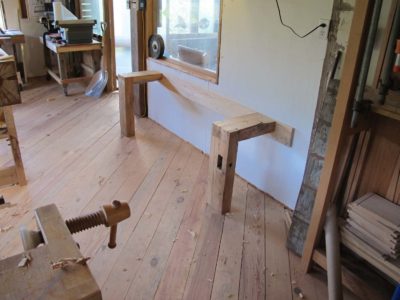
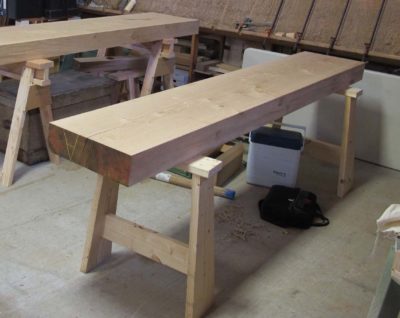
Coincident with that was making some half-trestles to place it on when it got finished. The tail ends of the fixtures were fastened to the wall and the dovetailed legs simply sat on the floor.
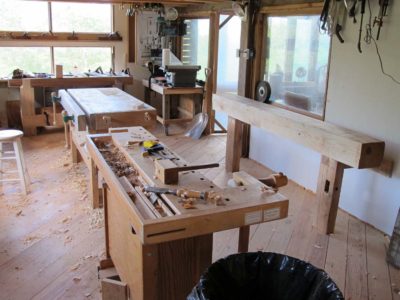
The beam itself just sits in place on top of a pair of anti-skid pads, needing not much else to stay in place.
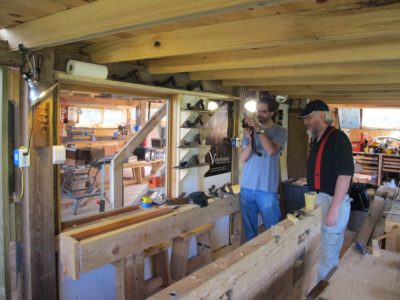
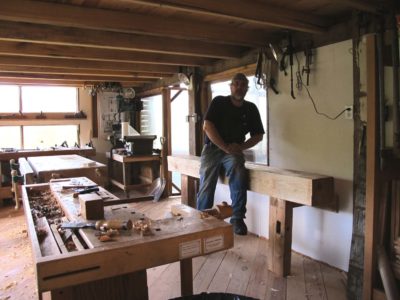
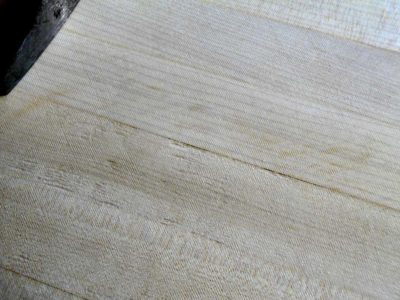
I soon added some planing stops, first in the form of counter-sunk screws then with a rising dog at the end, made for scraps of tongue-and-groove flooring, and put the tool to work. Visitors from near and far came to see it in action.
It was/is a crazy simple but high-performance work accessory, and if push came to shove I could probably get by with just this (I have also added some holes of holdfasts). It turns out I rarely need to use it to its fullest, but it would be perfect for its function at whatever length I might need.
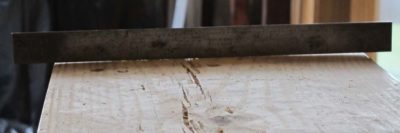

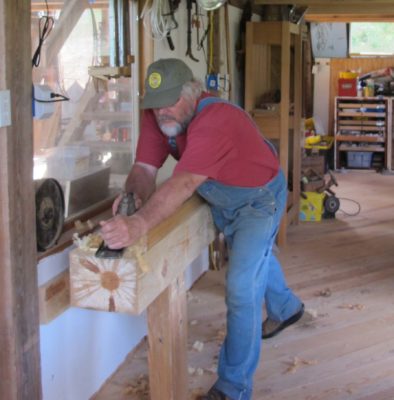
The only downside is that a timber this massive needs occasional care as it continues to equilibrate to the environment as it seasons. A local tradition here in the mountains is that lumber needs one year of seasoning for the first inch, an additional two years for the second inch, and so forth. By that rubric this beam should be pretty well settled in another three decades. In the mean time I need to touch it up every couple of years with a fore plane and a toother..

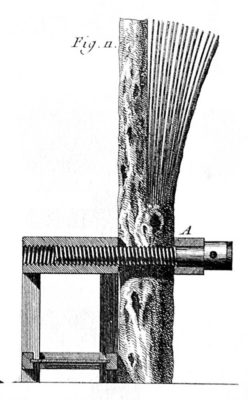
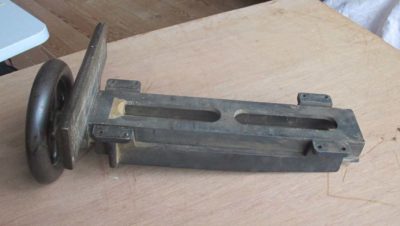
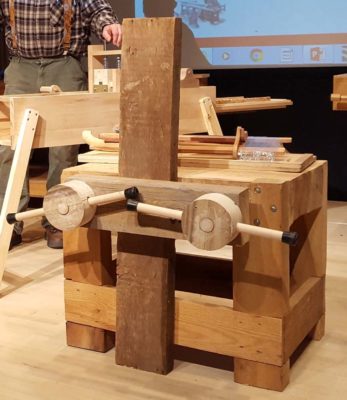
In great part due to the rapidly forming manuscript for To Make As Perfectly As Possible – Roubo On Marquetry and the number of my essays describing the seemingly arcane practices of 18th Parisian workshops, in 2011 I built a slightly diminutive (2/3 scale) version of Roubo’s sawing bench as illustrated in Plate 278, Figures 10 and 11. The dimensions for my version were determined by the space in my basement workshop; I now wish I had made it full sized. Doing so would have doubled the mass of the bench, and in this instance mass is really the only important thing. The construction was real meatball woodworking, I simply fit and fastened together 4×6 tulip poplar stock then drilled holes for the vise screws all the way through the top horizontally. For the female threads I simply used the wooden vise nuts that came with the threaded screws.
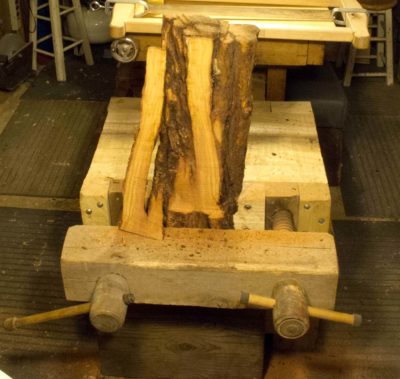
This workbench has only one purpose and function, to hold a work piece firmly while it is being resawn. What we found immediately in battle was that the bench vise did a fine job of holding the work piece in its jaws tightly. Unfortunately the bench was simply too light to perform well in action as the whole thing danced around the shop with every saw stroke. The only way we could get it to work was placing anti-skid pads underneath each leg and then loading it up with as much weight as was handy. Currently this sawing bench is the storage home for several hundred pounds of fire bricks I keep handy.
Roubo alludes to this problem himself, extolling the virtues of massive weights being stored on or under the bench to hold it steady, or even more likely bolting the entire unit to floor. In my old basement shop this made no sense on the concrete floor in a tiny space, it makes more sense now that I have wooden floors and lots of them.


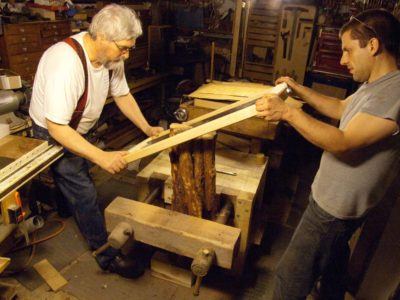
Most recently I used the saw bench during my demo at Working Wood in the 18th Century at Colonial Williamsburg, employing an attendee as my stabilizing weight. In preparation for that demo, and in response to my having cannibalized the unit to use the original vise screws on other benches, I made new screws and screw nuts with my Bealle threading unit.
I cannot say I have used this bench enough to become facile at resawing veneer, the best I can do is about eight leaves per inch. Only time will tell if I ever get to the point where I can saw a dozen leaves to the inch like the old timers, but if I do this bench or one like it will be part of the equation.
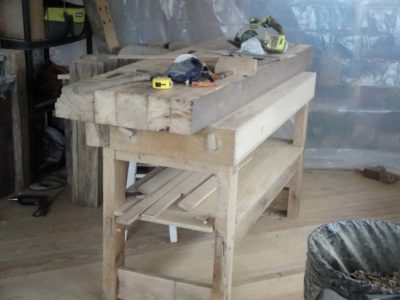
Before I move forward to discuss the next workbench in my inventory let me be diverted to discuss the retro-fitting of a previous bench, my Smithsonian Roubo, such that its location, role and function in the studio are completely new and immensely more valued. Over time the bench had come to occupy the end of the classroom space, primarily because it was the only bench I had that could fit there. It was not really large enough to suffice as a student bench for workshops so instead I employed it primarily for metal-working type projects including saw making and sharpening, hardware mounting, parts fabrication, etc. (sorry for the lousy picture; I had already removed the leg vise for another bench, replacing it here with a Record 53)
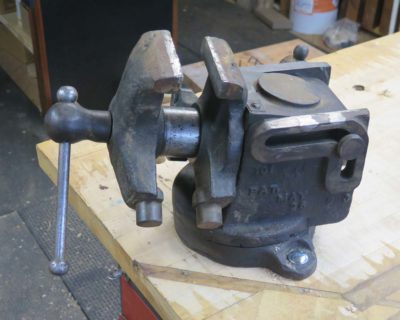
When I recently removed the generic end vise and mounted instead the ~125 lb. Emmert Universal Vise in its place, one piece of a convoluted equation began to take shape. I knew the vise needed a robust platform and this little-used bench performs the function perfectly.
A second element in this equation was expanding the work space on the side of the barn housing my shop; I reorganized it so that my own shop would extend an additional nine feet to include the full footprint of the 14′ x 36′ bay in the timber frame. (Of course that meant that I needed more workbenches there. Stay tuned on that one.)
A third component in the equation was a beloved niece-in-law had expressed an interest in learning woodworking (actually I have four beloved nieces-in-law, but this is one in particular). The odds are pretty good the second of the petite Roubos I built originally for my Handworks booth would eventually end up in their apartment. So, I removed it from the critical space it occupied adjacent to my third child before it became too disruptive to do so. I moved that little bench down into the newly opened space, for the time being.

Since nature abhors a vacuum something needed to go into that space previously occupied by the petite Roubo. Hmm, I really did like having a metalworking-ish bench in the middle of my herd of woodworking benches… Palm, meet forehead. Soon I had the old, almost extraneous Roubo bench relocated, revived and recommissioned, sitting where it will be used daily. I removed the second vise and stocked the space underneath with a lot of my mechanicky tools.
I have additional plans for this bench which I will chronicle when they unfold.
Here is a gallery of the Emmert Universal Vise showing off its moves.
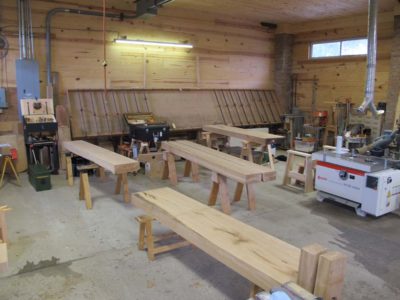
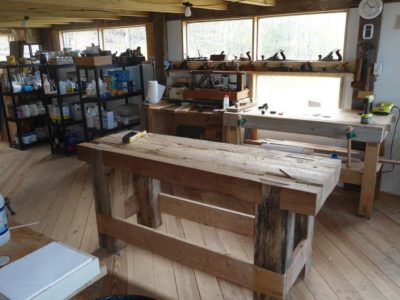
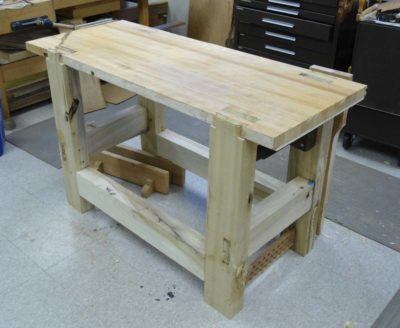
Almost coincident with my previous Roubo this much more successful bench was built in the barn, using surplus SYP timbers from the barn itself. The barn floor plan had been reconfigured from its days as a dairy barn so there were several pieces of unused timber available for new projects like this bench.
From the outset I made the objective that this bench would be the simplest possible, big slab, big legs, no vises relying instead on holdfasts.
Since we were not yet living in the Highlands the schedule of the bench project depended on my periodic visits to work on and in the barn.
The almost 6-inch-thick slab was glued up on an unseasonably warm January day when we were able to get the shop space up to almost 50 degrees with my two kerosene heaters.

The next session of working the slab was less than a month later when the outside temperatures were near single digits, and we were barely able to crack freezing in the space.

In another three weeks it was mild enough to work in shirt sleeves. Ahh, weather in the mountains.

Once the top was dimensioned and the mortises cut and chopped, the leg tenons were worked with the pieces being held in my Emmert K1. The legs were tulip poplar timbers left over from who knows what project, measuring 6″ x 8″.
Soon it was time to sledge home the leg tenons into the top mortises.

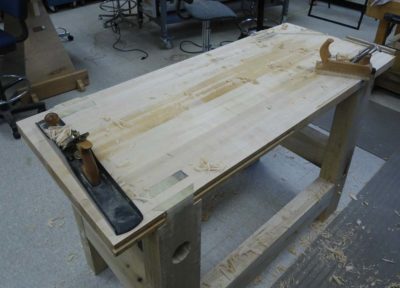
I added oversized stretchers and left the bench pretty much like this, in use, for another couple of years.
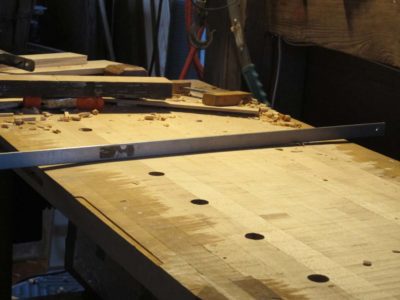
Eventually I spent the time on the final flattening of the top and filled its voids to make it a first-class working surface. It was not smooth but I didn’t really care about that as long as it was flat.
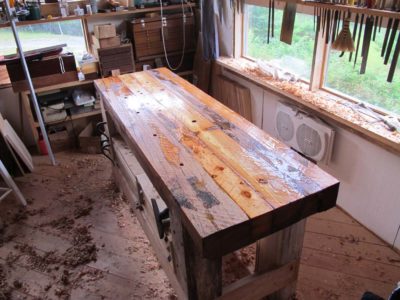
Immediately after that I sealed the whole bench with thinned varnish/tung oil mix. That really emphasized the cross-hatch pattern employed during the flattening process.


Once the sealant had hardened I toothed the entire top and pushed it up against the window and it remained there until last summer, when it was relocated to the other end of the shop where it still serves as my primary finishing station.
This was my first truly massive bench, so heavy I can barely move one end of it at a time. I love the thick slab top but the legs are a little too large and the stretchers are just ridiculous. With a re-do I would reduce the legs to more like 6″x 4″ and the stretchers to 3″ or 4″ wide at the most.
And, a bench without clamping vises works just fine, thank you very much.
In the title Roubo is in quotation marks because this bench was not strictly a Roubo, it was more Roubo-lite.
2011 was a turning point in my bench mania. In the preceding quarter century I had built or salvaged only four benches. From 2011 forward, inclusive, my inventory grew by more than a dozen. To be sure, going from a home basement workshop footprint of slightly over 200 sq.ft. to one closer to 7,000 s.f. in The Barn probably had something to do with it, but the truth is I was simply becoming increasingly fascinated with workbenches and vises, and now had the time and space to indulge that fascination.
My first personal encounter with a Roubo bench was back in the 80s when I got to test Rob Taruleh’s bench at an event where we were both speaking. It was intriguing but I was not then in a place to give it a go.
By around 2004/5 my successes and seniority at the SI allowed for my daily activities to become almost entirely self-directed; as long as I was productive within a broad framework of organizational priorities, did not ask for too much money to spend on my projects, and was not a trouble maker my daily activities were in great part at my own discretion. I made certain not to abuse this freedom, I remained productive in my scholarship, projects and publishing, I obtained almost all of my discretionary funding via external collaborators, and bit my tongue on a regular basis. (This last one was my biggest hurdle — Mrs. Barn says that one of my greatest challenges is that I am generally unsuccessful in hiding my contempt for knuckleheads and grifters).
Despite a sufficient number (4) of top-of-the-line German workbenches populating the furniture conservation studio I occupied for almost three decades at the Smithsonian Institution, my growing involvement with L’Art du Menuisier combined with the incessant evangelizing of Chris Schwarz compelled me to give the Roubo workbench a try in my own daily work space.
This is a fairly long-winded exposition as to why I made this Roubo-ish bench, it was because I wanted to. Even then I did not cause any waves using only surplus materials laying around the storeroom or my conservation studio, or in the case of the legs from my pile at home.
By 2011 with the Roubo franchise building a head of steam I felt it was time to experiment with the form, but not really go whole hog. Instead I took a couple days and built a Roubo-“ish” bench that was a so-so success. My starting point was a five-foot-long slab of laboratory counter top (missing one corner) that was about to be sent to the dumpster. Since it was only 2″ thick I backed it with a piece of 3/4″ plywood (yes, I knew even then this could be problematic, but thought I could get by with it being inside a tightly climate controlled space; little did I know that within two years I would go from climate control to climate, and lots of it) and grafted on another piece to fill the corner.
I also made the mistake of cutting the dovetailed tenons through the top at 45-degrees. In more recent work I have stayed with 60-degrees.
Once the unit was assembled I flattened the undulating top with a fore plane and a jointer, before finally surfacing it with a toother.

For the leg vise I used a vintage vise screw I had in my collection, but made the movable jaw out of some oak that was laying around.
For the next almost-two-years this was my everyday workbench and I liked it a fair bit, and it provided the validation I needed to develop my experience even further. It was a little too small and lightweight, issues that have been addresses in subsequent models.
When I departed the Smithsonian they had no interest in keeping this workbench for the furniture conservation studio so I just loaded it up with all my stuff and took it to The Barn. Soon enough the unregulated climate there wreaked its havoc on the composite top, crowning it almost a half inch. With a little time and a scrub plane this was resolved. It has remained pretty flat over the past three years.
The bench is too small and unrefined for my work now, although it is in the inventory. It’s at the end of the classroom, and at the moment I have it set up with a Moxon vise on top for saw sharpening and making. The leg vise was removed, being both in the way and needed for another project.


More than a dozen years ago I crossed paths with Tom, a retired police detective and rustic woodworker (that’s a description of the style in which he generally worked, not a commentary on his considerable skills.) Tom had a booth at a community yard sale selling some of his tools and, well, you know how the rest of that story goes.
Shortly thereafter we started spending Wednesday evenings in his shop making sawdust, sharpening tools, making and repurposing tools, and on occasion solving some global problem. Or more likely, just working on projects while we enjoyed each others’ silent company.
When we started that routine that lasted for a decade until we moved to The Fortress of Solitude, Tom’s shop was set up for him to work pretty much alone so one of our first projects together was to build another good workbench for me to use. Projecting from my own Old Faithful I designed and built a larger torsion-box-top bench on a petty standard base. Over a period of several Wednesday nights the bench took form until it was ready for battle.
Tom had never built a torsion box and was fascinated by the whole concept and process, especially when all the parts of the 1/2 baltic birch box were glued together into a 60″ x 24″ x 5″ thick whole. Once that was done I affixed the 60-inch twin screw vise to one of the bench faces (I had obviously already prepared the holes inside the box grid before glue-up) and suddenly he had another unique high performance tool added to his shop. I think we had it sitting on a pair of sawhorse for a couple weeks while I used it to fabricate the base, but before long it was all together and sitting on the floor for me to use.
Well, he used it a fair bit as well. Eventually Tom added a pair of rising stops to either end of the bench and I added a shelf underneath and it was done and put to work immediately.
For several years it served me well in Tom’s shop and I fully intended to leave it behind and for it to become part of his inventory when we moved away. (My weekly evening in Tom’s workshop was one of a very few things in Mordor I left behind with regret). Tom promised to visit The Barn and in fact he came a fair bit early on, and he had come several times to work on the barn with me.

On his first trip to work in the barn he surprised me by bringing the bench with him. He said he wanted to make sure he would always have a workbench whenever he came for a visit, which has not been as frequent as I would like.
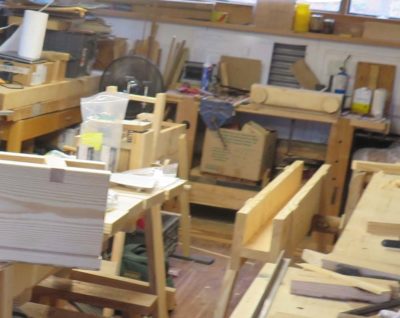
But the bench is sitting in the barn, just waiting for him to join me. Maybe a little cluttered, but ready and waiting.
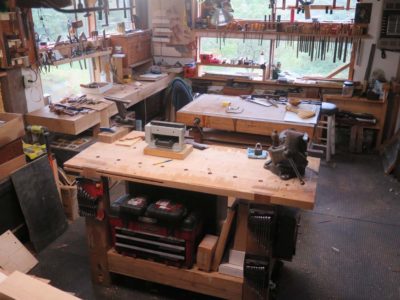
The bench today
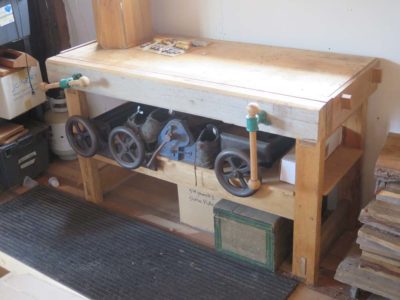
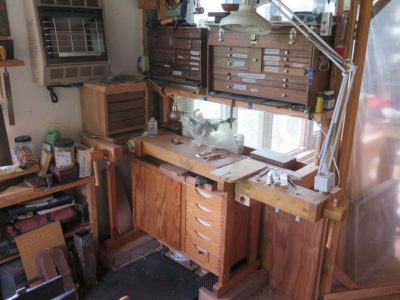
Sometime in the mid-aughts I came into possession of a raggedy c. 1970s Sjoberg workbench that was slated for the dumpster. It was a rickety old thing that needed to be pretty much disassembled and reconstructed to make work properly. Before, it wobbled so bad it was probably an injury magnet, afterwards it was stout and sturdy. I eventually added another four inches to its height by simply bolting on some mondo skids. Since it was still unusably light I then bolted the skids to the floor and now it is one of my high-value work stations for when I am doing conservation projects for smaller decorative objects or gunsmithing, engraving, marquetry or carving.
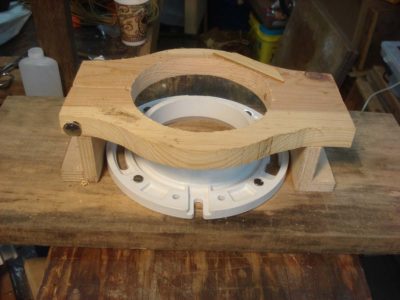
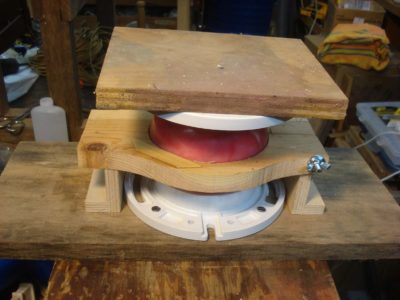

Some of the accouterments I have added to it include a tilting fret saw table that fits perfectly into the end vise, and a swiveling ball vise made from a pair of toilet flanges, a duckpin bowling ball (it’s a Maryland thing) and a hot melt glue gun and wood scraps. This resides on the floor underneath the bench when not in use. I’ve also got a stereo-microscope sitting there for those times when I need it, and a pair of Gerstner tool boxes filled with the tools I need for these projects on a shelf above it and a small drawer unit with carving and engraving tools sitting on the shoulder vise end. It is light enough to move aside easily whenever I need that vise.

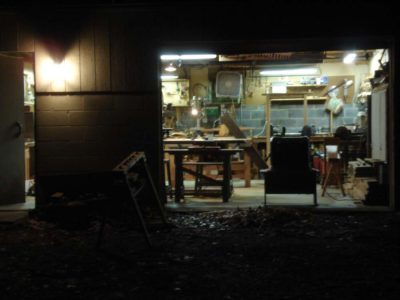
The bench was one of the very first things I brought to the barn, probably within the first year after it was enclosed, in ’09 or ’10. It was the closest thing I had to a functioning and available workbench and it arrived even before there was the final flooring underfoot.
Being pretty light it was moved around frequently until the spaces took shape. It finally wound up in a perfectly fitted niche just inside the entry door, adjacent to the propane wall furnace.
It is not the perfect bench, but the purchase price was perfect and with a bit of finessing it has turned into a valuable contributor to the shop’s functionality. Were my life situation different I could probably make a decent living with this as my only bench.

Recent Comments