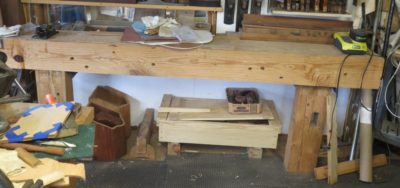
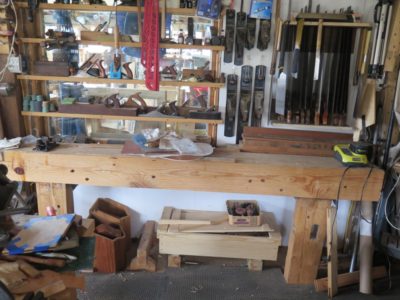
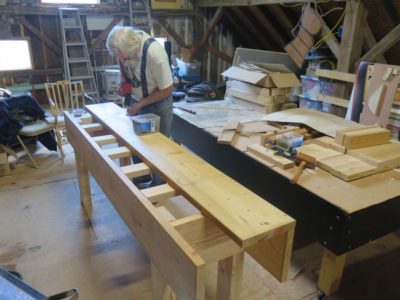
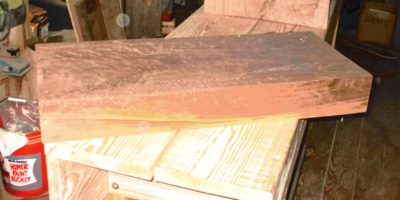
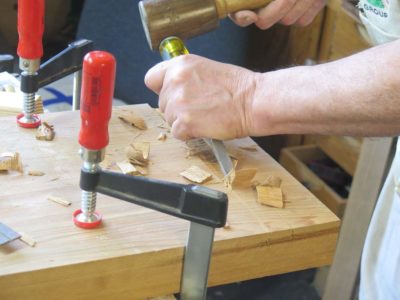
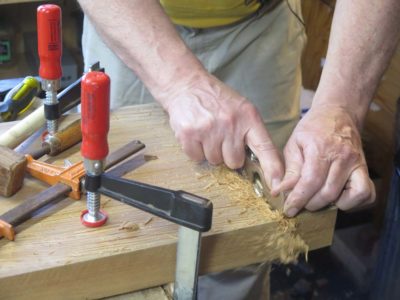
In my quest to build a low bench, a/k/a a woodworking-while-sitting-on-my-keister-is-more-attractive-with-age bench, I am embarking on making a mélange of the Roman Workbench, the Estonian Workbench, and the Jonathan Fisher Workbench, with the occasional influence of Nicholson with a couple added features thrown in. Rather than rearranging and sorting through the log barn to pull out a timber of just the right cross-section I decided to repurpose my old planing beam that had become obsolete once the FORP bench was completed and installed. Not needing an 8″ x 10″ x 8′ shelf in the shop, it was a fairly easy conclusion to reach.
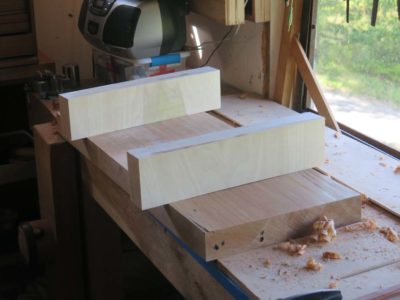
Much to my surprise the beam had become considerably heavier in the decade since it was installed, or was it the maker who became weaker? I’ve got a rolling table that I maneuvered into the shop to make the transport out to the large space a piece of cake. I placed the beam on two sawhorse and reached for my 10″ Milwaukee circular saw. (It’s times like these that I revel in having made that particular purchase 20+ years ago.) Making two passes on each side I was left with about an inch to saw by hand, and viola’ I would soon have a pair of ~5″ x 8″ x 96″ timbers.
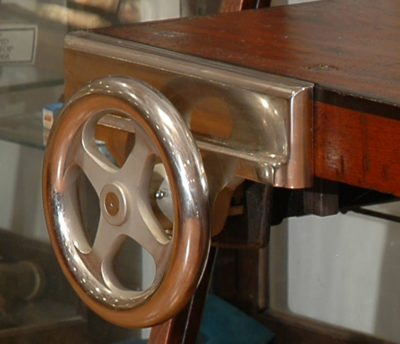
Over the past decade I have looked at dozens of piano makers’ vises similar to the ones H.O. Studley had on his workbench. Even at this very moment there are five in the barn. The head-scratching part about them revolves around two questions; 1) what were the processes of piano making that required such a remarkable vise, and 2) why are there no makers’ identifications on any of them? Given the time in which these vises were made, late 19th and early 20th Century, when manufacturers were stamping their names on everything that could be marked, this absence of identification was mystifying.
This week I got a picture from a friend, who had a friend who just bought a piano makers vise, and lo and behold there is a maker’s stamp right in the middle of the moving jaw, front and center.
The events of the past several months, including Mrs. Barn and me losing our remaining parents and my becoming closer to 70 than 60, are leading me on a path of deliberate winnowing of my shop and barn contents. Given that my sister is still going through my mom’s stuff — and she lived her last years in a one room “mother in law” apartment with my brother and sister-in-law — and the literal tons of belongings in my father-in-law’s four bedroom, two car garage house with a large back yard where he lived for 59 years, I am determined to reduce my material possession burden to my heirs as much as possible. Since my mom died at 103 I may have some time to get it all resolved, which is a good thing when there are 7,000 square feet and 70+ acres in the discussion.
Other contributors to this long-term process are the realizations that barn-based workshops will not have the prominence that I once thought would be true, and given my current set-up on the fourth floor I really do not need a second floor classroom outfitted with a perimeter of workbenches (I do however still use that space mostly for development of the ripple molding cutter). Also I recognize that at some point in time life in the mountains would just become too hard physically, and I would see the barn in my rearview mirror. Not any time soon, but it is inevitable in 10, or 15, or 20 years. One small step we are taking to delay that day as long as possible is to try to find someone who can execute most of the mowing and bush-hogging tasks around the homestead, but when you live in the least populous county east of the Mississippi River it can be a challenge to find someone to work for you.
One of my upcoming tasks will be winnowing the workbench inventory. Do I really need eight workbenches in my own workspace? Of course not. So, I will begin reducing that particular footprint almost immediately and there are definite “Workbench Wednesday” implications.
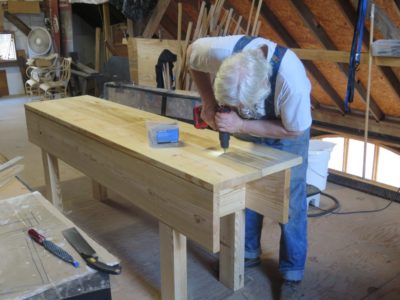
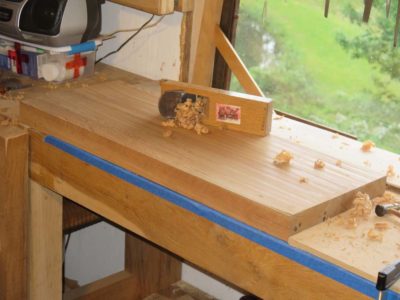
The first of these will be to replace my first workbench built for the space, the timber planing beam, with a low bench of the Jonathan Fischer/Roman/Estonian variety. Since completing my French Oak Roubo Project bench I have had no need for the planing beam so it will be resawn and joined to become the slab for that bench. It will occupy roughly the same space but serve a more immediate need as my knees and hips are becoming more troublesome and working while sitting is ever more congenial.
This change will also allow me to construct a standing tool chest to hold a copious inventory of hand tools, to be placed at the end of the low bench where my saw rack and metal hand planes hang on the wall. Since seeing Walter Wittmann’s cabinet a few years ago I have seen this as a solution to my tool storage problem and now is the time to act on it. The Japanese tool box will reside where Walter’s large lower drawers are located.
Of the plans for the workshop changes these are two of the three at the top of the list. The third is to restore my piano-maker’s workbench in order to make it a proper gift for my son-in-law, and move it out of my workspace. I m still cogitating on the ultimate home for the Studley-ish bench I built for the exhibit.
On top of everything else I have stock for at least another half dozen workbenches still unbuilt, but that may be moved on to other folks with the time, energy, and need that I do not have. Among these are the gigantic mahogany slab and vintage walnut 6×6 that would result in an eye-popping Roubo bench, a 14/4 curly maple slab already glued up, a stack of oak 10x15s, some 12-foot long 7×15 Douglas Fir timbers…
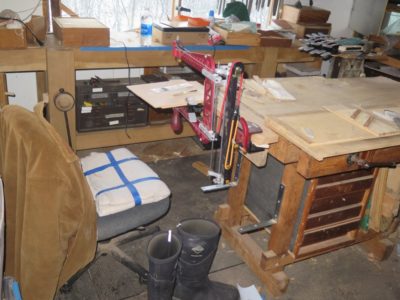
One of my quirks is that I usually like to lay a piece of sacrificial sheeting on top of my workbench most of the time, and today was my day to swap out the old one for a new one on the FORP Roubo bench. As I was making the swap I noted that it was also time to address one of the two main manifestations of Seasonal Affected Disorder that afflicts (?) wood in the natural course of events, sometimes called hysteresis, sometimes called rheological cycling, but generally known to us folks at the workbench as “wood expands, wood contracts.” One of the consequences is that when there are pieces of wood assembled with different grain orientations eventually they get out of sync dimensionally. In a Roubo workbench this become manifest as the tops of the leg tenons eventually protruding past the top of the slab.
As I was fitting new pieces of luan plywood to lay on the bench top I noticed that the tenons were quite proud of the slab, perhaps 1/16″. I only assembled the bench a couple years go and did not notice the issue when I laid the initial sacrificial covering at the time, but it was there now.
You might have thought that since the bench was initially fabricated eight years ago it should be fully settled into its new environment. Maybe, maybe not. If the old adage that wood seasons at the rate of “one year for every inch of thickness” is true then the answer would be “yes.” Since I moved to the hinterlands and talked to some of the local wood guys I have come to appreciate their view of seasoning woods, especially dense hardwoods. To them “one year per inch” does not hold true; instead they use a formula of “one year for the first inch, two additional years for the second inch, three additional years for the third inch,” and so on. By that metric my five-inch-thick bench top will pretty active for 1 year + 2 years + 3 years +4 years + 5 years, for a total of 15 years.
I dealt with the tenon ends directly in about an hour this morning, and will address the slight crown of the overall bench perhaps at the end of summer.
It might be worth reiterating that once I get a slab bench top flat I prefer to hit it with a toothing plane to give it a little texture. I lose none of the planarity but gain a lot of grip on the workpiece.
Going back many years I was an enthusiastic supporter of the concept of a vertical marquetry saw as an alternative to a horizontal chevalet, a machine I never got the hang of. I’m not sure if I was the first person to raise the concept to Knew Concepts but certainly I was in there early with encouragement and specific concept and design ideas. The development of the tool took many years and trips down many rabbit trails, not the least of which was the passing of our beloved friend Lee Marshall from Knew and the transition to Brian’s sole leadership and all the logistical and legal details that entailed.
Then came the day several months ago when the very first unit rolled off the assembly line and shortly thereafter arrived on my doorstep. I assembled and used it just enough to get the sense of the tool, then put it away since I had so many other things in my pile of things to get done. Well, I am finally returning to the tool. The first thing was to find a permanent (?) home for it in the workshop. At the moment that location is the end of my oldest and dearest friend in the shop, my Emmert workbench.
Time will tell if this is the final resting place for this magnificent machine, but for now it is working just fine.
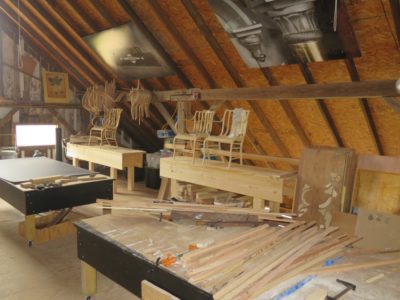
With all of the steam bending done for the Gragg chair workshop John and I spent a little time reorganizing the attic of the barn, now with only the months of waiting for the students to arrive. One more workbench to move across the room and it’s all done.
Yes, we hoisted one and made two new benches and began to place them around the perimeter of the space. At almost a thousand square feet it is a grand luxury for any workshop, and I have only Mrs. Barn to thank for it. I had intended to leave the level of the barn un-floored, but she recommended, correctly, that if I did lay down floor I would find it immensely useful She was correct, again.
So, at the workshop every participant will have a fully outfitted bench plus half of a 4′ x 8′ assembly table on wheels, which are themselves re-cycled platforms for the long-passed Studley exhibit.
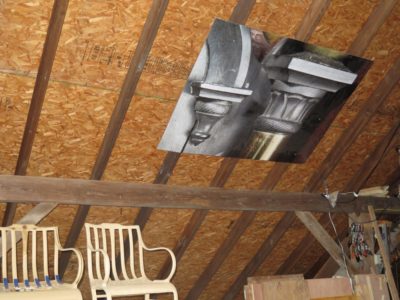
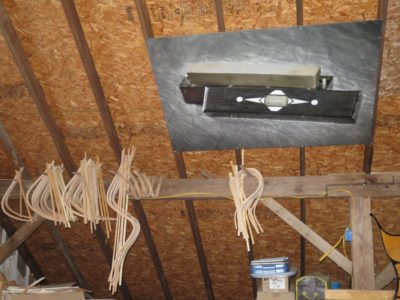
One final decorative touch was to tack the graphic panels from the exhibit over the benches. Whether these inspire or intimidate is yet to be determined.
In addition to bending all the necessary parts for next August’s Build A Gragg Chair workshop John and I spent some time setting up the attic for the event as it is the only space in the barn large enough for the activity. I already had two eight-foot workbenches up there, but in order for all the participants to have their own bench we needed three more.
One of them was a simple problem to solve, at least conceptually. Just take one of the benches from the classroom space on the second floor and host it up with my vintage compound block-and-tackle. We did accomplish that but we are definitely not as young and probably not as strong as we once were. Plus John probably weighs about a buck fifty if you put bricks in his pockets. Even with a compound hoist, a 350-pound bench weighs 350 pounds.
But hoist it up there we did.
For the other two I made two more Nicholson benches after carrying the individual boards up the stairs one at a time, definitely an easier path to glory. At the moment they are sans vises and holdfast holes but that will be rectified soon enough.
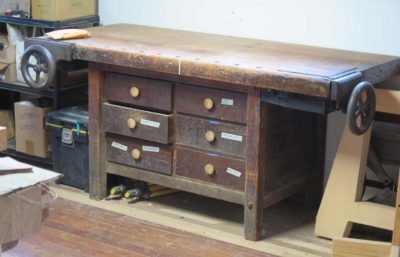
Now my total workbench inventory for the barn is 19, an entirely appropriate number in my opinion. This is probably the end of the run for new Nicholsons or laminated Roubos as the recent prices for lumber have definitely scared me off. For example, I recently needed two ordinary (untreated) twelve-foot 2x8s, they were $23 apiece. The 24-foot 2x12s I’ve been buying for workbenches used to be $54, now they are $97. Fortunately I had just enough of my old inventory to build these two benches.
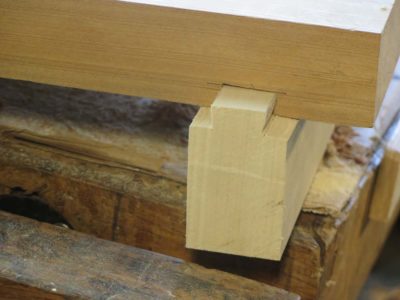
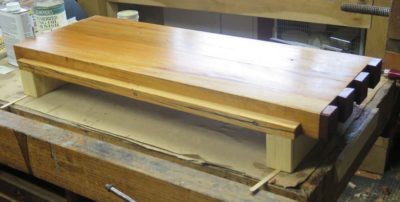
With the sliding-dovetail “legs” installed I trimmed the dovetail tenon flush with the side shoulder and underside of the slab. This allowed me to affix a simple edge-planing shelf.
Rather than punching through a square planing stop or two I opted for dovetailed end risers for my planing stops. I find these preferable in almost every way since they require very little effort or precision (I just set the angle on the table saw and cut everything in about five minutes) and screw one half of them into the end of the slab, spaced according to the tapered risers.
I gave every surface a slathering of some ancient Moser’s Polymerized Tung Oil Varnish whose entry into my inventory is lost in the distant mists of time. Each coat, thinned by about a quarter with naphtha, took three or four days to harden fully but I very much like the result. It really toughened up the cypress surface,
Thus this simple prototype is completed and ready for work. I found out immediately that it to too high of a work surface for actual planing, but when placed on my lower mini-Roubo the work height was perfect.
Now all I have to do is carve out some time to re-saw my walnut slab given to me by Tall Tom and make a pair of workbench accessories, a mini-bench and a planing board.
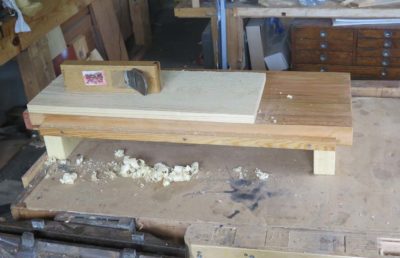
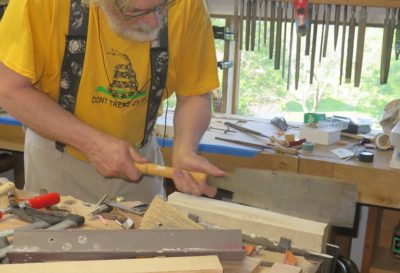
With the cypress slab glued up and the ends trimmed I gave it a light planing using the first Japanese plane I ever bought, maybe thirty years ago. I set the plane to take a beefy cut to get the work done in a hurry, the final planing was still a ways down the road.
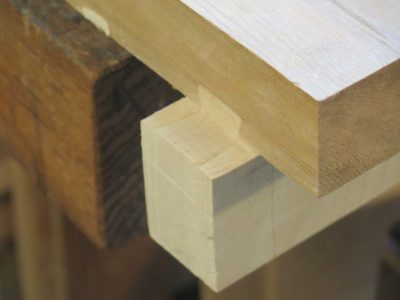
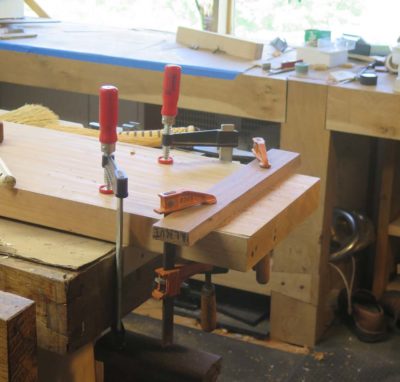
For the feet I had a couple of 12/4 tulip polar off-cuts from my stock of Gragg chair materials. I decided to use this material with the grain running parallel to the cypress slab for the purposes of sympathetic moisture response.
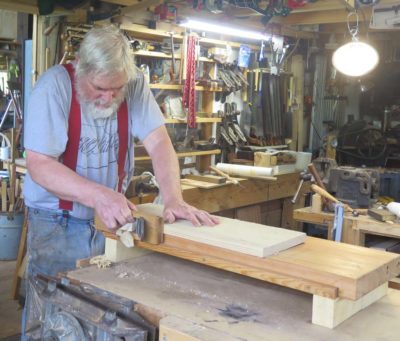
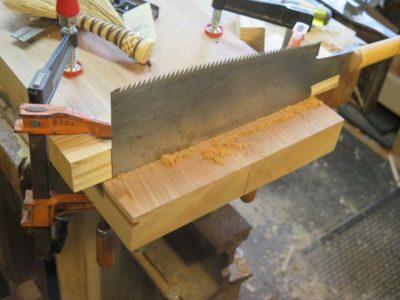
These hunks were set into the underside of the slab with sliding dovetails. I cut the rough rebates on the feet with the ryoba saw and finished them off with my homemade dovetailing plane.
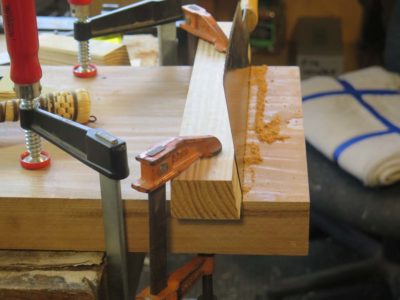
To make sure I cut the sliding dovetail slots with the same exact angle I made a sawing bevel from a piece of waste wood.
Again I used the ryoba saw to cut the shoulders of the slots, the bevel guide made it a piece of cake.
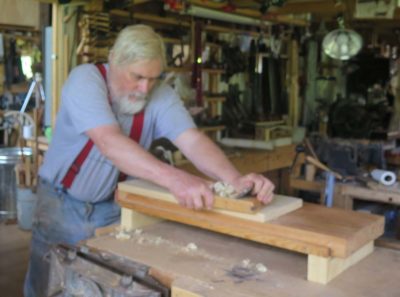
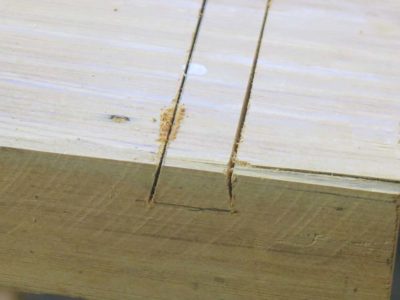
Most of the waste was removed with a chisel and mallet, followed by my dado plane. I would have used a router plane but for the life of me I cannot remember where I left any of the three I use regularly. I hope that fact comes to me in a dream or something.
With a few smart taps from my mallet the feet were seated into the slab.
In great part thanks to my friend WilliamD’s demonstration of his mini-workbench at an SAPFM Chapter meeting in Fredericksburg VA several years ago, and more recently Youtuber Adrian Preda’s video on making his bench top planing board, I’ve been motivation to build a bench-top mini-bench type accessory or three.
For decades I used a pair of Japanese-style mini-sawhorses and a small torsion box for the purpose of raising the working surface to be most amenable to my creaky 65-year-old back and failing eyes. Finally I was able to carve out a little time to work on a first version of this tool. This was a very simple planing board, I will make my version of WilliamD’s much more complex tool once I get this one done.
Preda’s approach to making his board was not one I chose, but the configuration and some of the features he integrated were absolutely inspiring to me in moving this project to the top of the pile.
Looking through my pile of wood scraps I settled on gluing up a two-piece top slab of cypress, dimensioned to a slightly full 8/4. I prepped the two pieces and glued them together with PVA into a 12-1/2″ x 2-1/8″ x 37″ slab and set it aside for a couple weeks until I could get back to it. A couple weeks turned into six months. Sigh. Even though I had interruptions by more urgent items I never stopped thinking about this mini-bench and how it could enhance my work.


Recent Comments