Making Roubo Squares – Day 2
By the start of the second day everyone’s trains were barreling down the tracks and all we had to do was keep on keeping on. Even as I entered the barn the sounds of sawing, filing, and sanding filled the air.

I had given each of the students one of these DARPA funded, MIT developed tools to work on the ogee tips at either end of the squares. One side was flat and the other was round, and when wrapped with sandpaper the tool was perfect for the task of finishing the shape. The uninitiated might think these were simply a 3/8″ dowel split in half on the bandsaw, but they would be properly ignorant of the national security dark technology pedigree of the tool.


Pretty soon the tips were more-or-less derived.

One procedure that was replicated perhaps a hundred times that day was returning to the abrasive covered granite blocks to bring the squares closer to “true,” a process that would be continued until after the torch work and the “square-ness” was perfected versus the Vesper final word square.


Len was the first to get the brilliant idea of creating a 30-60-90 triangle from the remaining scrap of rectangular brass plate left over from the four nested squares. Using my older version of the Knew Concepts Mark III saw he set to work and soon had the inside design cut out.


Meanwhile Dave, John and Pete got their tips shaped and polished.

Len finished the interior of the piercing of the triangle.

All the while the pile of brass filings and shavings built up at every work station. This continued until the very end and we compiled an impressive pile of scraps and waste filings, I’d estimate somewhere around five pounds worth.

All of this was prelude for the tasks presented after lunch as the shoes for the beams were brazed in place with silver containing solder. Once the mating surfaces were perfected it was time to move to the torch work stations.
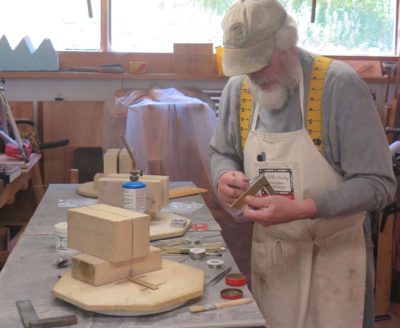
The set-up was designed for efficient and safe torch work. I will blog about making a perfect set-up for bench top brazing in the next couple of weeks.

Fortunately I had all the things I needed on hand; fire bricks, kiln shelves to use as brazing platforms, and inexpensive lazy susan bearings so each place could turn. I placed three work stations on top of cement backer board from a home improvement center. For this project it was important to isolate the workpieces from the shelf and the bricks as much as possible to reduce the amount of heat loss from direct contact during the brazing. That is why the work pieces are raised up from the shelf by two small pieces of scrap brass.
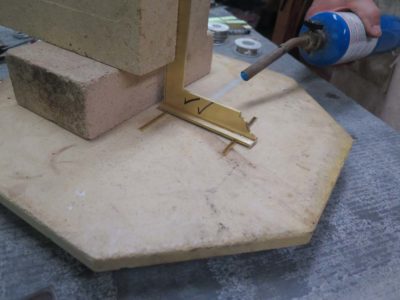
After slathering on the flux to the contact edge of the square it was placed on the horizontally situated shoe, in the center. Then the torch was lit and the heat turned up. We were using both propane and MAPP torches, the first was fine and the second faster.

Once the assemblage was heated up and the brass began to get a coppery tone it was time to simply flow the coiled solder into the back side of the joint and let the heat draw it underneath the joint toward the flame.

Dave gave the quenched joint a fierce testing, and was impressed at the strength of it.


Then everyone set to brazing on the bases of their respective squares, then began the cleaning up process.


And that’s how we spent the rest of Day 2.

Join the Conversation!