Processing Beeswax, Part 2
With the water soluble contaminants dealt with and the multitude of bee carcasses and large particulate matter screened out, and the smaller particulate matter concentrated into a thin layer at the bottom of the slab of cooled beeswax, it’s time to turn the half-cleaned raw material into a purified and pristine mass for Mrs. Barn to work her magic.
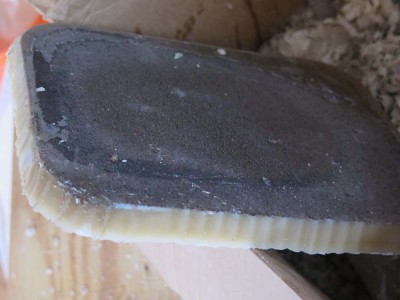

With a common bench knife I scrape off the thin layer of grit that formed on the bottom of the molten block as it was cooling.

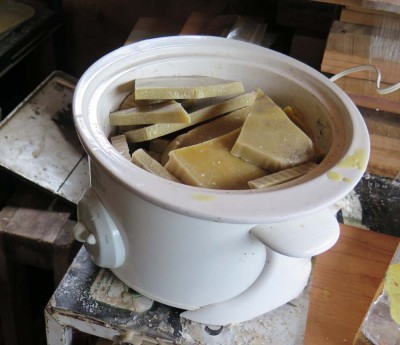
The remaining slabs are broken into smaller pieces and put into the cooking pot to melt them.
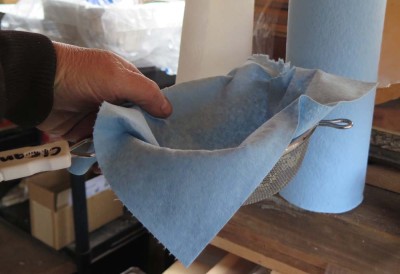
Once the clean(er) material is melted, I prepare the larger sieve through which it will then be ladled. In this step I use the common blue shop paper towels as my filter. This material works perfectly: it is inexpensive, so I do not hesitate to swap it out with every new flat I am pouring, and it does a remarkable job of filtering out the last remaining particulates. I learned early on to have a dedicated set of pots, ladles, and sieves for both the dirty preliminary steps and this final clean step. It makes all the difference in the world!
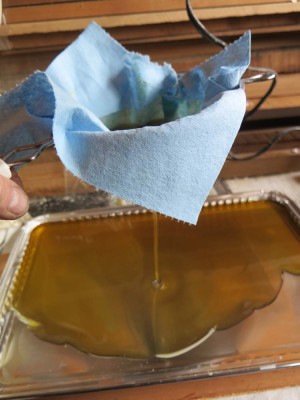
Scooping up a ladle full of the cleaner molten wax, I pour that into the sieve and, through the filter paper, a clean aluminum baking tray.
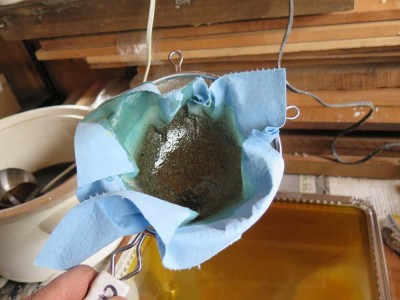
The performance of the filter paper, at a few pennies per flat, it what makes this all possible.

The golden transparent (and thus pure) molten beeswax in the flat is a joy to see. Like I said, I swap out the filter paper with each new flat being poured. This used up filter paper is not wasted, it becomes fire starters for the wood stove in the shop.
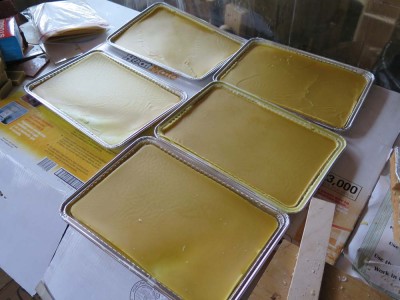
The result? judge for yourself.
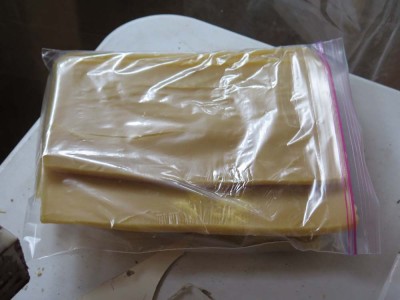
At the end of each day of wax rendering I break up the thin, pure slabs, place them in large freezer bags, and carry them down the hill to be turned into the blocks we make available to you.
Next time: making a packaged product.

Join the Conversation!