Restoring the Forestock II
With the first split successfully re-integrated it was time to turn my attentions to bringing it all together. Since the previous damage(s) resulted in enough loss to the fracture margin the two pieces would not align perfectly, I needed to bring them into proximity using shaped cauls.
My first attempt used a plaster mold made along the outside of the larger piece. I simply wrapped the wood piece in shrink wrap and cast plaster, hoping to use the resulting piece as a clamping and aligning form. I just was not happy enough with the result.

Instead I used the actual tubing from the gun, around which the pump action made the forestock slide back and forth along the tube. To make sure I had the right amount of clearance, and to provide the perfect clamping form, I wound the tube with three layers of waxed paper. This worked perfectly.

Putting the wrapped tube inside the larger of the two broken pieces, I brushed the West epoxy onto both gluing surfaces, the placed them in contact with each other.
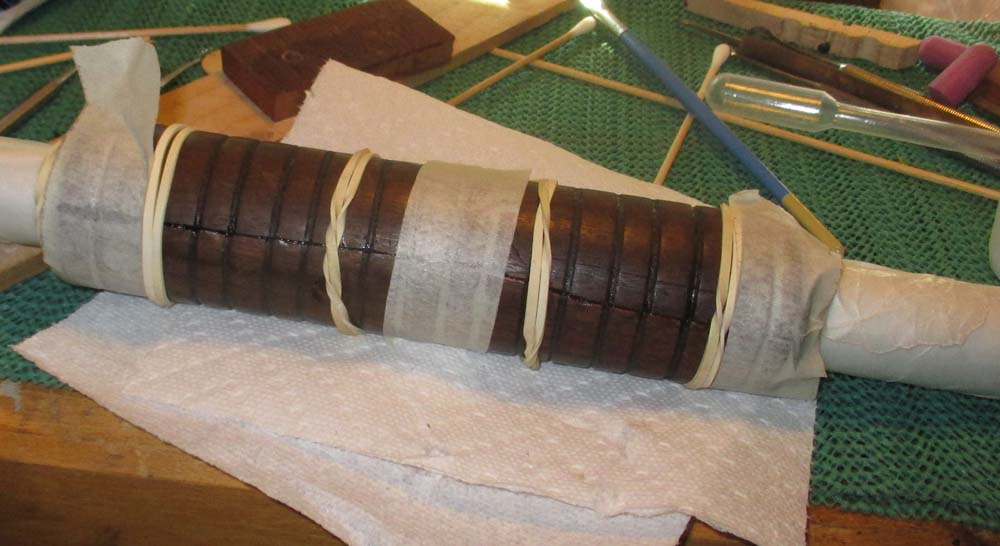
Using rubber bands I gently moved the two pieces into the closest configuration possible, and when that was accomplished I used some small pieces of masking tape to hold everything firm, and let it sit overnight.
The next morning I mixed a small amount of epoxy and added some more to fill the voids in the break. The following day I smoothed off the excess epoxy with dental tools and needle files. The result was acceptable.
To add an additional level of robustness to the stock I prepared a piece of nylon sheer drapery to served as a “bandage” on the inside of the repaired split.
 When it was ready to apply I brushed some epoxy on the inside wall of the forestock, then saturated the “bandage” while it was sitting on a piece of mylar then moved it into place.
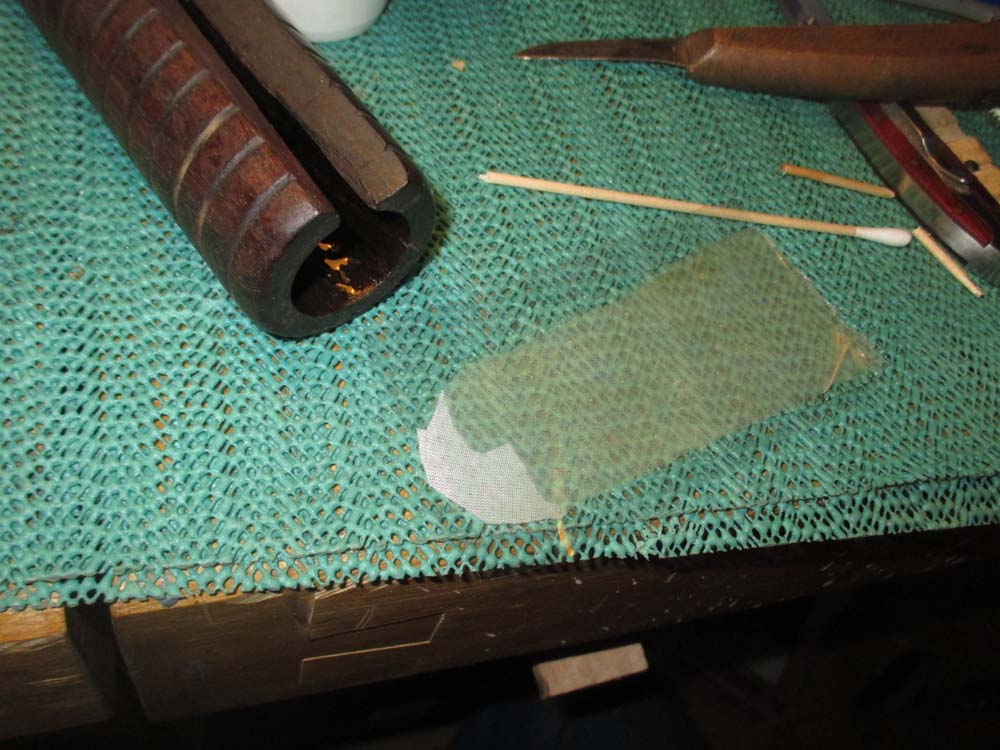

With the small sheet of mylar and the epoxied bandage in place, I used a tube balloon, inflated in situ, to provide the necessary gentle pressure to make sure the epoxy saturated nylon sheer was in direct and intimate contact with the surface.

When I dismantled the glue set up the next morning I was delighted to see that it was successful. A minute with some fine sandpaper wrapped around a large dowel to smooth the inside surface and the structural repair was completed.

The salvaged forestock slid perfectly up and down the tube.
To be in concert with the restoration of the other parts of the shotgun, I lightly cleaned and sanded the outside of the re-unified forestock before applying a couple coats of Tru Oil finish.

I returned the repaired piece to Bob and he was delighted with the end result. He will complete the coatings homogenization.

Join the Conversation!