Sample Board Partying – Before the “Finish,” Fuming and Polissoir Burnishing
As I presented my sample boards at the luncheon banquet on my recent trip to Florida, I began with two simple methods to enhance and modify the wood surface itself, even prior to beginning the application of any finish materials.
The first, and a very popular once again, was the coloration of white oak through the application of ammonia. In the first sample I simply brushed on liquid ammonia and left it to dry. The coloration is about what I expected, with the slight blotchiness and shallow penetration that would be the result of a light liquid application. The depth of penetration from the single wetting with ammonia was about 1/16″
A second and similar sample was that of white oak exposed to ammonia vapors. In this instance I prepared the six oak samples and placed them standing upright in a circle around a coffee cup warmer, on which I placed a half pint of full-strength hardware store ammonia. I turned on the coffee cup warmer to heat and vaporize fully the ammonia and placed a plastic bucket upside-down over the lot, and left it for twelve hours. I neutralized the ammonia with a light swabbing of white vinegar and left them to air out for a few hours, but there was no noticeable odor.
The result was the sumptuous almost-mocha coloration we have come to expect as the base for a lot of Craftsman furniture. An application of a couple coats of deep red garnet shellac would have yielded a magnificent dark reddish brown finish. I left the samples in their “native” state to make sure that the audience could see it in the raw. Just to see how effective the fuming was, I sawed a sample in half, and the entire 1-inch cross section was the same fumed color.
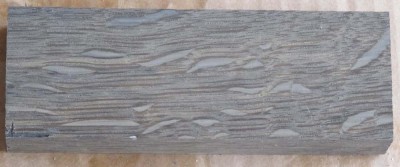
As a special treat I showed a set of samples that I did not prepare other than to cut them to size. These were pieces of “bog oak” from a crib dam on the Rappahannock River that had been submerged for nearly a century-and-a-half. The coloration and luster of these pieces as truly spectacular, and I cannot wait to make some furniture from the pieces I have.
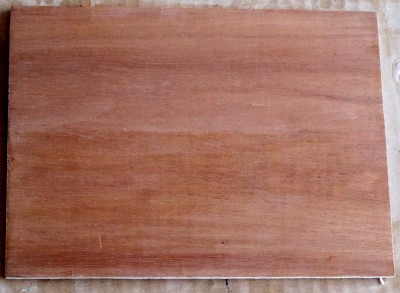
A final “pre-finishing” step was, not surprisingly, burnishing with a straw polissoir. I lightly scraped the entire surface, then burnished one half of it. I demonstrated this one at the luncheon, bringing the mahogany surface to a desirable sheen in just a few seconds. I also noticed that these samples drew continual attention (caressing?) during my presentation, even after I had moved on to other topics.
After that we got down to the serious business of selecting and using a variety of finishing materials


Join the Conversation!