Tuning Up The Planing Beam and Faux Studley Workbench
I’m in the midst of a project with lots of hand planing (the client requested a small writing desk reflecting the style and technology of 2nd quarter 19th century) so I spent a little time upgrading both the planing beam and the faux Studley workbench.
My main issue with the planing beam was that the flat head screws I had installed as the planing stops were inadequate for the job. Even though they were #14 screws, they were modern #14 screws so they bent under hard use, rendering them useless as retractable pins. In exasperation I got them out and threw them across the room into the trash where they belonged. For a while I just clamped a piece of scrap stock on the end, which worked for some things but was in the way for others.
I decided to come up with a permanent and robust solution.
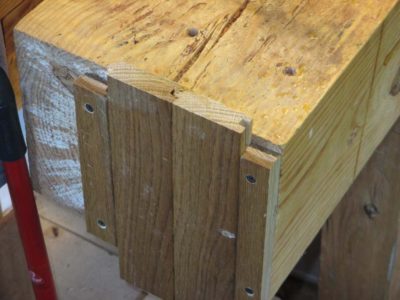
My intention was to make a rising stop that was housed on the end of the beam. A great idea and easy enough to do. Being lazy I found an even easier method than I had thought initially. Since I seem to be genetically incapable of throwing stuff out, when I was puttering around up on the fourth floor looking for some wood to use for the shelf underneath the Roubo bench I was making, I did indeed find two boxes of tongue-and-groove flooring scraps left over from creating the floor of the classroom. Scraps too small to use for anything. Not only did I have enough for a open slat shelf under the new workbench, but another couple of pieces were perfect for the new planing stop.
I made three 10″ pieces of the tongue-and-groove, glued two of them together and ripped one in half. These became the sliding stop and the shouldered housing. I held them against the end of the planing beam, affixed the shoulders with screws to the end of the beam and was making shavings seconds later. I must’ve taken almost six or seven minutes of my time to get it done.
For this desk project I had to prepare some mahogany boards that were about 18″ wide so the planing beam was not the workplace of choice for getting them done. But, it was a perfect application for the broad expanse of the Studley slab I made last year. The only thing missing was an end vise and some bench dogs, so that was the task of the hour.
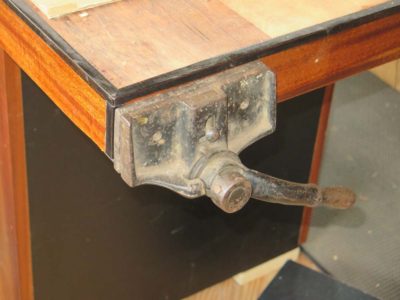
I mounted the Sheldon vise at the end location, but was hampered by the fact that the Sheldon was so small it did not come close to the top of the bench. (I was not confident the Sheldon would serve my needs so am resistant to the notion of excavating the underside of the slab until I know for sure.)
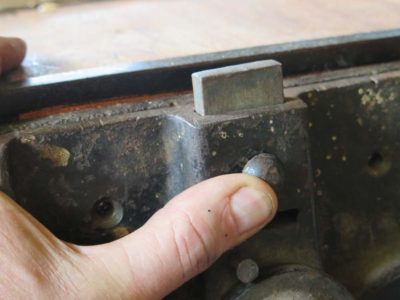
Even with the sliding dog in the fully extended position it only came proud of the top by about 1/32″, certainly not enough to work.

So I made a new dog out of some anonymous tropical hardwood I had in the scrap bin, and made it so that it was even with the top when fully retracted and almost 3/4″ proud when fully extended.
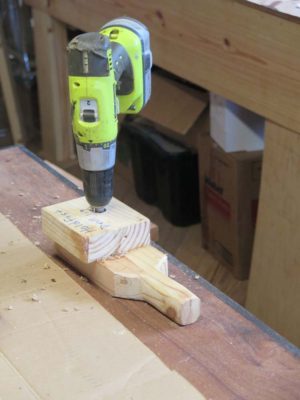
To pair with the new sliding vise dog I took my 3/4″ holdfast boring jig and drilled a series of six holes into which 3/4″ oak dowels were inserted. Works like a dream, but I am still not sure the Sheldon is up to snuff as the permanent solution. I’m still holding out for a piano-maker’s end vise, even if I have to make it myself. But that won’t be happening any time soon.
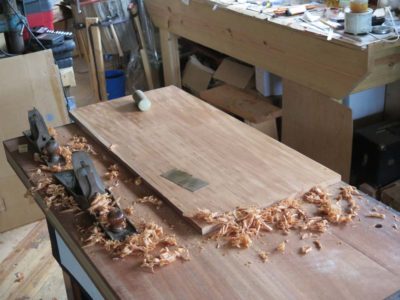
So for now my faux Studley workbench is fully functional and in heavy and fairly constant use, and the planing beam remains one of my favorite work stations.


Join the Conversation!