Workbench 1, 2, 3 – Day 2
One guy, two workbenches, in three days.
Note: Obviously these are not perfectly literal days, as my time was scattered among many competing needs during this period; other work around the homestead, getting ready for gardening season, other projects in the studio. In reality this took small pieces of seven days, but I’d estimate that if I was doing nothing else it would take me three short days of work to accomplish.
On the second day I undertook the gluing up of the bench top slabs and legs, such that each slab was half of the final bench top so that I could feed these through the power planer prior to gluing the two half-slabs together.
The only notable aspect of this process was my “clamping” mechanism, the theory of which took me back to the pattern shop lo those many decades ago.
But let’s start with the glue and the spreading thereof. My jug o’ PVA had been laying on it’s side, unmoved, since the workbench build last summer. The combination of time, lack of motion, and its residence at the far end (and hence colder) of the studio transformed it into a sickly yellow pudding. I got some out of the jug and examined it, assuring myself the change was purely physical and not chemical. The oligomers were not fusing into polymers so the almost-gallon of glue was salvageable.
I cut open the jug and plopped the contents into a wide-mouth PET jar and turned loose my hand drill holding the paint stirrer on it after adding a smidge of water. Soon enough the stiff pudding turned into a sludge consistency which was good enough for my needs at the moment.
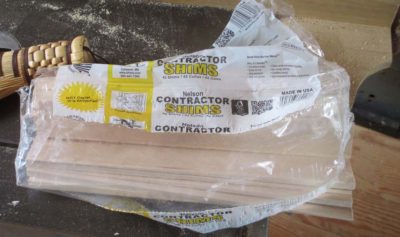
Harkening back to one of my favorite past times of watching youtube videos of Japanese craftsmen I decided to try their method of using a spatula for glue application rather than our more typical brush or roller. I did not want to spend any time making a special, probably disposable, spatula for this endeavor so I looked around to see what I could find to suit the bill. Sure enough, the near-perfect tool was sitting right there on the shelf along with its siblings. A package of very nice carpentry shims was just the trick.


The tip was tapered and thin, making it flexible and well-suited for applying the glue, breaking up any remaining globs during the spread-out. This spatula came in handy in another couple of minutes as well during the “removing excess glue” portion of the operation.
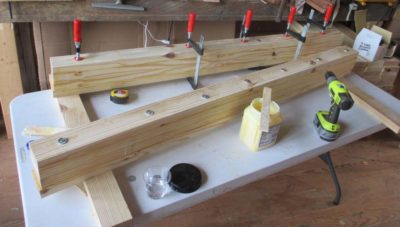
I glued up the first iteration of the assembly with clamps. I discovered immediately that this approach, while manageable with two pair of hands, is unwieldy and aggravating with only one pair of hands. Since I generally view complex gluing as an operation whereby going slow is the best way to go fast, I broke it down into component sub-operations amenable to my being only one person most of the time. Occasionally I am more than one person, but that is primarily for conversational purposes late in the day after working alone for several hours on mundane tasks. Even then this circumstance does not provide any additional help to the tasks before me.
In the pattern shop almost everything we fabricated was “un-clampable.” Our two go-to methods were rub joints followed by a lengthy time of leaving the workpiece alone, and gluing-and-nailing, followed the next day by the removal of the nails with a nail puller. Here I employed a variation of that theme.


Instead of glue-and-nails I used glue-and-decking-screws with fender washers to maximize the clamping power of the screws and keep the screw heads from burying into the wood. With 4″ screws I could assemble four laminae at once — screwing from both sides — which suited me just fine. I did that four times as they were the inner core for the four half-slabs. I used a C-clamp for aligning the edges of the laminae.
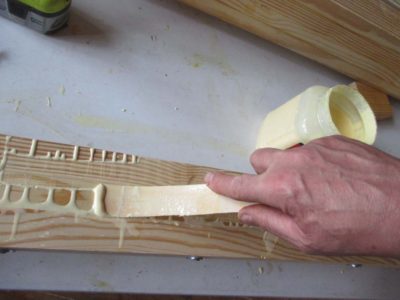
Once each screw-up was completed I removed the glue squeeze out, again using the shim/spatula to scrape it off. I found that I could then reclaim about 3/4 of the excess glue, making the wipe-up easy and fast.
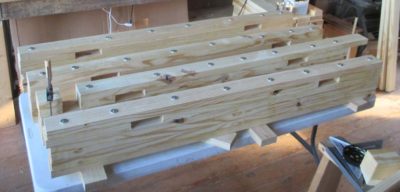
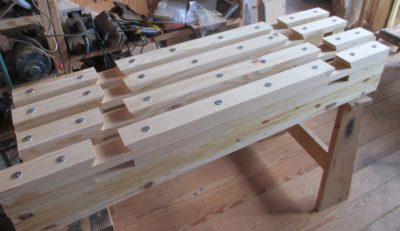
While those four assemblies were set aside I moved on to the outer three laminae for each half-slab, the mortise joinery for the double-tenoned legs yet to come. I layed out the locations and spacing of the mortises, then cut the adjacent pieces to fit. I screwed these in place one piece at a time, working my way through the four half-slab assemblies in turn. By the time I got done and moved back to the first one for the next layer, the previous screw/clamping had set enough that I cold proceed.
I let them sit overnight for the next steps.
Thus something that could have been a hurried nuisance became a much more controlled and congenial success.



Join the Conversation!