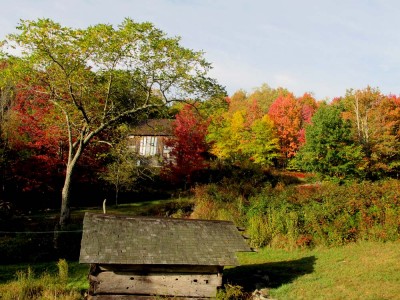
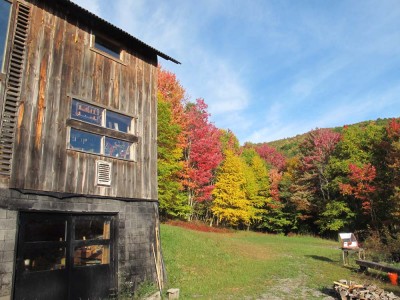
In previous years our sporadic presence in the mountains often meant that we missed autumn, which comes and goes pretty quickly. The trees reached full color only a week after beginning to turn, and will be gone in another week. When the sun is shining the maples are practically neon.
I continue to chop up trees, and this is maple the first large tree I felled completely by myself. It was about 60’tall and 18 inches at the base. I definitely need a larger, more powerful chain saw. The firewood inventory continues to increase, the local habit is to have next year’s firewood pile sitting and seasoning through the coming year. I’m thinking I may be approaching that point fairly soon.
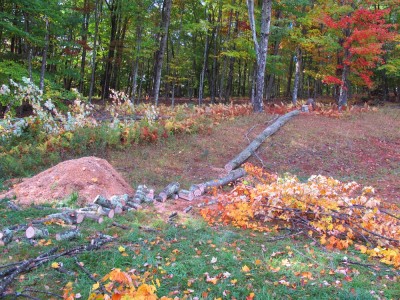
Also I am moving the tree line back to the southwest of the barn. In winter the trees, even though devoid of leaves, are thick enough such that I loose sunlight by about 2.30. I’m hoping that by moving the tree line back 100 feet I can extend that by an hour.
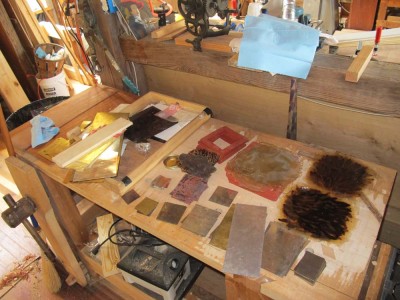
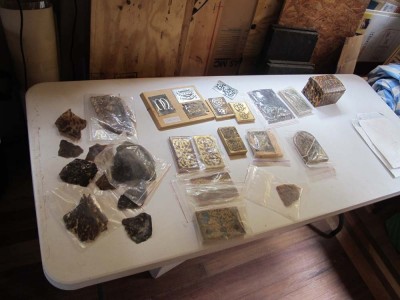
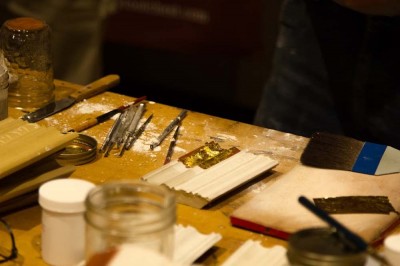
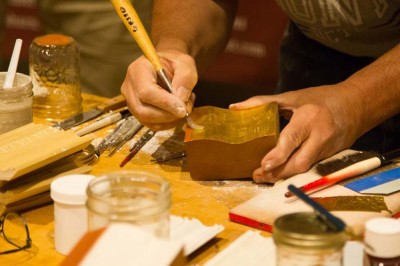
This coming Friday through Sunday I will be teaching a three day workshop on the Boulle technique of marquetry at The Barn. This is something I very much look forward to. So, for the past few days I have been punctuating my days by preparing the classroom space for the event.
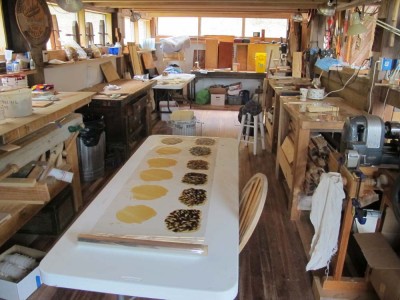
One of the parts attendees seem to enjoy the most is the making of tordonshell, and here is a batch I have prepared for them to use. They will make their own to take home.
Come Sunday afternoon they will have some finished panels, the number and complexity depending on their interest and the time it takes them.
I still have an empty slot for this, so if it interests you drop me a line at the Contact portal for the site.

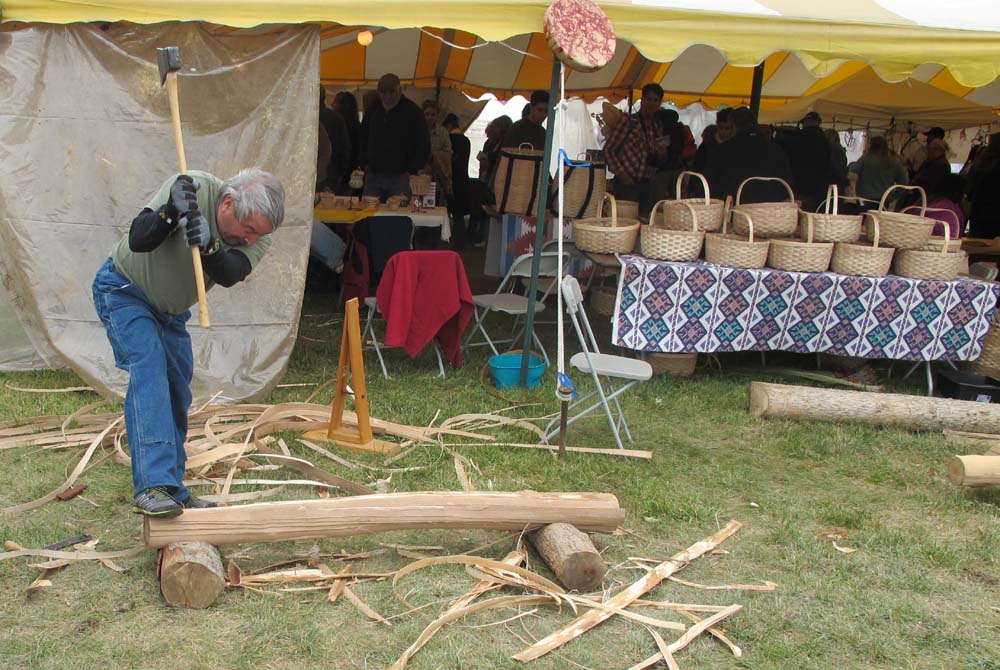
A week ago Saturday we attended the Maine Organic Farmer’s and Grower’s Association annual “Common Ground Country Fair,” a weird amalgam of passionate foodies, sensible homesteading and rural stewardship, self absorbed yuppie/hippie types who likely shed their costumes and returned to their Ivy-League lives by Monday (I can only hope they didn’t stay that way in perpetuity, although I don’t know what those old balding men will do with their pony-tails), skilled craftsmen, pagan mythology, eco-hysterics, some pretty cool gadgeteering, and some stuff that simply defied description.
And of course, fabulous food. And friends.
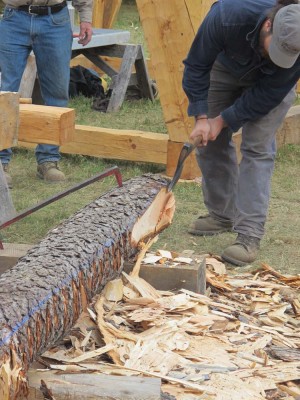
I especially enjoyed the skilled trades and crafts on display and being demonstrated, including hewing,

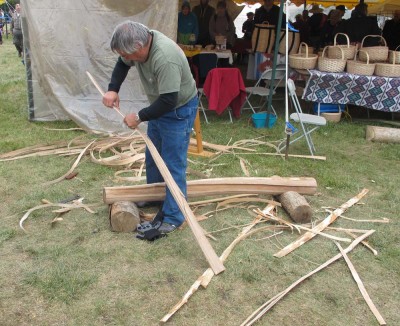
ash sapling peeling for basketry,
furniture making, woodlot and forestry managing,

a huge range of primitive skills like starting a fire with a bowsaw setup and making archery bows (I wanted to take the fellow’s drawknife and sharpen it proper, because he was basically chewing his way through the wood), spectacular sheep dog exercises,
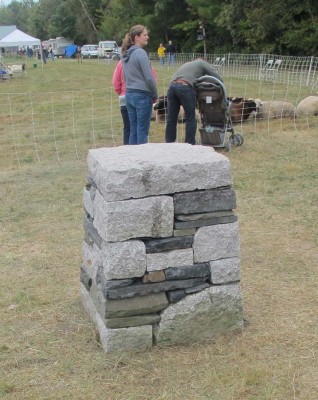
stone carving humble,
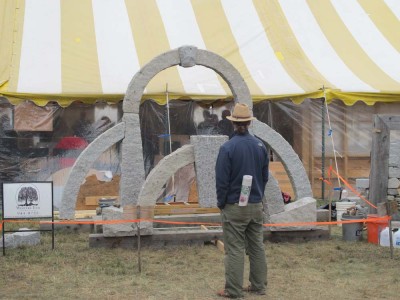
and spectacular, and a whole bunch more.
It definitely supplied this year’s quota of human contact, although that one gal with the black make-up and a hardware store’s worth of accouterments in/on/through her face makes me wonder about the human part. I really wish I had taken a picture. I simply do not understand the appeal of self mutilation.
It was pretty clear that the patron saint for the event was Karl Marx, and the omnipresent hectoring of the unctuous enviros made me recall this observation of CS Lewis.
Of all tyrannies, a tyranny sincerely exercised for the good of its victims may be the most oppressive. It would be better to live under robber barons than under omnipotent moral busybodies. The robber baron’s cruelty may sometimes sleep, his cupidity may at some point be satiated; but those who torment us for our own good will torment us without end for they do so with the approval of their own conscience.
Still, a grand time was had! I only wish I had yelled out, “Hooray Monsanto!” or “Fracking now!” just to see the tremors sweep through the crowds.

The second stop on the New England Tour 2014 was the homestead of Joshua and Julia and Eden, and what a delightful stop it was. Aside from the fellowship we encountered an overload of learning and experiencing

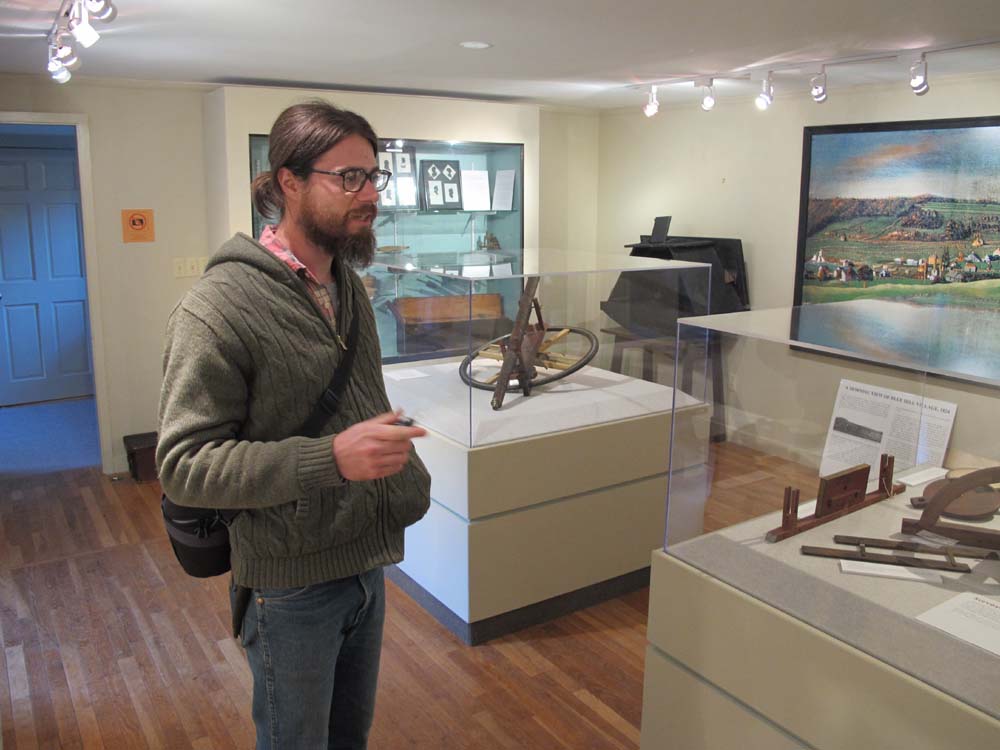
On our way to dinner the first evening we stopped by the Jonathan Fisher House museum, where Joshua is engaging in a lot of important research and recreation for his upcoming book on this rural Maine polymath. There was simply too much to see in such a short time, and I am eagerly awaiting the results of Joshua’s research on this remarkable man who was part parson and part inventive genius furniture maker.
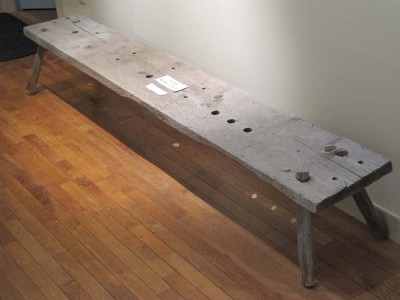
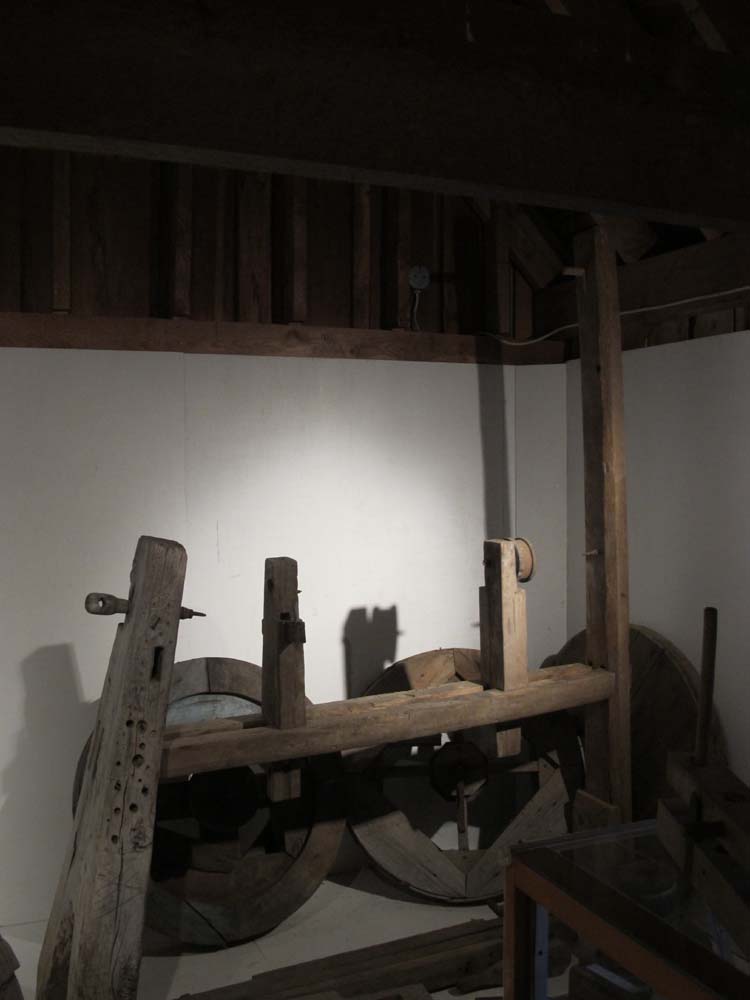
Of course one notable item in the collection is this Roman style workbench,
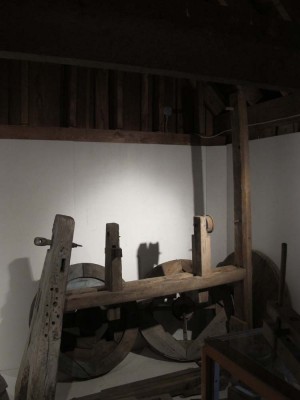
while another is the windmill powered lathe that Joshua is currently reassembling after two centuries of non-use.
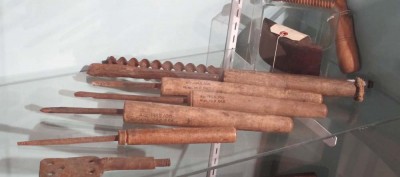
Miraculously many of the original turning gouges are still in the collection.
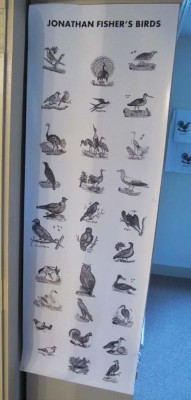
Fisher was many things including an accomplished artist, as these prints from his woodcuts will attest. I fully expect Joshua to paint a compelling picture of rural inventiveness and creativity from the Maine frontier of two hundred years ago.
This year’s just-completed whirlwind blitz through New England began with a day of photographing Ben’s bench in central Rhode Island.
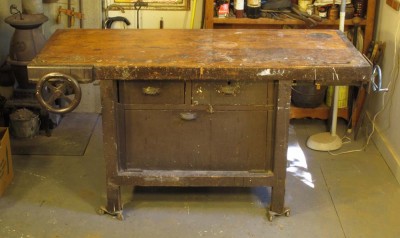
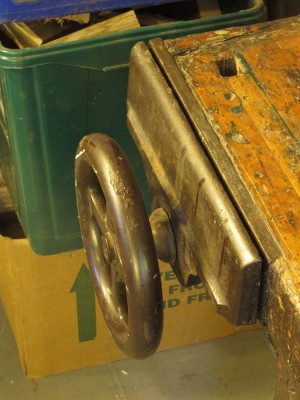
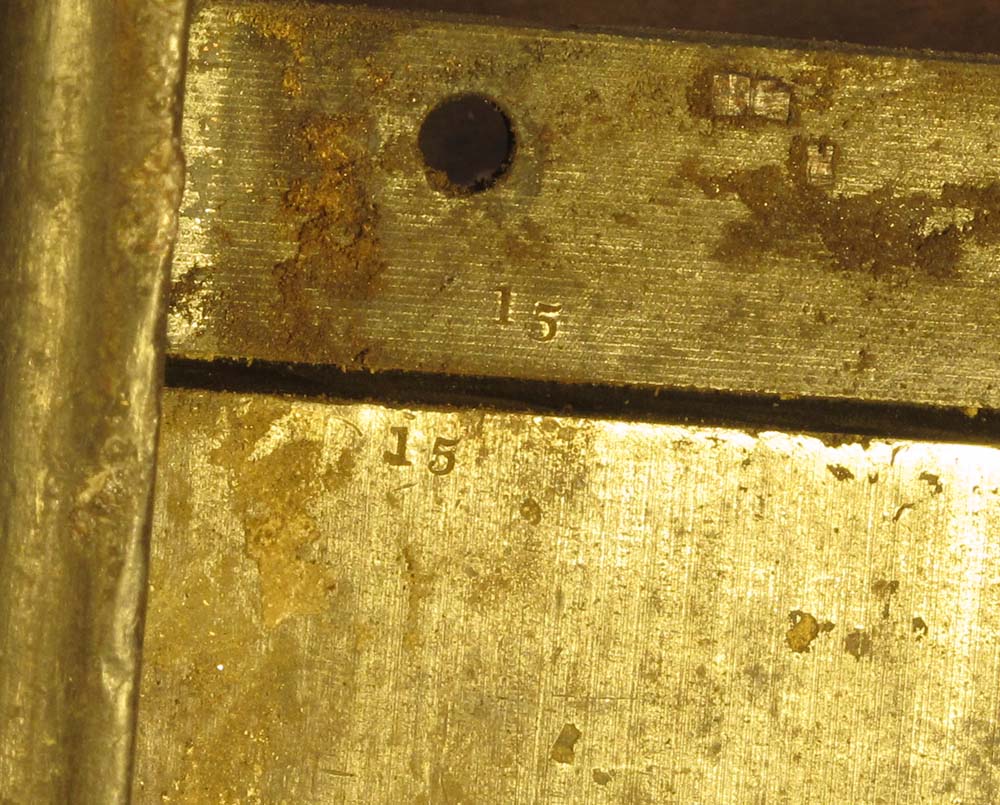
It turns out that Justin, the son of some dear friends here in the mountains, knew a guy with a piano maker’s workbench. The upcoming book on HO Studley and his tool cabinet and workbench will include a gallery of similar benches and vises, and Ben’s was certainly worthy of inclusion.

The bench featured a number of exciting revelations, not the least of which was the number “15” stamped perfectly on three of the adjacent parts. I can only conclude that there are (or were) at least 14 other units of the same manufacture somewhere.
What was best about the visit was that Ben’s bench is still a working tool to this day. He was apologetic about some of the accretions, but I was thrilled to see it still helping a guy make a living.
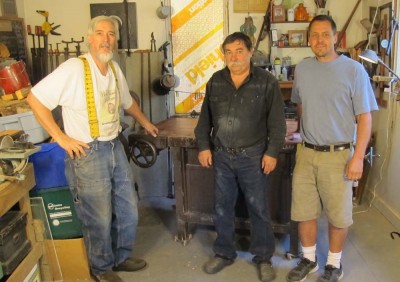
The motley crew, with Ben in the center and Justin on the right.
Thanks to the generosity of attendee BL I can post a number of images from the WIA Saturday afternoon session on gold leaf.
The preparation for either perfect polychrome or gold leafing is essentially the same, requiring good gesso and application techniques, along with attentive treatment of the surface at every step as each successive step amplifies the quality f the previous step like a blinding spotlight.
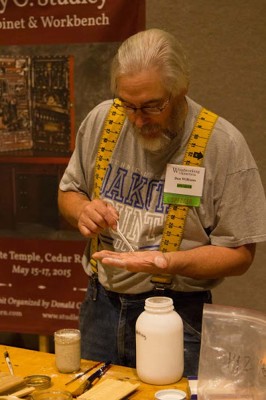
I test the first application of dilute gesso by making a drop in my hand; I want it to look like skim milk.
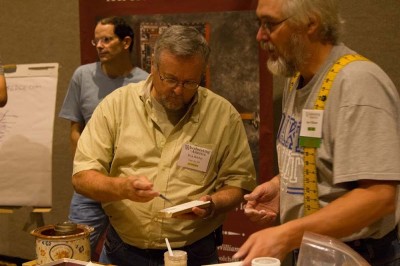
The really great things about the small audience were the ability of everyone to get really close to see what was going on, and the chance for almost everyone to try their hand at applying good gesso so they would know what it looked and acted like on the brush.
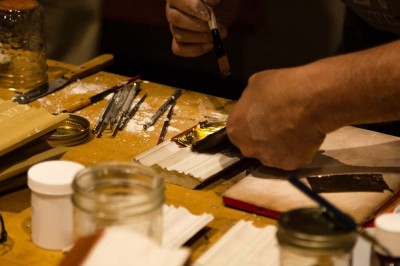
Once the gesso is built up on top of the carving it needs to be “re-cut” or re-carved since the gesso will obscure the detail as it gets built up. I generally use dental scrapers and chisels for my re-cutting. In gilding shops of old, the re-cutter was usually the highest paid guy in the shop.
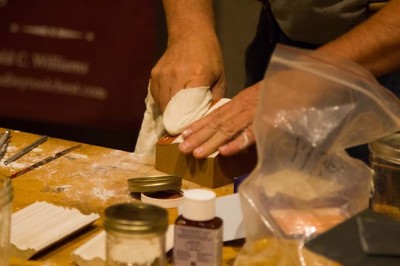
Often the final step in the gesso and bole stage is to briskly rub the surface with a piece of linen, which creates the polished base on which the gold leaf is applied.

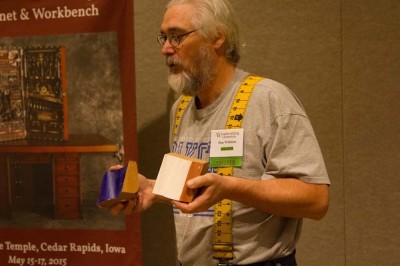
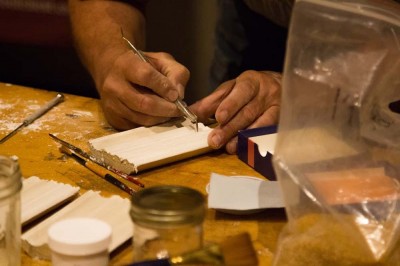
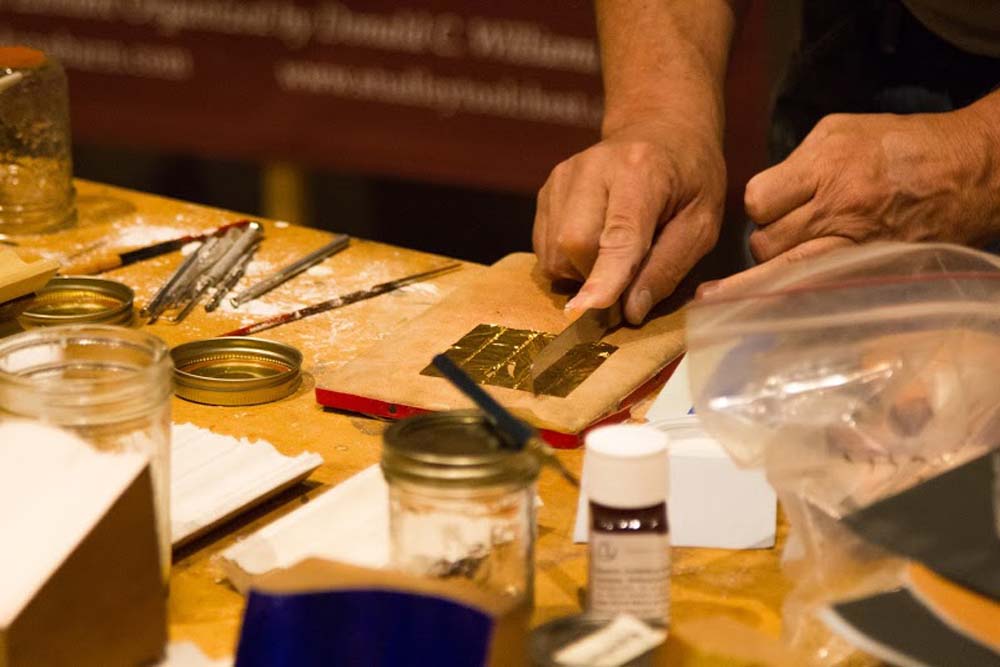
Here I am just showing the cutting of gold leaf on the gilder’s pad. Since modern gold leaf is somewhere around 1/100,000th of a inch thick, a delicate touch is required.
Prior to the start of the two-hour session I brushed some quick-set oil size on a painted and polished surface, and at the end of the session I laid the leaf. Here I have just set the fragile gold leaf on top of the hardening oil size and am pouncing it down.

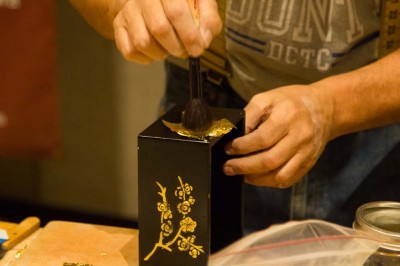
Brushing of the leaf reveals the areas that had been sized and those which had not been sized.
Water gilding is a whole ‘nother cat. Here I had just wetted the surface with my gilder’s liquor and laid the leaf on it while it was still wet, allowing the water to draw the leaf down to the surface as it soaks into the gesso and bole.
Water gilding, done.
At a specific point in the process for water gilding the ground dries to the perfect point where a polished stone burnisher can be worked on the surface, bringing it to a mirrored shine.
All in all, not a bad amount of demonstrating for a complex process and only twp hours to show it.
Since I am ramping up for mega beeswax production (about 500 pounds to process and pour into blocks for sale), I thought I should make a new rubber mold more to my liking. My previous mold design was a spur of the moment sorta thing that I needed in a hurry. It has served me well for a while, but I never really liked it all that much. So it was time for a new one.
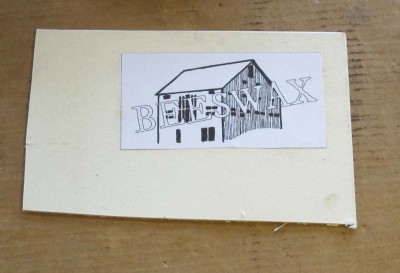
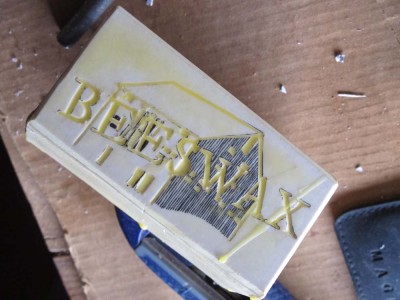
The new one is based on a poured-wax block of 1/4 pound, whereas the previous one was approximately 6 1/2 ounces, not exactly a nice round figure. Once I determined the new mold size of 4 inches long by 2 inches wide and 1-3/4 inches thick, I needed to make a design to match the size of the face. I settled on a background of the barn with the word “BEESWAX” overlaying it.

I printed out the pattern I created, and using spay adhesive glued it to some 1/8″ mat board,
then glued that to a wood block.
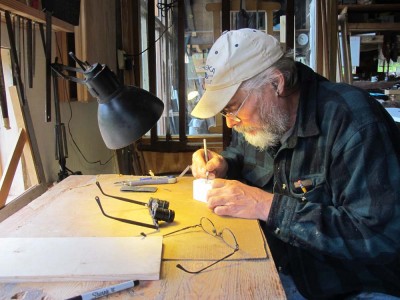
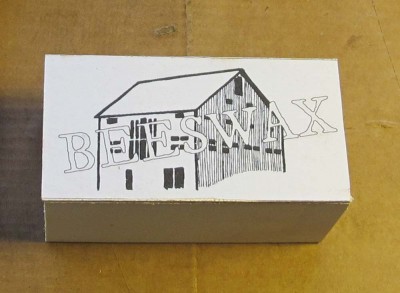
With a scalpel I incised the completed design,
then dipped the whole thing into molten wax since the edges of the paper were a tad ragged in some places.
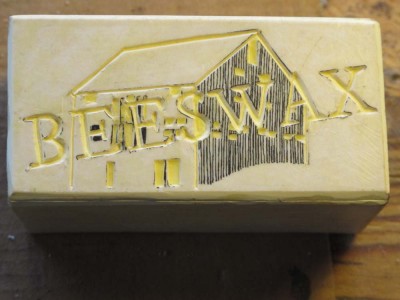
When the wax hardened I re-carved the master pattern to show some various relief levels in the design,

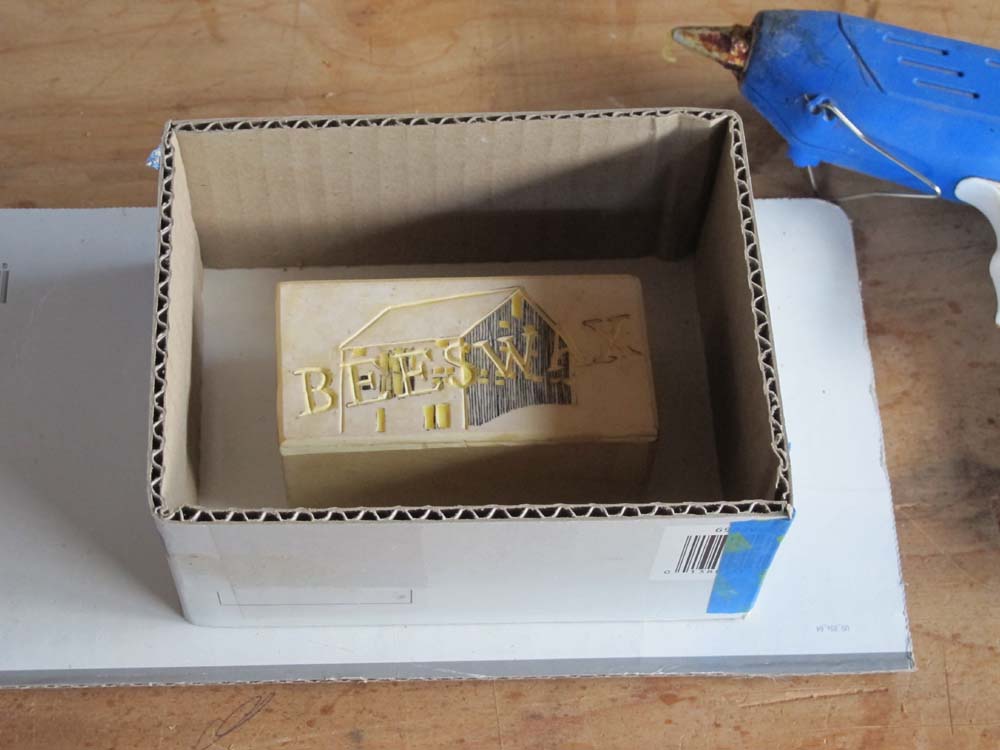
and readied everything for pouring the rubber mold by first mounting it to a piece of cardboard using hot melt glue.

Then I built the cardboard dam around it (I could not find my molding clay and Lego blocks I normally use),

and filled the flask with RTV silicon rubber.
Done! I can’t wait to see how it turns out.
My recent presentation on “Gold Leafing” at WIA was the most I could cover in a short period, but it was still woefully shy of a thorough understanding. I hope it was a solid teaser. We were able to complete the entire process in the compressed time of two hours, ending with laying gold leaf by both oil size and water gilding, with a little burnishing tossed in. (If you were at the presentation and have some of the pictures to share with me, I would be delighted).
I emphasized that the truths about finishing in general became stratospheric when that “finishing” was with gold leaf. Namely, each step of the processed is conveyed clearly in the following step, so you’d better make sure to get it right every step along the way. Integral to gilding in my opinion is the making and using of traditional glue-based gesso as the primer built up to the point where the surface was ready to apply the gold leaf and it would look good. While I will not go into detail on the techniques of each step here, I do want to take a minute to talk about how I make and use gesso. I do not know if it is the “right” way, I only know it is how I do it and it has been working fine for me for more than four decades.
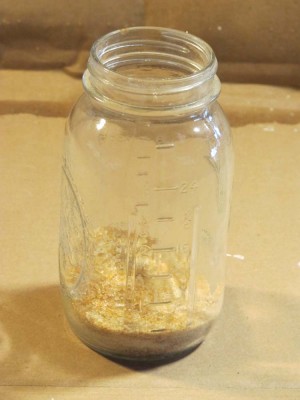
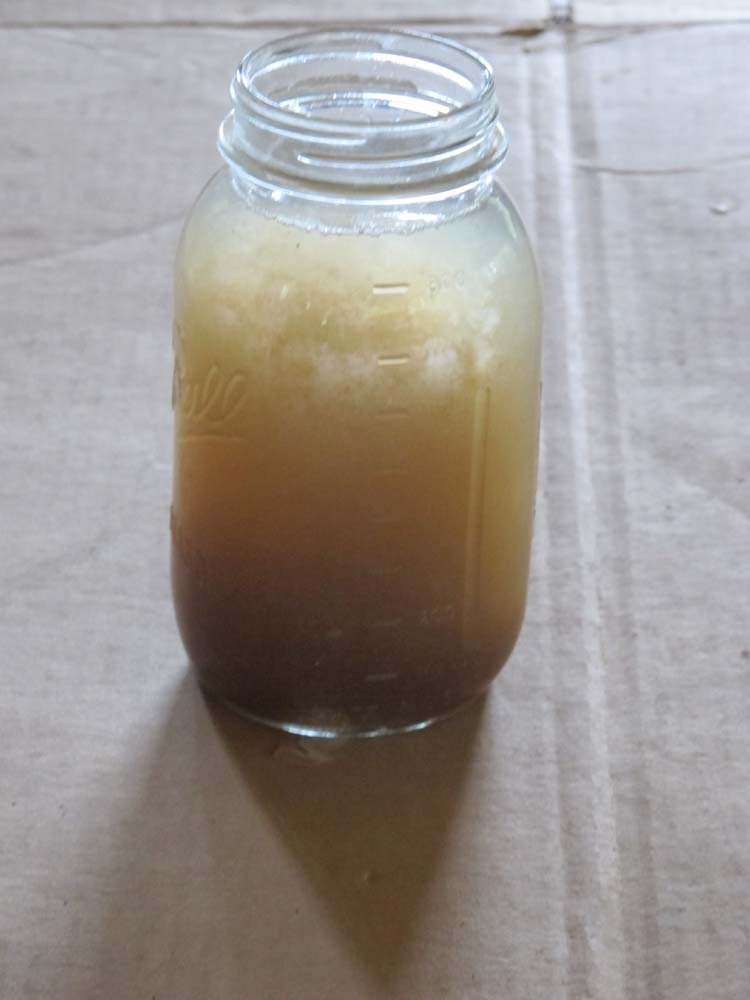
I start with an empty jar, and place dry glue granules in the bottom to fill about 10% of the volume. My preferred glue for this is either 379 or 444 gram weight strength glue, but I have had fine results with glue as low as 192 g.w.s.
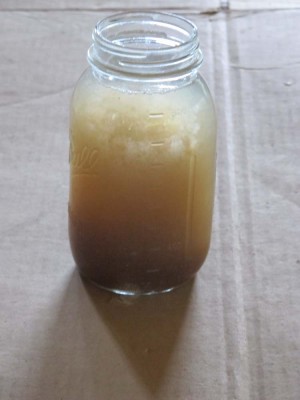
I fill the jar with clean water and let it soak overnight, then cook it to make it a homogeneous solution. THIS DILUTE GLUE IS THE CORE OF THE GESSO MIXTURE, AND IS NOT MODIFIED FROM THIS POINT ON.
I use this as my glue size and binder for the ever thickened gesso and I NEVER add more glue to the solution. The ideal is to progressively dilute and make the glue weaker, to render a leaner and leaner admixture as you build up the gesso ground. You always want gesso to be getting marginally softer as you apply additional layers of this ages old primer to your workpiece.
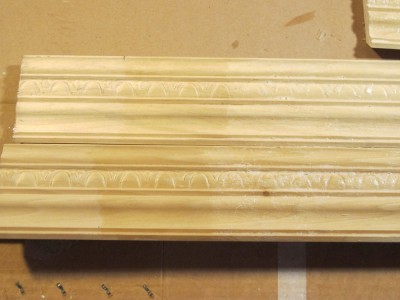
I first brush on a generous application of the dilute glue size to the wood surface, and allow it to dry thoroughly. (see center section of the sample)
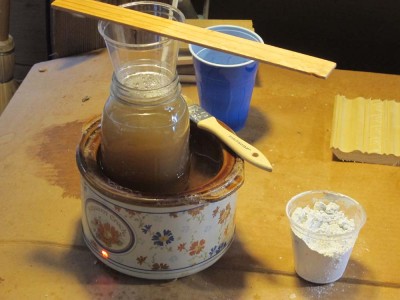
When that is dry, to the heated glue solution I add enough calcium carbonate, sold as “Whiting” by art suppliers, to make the jar seem like it is filled with skim milk. Here I am preparing to add the amount of whiting to the glue solution.
I brush this on to the surface and allow it to dry. In the follwing steps, I make note of how much whiting I added to the glue size to render this first “skim milk” solution, and I add that same amount for the next iteration, which I also brush on and allow to dry. Then a third portion of whiting,and a fourth, and as many as is necessary until you get to the point where the heated gesso acts like heavy cream. Make sure to “pounce” the gesso in the early stages with a coarse brush to make sure it fills all the interstices if there is carving.
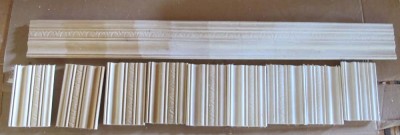
Here is the progression of the applications and the built-up surface ready for abrading and re-carving as needed. In this case I could have stopped after the sixth application and it would have been fine.
And as I said, the addition of more and more whiting serves to dilute the glue portion of the mixture. Also remember to stir the heavier gesso as you use it because the whiting will settle to the bottom without agitation.
This is as perfect a primer as I have found for my work whether gilding or japanning. How much you build up depends on how well you prepared the wood to begin with, and where you want the surface to end up.
At some point over the coming winter I will work a surface through from beginning to end so you can get the detailed blow by blow. Until then you can go to the Writings page of this blog and read the article I wrote on Japanning, which gives a good summary of the process.
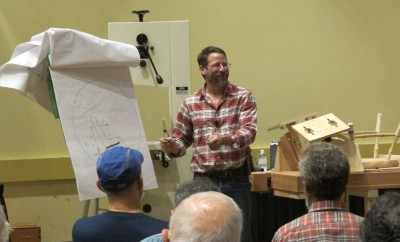
Last Saturday found me first at Peter Galbert’s talk on rocking chair design, which I found very helpful as I contemplate some efforts in this area, and merely heightened my anticipation for his up coming book
Following that I hustled to my room to set up for the gold-leafing discussion and talk, from which unfortunately I have no pictures as I forgot to ask anyone to take pictures on my camera. If you were there and would like to share some of your pictures with me, please let me know.
Our assembly for that was wonderfully small, perhaps two dozen, so I just had everyone gather around the workbench while I worked and talked and demonstrated. The size of the audience allowed for much more participation than normal, as everyone got to try brushing good home made gesso, etc.
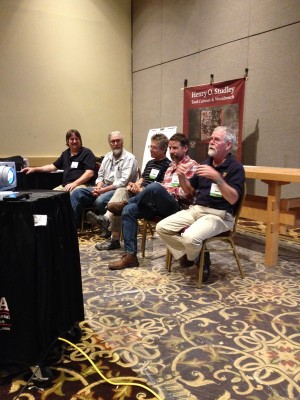
photo courtesy of Megan Fitzpatrick
Following that was the chairmaker’s roundtable. Again the discussion was enlightening and helpful to future work in that area. Notice how cleverly I placed the banner for the upcoming Studley exhibit.
We had a quiet delightful dinner with our hosts, then sped home the next morning to reload out suitcases for another whirlwind research trip to New England.
More about that anon.
From Chris Schwarz’ blog:

The deluxe edition of “To Make as Perfectly as Possible: Roubo on Marquetry” has been named one of the “50 Books of the Year” for 2013 by the Design Observer, in association with AIGA and Designers & Books.

Designed by Wesley Tanner, “To Make as Perfectly as Possible” is the most beautiful modern book I have ever held, much less worked on. Wesley, a fine woodworker himself, did justice to the immense years-long translating job by Don Williams, Michele Pagan and Philippe Lafargue.
You can see all of the winners of the competitionhere.
This “50 Books” competition is the oldest continuously operating graphic design competition in the United States, starting in 1922.
Please join me in congratulating Wesley on his prestigious award.
— Christopher Schwarz
P.S. We have about two dozen copies of the deluxe edition for sale in our store. Once they are gone, they are gone forever.


Recent Comments