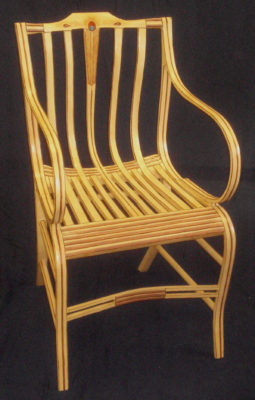
Like Henry Studley, we do not know much about the personality of Samuel Gragg. Obviously we can deduce from his Elastic Chair that Gragg was both aesthetically and technically adventurous. While he made the Elastic Chair for only a few years before moving on to more typical chair forms (read: more profitable) even then he could be a bit outside-the-box.
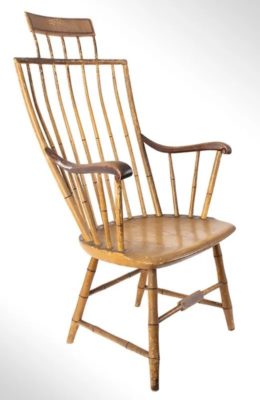
Recently reader BrianA sent me a link to a current “For Sale” Gragg chair that is sorta Windsor, using that descriptor very loosely.
I’m thinking I would have liked this guy.
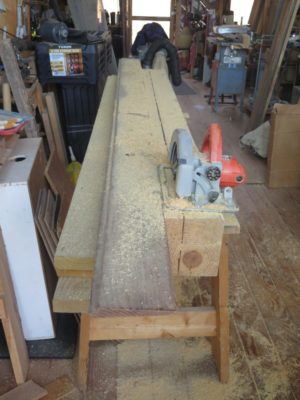
With the two timbers glued into one slab I pulled out my trusty scrub plane and started hogging off material since the wind was a tad pronounced. I was able to get the initial pass finished out in the great room of the barn, and again put my mighty 10-inch circular saw to work cutting the slab to the 13″ width I wanted. As with the initial timber splitting I was left with an inch or so to cut by hand.
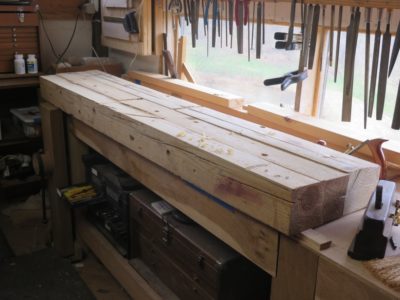
Moving the sized slab onto my Roubo bench in the studio I employed the Roubo technique for achieving the flat plane of the slab.


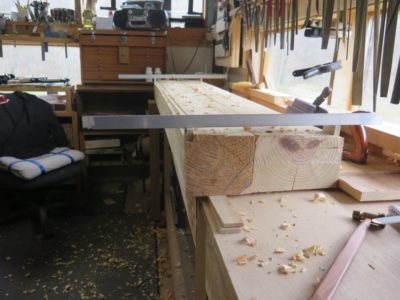
First I shot a rabet down each edge of the slab, using two pillared winding stick to determine when they were perfectly parallel to each other. My original Roubo winding-sticks-on-stilts were unavailable so I just used two hardware store aluminum bars sitting on identical blocks. Once I had the parallel edge tracks established I grabbed the scrub plane and got the surface flat in about a half hour each side. It’s worth noting that even though the wood was southern yellow pine, it was new growth SYP and much less dense than the timbers from the barn itself.

Next, it’s on to the staked legs.
My first exposure to the existence of something called “a patternmaker’s vise” was in 1978 when I went to work in an actual pattern shop. Although I had been engaged in woodworking at increasingly sophisticated shops for several years by that point, the Emmert vise was unknown to me. My job at the pattern shop was a 7AM-3.30PM shift, which was a struggle for me since I am a night owl by nature and getting up to work on time was a challenge even though it was only a three minute bicycle ride to the foundry from my house. But, that work schedule allowed me to have plenty of afternoon and evening time in the shop I built behind the house.
I was so entranced by the Emmert that I checked into buying a new one from Kindt-Collins, the Cleveland based foundry supplier who was by that time the manufacturer of the original Emmert K1 vise. I cannot recall exactly whether the new one was priced at $1750, $2250, or $2750. All I knew was that there was no way I could afford any of those price points in 1978. I did obtain a pair of Emmerts right after Mrs. Barn and I married and went to Delaware for college in the beginning of 1982. The Philadelphia Navy Yard had recently closed their foundry so there was a huge stash of Emmerts just up the road at a Philly machinery salvage outfit, and I think I paid $200 for my pair.
At least one of mine has always been installed and the center of my workspace ever since. I cannot really imagine a workshop of mine not having one.
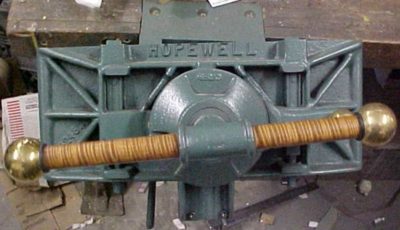
Last week my pal JohnR let me know that the Emmert vise may have been rebranded as “the Hopewell vise” and back in production. The information is at the following link. Maybe this is already known throughout the woodworking blogosphere and I have just been too wrapped up in my own activities, but here it is.
CS Machinery (mprime.com)
If you have always wanted a brand new, incomparable patternmaker’s vise this could be your chance. I have no connection to the new maker and have not encountered one of these vises, but I would love to know more myself.
As I once told an aficionado of workbenches, “If you have avoided using an Emmert before, do not start now because you will be black and blue from kicking yourself for not trying it earlier.”
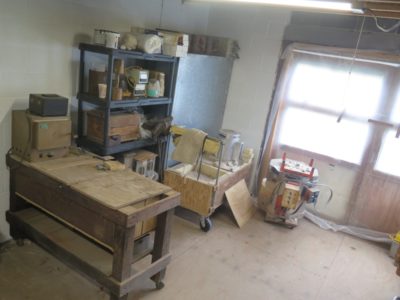
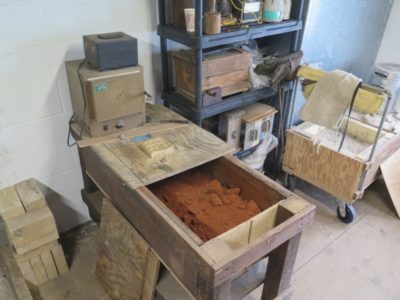
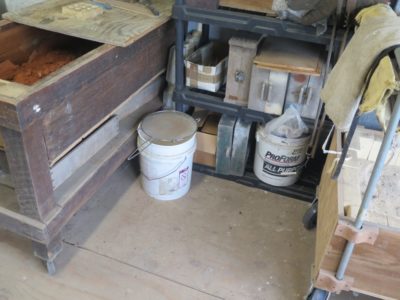
Since escaping Mordor and relocating to the holler at the end of the road, most of my metal casting set-up has been piled in the corner, patiently awaiting my ministrations to bring it all back on board. That status changed last week when I set aside a day to tidy up that section of the ground floor adjacent to the wood/coal stove, and unpacked all the foundry accoutrements and set it all up. It was really satisfying to get everything out and get reconnected with my brain, eyes, and hands. Now the only things left to do are drop a 220v line for the kiln (for firing the refratory molds used in lost wax casting) and to rebuild the doors to the first level adjacent to the foundry.
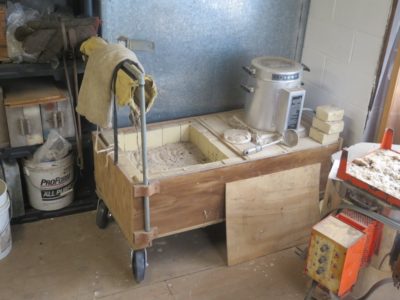
My plan is to roll my mobile foundry cart outside whenever I am casting; I’ve never had a foundry accident, but inadvertently spilling white-hot molten metal inside a 125-year-old wooden structure is a vignette that might not have a happy ending. The doors at the opening were badly damaged in a terrific storm a few years ago and making new ones will be easier than repairing the old ones.
On top of that, in recent months I’ve made the acquaintance of a gifted Amish blacksmith who recently moved to Shangri-la and am giving him one of my smelting furnaces so together we can set up a larger foundry in his shop. That endeavor will require its own set of postings, although I must admit that I have never asked him about photographing there and am not familiar with Amish custom in that regard.
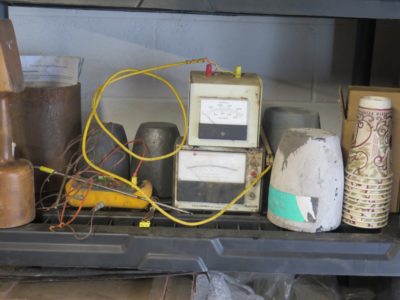
Soon the Don’s Barn blog will regularly feature even more metal work, including detailed inventory of my foundry equipment, supplies, and processes.
Beginning probably next week I will relate the account of recreating some metal moldings and medallions for use in the conservation/restoration of a late 19th century cabinet that was missing its base along with the cast metal moldings and fittings. I do not think I have told that tale here before (I’m at almost 1500 postings but much of that is not easily searchable, much less rememberable) , but if I did you get to see it again.

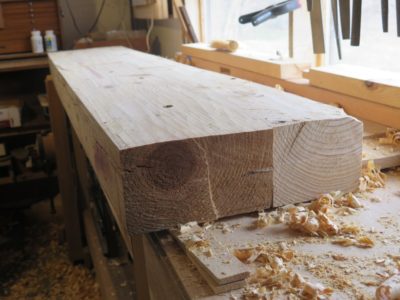
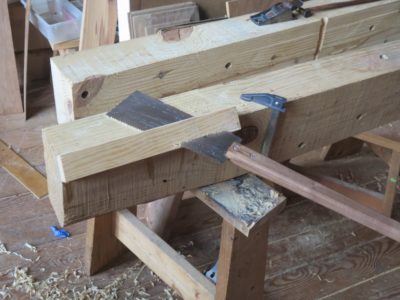
With my former planing beam cut almost all the way through using my trusty 10-inch circular saw I was left with sawing the last inch of thickness by hand. Grabbing my equally trusty ancient 3-1/2 t.p.i. handsaw I made short work of the separation, getting almost 1-1/2 inches of cut per stroke.

I then made a nuisance mistake by cutting off the wrong end of the timbers I was only going to make a six-foot bench). I should have cut of the end with the wainey edges, but instead I cut off the nice crisp end. So now I had to take a few minutes to plane flat the rounded edge and glue on a new piece in order to make it square.

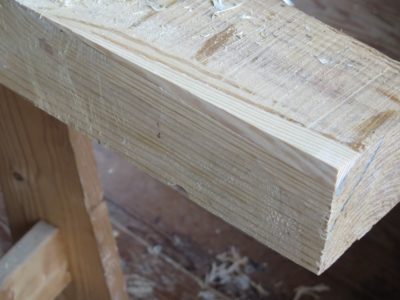
That I accomplished by just sawing off and hand planing the excess.

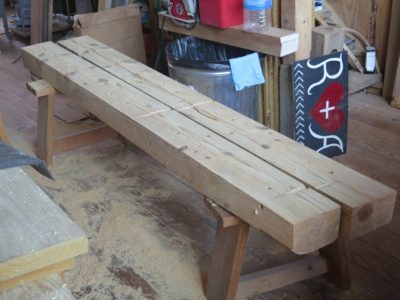
With the pieces separated I dove in with my scrub plane to get everything more or less planar by eye. The beam had a bit of wind in it which became exaggerated (doubled) by the splitting. Once the mating surfaces were flat-ish, or at least fitted each other nicely, I got out my fave toothing plane and got it mated for real, ready for the, er, mating. In this instance I used PVA, in part because I did not know the final environment for the bench but really because I had not prepared hot hide glue in advance and thus had none ready to go when I was determined to execute the glue-up.


It is really comforting and confirming when the squeeze-out is uniform through the length and breadth of the joint.
In recent years Mrs. Barn had been traveling to the West Coast several times a year to attend to her dad in his failing health. Normally she would not even carry any luggage beyond a small carry-on bag, so she left her laptop at home and just took her small Kindle. After making my prototype Kindle case last year I decided she needed a nice case to protect her smaller Kindle during her travels, so it was on my agenda for Christmas. I got it done just in time, but then we had to postpone our family Christmas for three months due to a variety of circumstances, not the least were my mother’s funeral, my father-in-law’s death and funeral, my son-in-law’s inadvertent exposure to someone with the ‘Rona, my daughter’s need for self-quarantining for work travel…

As with the first case I started by making my own veneer-core plywood using the abundant ash veneer from my stash using West System epoxy as the binder, under the dead weight of a stack of fire bricks. I am becoming even more smitten with this type of sheet good and may try to figure out how to make larger panels to employ in other projects. I have used Baltic birch plywood as my “go to” for years, and still rely on it a fair bit. But the veneer-core plywood is just something special. I guess I’m gong to have to make a large veneer press to make it happen.
My friend Justin sent me another picture, this time from the 1882 Boston Directory. Very exciting!
Is this where Studley got his bench vises?
The hunt is afoot.

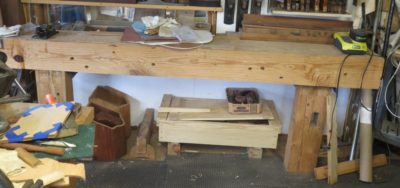
In my quest to build a low bench, a/k/a a woodworking-while-sitting-on-my-keister-is-more-attractive-with-age bench, I am embarking on making a mélange of the Roman Workbench, the Estonian Workbench, and the Jonathan Fisher Workbench, with the occasional influence of Nicholson with a couple added features thrown in. Rather than rearranging and sorting through the log barn to pull out a timber of just the right cross-section I decided to repurpose my old planing beam that had become obsolete once the FORP bench was completed and installed. Not needing an 8″ x 10″ x 8′ shelf in the shop, it was a fairly easy conclusion to reach.

Much to my surprise the beam had become considerably heavier in the decade since it was installed, or was it the maker who became weaker? I’ve got a rolling table that I maneuvered into the shop to make the transport out to the large space a piece of cake. I placed the beam on two sawhorse and reached for my 10″ Milwaukee circular saw. (It’s times like these that I revel in having made that particular purchase 20+ years ago.) Making two passes on each side I was left with about an inch to saw by hand, and viola’ I would soon have a pair of ~5″ x 8″ x 96″ timbers.
I am not a tool collector.
To be sure I have a lot of tools, perhaps (probably) even to excess as there are many tools of which I have multiple representations. Some of this is a result of having tool sets in several different places, for example the workshop in the basement of my daughter’s house, the video studio up on the fourth floor of the barn, and my own workshop on the second floor, etc.

In addition I have a number of tools that are slight variations of each other; what other explanation is there for my inventory of more than a dozen toothing planes?
I recall vividly a conversation between Mrs. Barn and Robin Lee of Lee Valley Tools Tools during the set-up of a Handworks event, where the full panoply of the Veritas offerings was on proud display.
Mystified by the range of hand planes on display, she asked him, “How many planes do you really need?”
Robin’s reply was, “How many are there?”
Another reason (excuse?) for having too many tools is that I have upgraded a particular tool for a slightly better version of the same thing but failing to dispense with the previous one. That might explain my owning at least a half dozen shooting planes.
Yet another reason for having excess tools is my affinity for designing and making tools that would be, by definition, unique as my personal creations.
Nevertheless I can state unironically I am not a tool collector since I do not have any tools for the mere purpose of possessing them for whatever reason. I cannot think of a single tool in my possession that I would not use in the shop. Some do not get used frequently, nevertheless I own them for the purpose of working the materials in my milieu.


I do have a few tools that are of “collectible” stature, most notably a near-pristine c.1800 Robert Towell miter/shooting plane. I could afford it only because Towell was lackadaisical about stamping his work and even though this is almost certainly one of his it is not stamped. Thus, its purchase price was only 10% of what it would have been otherwise.

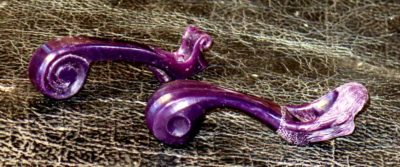
I also have a couple of small Art Nouveau-ish tools by contemporary jeweler/sculptor Chris Laarman’s that are simply lovely to my eye and hand.

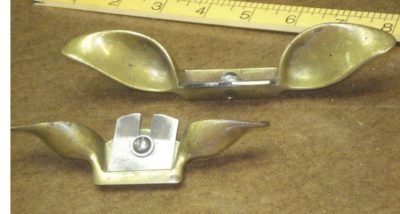
My set of “whale” luthier’s finger planes and a whimsical pair of “pig’s ear” user-made spokeshaves are a pleasure to all the relevant senses, including my sense of well-being and my sense of satisfaction and contentment in the shop.
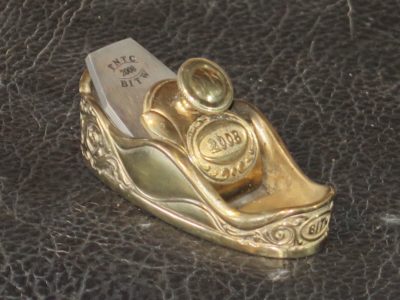
These tools are Objects of Inspiration as I live out and move forward with my own creativity. In particular I am orienting increasingly toward the world of tool making, not necessarily “wooden thing” making. In coming weeks, months, and years creative metalwork will become an ever greater emphasis of my own work especially in the world of “precious,” purely indulgent tool forms starting with these unfinished models for two finger planes that have been in the drawer since I first designed them fifteen years ago.

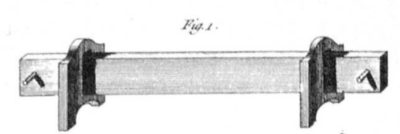
Studley’s front vise
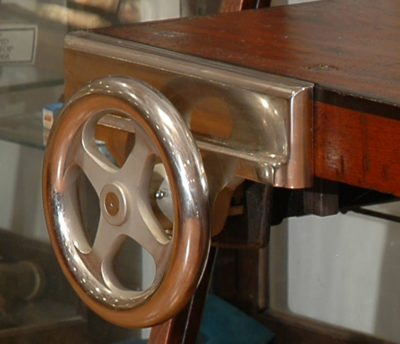
Over the past decade I have looked at dozens of piano makers’ vises similar to the ones H.O. Studley had on his workbench. Even at this very moment there are five in the barn. The head-scratching part about them revolves around two questions; 1) what were the processes of piano making that required such a remarkable vise, and 2) why are there no makers’ identifications on any of them? Given the time in which these vises were made, late 19th and early 20th Century, when manufacturers were stamping their names on everything that could be marked, this absence of identification was mystifying.
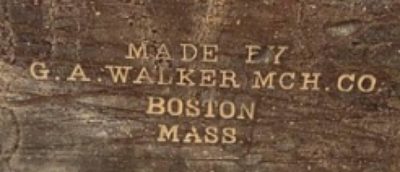
This week I got a picture from a friend, who had a friend who just bought a piano makers vise, and lo and behold there is a maker’s stamp right in the middle of the moving jaw, front and center.
Very exciting indeed.


Recent Comments